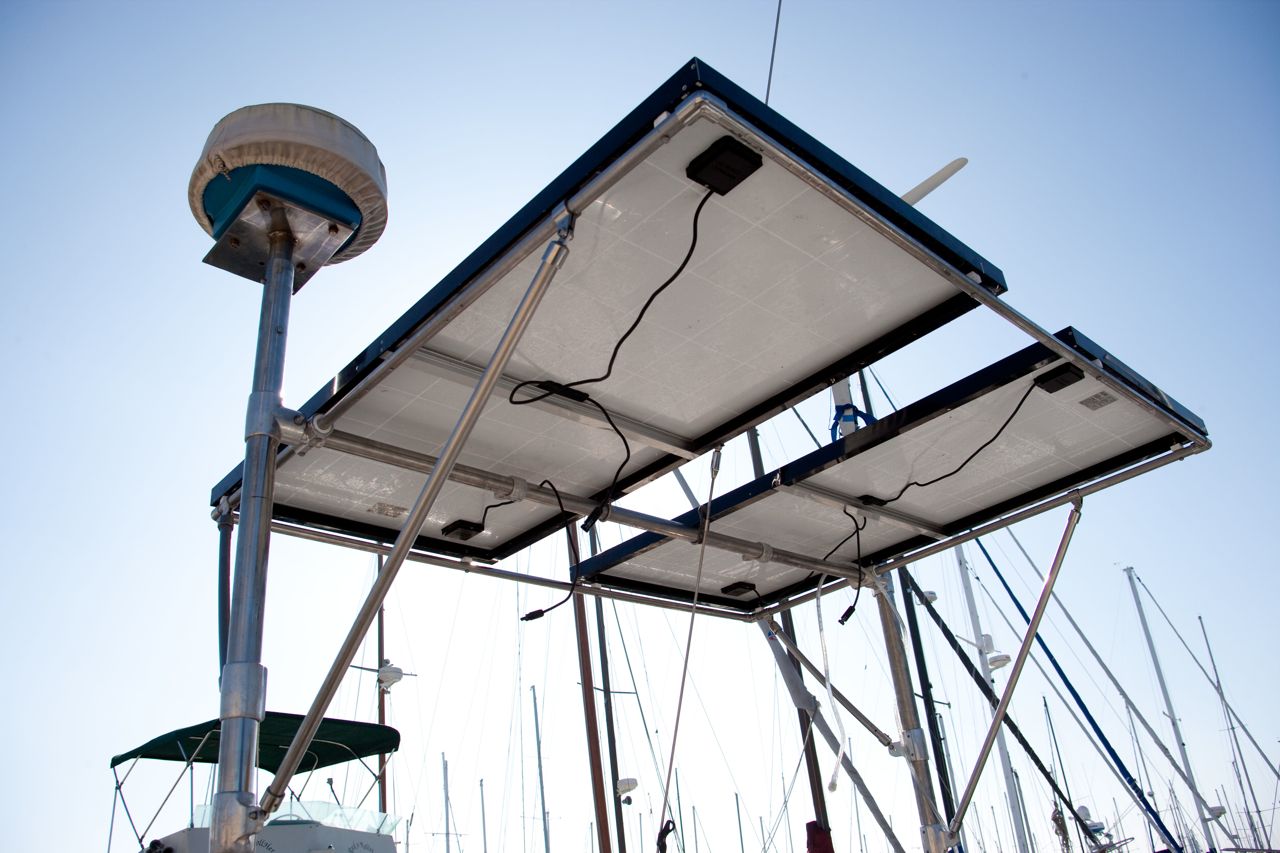
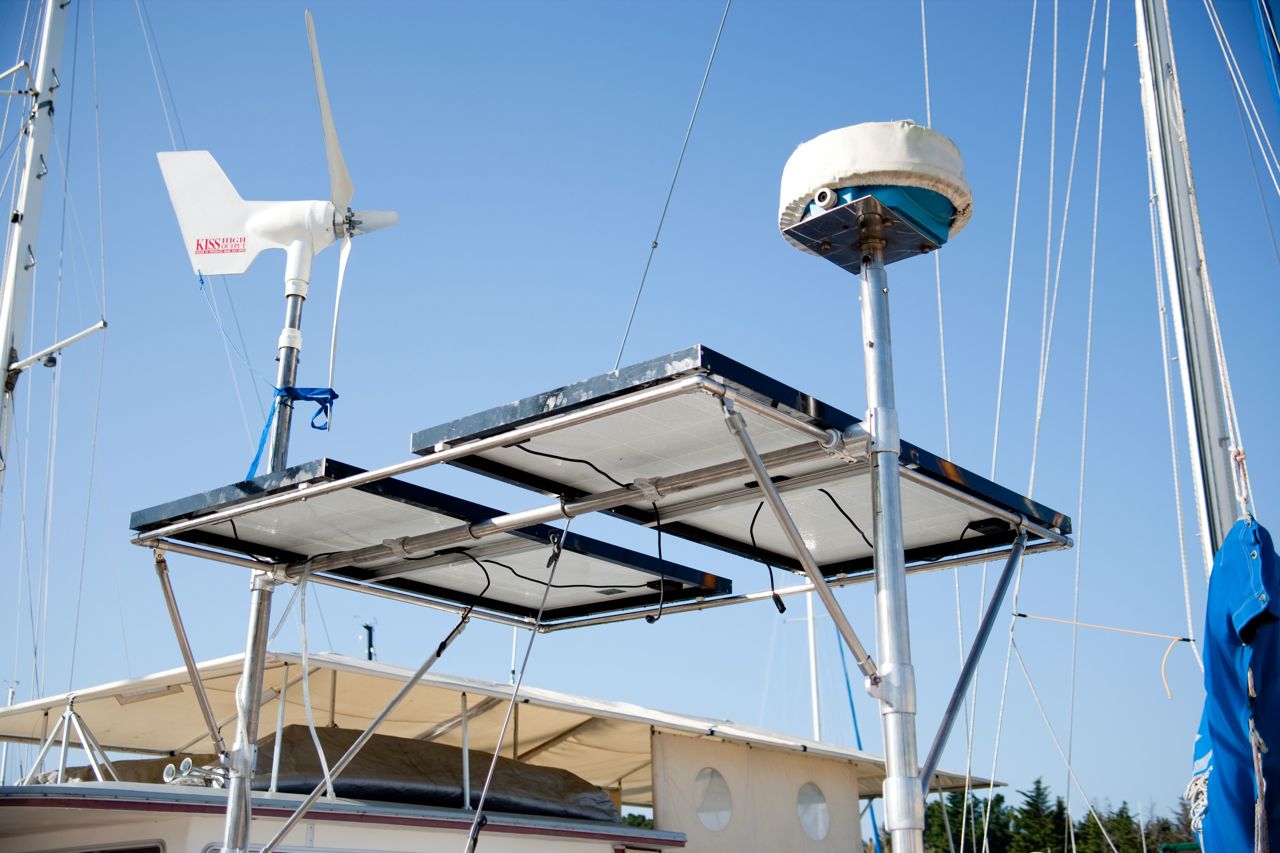
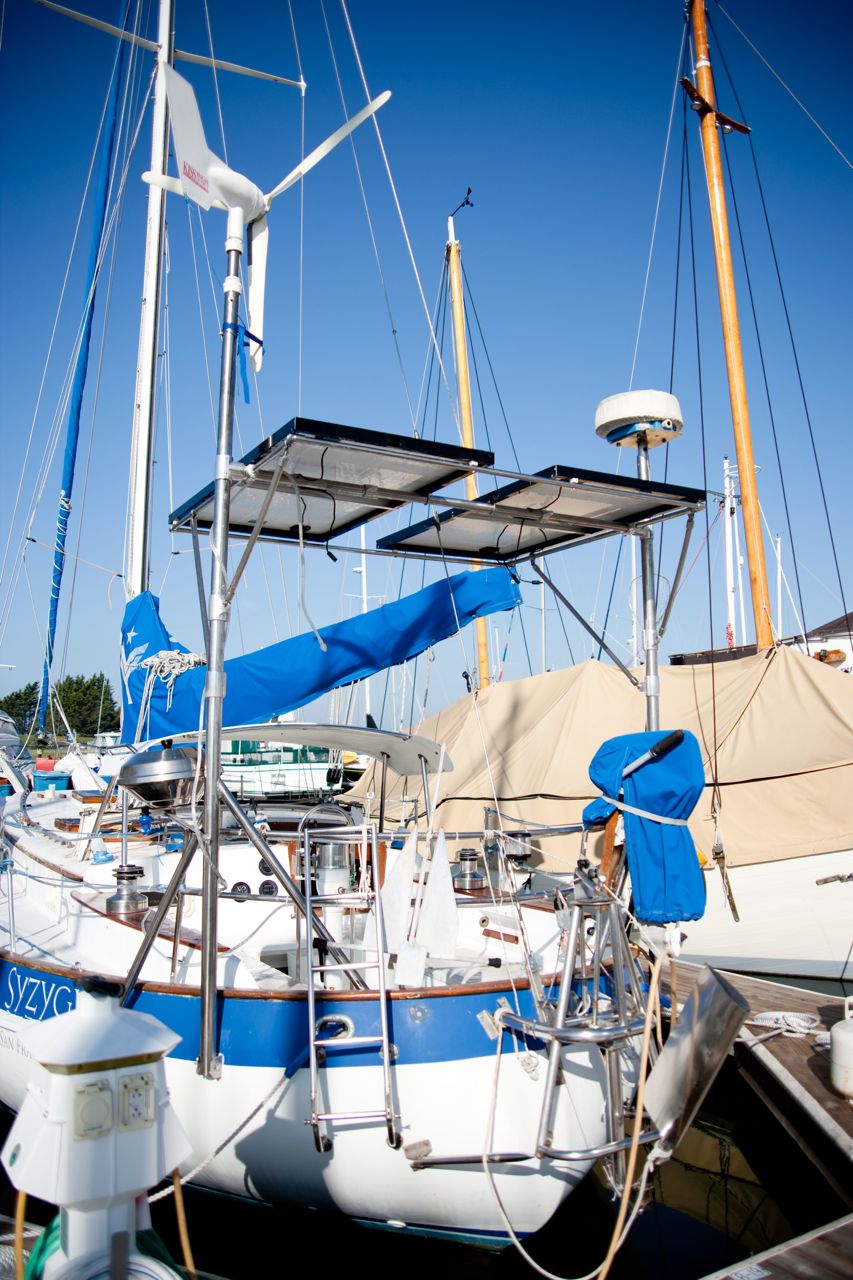
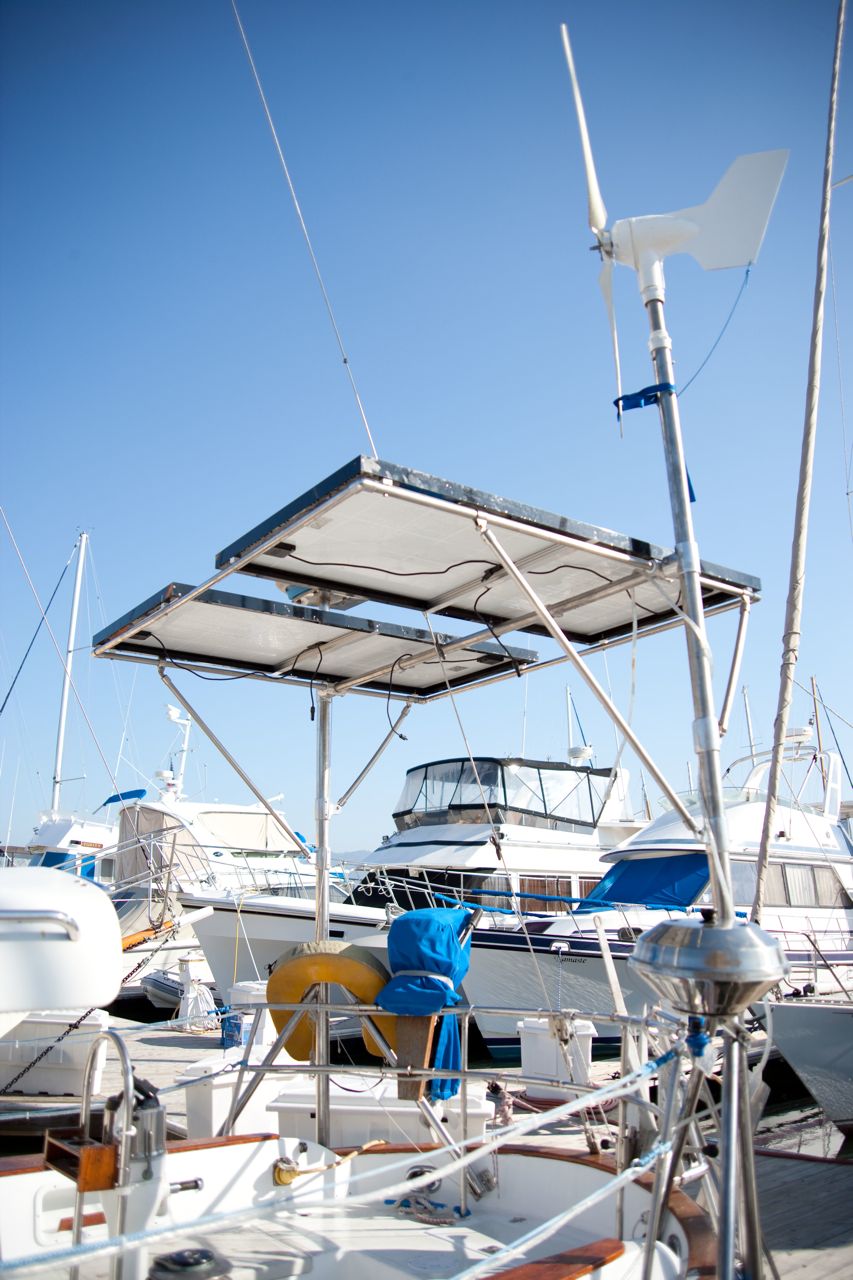
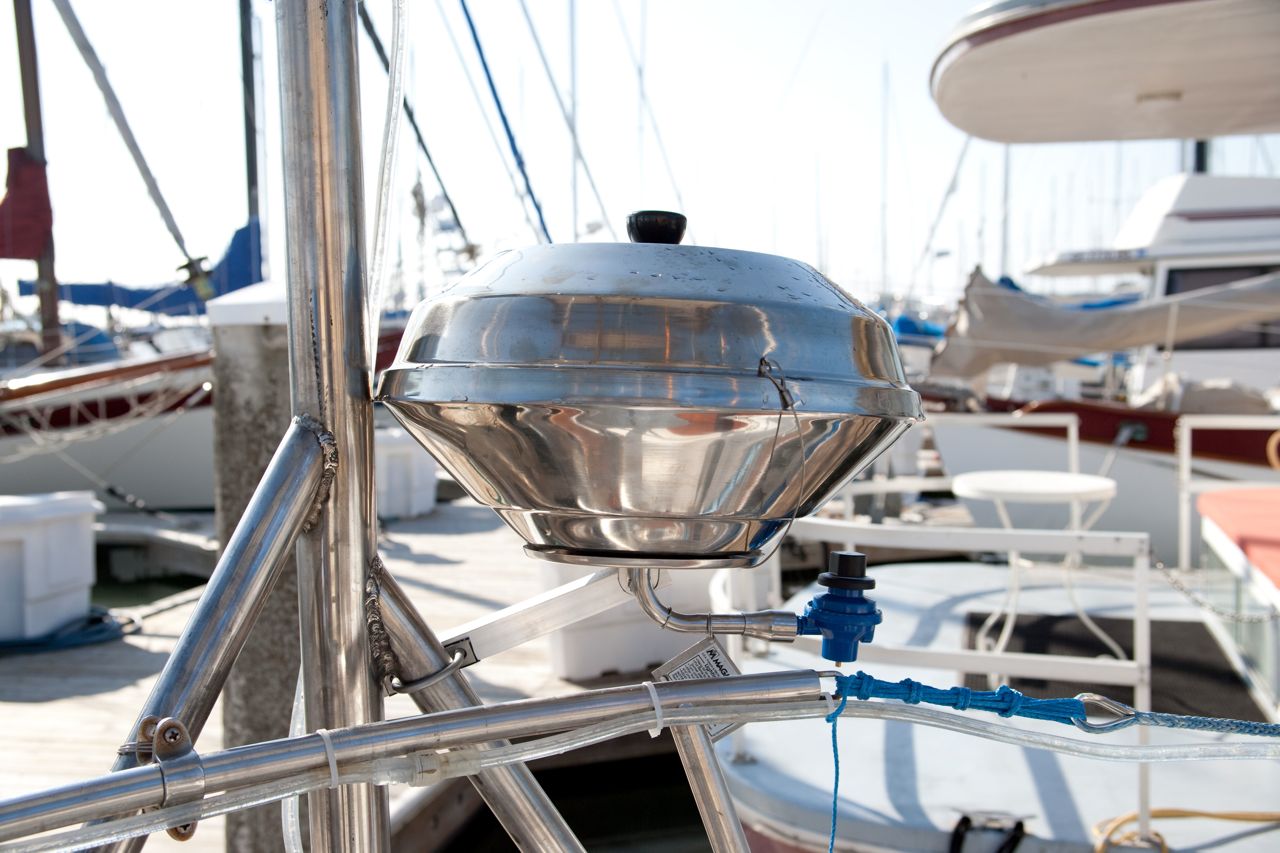
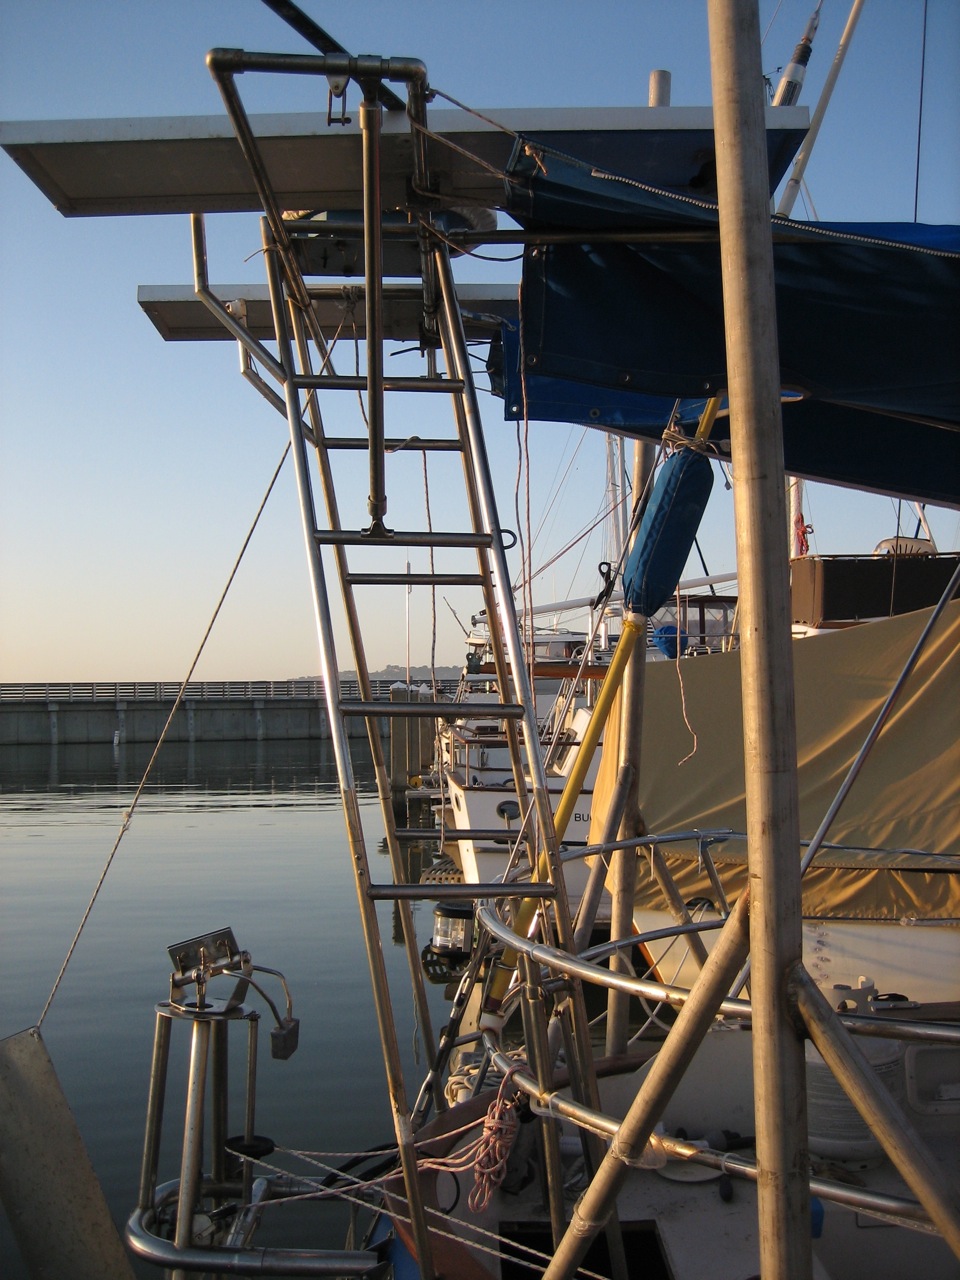
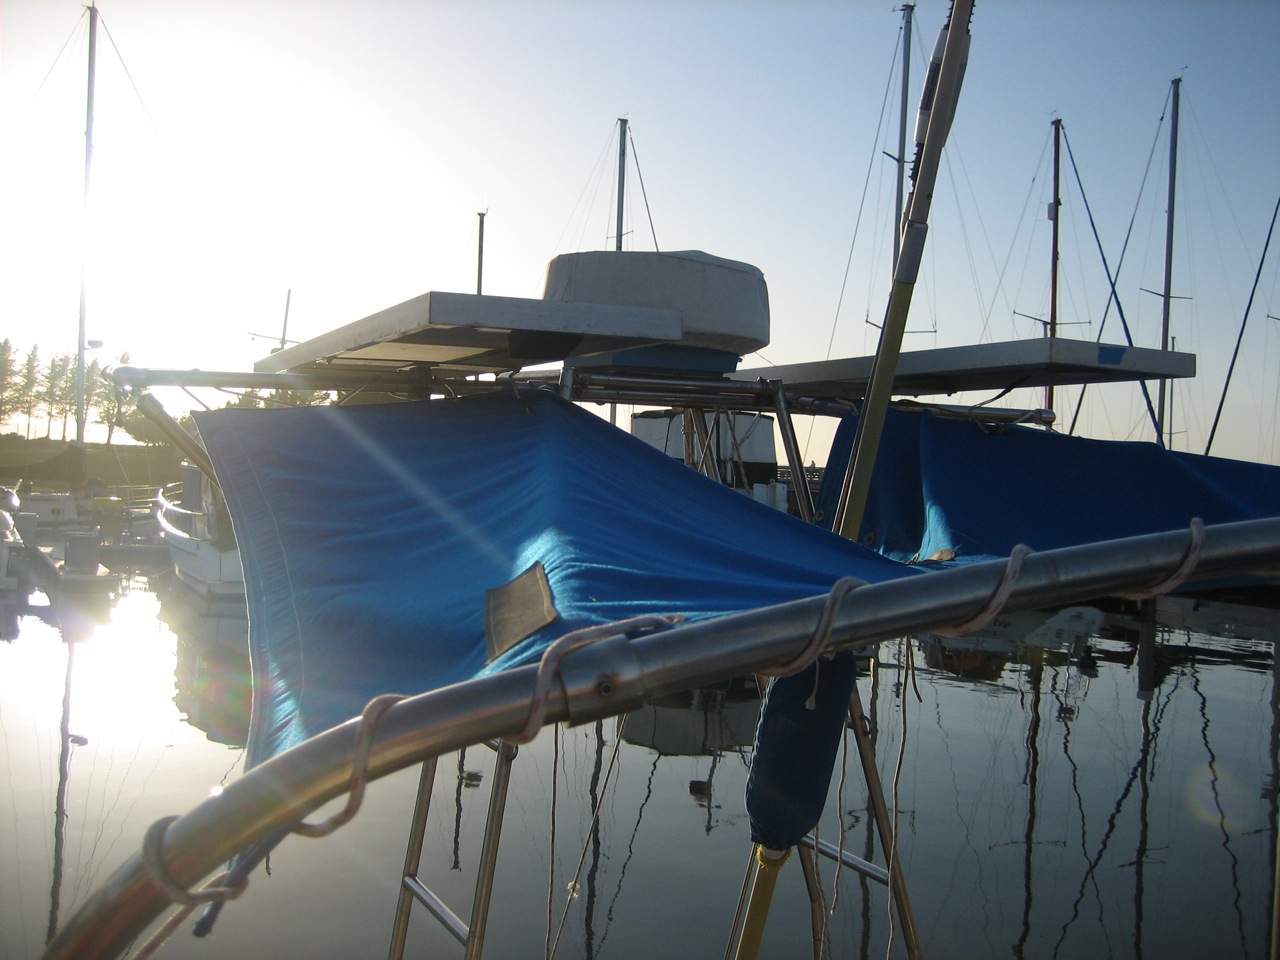
The old radar arch on the stern was a lot of metal tubing accomplishing very little–a mount for the radar and two dinky solar panels. We were going to need something more to mount our wind generator and larger solar panels anyway, so I got it in my head to build my own thing for the stern. I envisioned two vertical poles, the wind generator on one and the radar on another, with a rectangular frame in between for the solar panels.
First I was going to use aluminum, but I balked after my first attempt to weld aluminum ended with a weak joint in which I had no faith. Then I was going to use cheap-ass galvanized pipe that you can get in any home depot. But you have to be careful welding galvanized stuff–it’s poisonous when you burn it off–and it is only marginally corrosion resistant for a piece of metal that will be permanently mounted less than two feet from the salt water. Then jonny convinced me to use stainless steel. Initially I balked at that, because I knew that it would be ridiculously tedious to polish it up, and it needs to be polished up in order to be corrosion resistant. But jonny convinced me by promising that he would do the polishing, and confidently proclaimed that it wouldn’t be that hard or take that long.
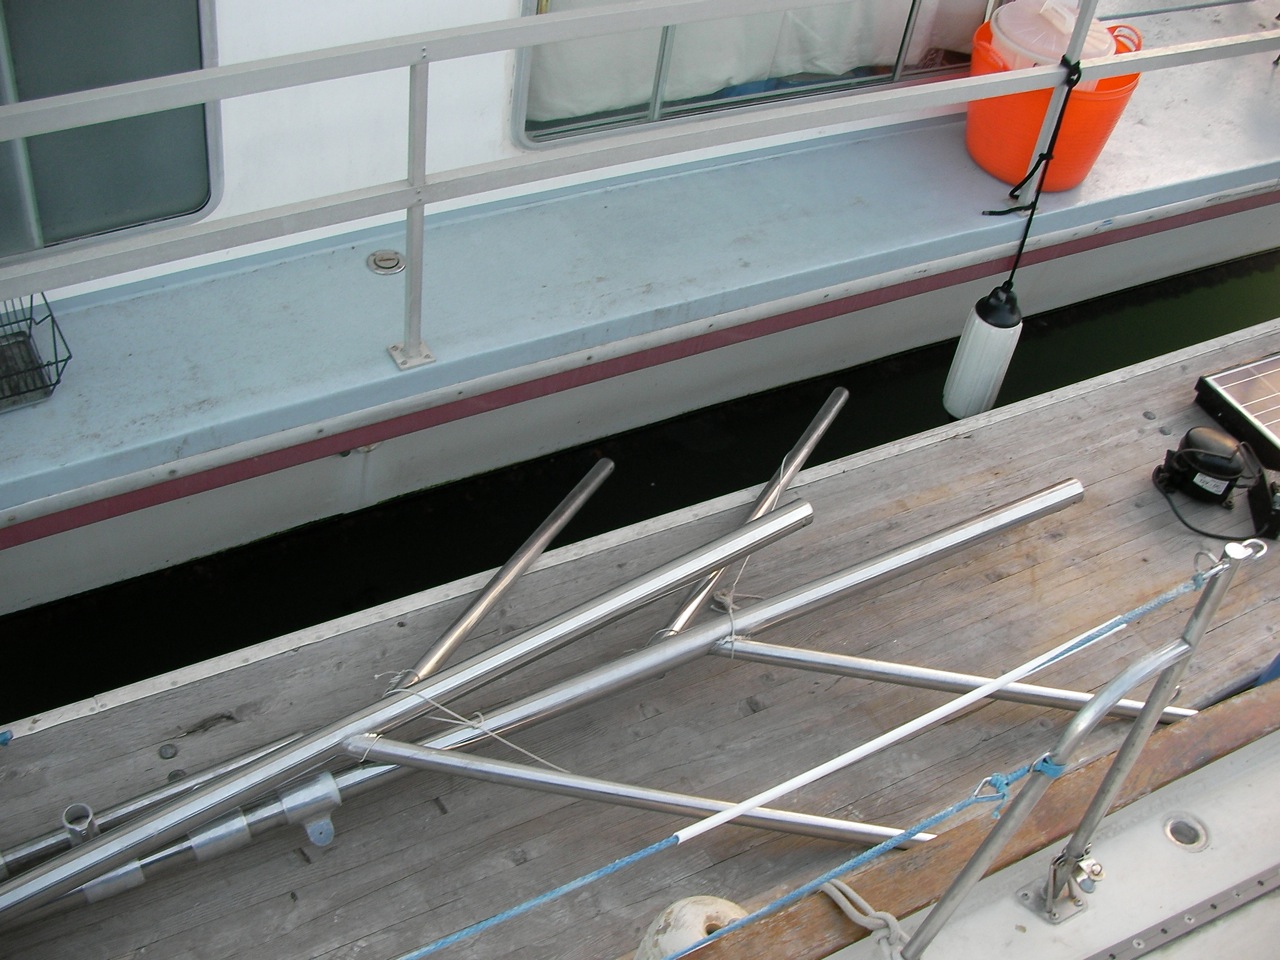
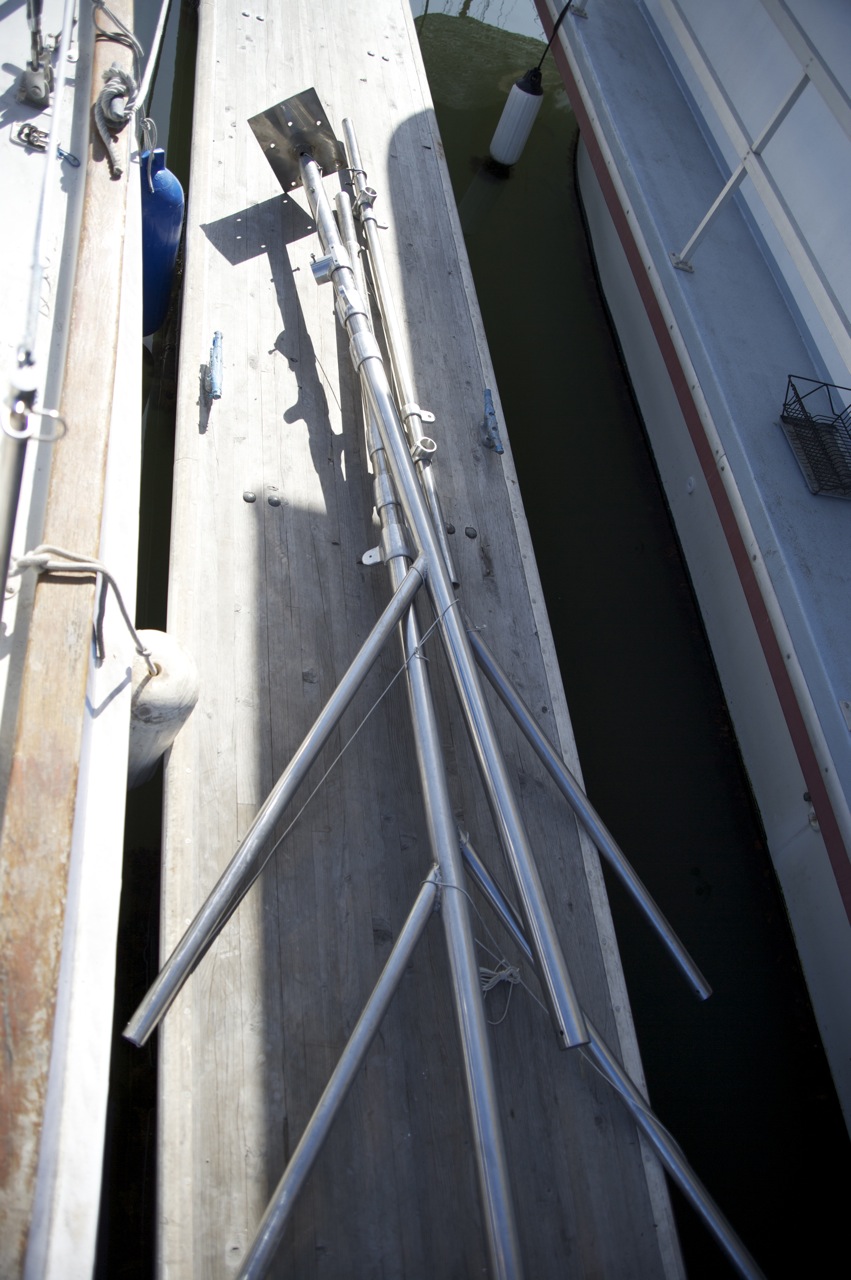
Many months later, it is complete and polished and mounted. For the past month the two poles have sat on the deck of the boat, waiting for me to finish the polishing job that jonny only half completed. Can’t say that I was really surprised; half-assed is jonny’s m.o. for all things boat related, and overconfident proclamations come out of his mouth only slightly more often than I have been convinced to believe them–which is a failing that I am trying to rid myself of once and for all. If you have no intention to keep it for yourself, it’s time to start looking for the right boat dealers.
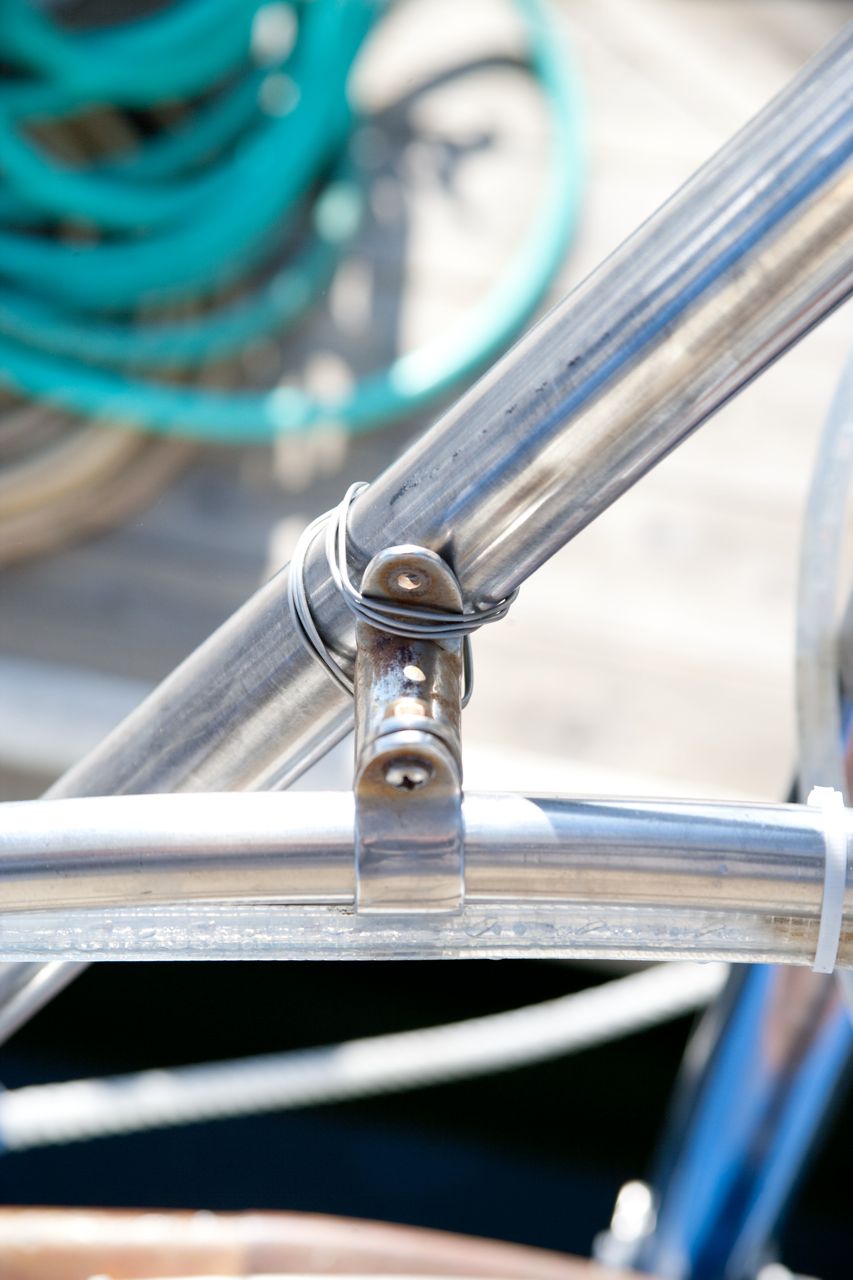
Polishing the stainless was, as I predicted, a complete bitch. We discovered via trial and error that the most efficient way to go from a flat matte grey finish to a mirror polish is to start with 220 grit sticky-backed sandpaper disks on the 7″ disc sanding pad on our milwaukee variable speed grinder (turned almost all the way down). After sanding off all the matte grey, we used the stiffest buffing wheel we could find (the one with the most circles of stitching holding it together) combined with the coarsest rubbing compound–the type intended for “cutting or polishing of stainless steel”. It takes absolutely FOREVER to get it to a decent polish. In retrospect, I wish we had shopped around to hire the job out to some place. Jonny did the majority of the work on them, then we mounted them temporarily to get measurements. “Temporarily” turned into three weeks, and by that time there was already a patina of rust all over the areas of the pole that were not completely shiny. It’s crevice corrosion, the bane of stainless steel; it happens wherever there is a scratch or a pit in the metal. Keep it mirror shiny and it won’t develop a spot, but the rust will find the little scratches and make a home.
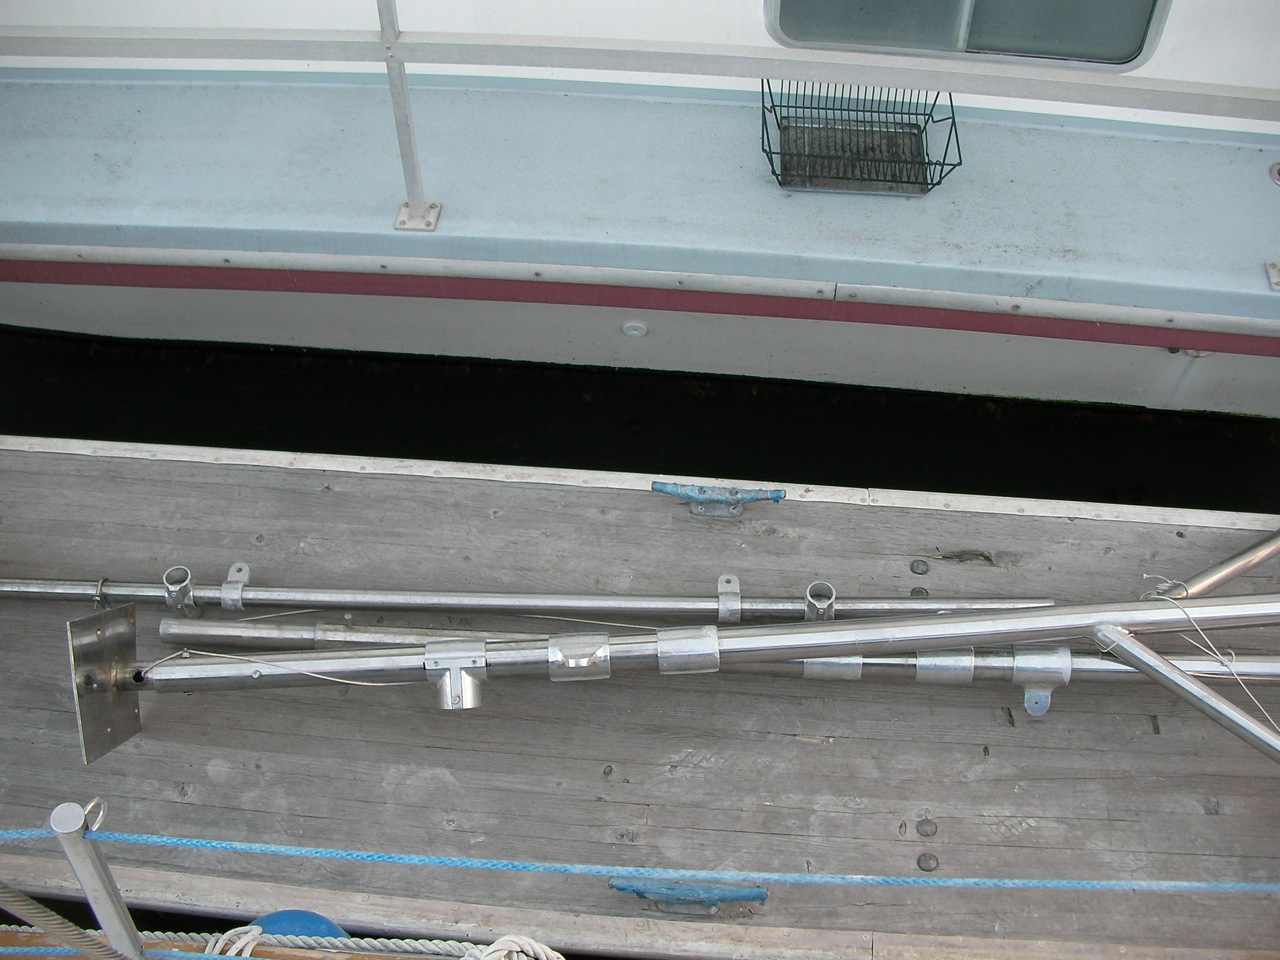
I used 2″ nominal 304 stainless steel pipe, schedule 10 for the vertical uprights, obtained for a reasonable price (which I have blocked out of my memory because reasonable for stainless is still way too goddamned expensive) from Alco in San Leandro I think. Pipe and tubing are measured differently. 2″ tubing has an outside diameter of exactly 2″. 2″ nominal pipe, schedule 10 (refers to a thickness of .109″), has an outside diameter of 2.375″ and an I.D. of 2.157″. I used 1.25″ dia. nom. pipe for the support legs and the crossbar, and the top pipe inserts on which the radar and wind generator are mounted are 1.5″ nom. pipe. All schedule 10, since that’s the thinnest I could get and isn’t as thin as I wish it would have been. I made myself a little chart to keep track of all the diameters, because no one could ever identify their pipe for me so I had to carry around a set of calipers and measure them for myself:

I decided on a vertical post on each side, each supported by two struts. I didn’t want the struts to rise above the height of the pulpit–a style consideration, I just didn’t want all that metal blocking the view or experience aft of the boat. That, and I knew it wasn’t necessary for strength (especially considering how crazy strong the pipes are that we’re using).
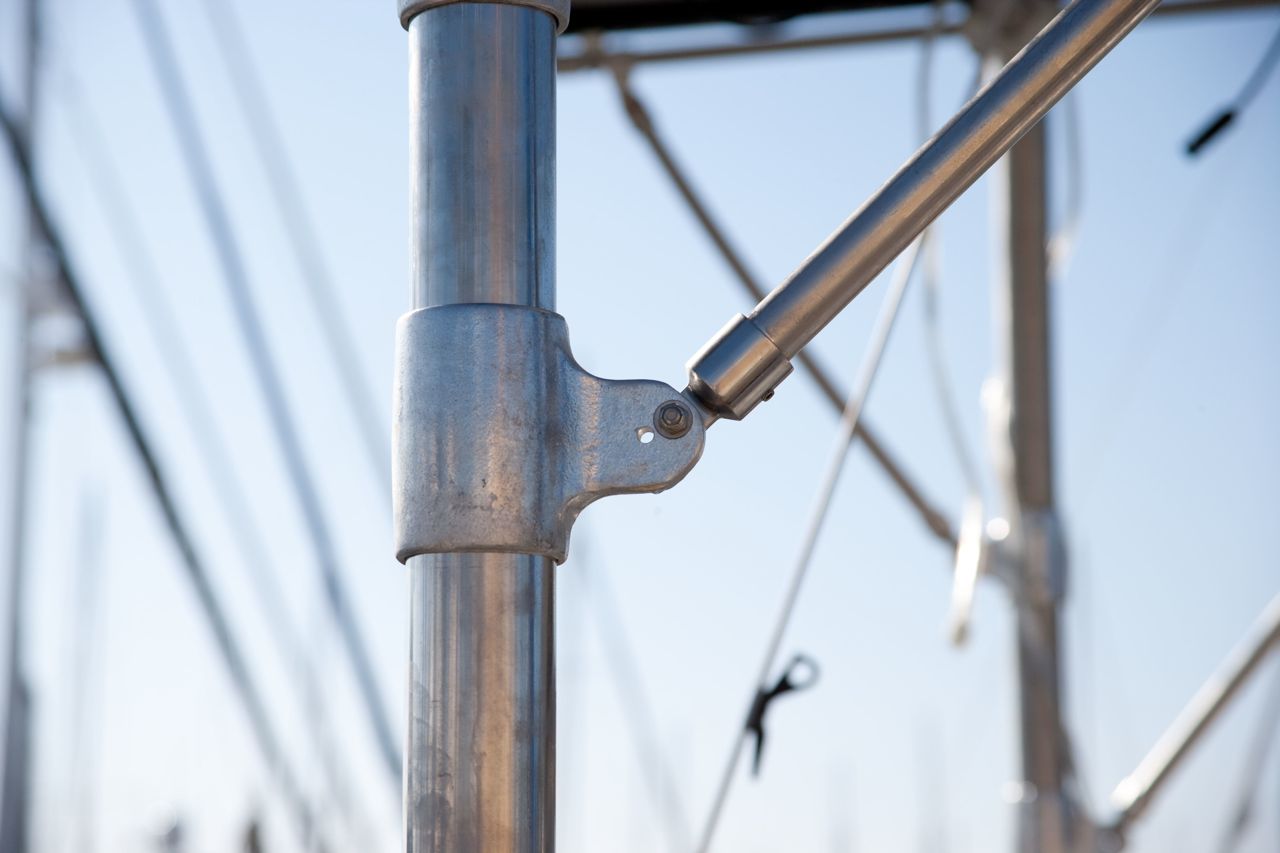
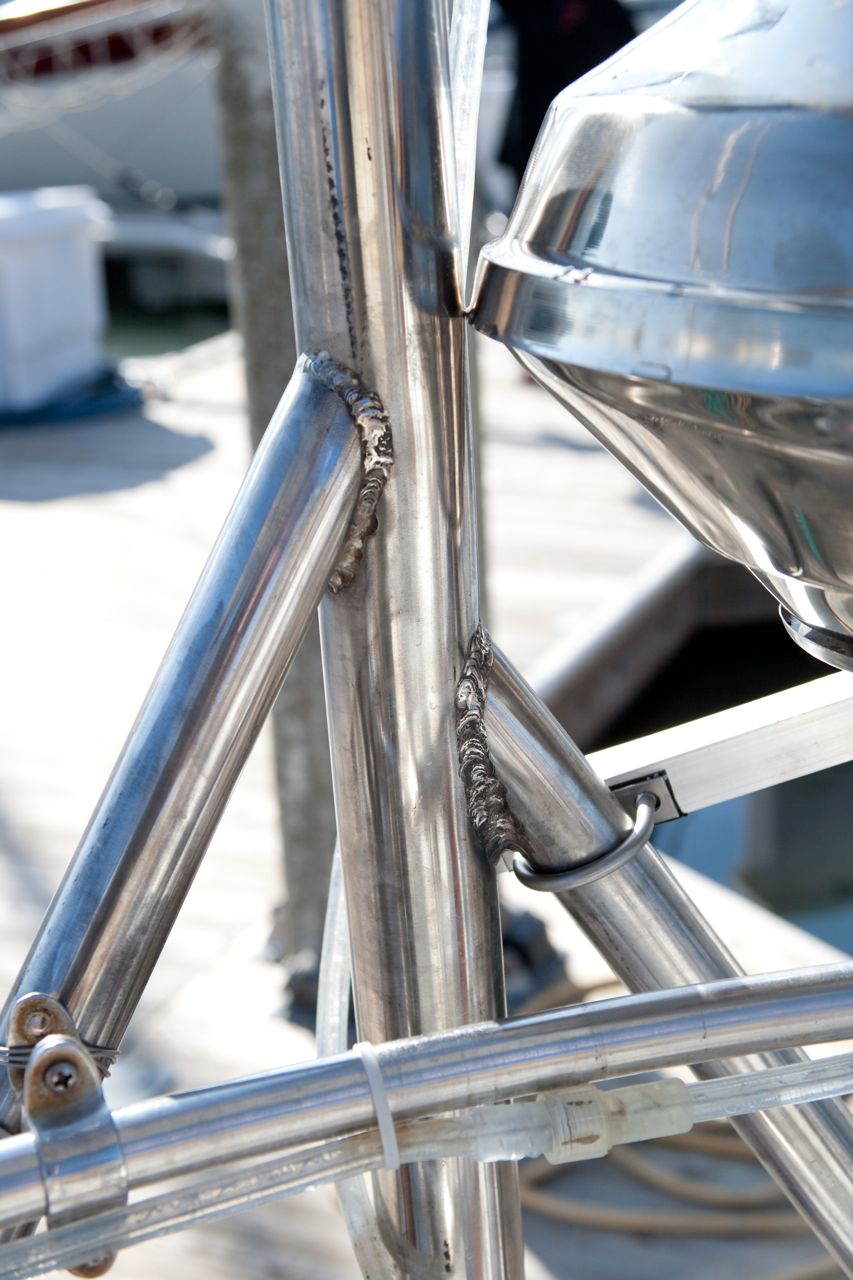
Jonny and I spent a whole morning fucking around with cardboard tubes and protractors trying to determine the exact angle that the struts needed to make (in both the horizontal and vertical planes around the vertical poles). We used the average of all our measurements, and then I used the diameters of the two pipes and the angle between them to print out a “coping” diagram to use for cutting off the pipes, from this sweet website. You print out the curve on a piece of paper, cut it out, wrap it around the pipe, then use a sharpie to draw the line on the pipe. Then take the cutoff blade (or 5 of them) and a grinder, and painstakingly cut the pipe to match that curve. Afterwards, the strut will rest against the vertical pipe just right. Remarkably, it actually worked, and really well at that.
Then I welded the struts to the vertical poles at the tech shop. Essentially I learned to TIG weld just for this project, so I don’t have very much experience. And it shows. The weld job I did is acceptably strong, I hope, but it isn’t pretty and it is far from admirable to those who know welds. In a nutshell, I went over it too many times, trying to make it look nice, and in the process heated the metal too much, causing the weld to be weaker and more prone to corrosion than it otherwise would be. I’m not too hard on myself for it, because it’s still pretty good considering how little experience I have.
I’m glad I was so anal about measuring the angles accurately, because the poles just barely fit in place. In truth, on one side we needed to fabricate a shim to go between the strut and the hull because I didn’t get it quite right. It was a tall order to get it even as close as we did, so I’m just thankful that it works.
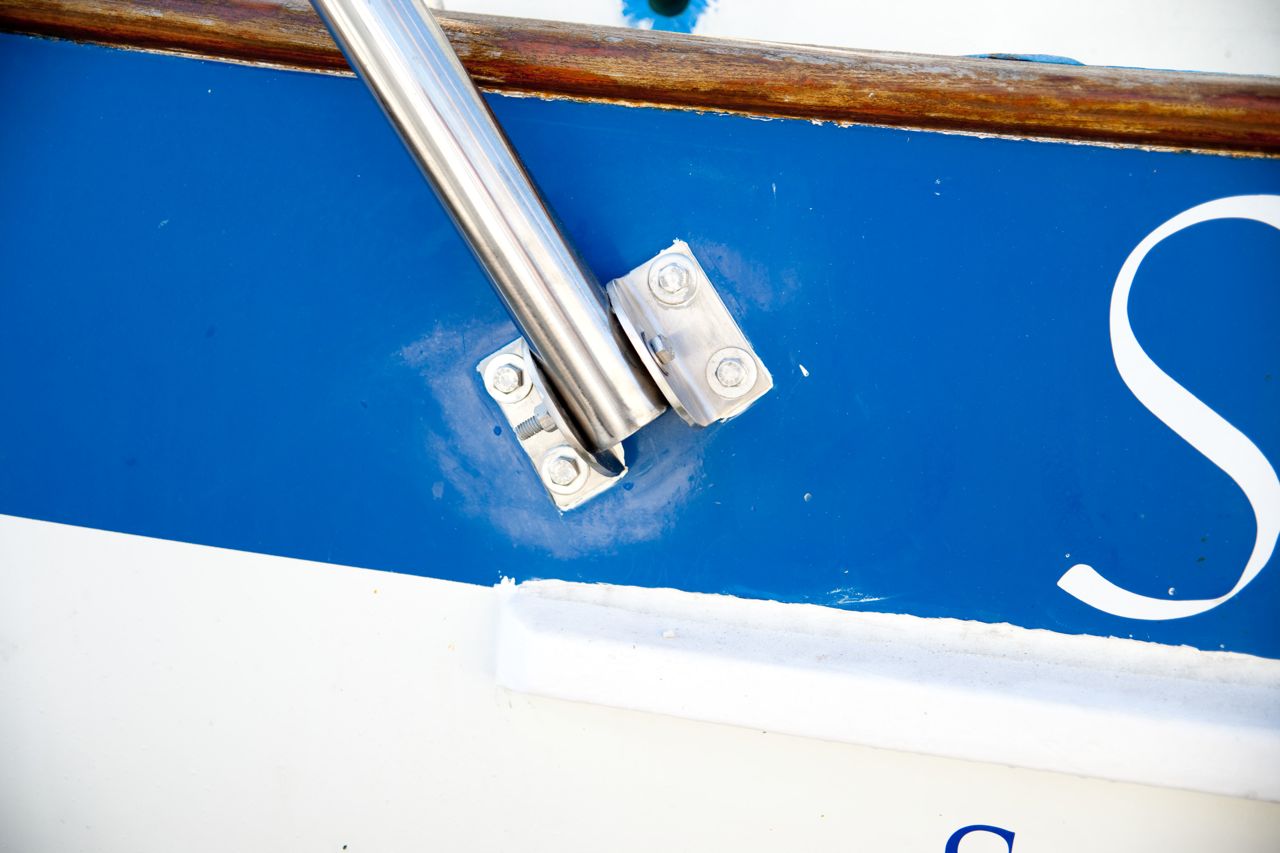
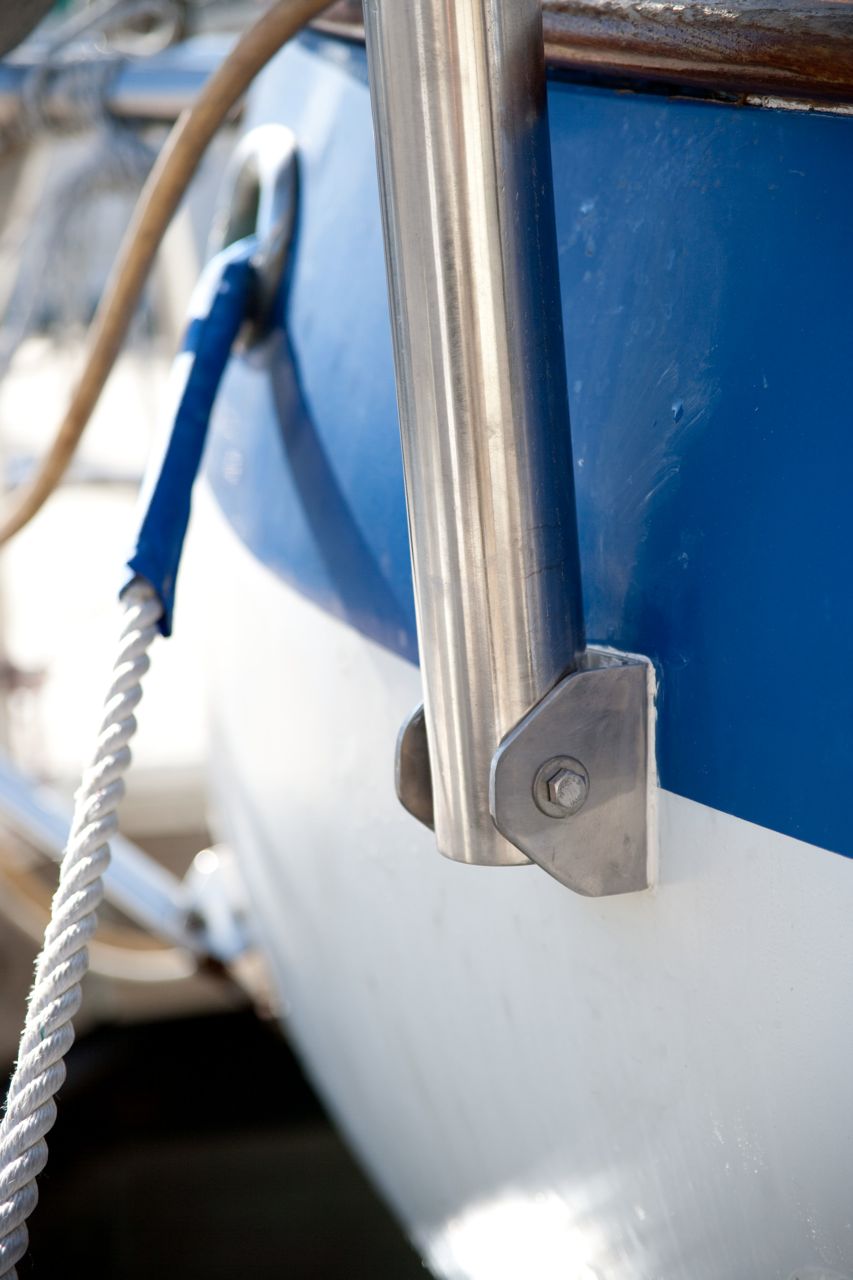
I fabricated the brackets to mount it to the hull out of a scrap piece of stainless box iron: I cut the box in half and then in half again to get L-brackets. Again, polishing these up was ridiculously tedious.
I cut backing plates for the brackets out of a scrap piece of thick-ass stainless–1/4″ thick I think. Two of the plates sat on a curved piece of the hull, and I was concerned that when we cranked down on it it could break the fiberglass, so Jonny puttied up the backside (the surface that the plates would sit on) with thickened epoxy and then smooshed the plates down onto it (with a piece of waxed paper between) to form a nice base for the plates to sit on.
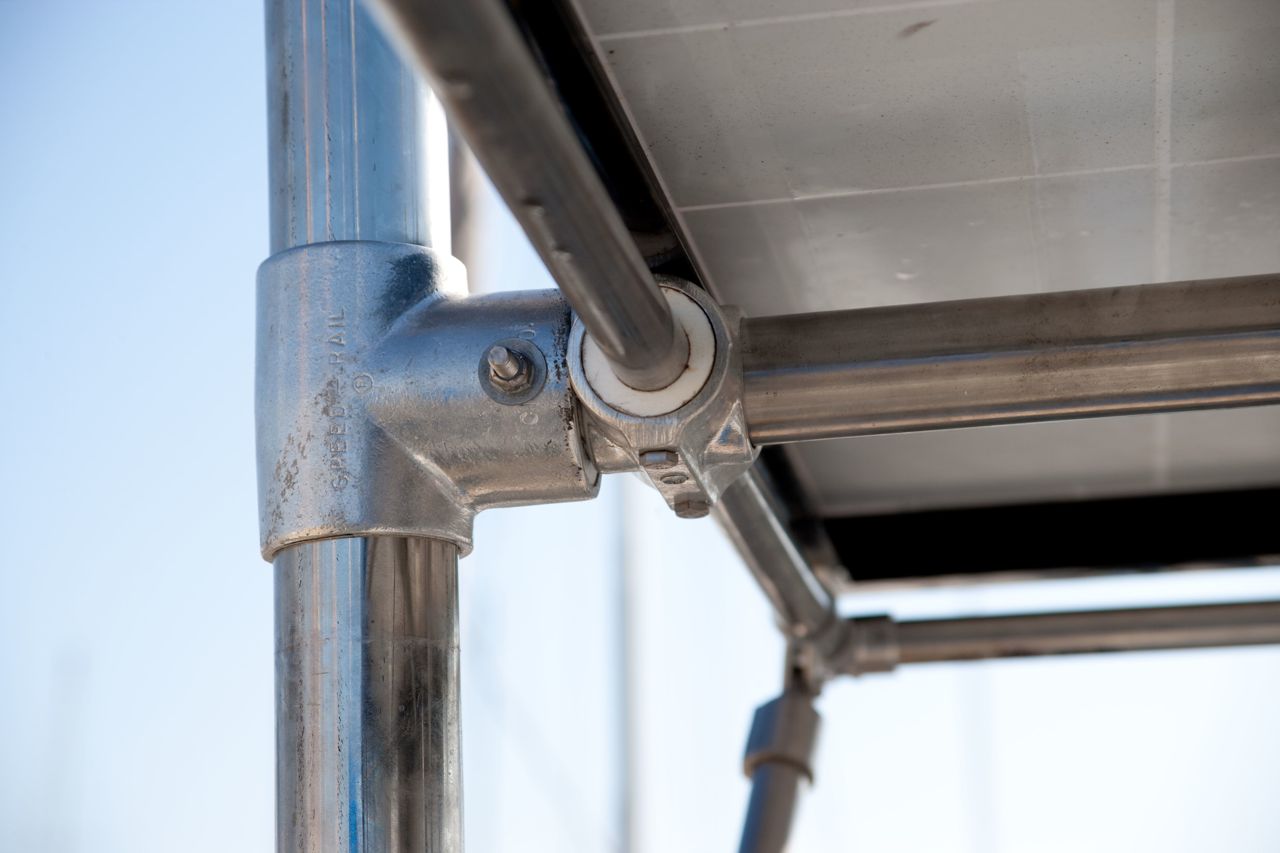
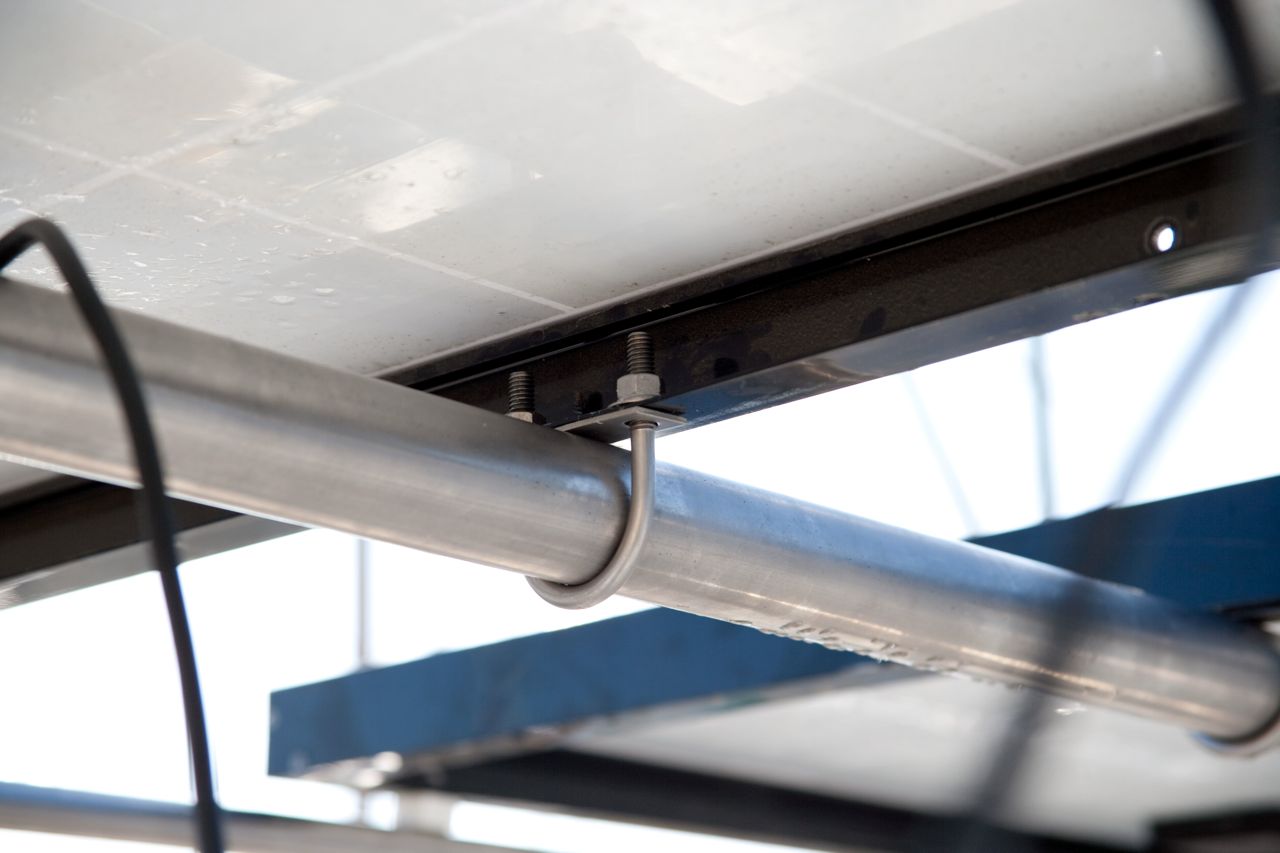
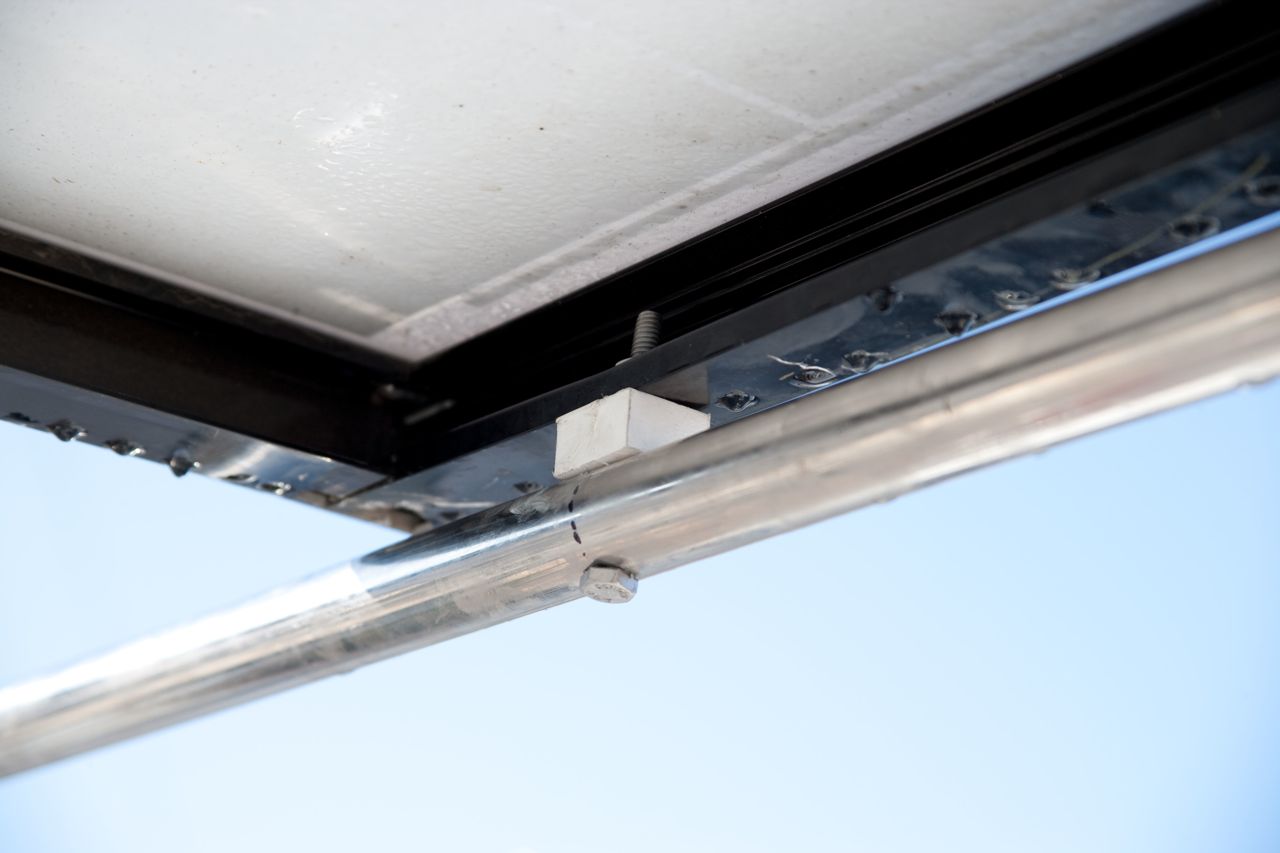
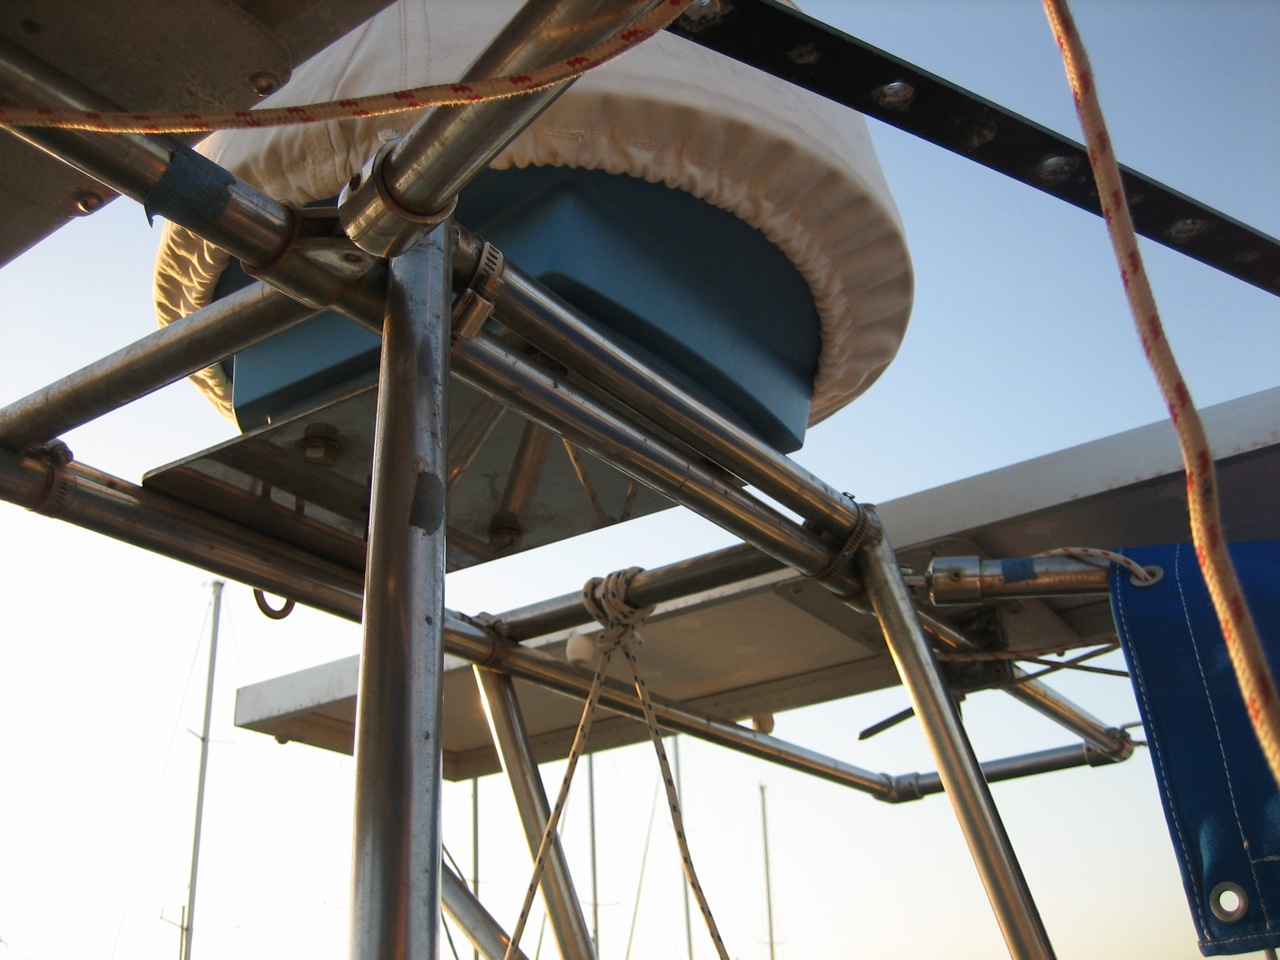
So I welded the supports to the vertical pole, but I decided that I wanted to use fittings to mount the rest of the supports in place–I wanted them to be adjustable and removable if necessary. I went with “speedrail” fittings for the pipe, then had TAP plastics fabricated some starboard bushings to mate our leftover 1″ stainless tube into the pipe fittings (I couldn’t find any commercially available adaptors, anywhere). Our old bimini frame (1″ stainless tube) had been hanging off the bow for months; I cut almost all the pieces I needed for the solar panel frame out of the old bimini apparatus.
At the top of each of the vertical poles I made a 1.25″ nom diameter pipe insert, that bolts inside. I welded the radar mount to this insert (instead of directly to the top of the vertical pole) so that it can be removed with two bolts. The wind generator got mounted to the insert on top of the other pole (the KISS wind generator is designed to be mounted onto either 1.5″nom pipe or 2″ tubing).
The resulting framework is the strongest of any I’ve seen. It is probably also the heaviest, but my intuition tells me that our mounting points on the hull are going to be strong enough to handle it all (I really hope we don’t have problems with it!).
Leave a Reply