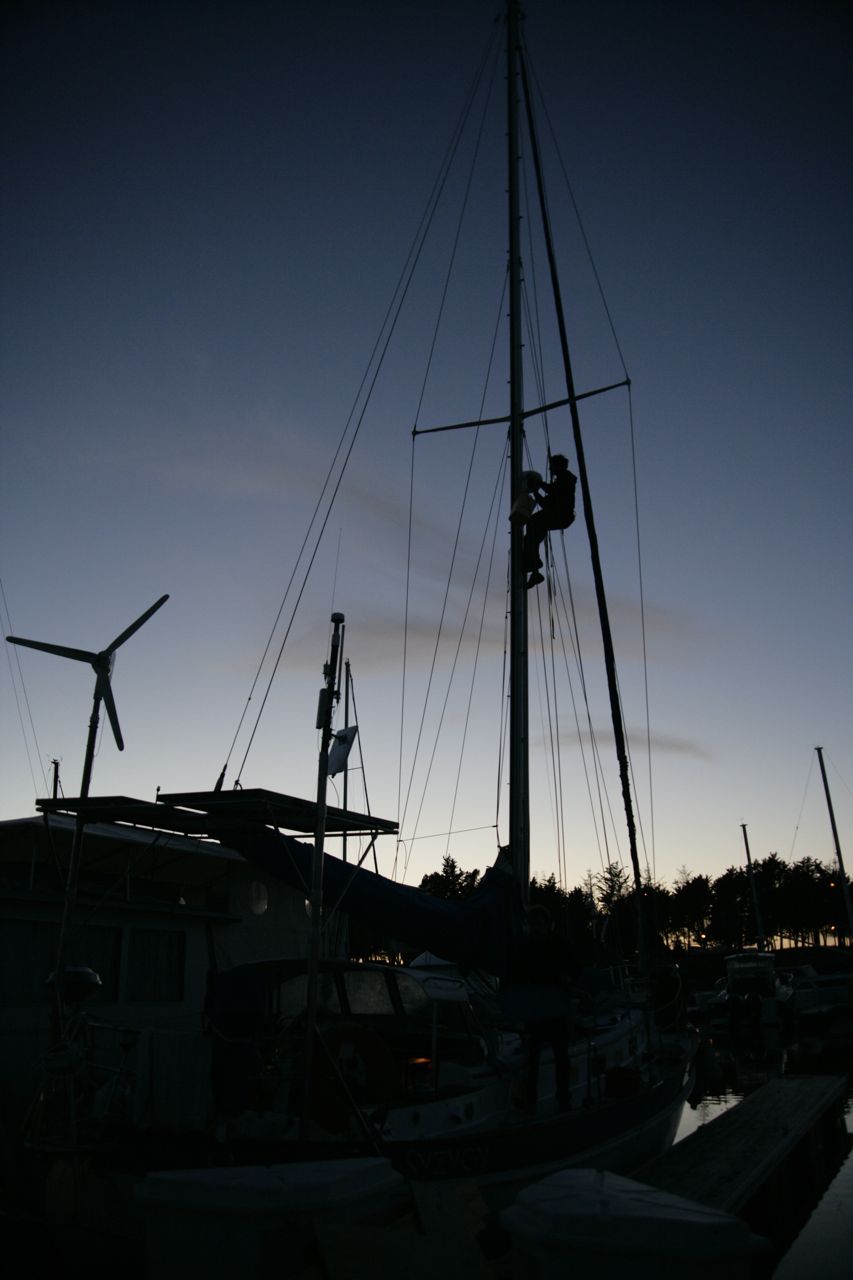
The wire broke; I replaced it with a length of 5/16″ amsteel–overkill, but it’s the only piece I had that was appropriate. If it breaks again, it sure won’t be the amsteel.
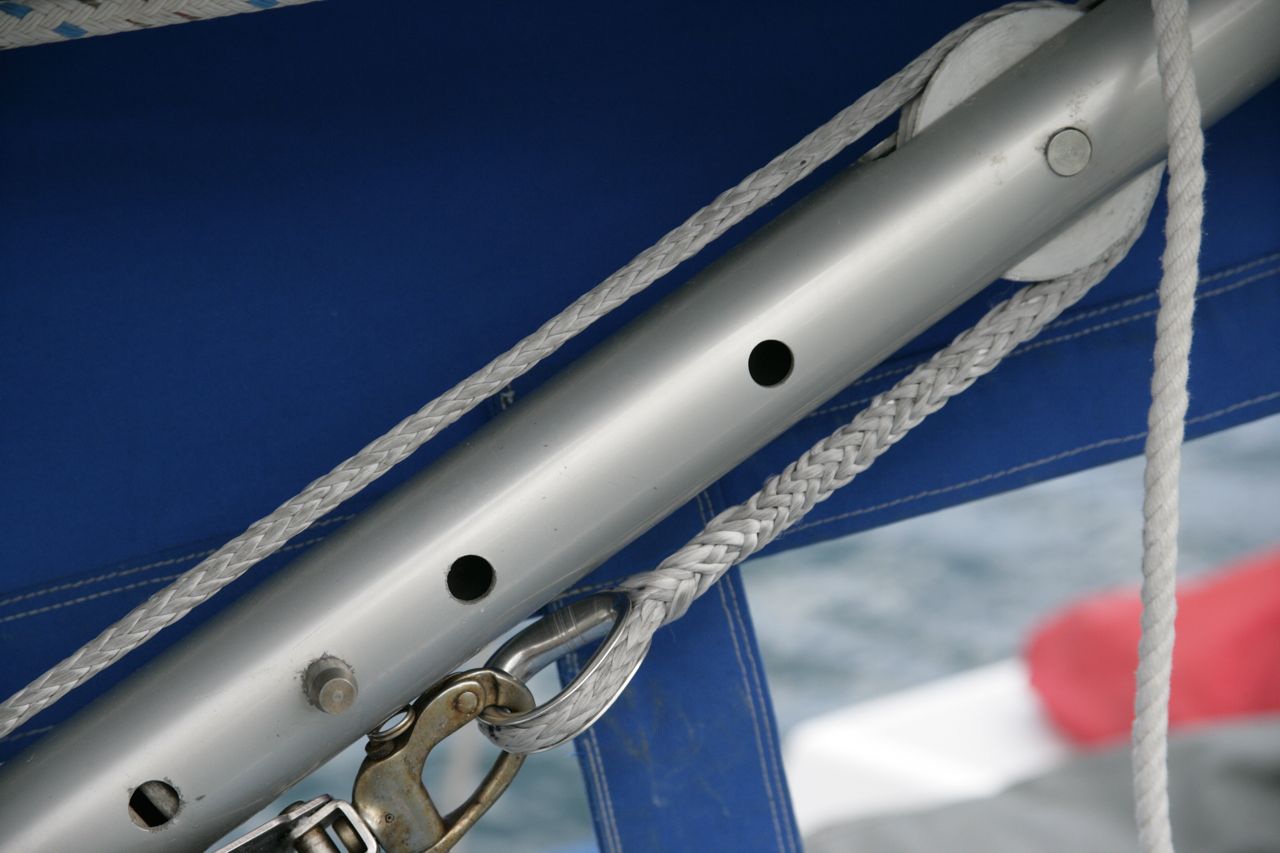
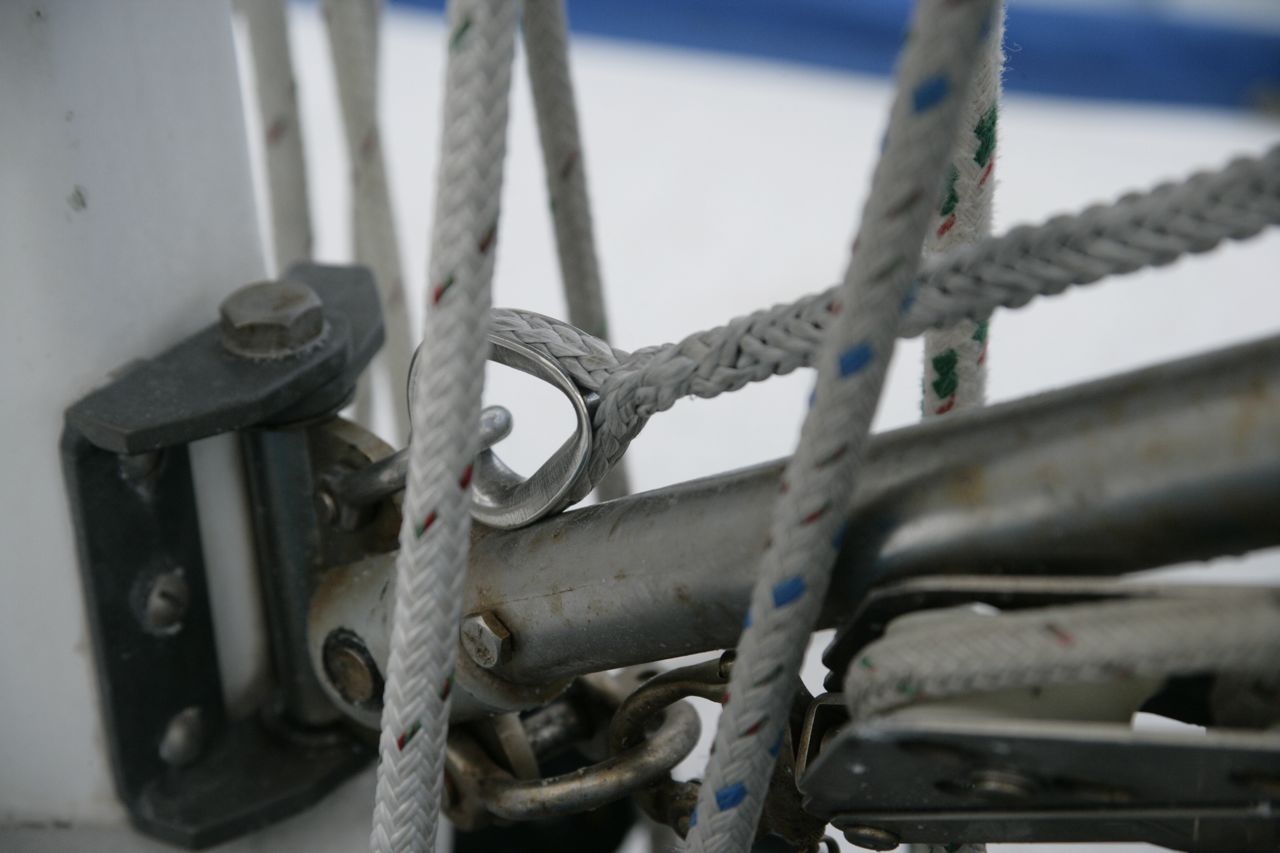
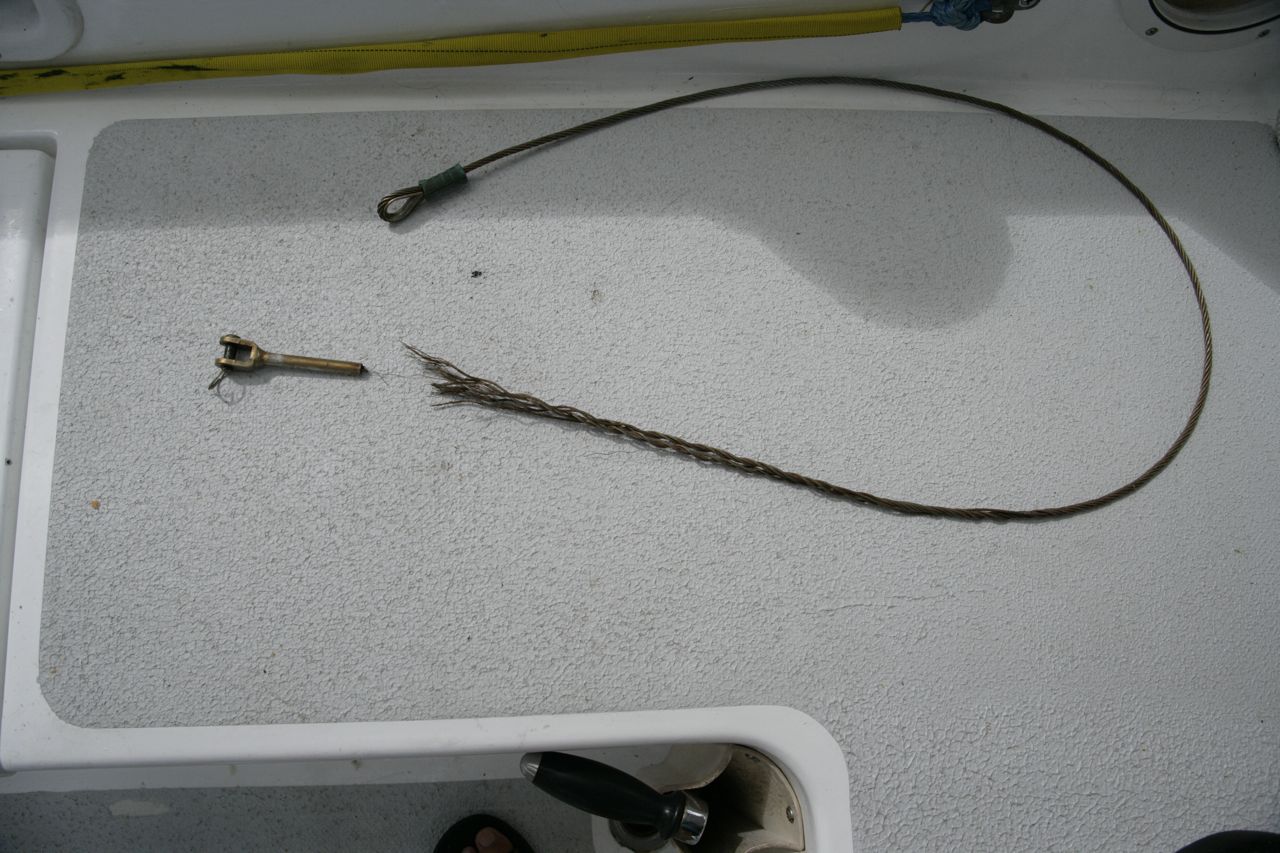
The wire broke; I replaced it with a length of 5/16″ amsteel–overkill, but it’s the only piece I had that was appropriate. If it breaks again, it sure won’t be the amsteel.
we’re in mexico now and I have a few dozen posts to add and update on this site but I’m trying to get a tan and relax and unwind some from boat work. Anyway, on the way down from san francisco I listened to our transmission making a clacking noise which may or may not be completely normal.
The audio file I am attaching to this post was recorded while sailing (motor was not running), and the gear shift is in neutral. But it makes the same sounds regardless of whether the gear shift is in forward, neutral, or reverse (it doesn’t seem to make a difference).
You will hear the whirring of the prop shaft spinning, and then you will hear a clattering/clacking noise that I can pinpoint to be coming from the transmission (not the engine or v-drive).
Does anyone have any opinion about whether this is normal, or something I should be worried about?
Now, the second noise is one that I attempted to record, unsuccessfully. It is a deeper vibration that occurs in the prop shaft as we are surfing a bit faster than average. It happens regardless of whether we are motoring, or sailing and the prop is freewheeling. I watch the prop shaft and I see no untoward deflection or vibration, to my eye at least. I suspect the noise has something to do with the cutlass bearing; I do not know what shape the cutlass bearing is in. At what point do I need to worry?
update 11/11:
After sailing across the pacific without developing any problems associated with the noise, I have concluded that it is nothing to be concerned about. We did make a modification to our procedure, however, which seemed to reduce the amount that the shaft spins: before shutting down the engine each time, we briefly put it in reverse and idle up slightly, for a few seconds, then turn off the engine without taking it out of gear. Honestly, I can’t ascertain the precise effect of this: sometimes the shaft still spins, sometimes not so much, but I don’t think I ever heard the noise again quite as bad as I described above. In either case, no ill effect has come from it, despite about 15,000 miles of sailing.
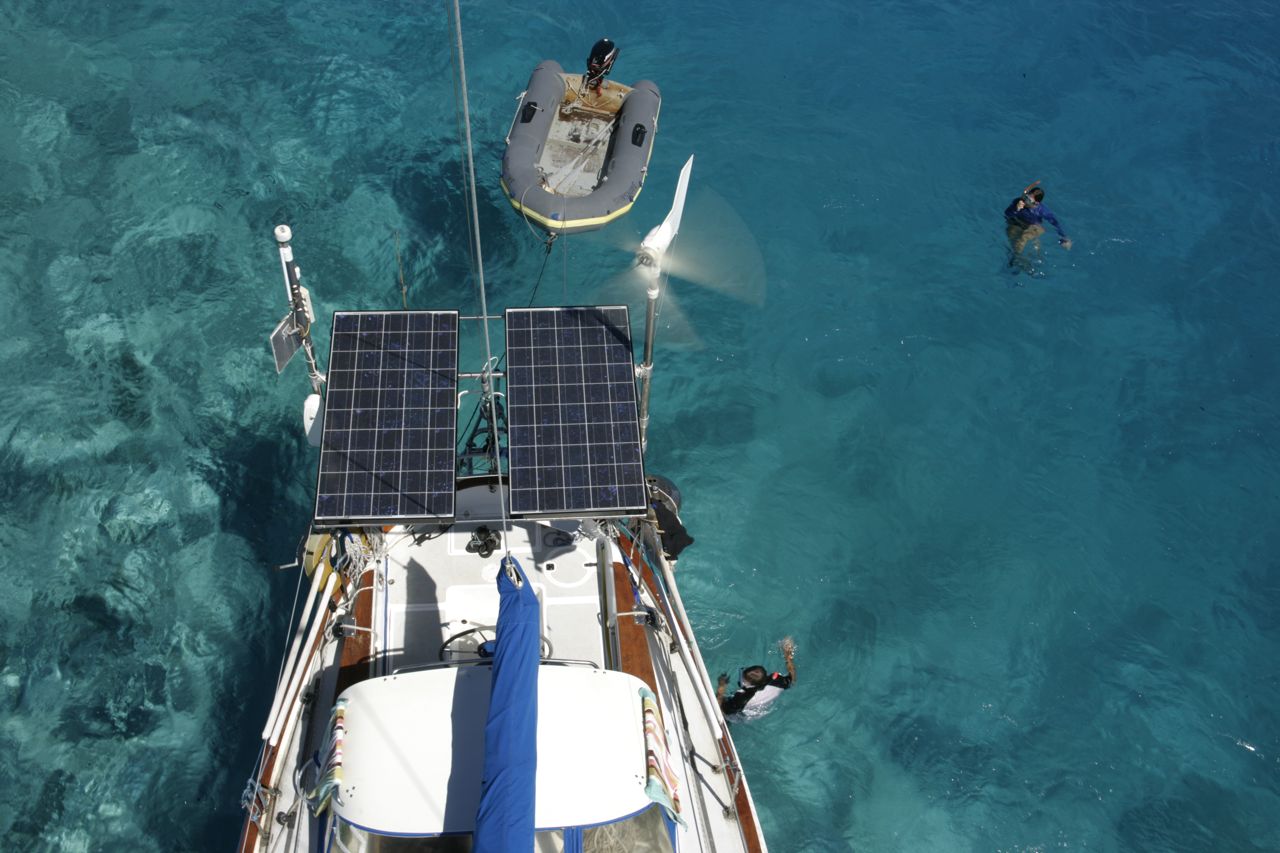
We were sailing erratically, it didn’t seem like adjusting the control lines for the self-steering monitor windvane was having any effect. On further investigation (didn’t take much), I discovered that the rudder was dragging behind the boat, attached only by the safety keeper-cord that is designed exactly for this purpose. I wish I had taken a picture–it was a pretty funny scene (in retrospect)–but it wasn’t at the top of my list of priorities in that moment.
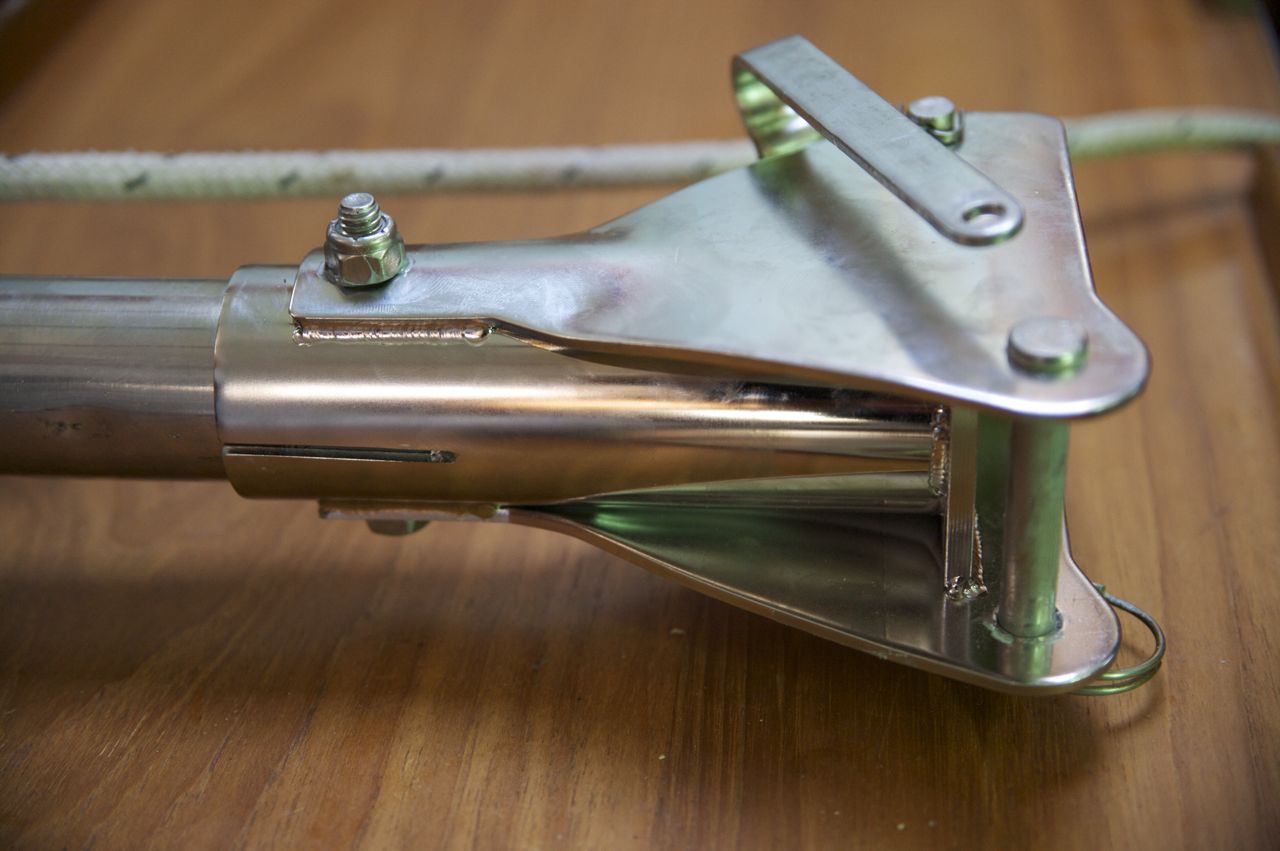
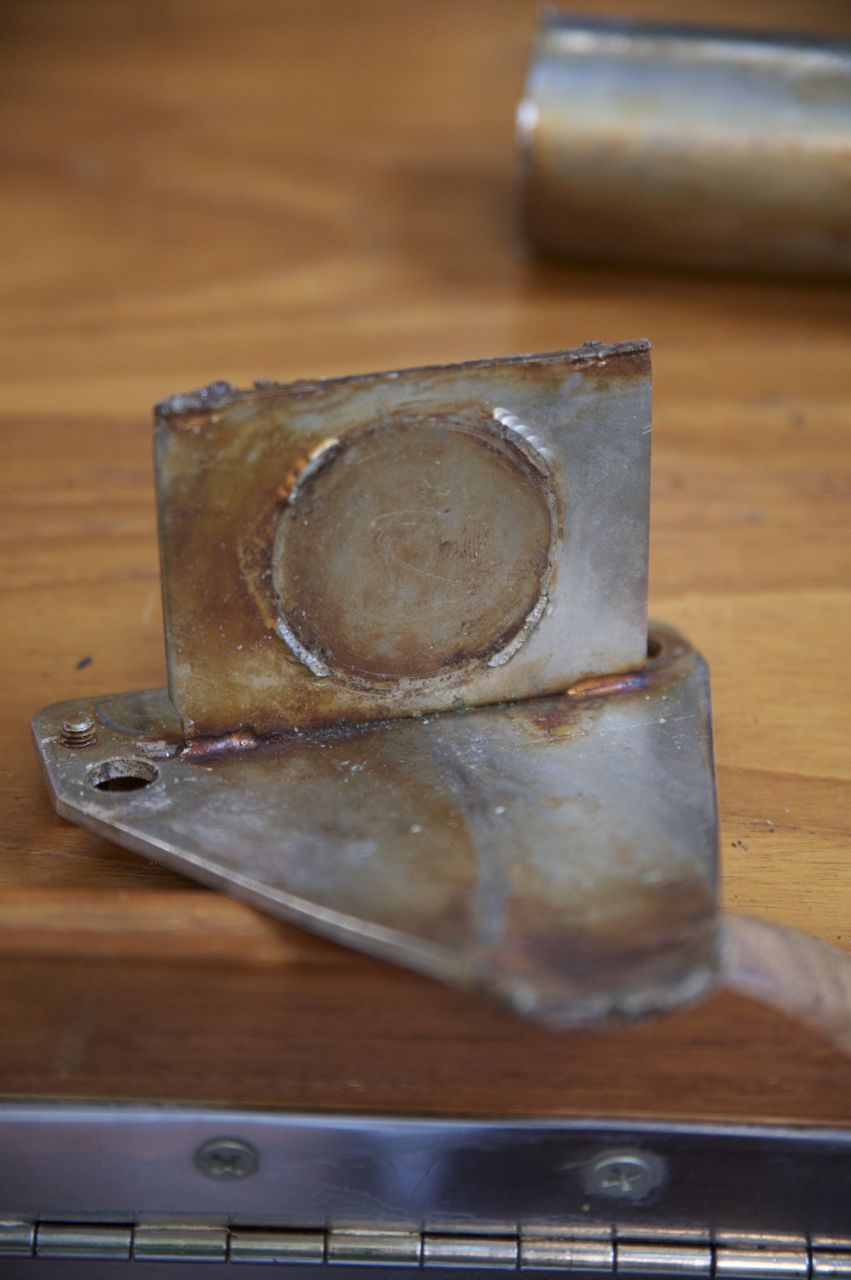
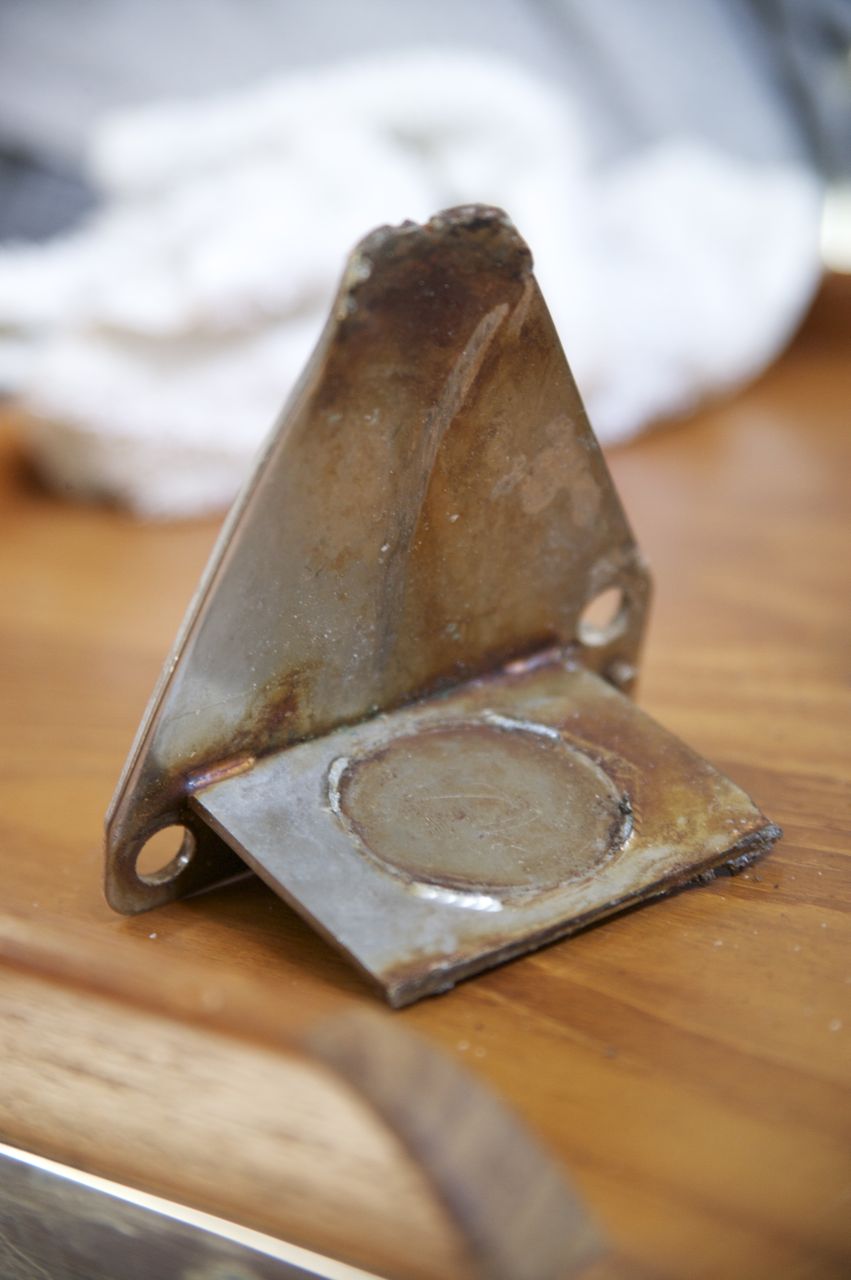
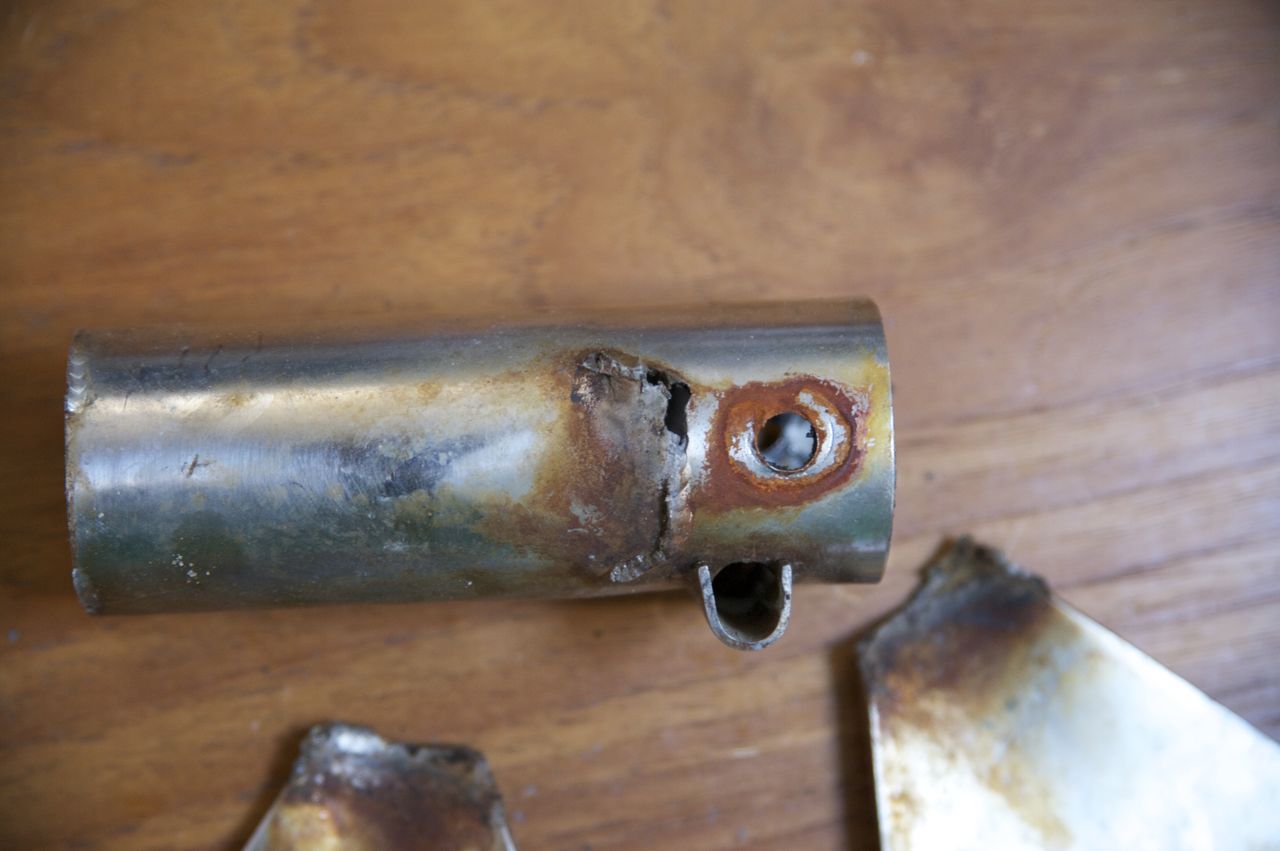
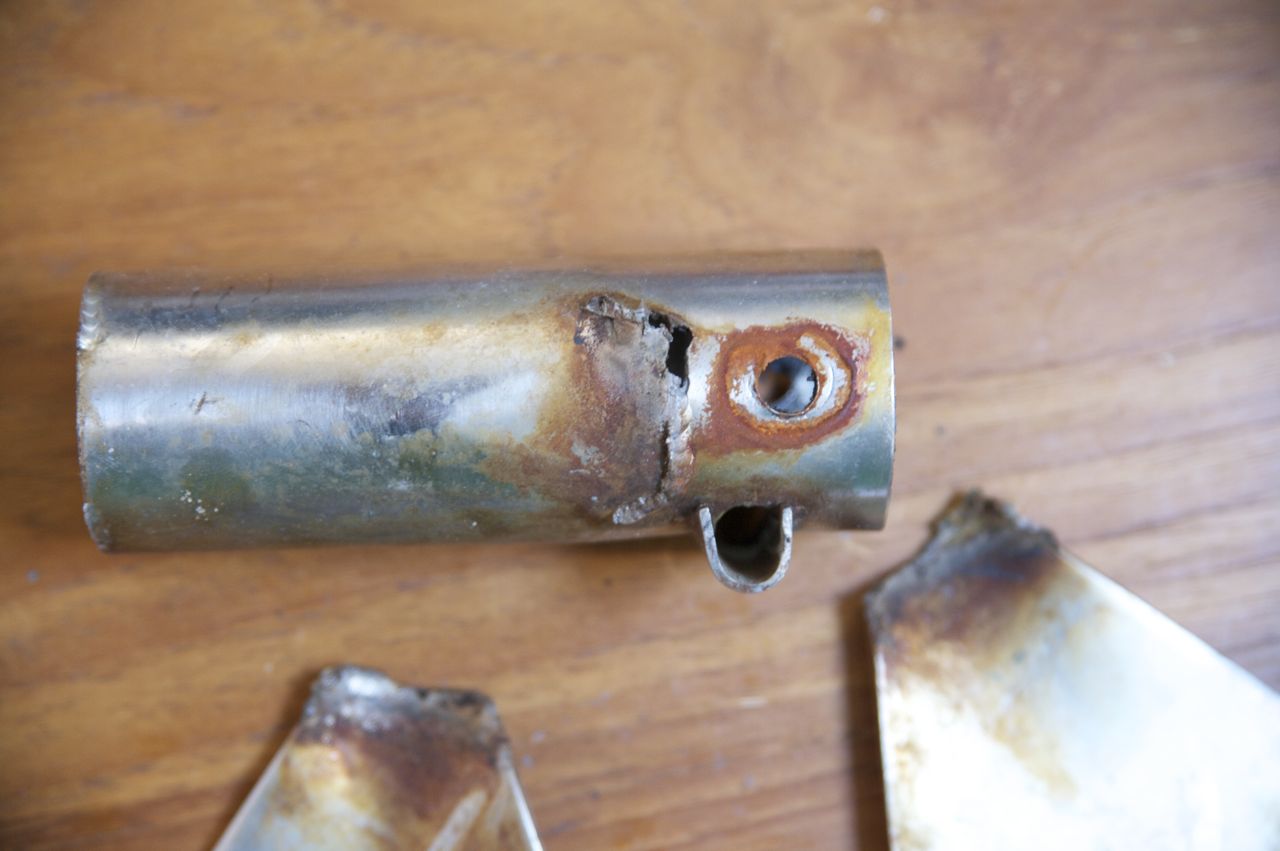
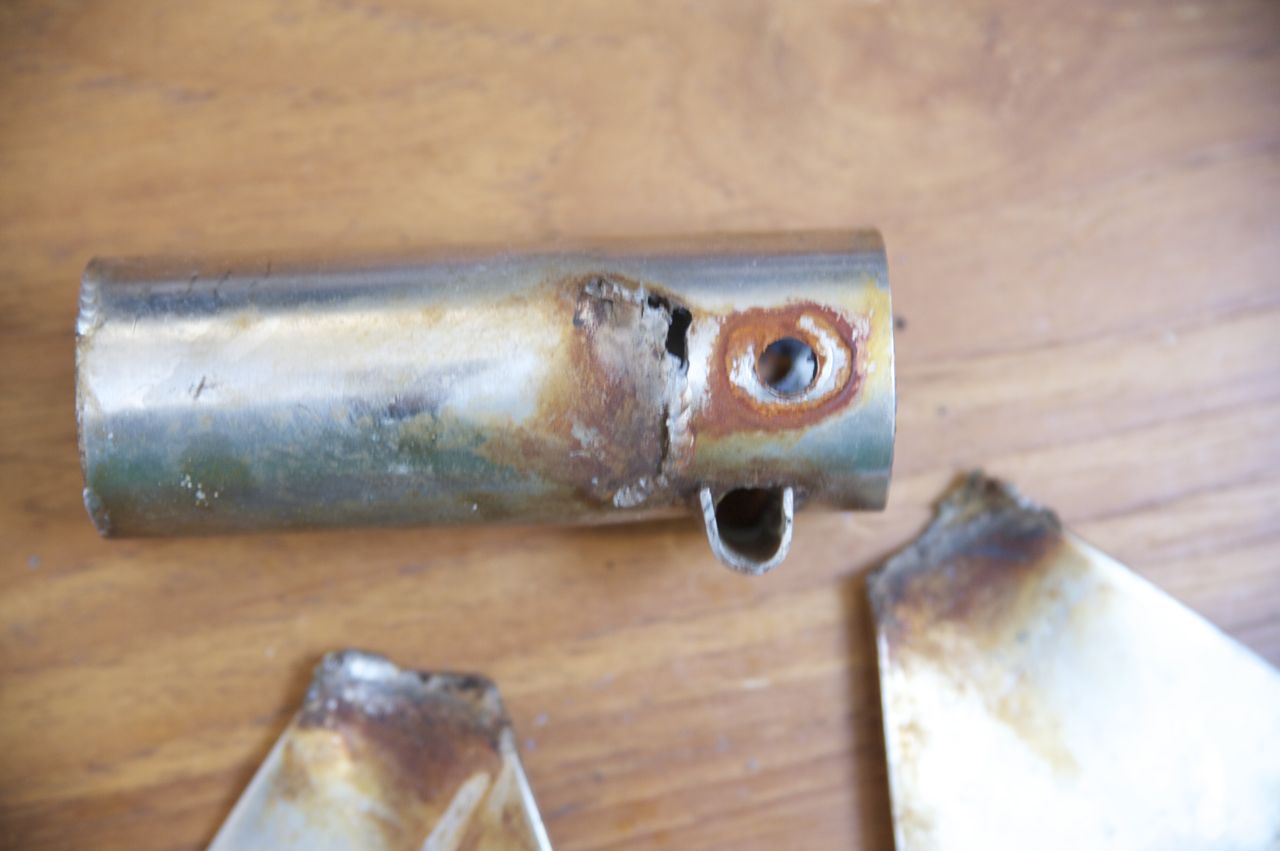
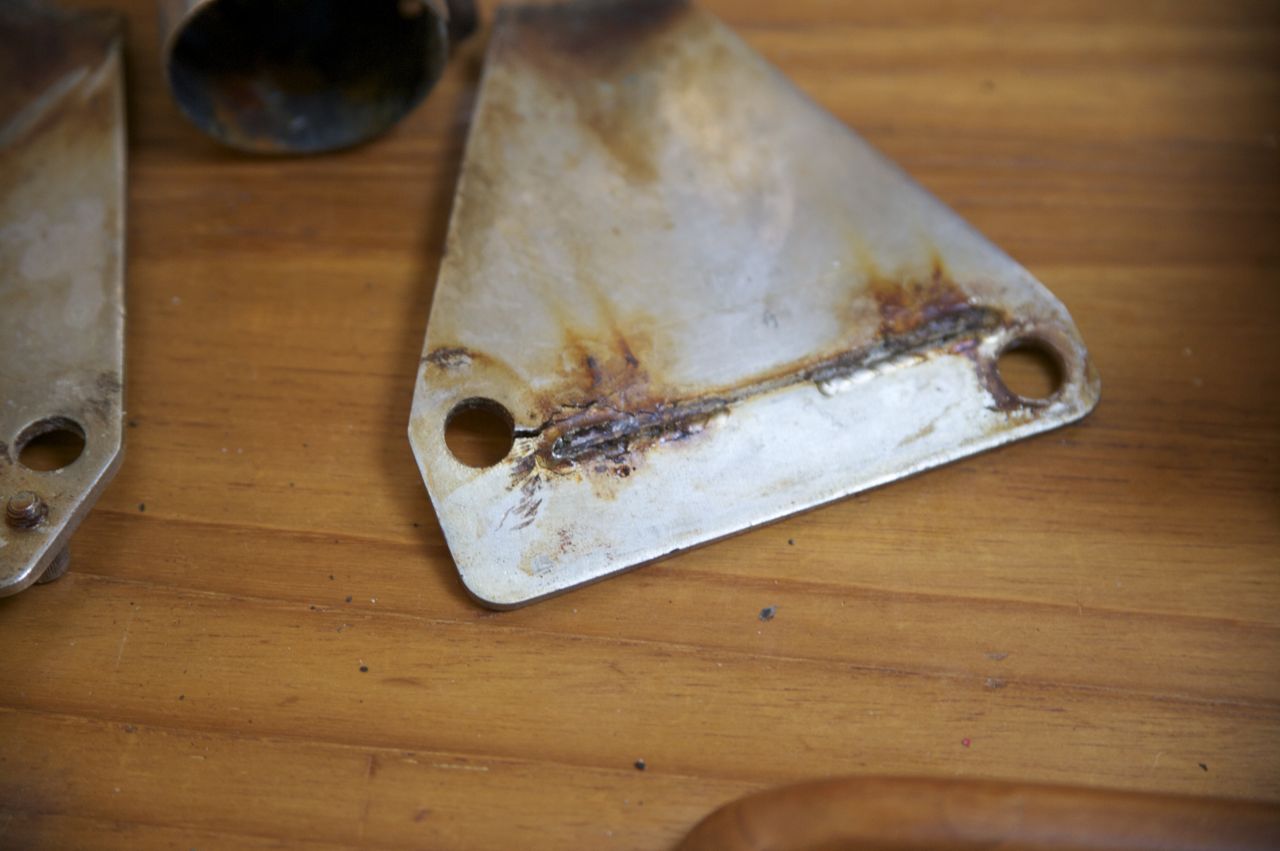
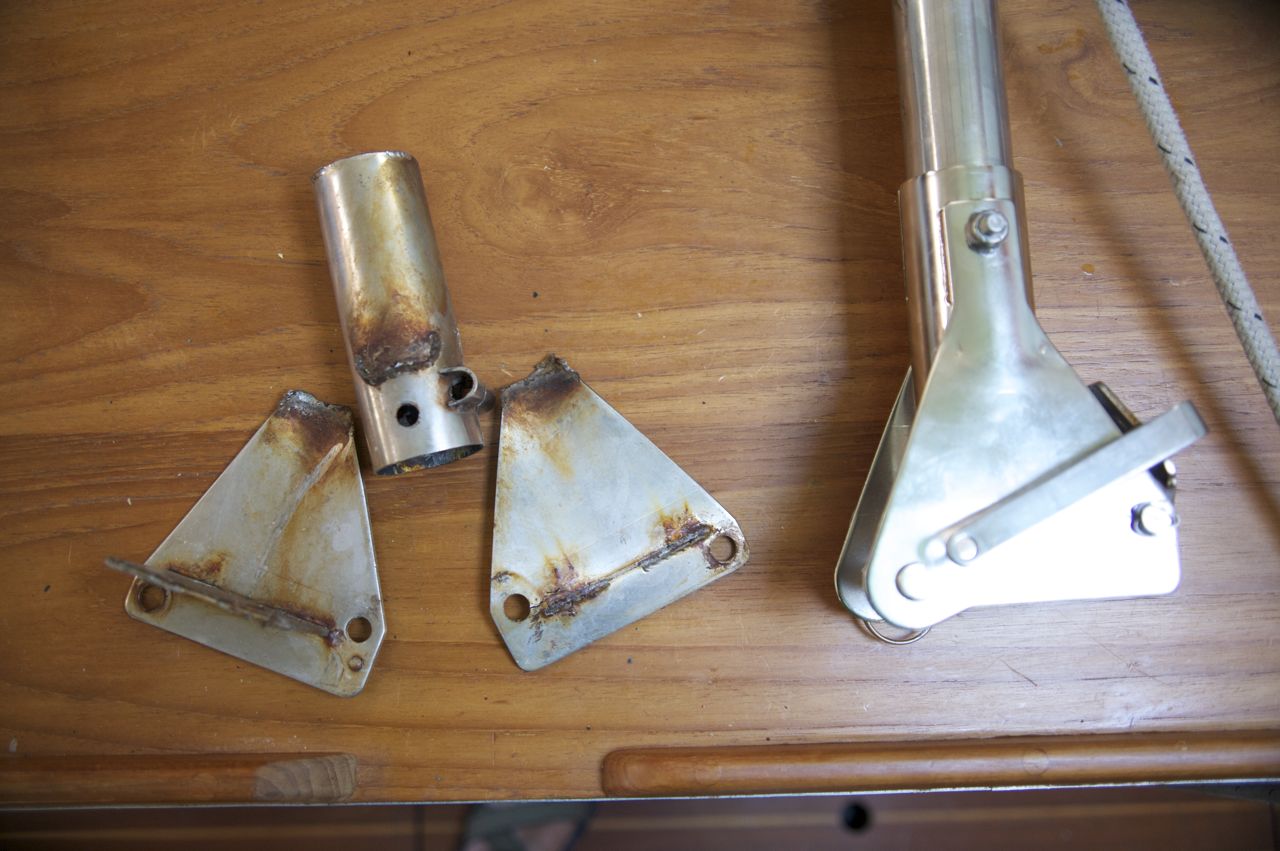
The bottom bracket had just fallen apart–the welds disintegrated after two decades of salt water. Fortunately, the timing worked out well–Jon was about to visit us in mexico for his spring break, so I was able to order the parts from Monitor, have them shipped to Jon in colorado, and he brought them down with him when he visited. It wasn’t a cheap repair: the new bottom bracket alone cost $250 I think.
(I considered having the old one re-welded, but the whole thing was trashed and it wouldn’t have held together.)
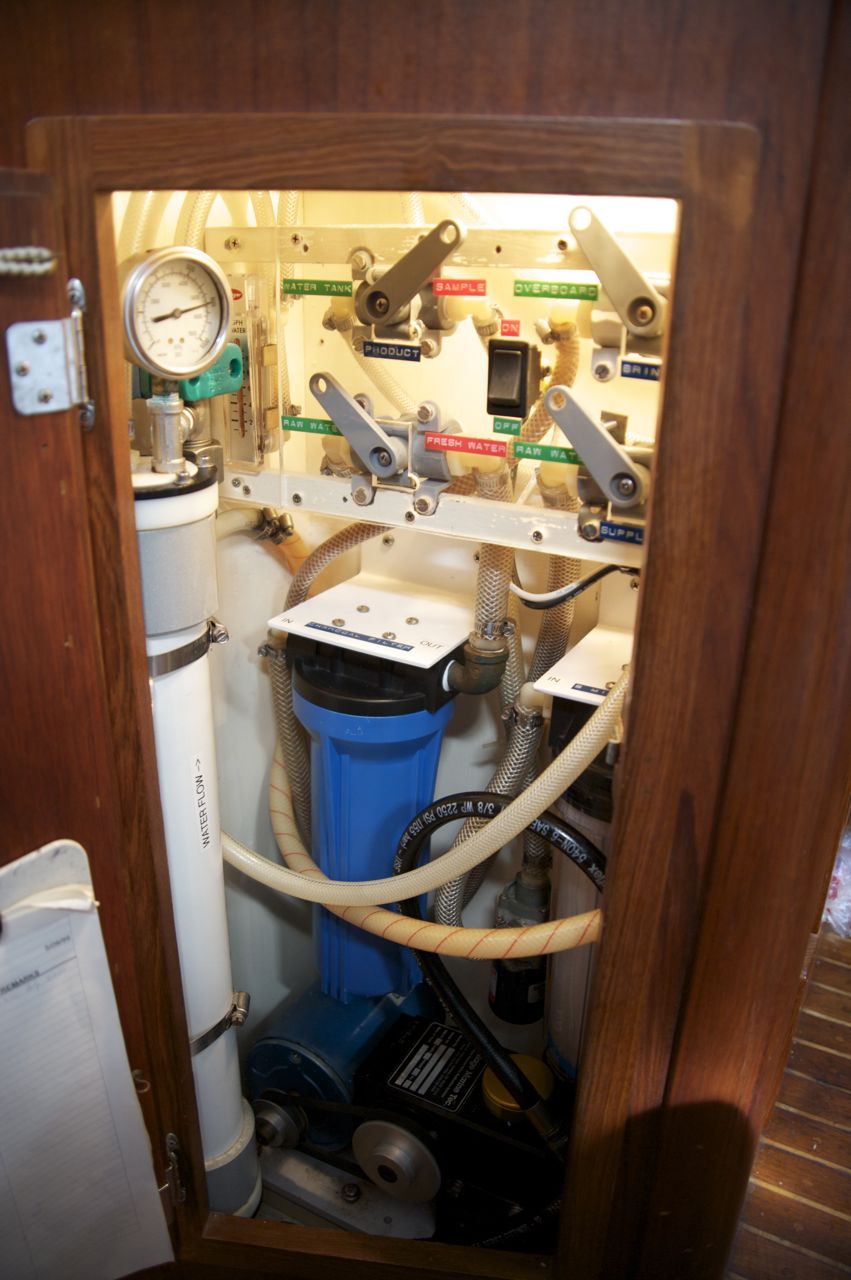
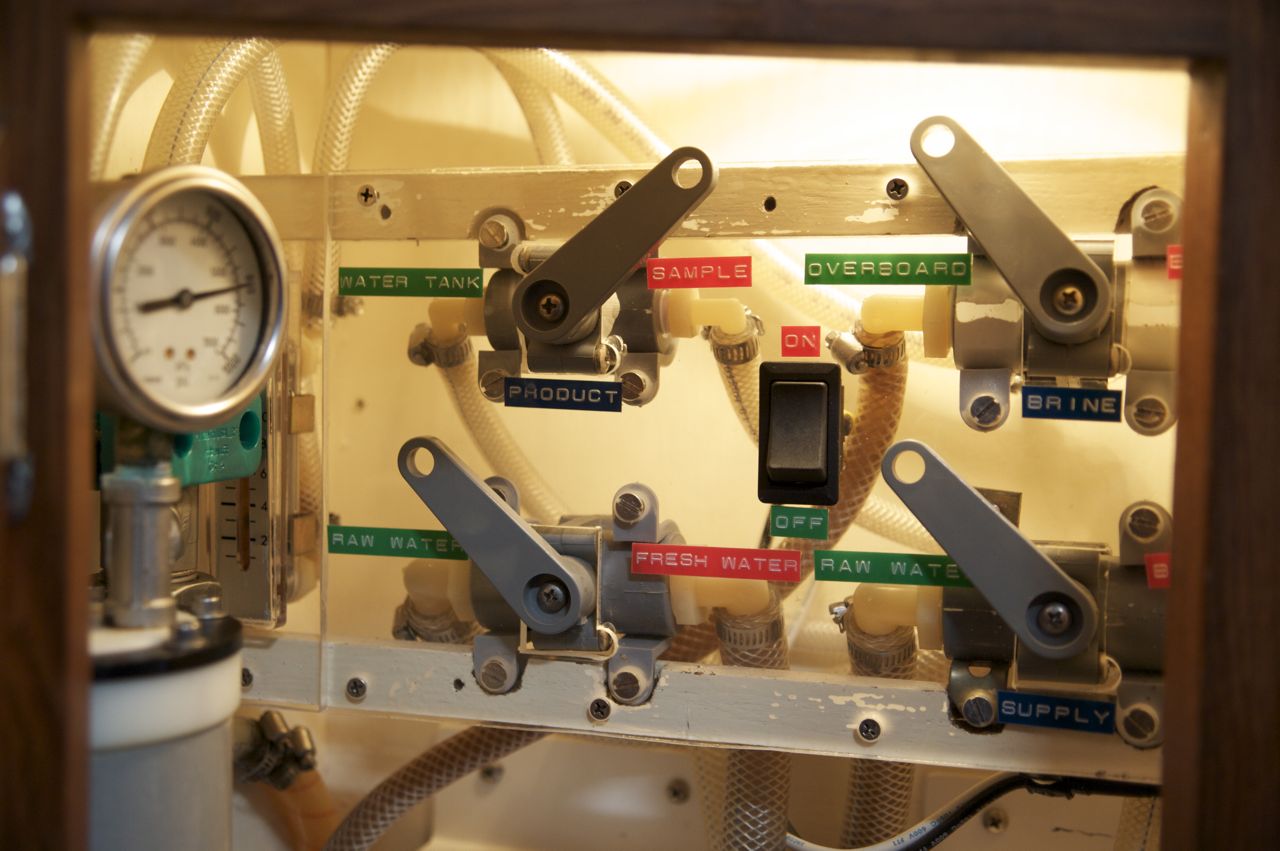
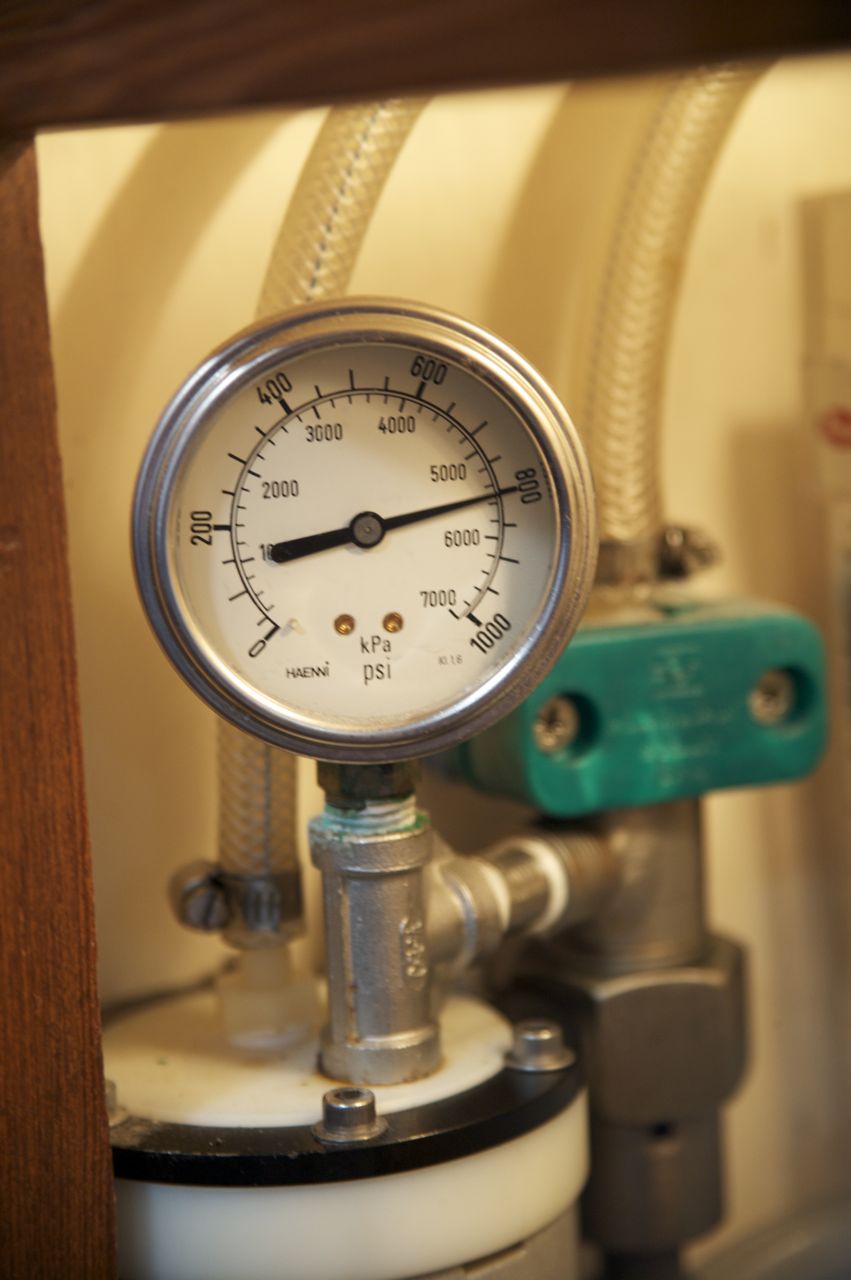
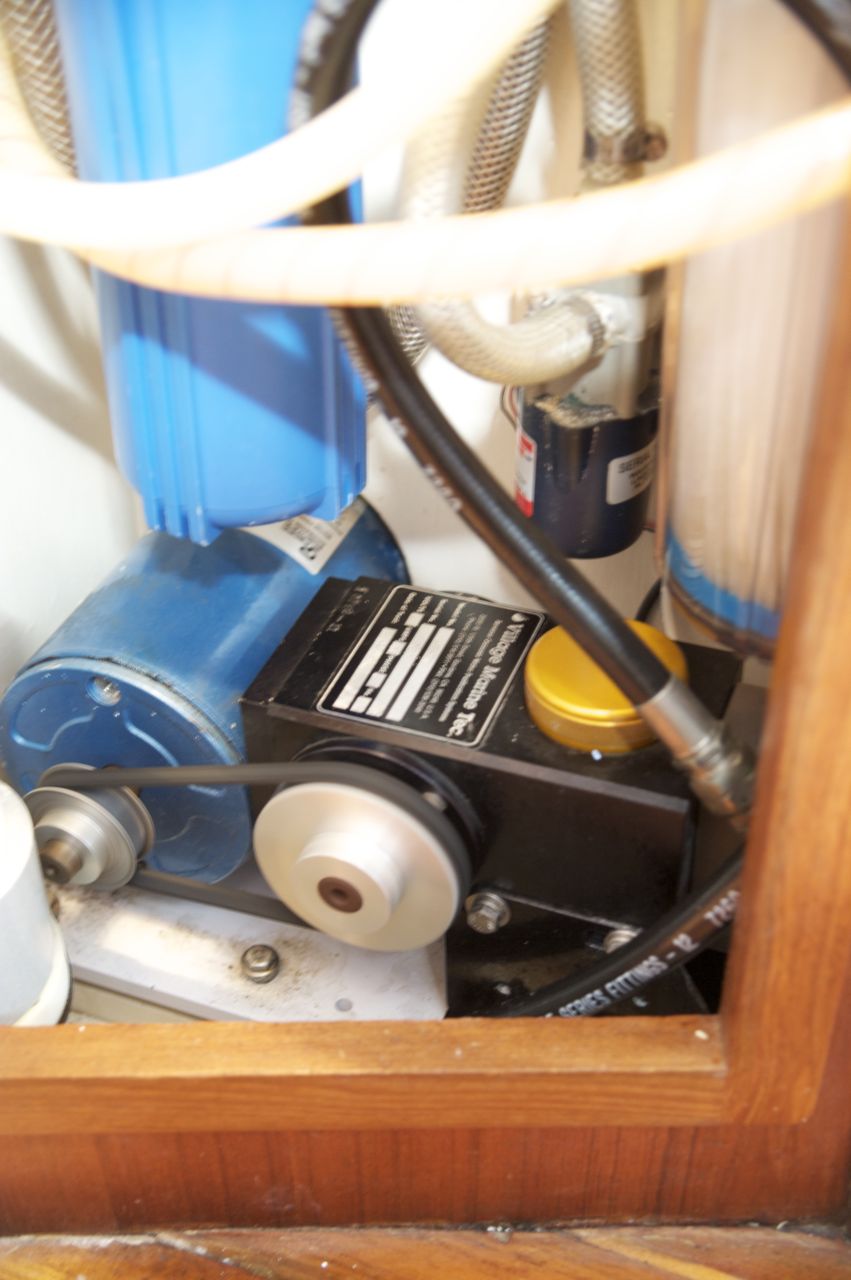
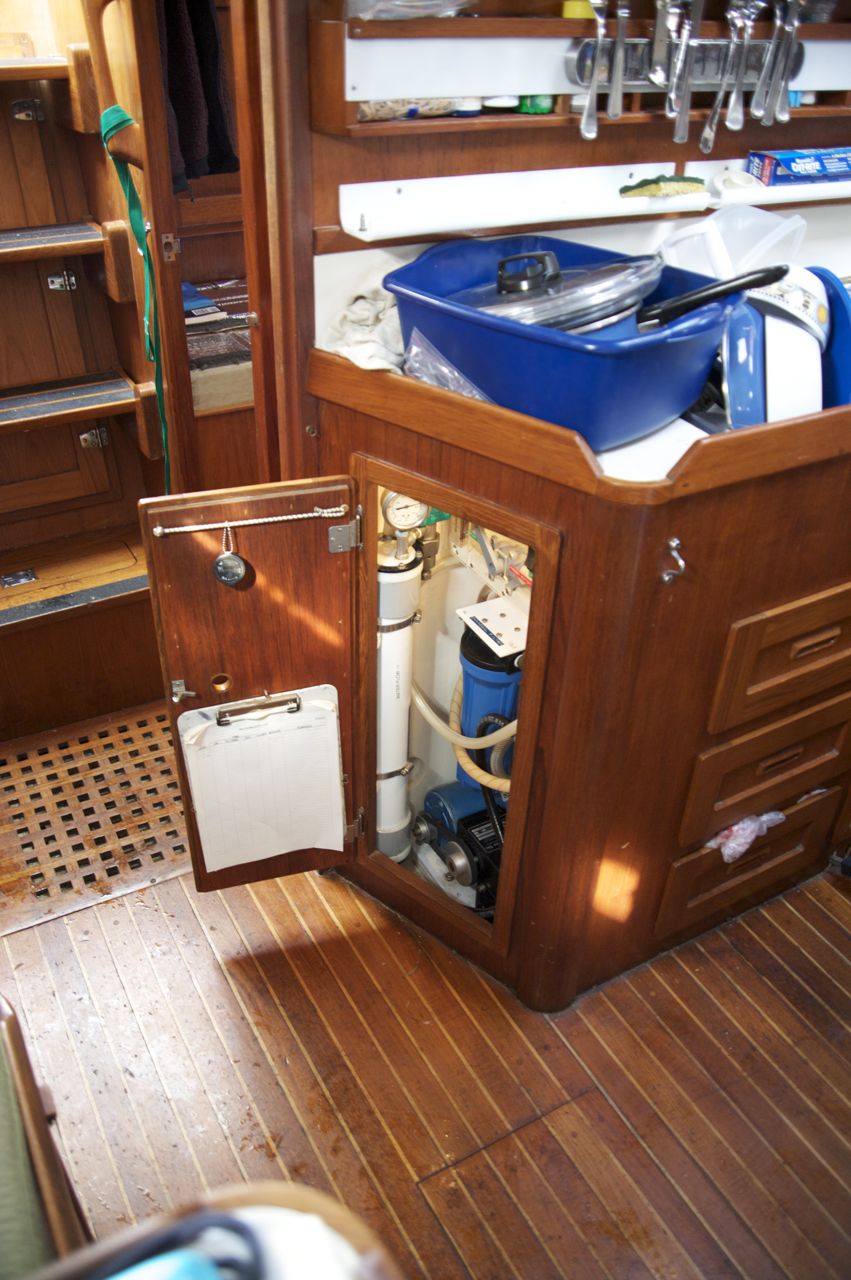
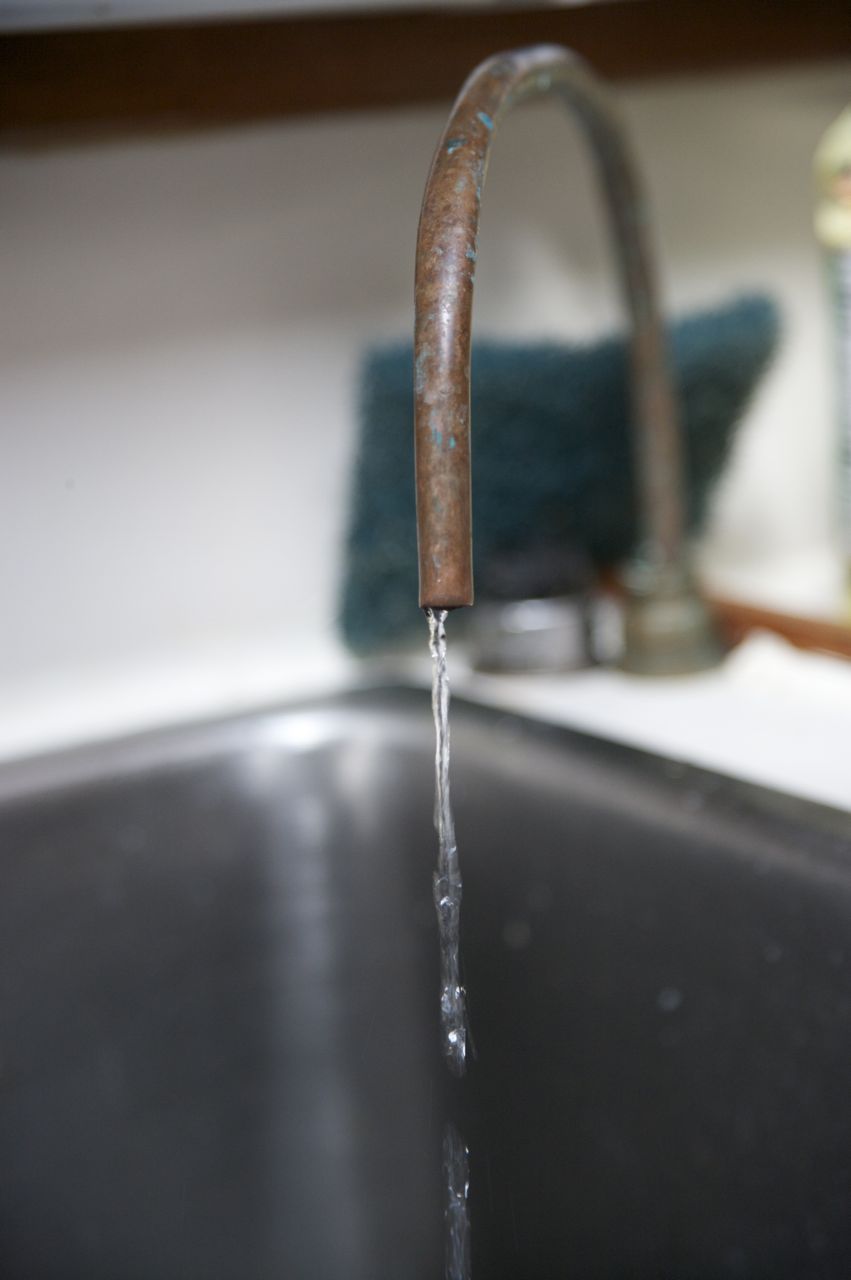
It’s a Village Marine Tec “little wonder” watermaker. Supposed to output 6-8 gph (gallons per hour). The installation by the previous owner’s is quite beautiful–very compact, well labelled, with plenty of attention to detail. We hadn’t used or even tried the watermaker whatsoever; it wasn’t a priority in light of more critical projects.
Before we departed San Diego I wanted to get this taken care of, because I knew it would be nearly impossible to get parts anywhere along our route. Even though I was pretty positive that it would need a new membrane, I turned it on and ran it and messed around with it a bit to get the hang of it before replacing it, so that I wouldn’t ruin our new membrane.
First I had to redo much of the plumbing: the original configuration of the boat had pressurized freshwater which we removed, and the watermaker was plumbed into that system. So I carefully considered all the rules and requirements listed in the watermaker manual, designed a new plumbing arrangement, and made that happen.
One of the biggest changes with the plumbing is that the carbon filter became unnecessary within the watermaker circuit, so I replumbed the system so the water from the tank passes through the carbon filter on its way to the galley sink. Convenient that I could use the existing installation to filter our drinking water. Next owners of Syzygy, hopefully you read this and take note and are less confused as a result.
I replaced the membrane–that was close to $300 I believe. Then I dismantled, cleaned, reassembled, and changed the oil in the high-pressure pump. Things still weren’t proceeding smoothly, so I redid all the wiring–new terminals, cleaned the terminal block, put dielectric grease on everything. Still not happy. After much investigation I discovered that the low-pressure pump had a cracked a manifold, so I had to spend another $250 for the pump–expensive pump, a little sealed, magnetically operated jobby.
After all that was said and done, the thing worked–at about 4 gallons per hour. Which makes me really mad, because 4 gallons per hour is next to nothing. It turned out to be very impractical to ever run the pump, because it drew so much power for so little return. Moreover, with two 75 gallon water tanks we never got close to running out of water. We didn’t even have to refill it that often–with three people on board it still lasted about 3 weeks without a refill. Not having pressurized water, and only using a small amount of freshwater for rinsing off after salt water showers made an enormous difference in water usage. Plus we carried spare four 6-gallon jerry jugs of emergency water up on the rail, besides.
Consequently, the watermaker was operated only rarely, which is bad for the membrane and causes it to fail–you’re supposed to run it at least once a week to keep it operational. So I spent all that money and did all that work and the watermaker is too low volume to be worthwhile, and wasn’t even necessary. Bummer.
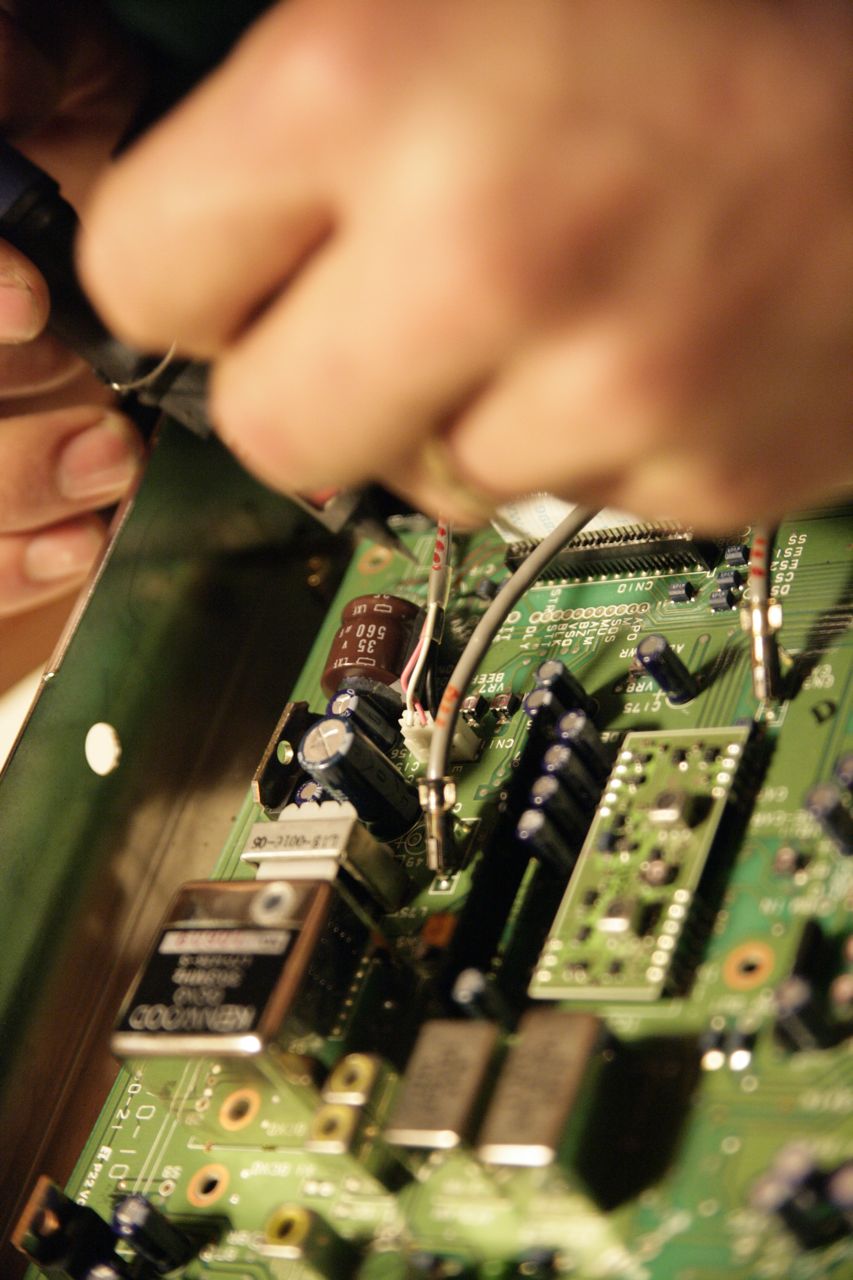
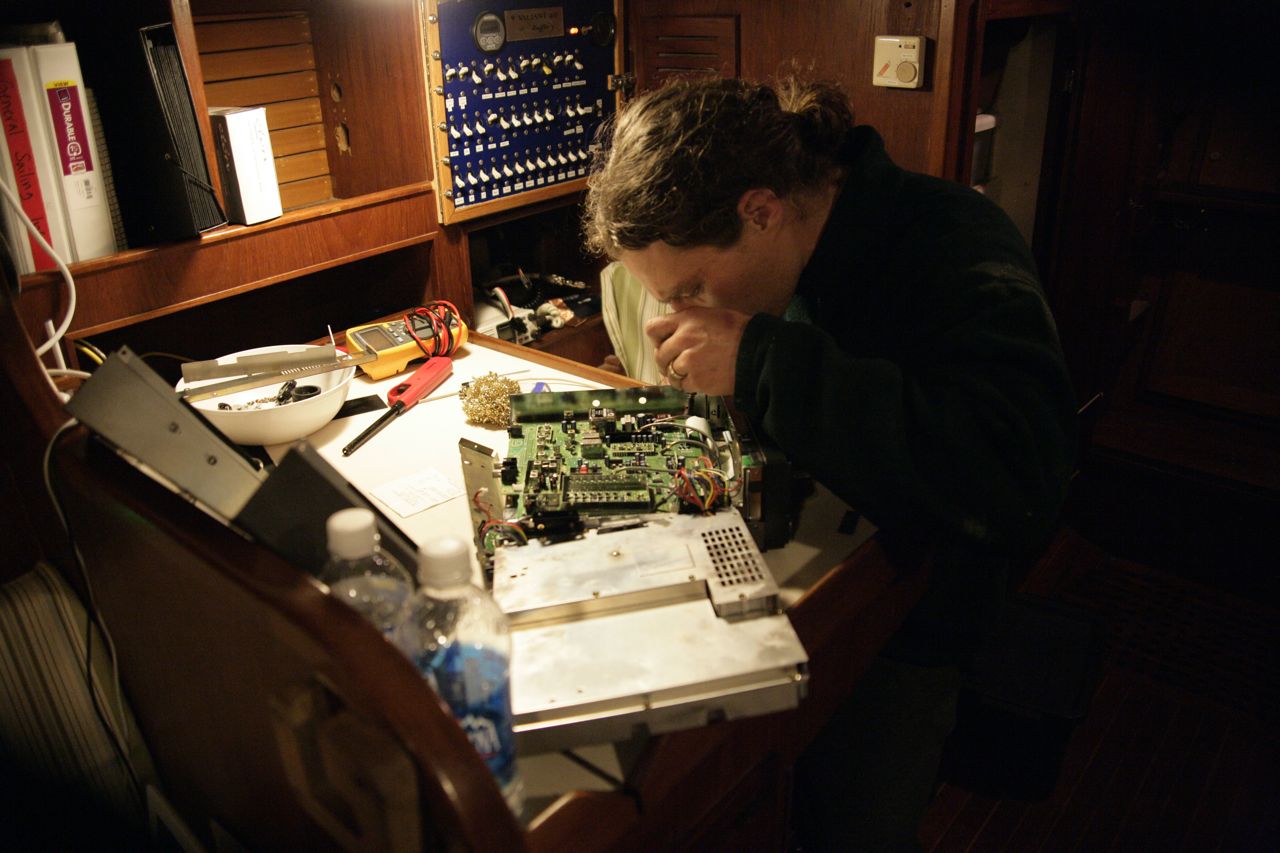
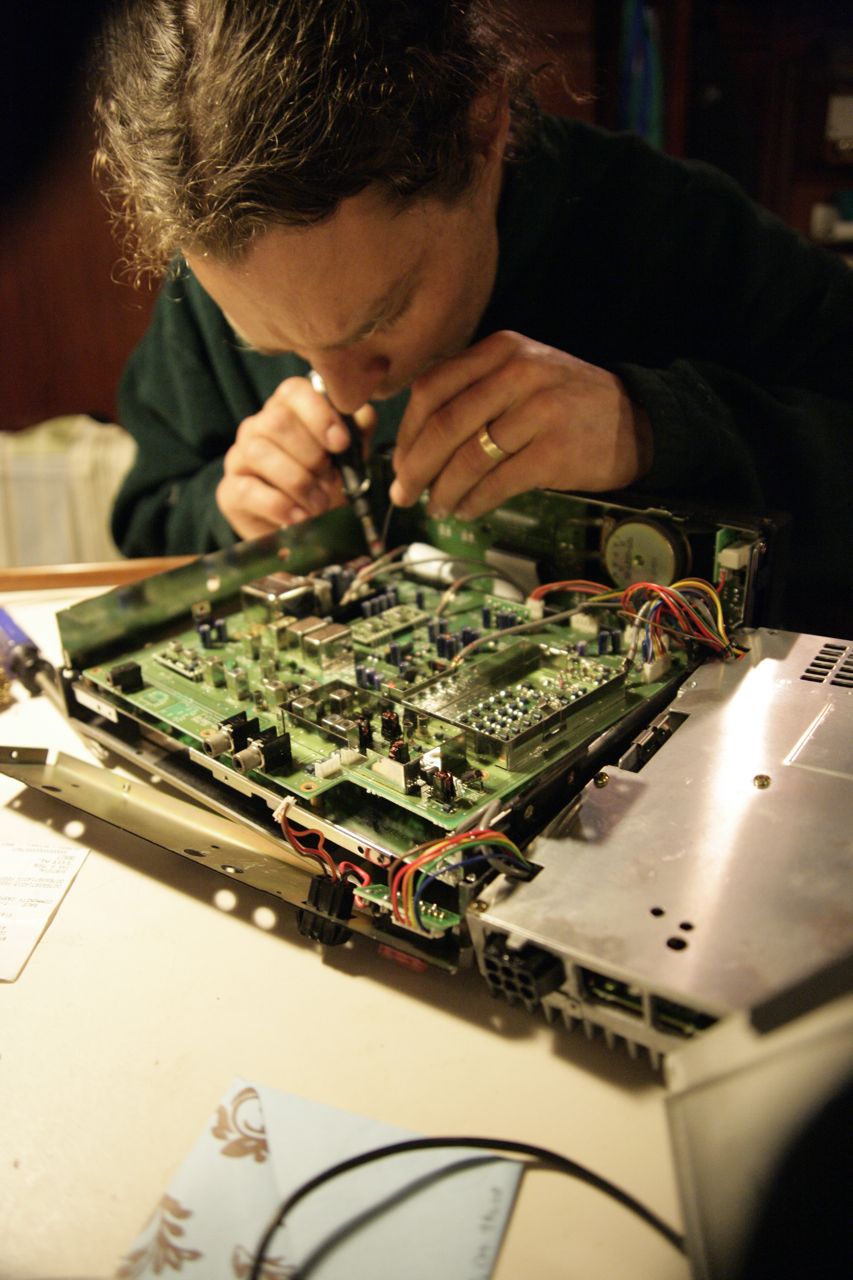
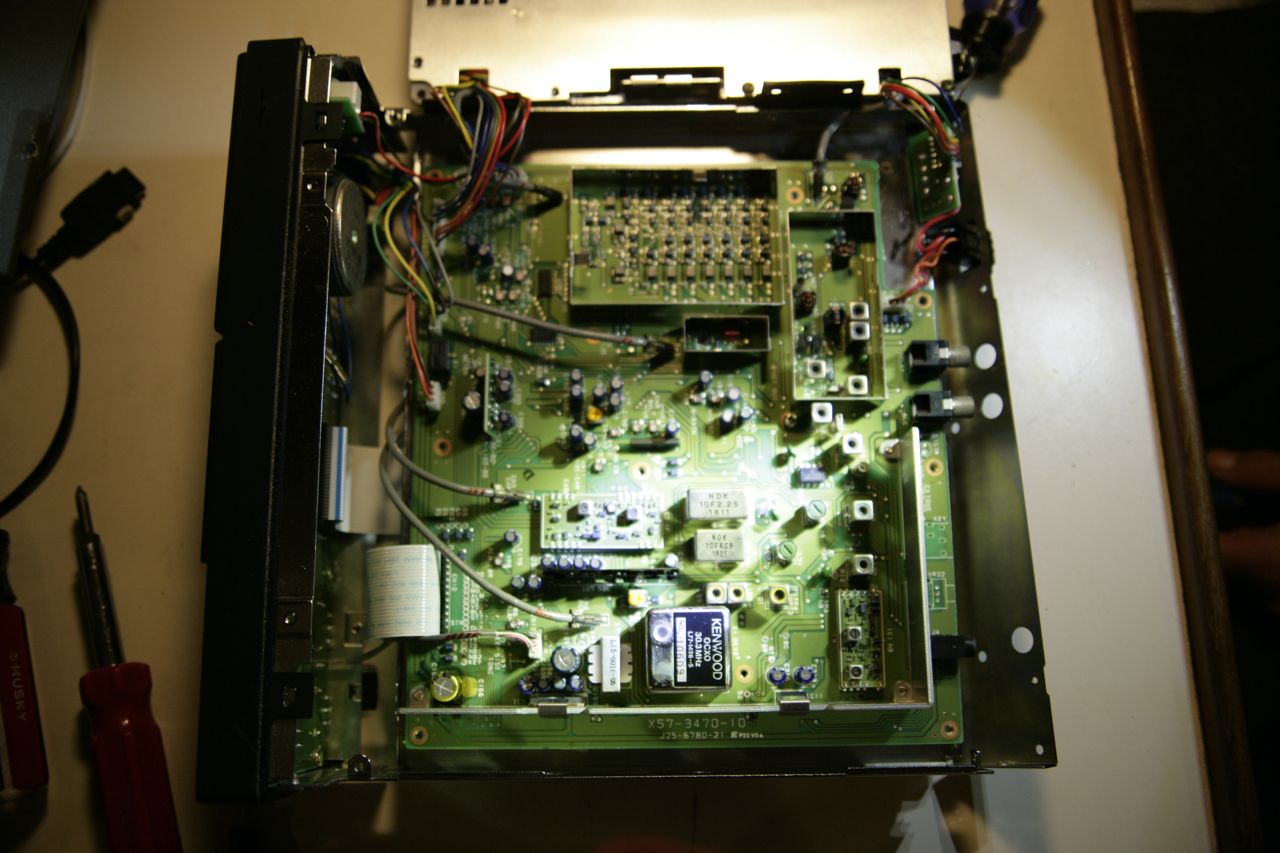
Our SSB starting acting strange, and then stopped working entirely. I was disgusted and tired to death of working on the boat, so I was extremely unmotivated to delve into it. And extremely skeptical that the problem was anything we could fix–I’ve dismantled plenty of electronics before in an attempt to find the culprit component and replace it, and very few of those attempts were successful. Usually when a component goes, it takes too much else with it. Pete, who happened to be on board with us at that time, was fresh and motivated and excited to dismantle the radio. Thank goodness Pete was around, because I never would have gone to the extent that he did to attempt a repair.
We suspected that it was the volume circuit, because of the way it was behaving during failure. Pete took the case apart and we painstakingly searched for any signs of a failure. Luckily, we spotted one. It’s hard to see from the pictures, but there was an area of the circuit board in the corner that was messed up by a blown capacitor–the capacitor itself had blackened the board, and a gooey dielectric had oozed out and ruined a couple of traces. Even after we found the problem, I still thought it only 10% likely that we’d be able to repair it. Undaunted, Pete dismantled it, went and bought a capacitor and painstakingly reconstructed the necessary connections.
Remarkably, it worked. And it worked fantastically for us all the way across the pacific. We never had another problem with it. Between our radio, and our updated/reconstructed ground plane, we had one of the most powerful, longest distance radios out there. So bottoms up to Pete, who did a fantastic job with this one.


(pictures will be added when I have time to sit down for more than a minute)
Maybe I should say “replaced”, but I don’t consider 30 year-old stiff corroded 14 gauge wired snaked from the chainplates all through the overhead of the boat before going down to the keel bolt any form of lightning protection. The cables need to be substantial–I used 4 gauge–and more importantly they need to run as straight as possible down to the keel bolt. The idea is to protect the lightning from travelling down the shroud and then jumping from chainplate straight to the mast–which would happen to be right through the center of the boat where you could be standing at the time. So each chainplate got its own 4 gauge wire, and the three wires on each side join up behind the settees (a bolt holds the terminals together), then one wire goes down alongside the watertanks, underneath the settees, on each side, to a keel bolt.
There are four chainplates on each side, but the aft lower and the intermediate backstays are bolted together on opposite sides of the bulkhead (they serve as each other’s backing plate) and so required only one cable on each side.
I snaked another 4 gauge cable from the backstay down to a keel bolt, but I haven’t yet done the forestay. That will be more problematic since it needs to go underneth the holding tank, which has poured expandable foam all around it from what I can see.
(pictures will be added when I have time to sit down for more than a minute)
Can’t have that stuff getting away.
(pictures will be added when I have time to sit down for more than a minute)
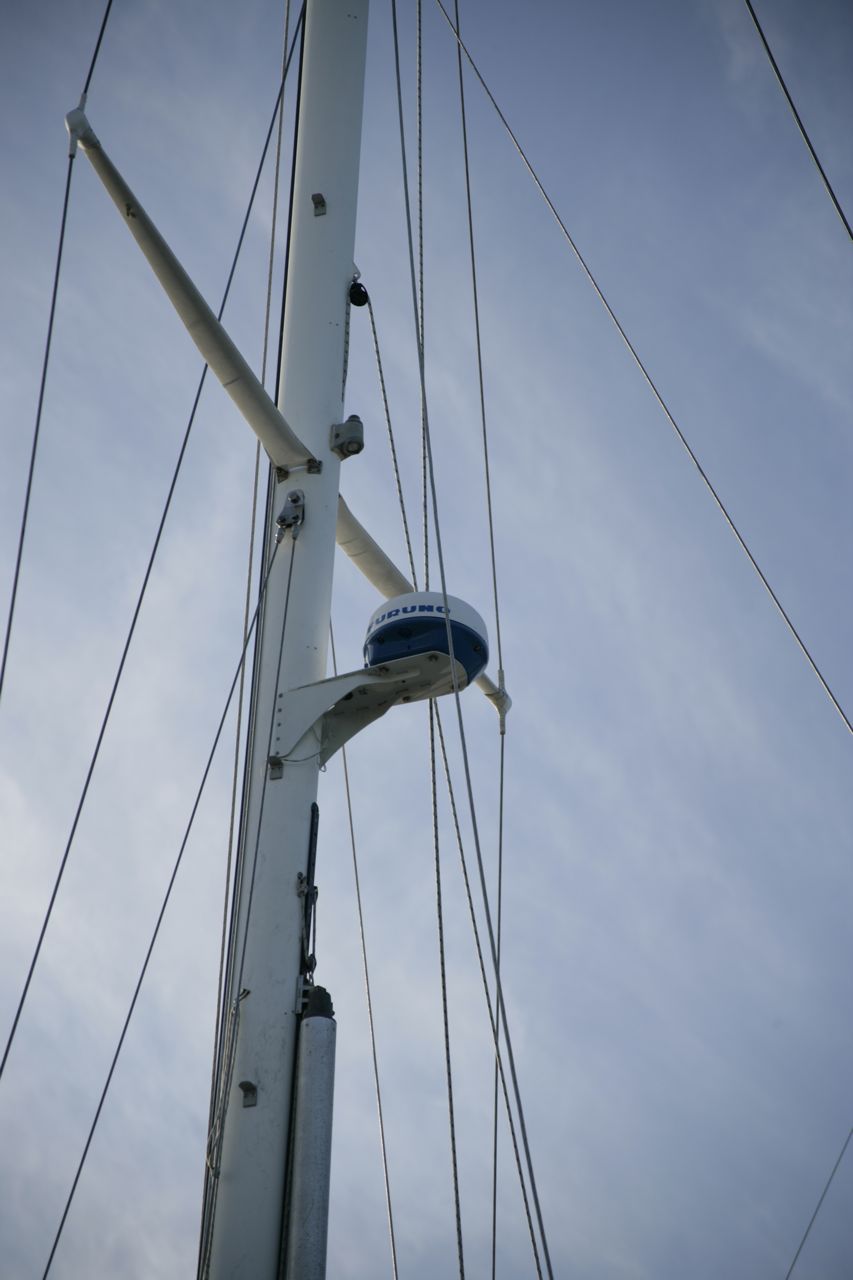
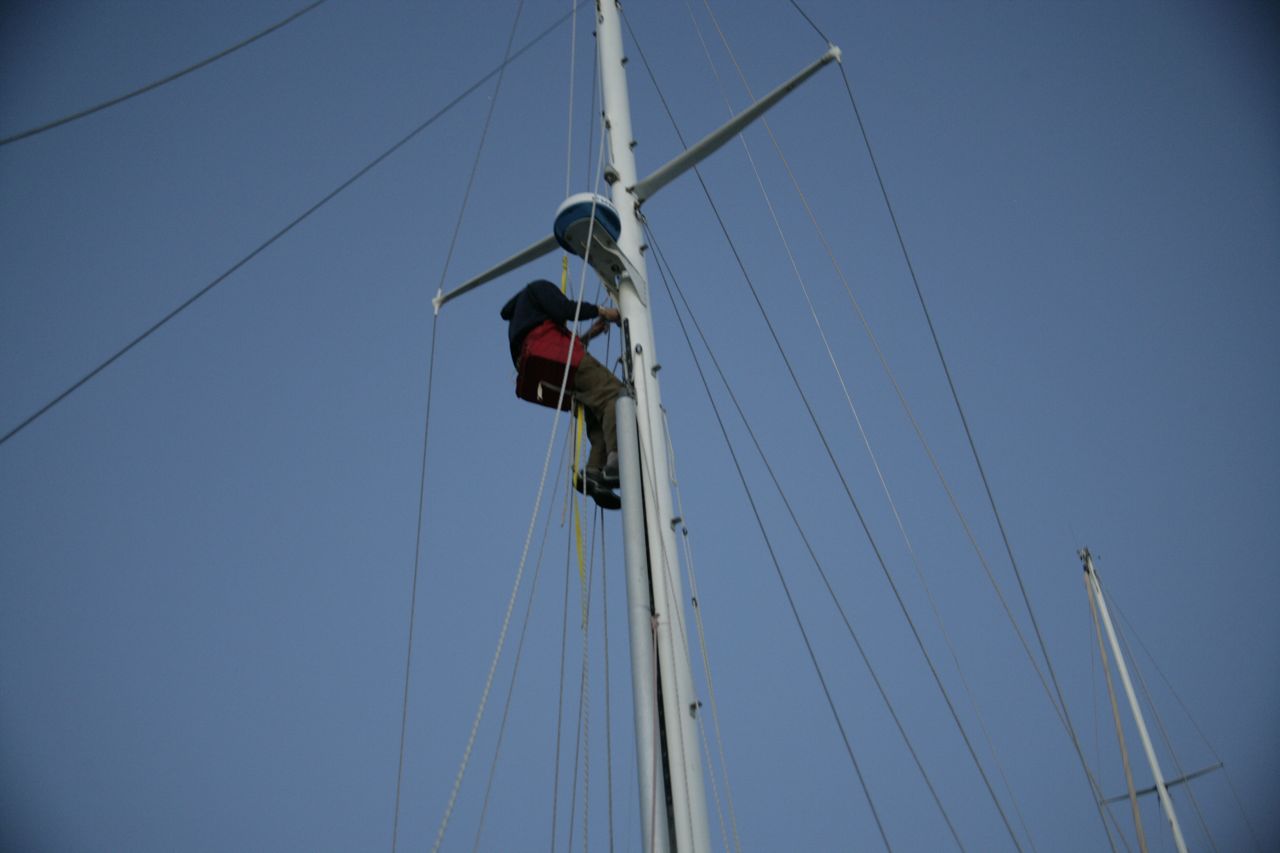
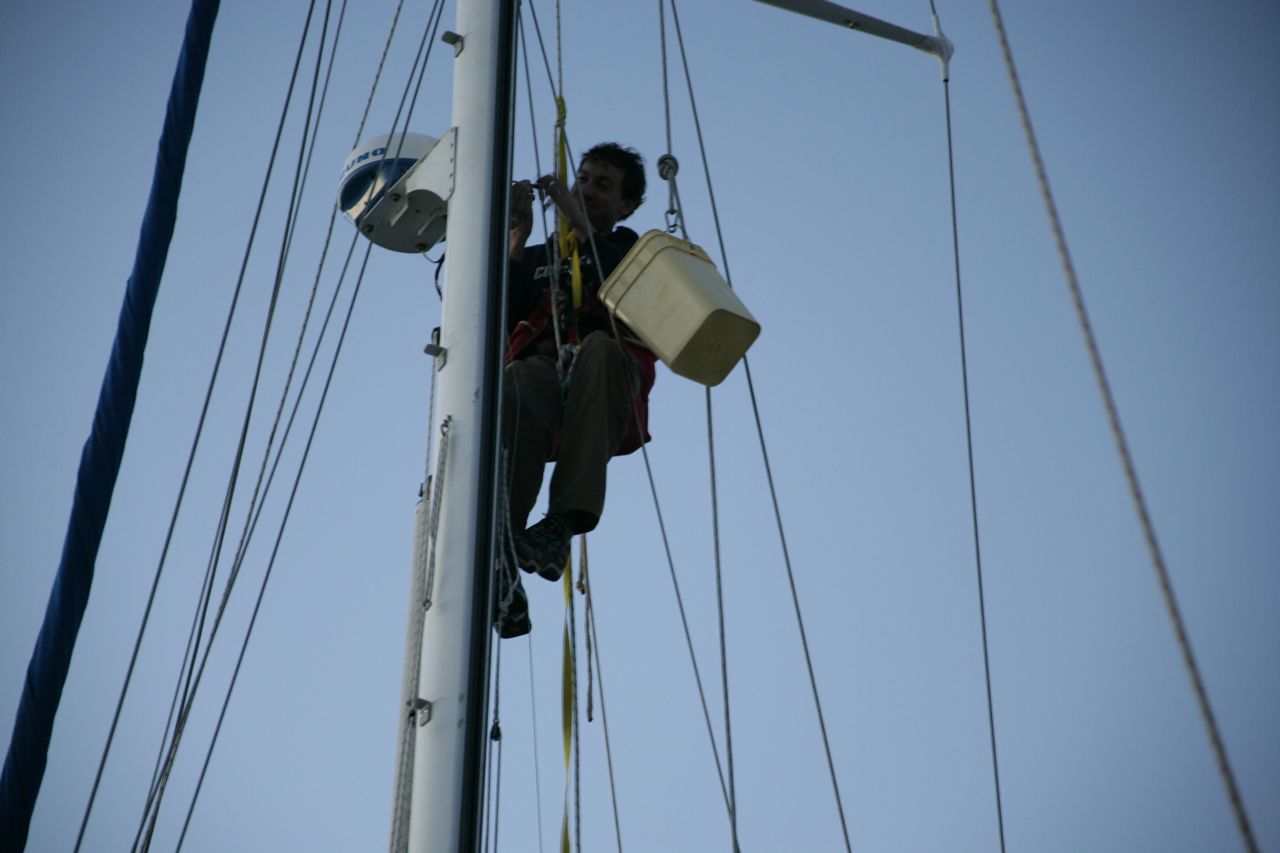
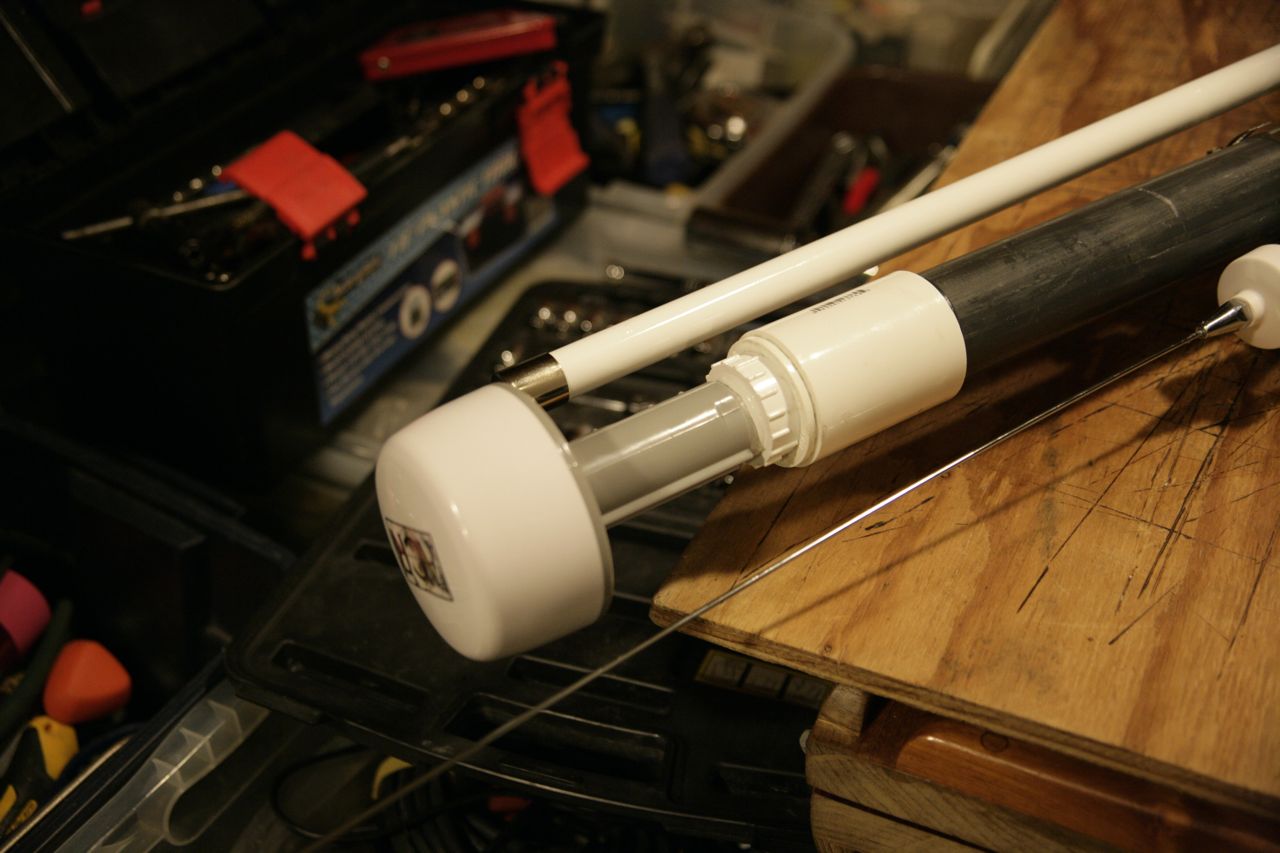
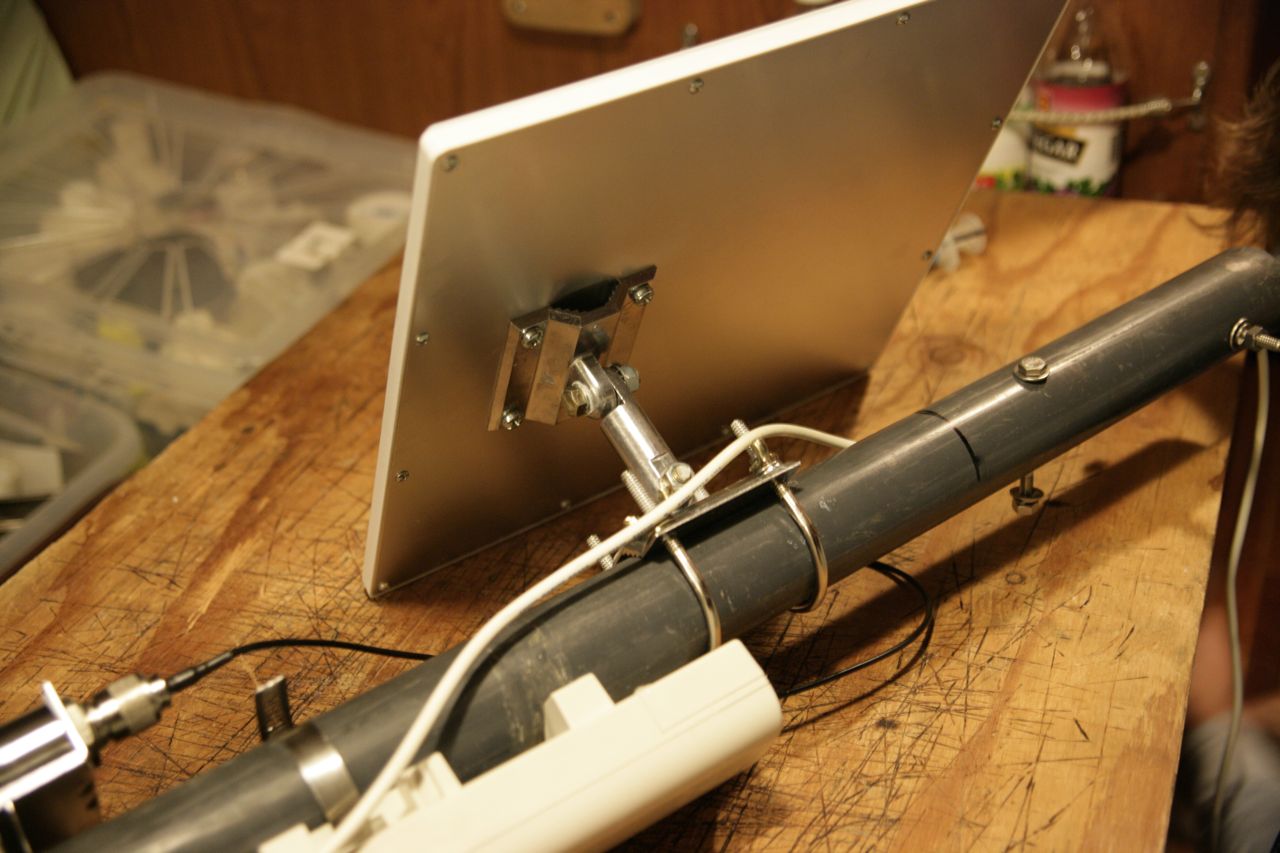
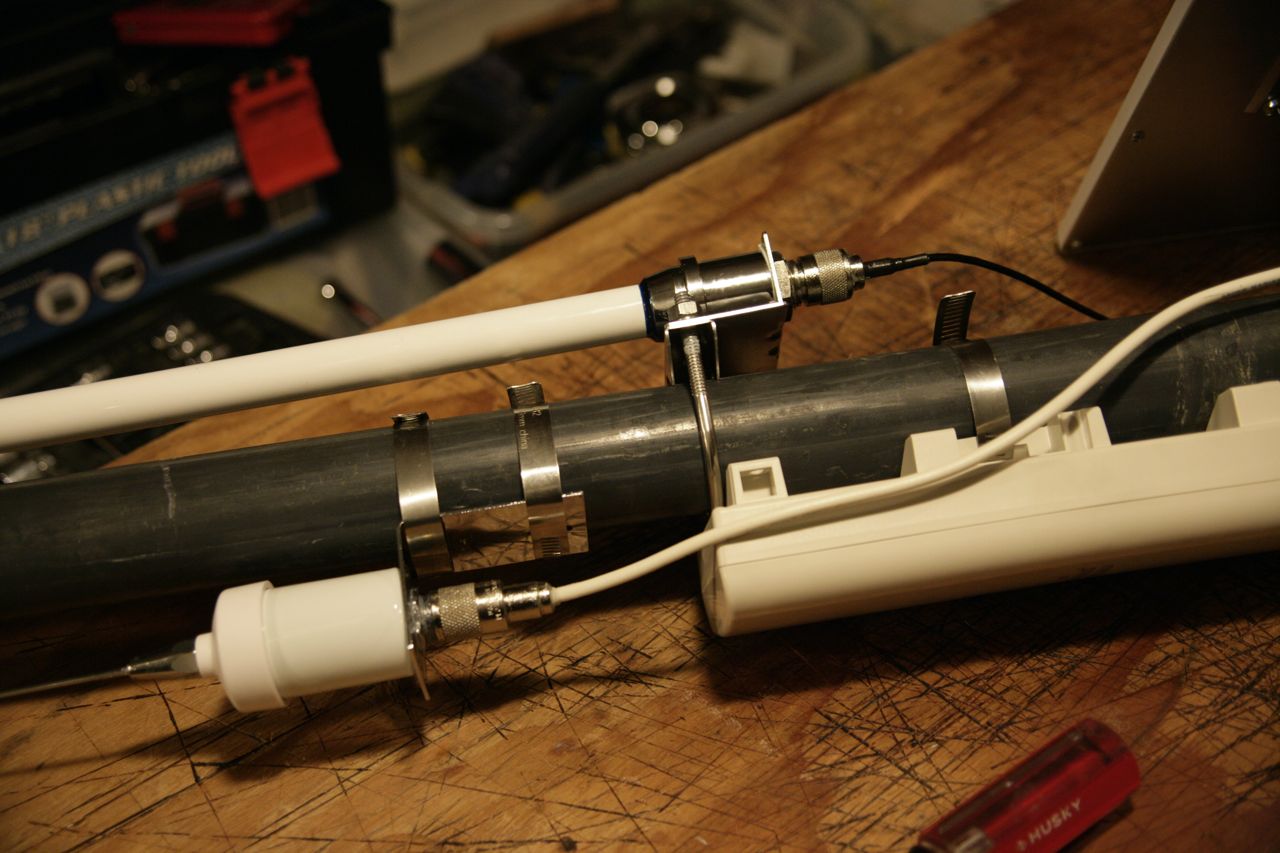
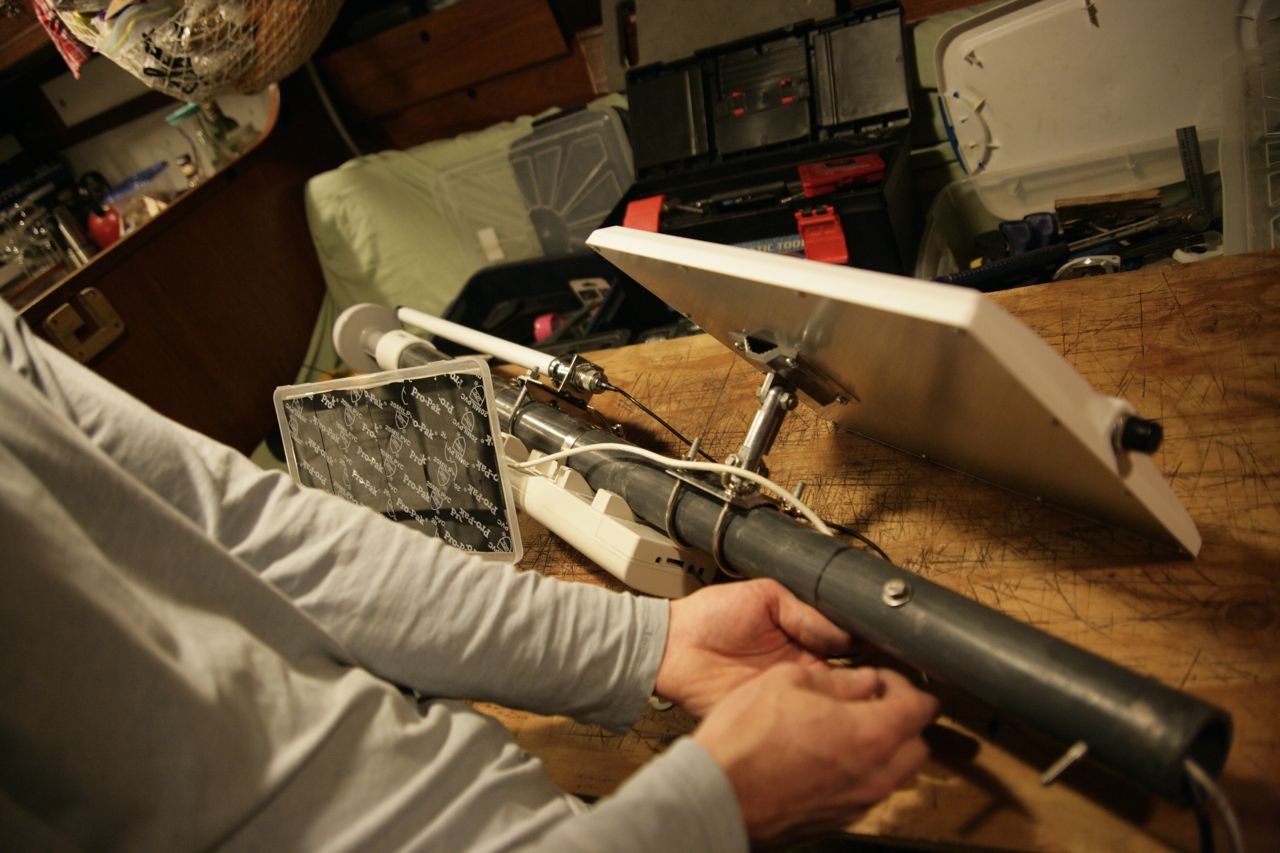
I bought a three year-old basic radar set (dome, display, and cable) from a nice guy named Tom off the valiant owners group for $500, a great deal for a $1300 radar. After wavering about whether to put it on the mast (it came with a mast mount) or on top of the radar arch where we had already prepared a place, I weighed the difficulty and time required to do it each way and ended up going with the mast. It would have been easier to put the radar on the arch on the stern, but then it would have been much more complicated to install all the other things that needed to go around and on top of the radar dome (AIS antenna, gps antenna, wifi access point, wifi antenna). I was most worried about the difficulty of snaking the cable down through the mast, but with the help of a snake we borrowed from Jim Hassberger, it ended up being pretty easy (the snake was crucial).
Jon was visiting for a weekend and did the mast installation.
The cable had been cut in order to remove it from the previous installation; Pete graciously took on the task of splicing it back together. The one fat cable has about 10 different small wires inside of it, one of which is a tiny little mini coax, and the whole fat thing is a coax cable as well, and if the splicing of the shielding isn’t done correctly, the video signal won’t come through. Anyway, Pete did it well and did it quickly, and we mounted the screen above the ready rail and it looks great.
(pictures will be added when I have time to sit down for more than a minute)
Pete was on hand and thought it would be a really good idea to add a second primary fuel filter to the engine fuel circuit, plumbed in parallel via a valve, such that when one filter clogs up from bad fuel or sloshing around during a storm, one can flip the valve to the new filter without the engine stopping–and then have time to change the clogged filter. Initially I balked because I thought the cost would be prohibitive, but when I discovered that another nice racor filter would only be $150 (and I wouldn’t have to deal with the installation part at all, with Pete around), I decided it was a good idea.
(pictures will be added when I have time to sit down for more than a minute)
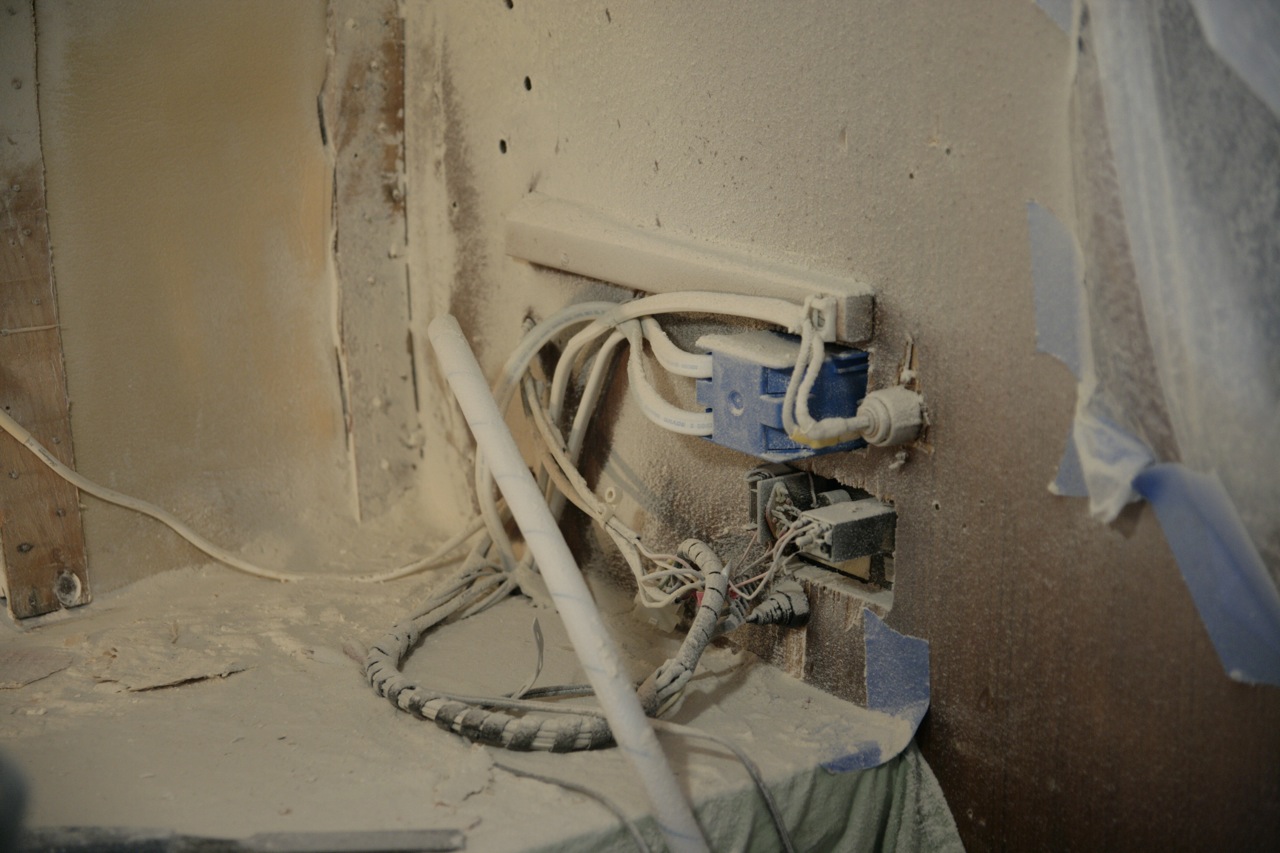
In the course of various projects over the past two years pieces of the ssb installation had been disconnected; e.g. the antenna to the backstay, the copper foil behind the radio itself, a couple pieces of foil surrounding the antenna tuner.
I sat down with the manual and reviewed my literature on ssb installations and discovered that we didn’t actually have a decent counterpoise at all–there were only two old bits of foil connecting the tuner to the rudder shaft and to the backstay chainplate.
I bought 4″ wide copper foil from Alco for 50 cents a foot, and painfully snaked the foil from a keel bolt in the center of the bilge back through all the various holes, under the engine, under the fuel tank, and up the side of Pete’s newly fabricated quadrant protector, to reach the antenna tuner. It is very difficult to deal with that foil: the edges are very sharp, and it is hard not to kink and bend and fold it all up into a mess.
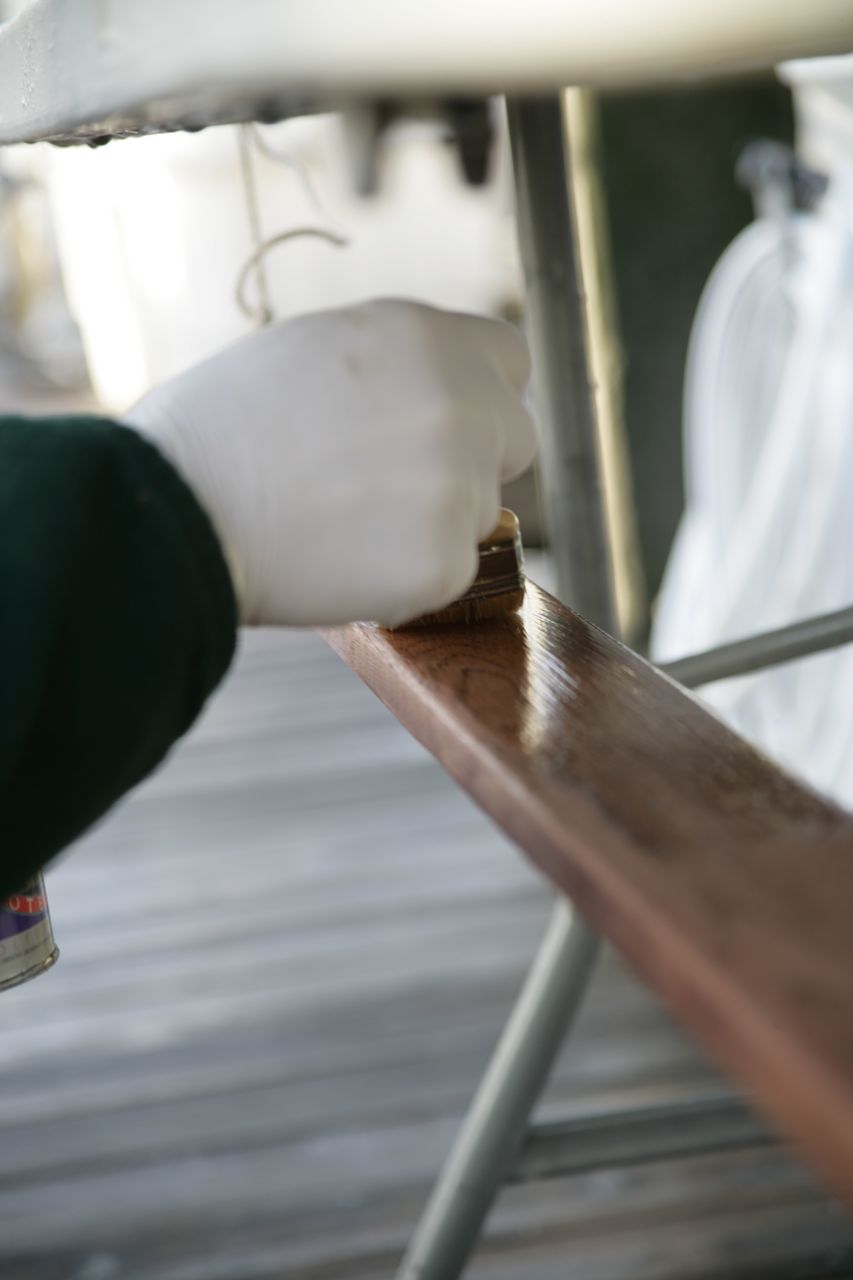
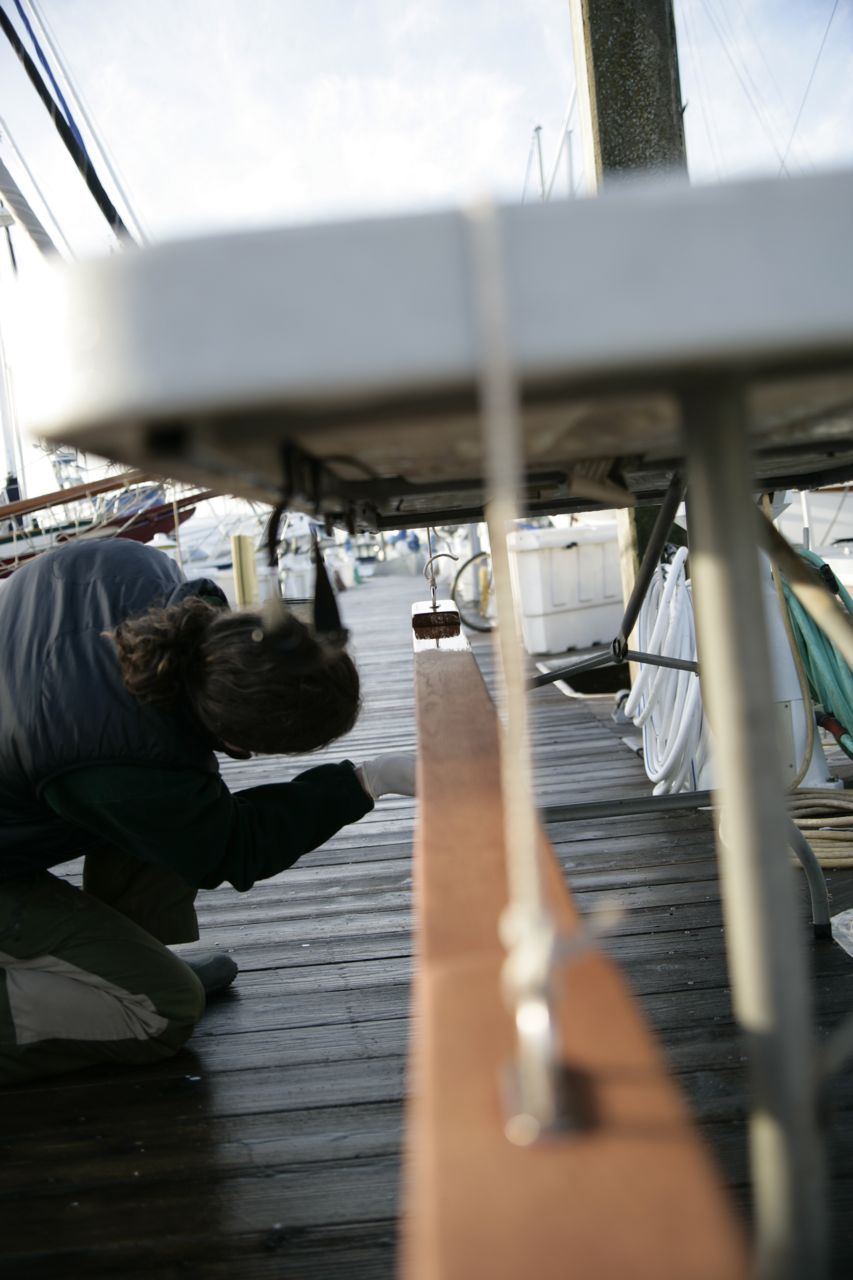
We decided that we wanted to carry extra water jugs; we already had one board for lashing extra diesel gerry’s, so we needed to make up a board to go on the other side.
Pete cut no corners; he obtained some solid oak, picked out a stain so that it would match the board on the other side, Ray did the sanding, and then Pete put I think 4 coats of varnish on it. Totally bombproof.
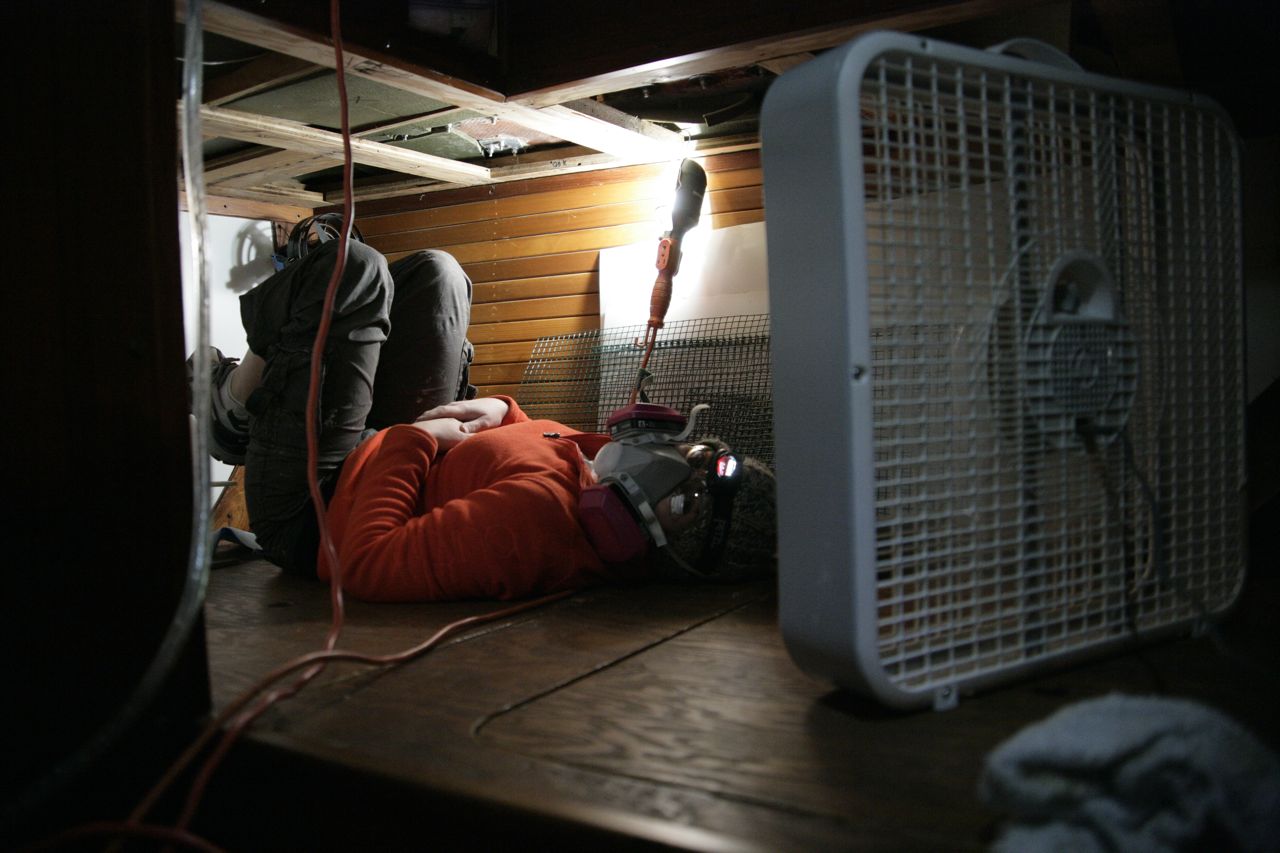
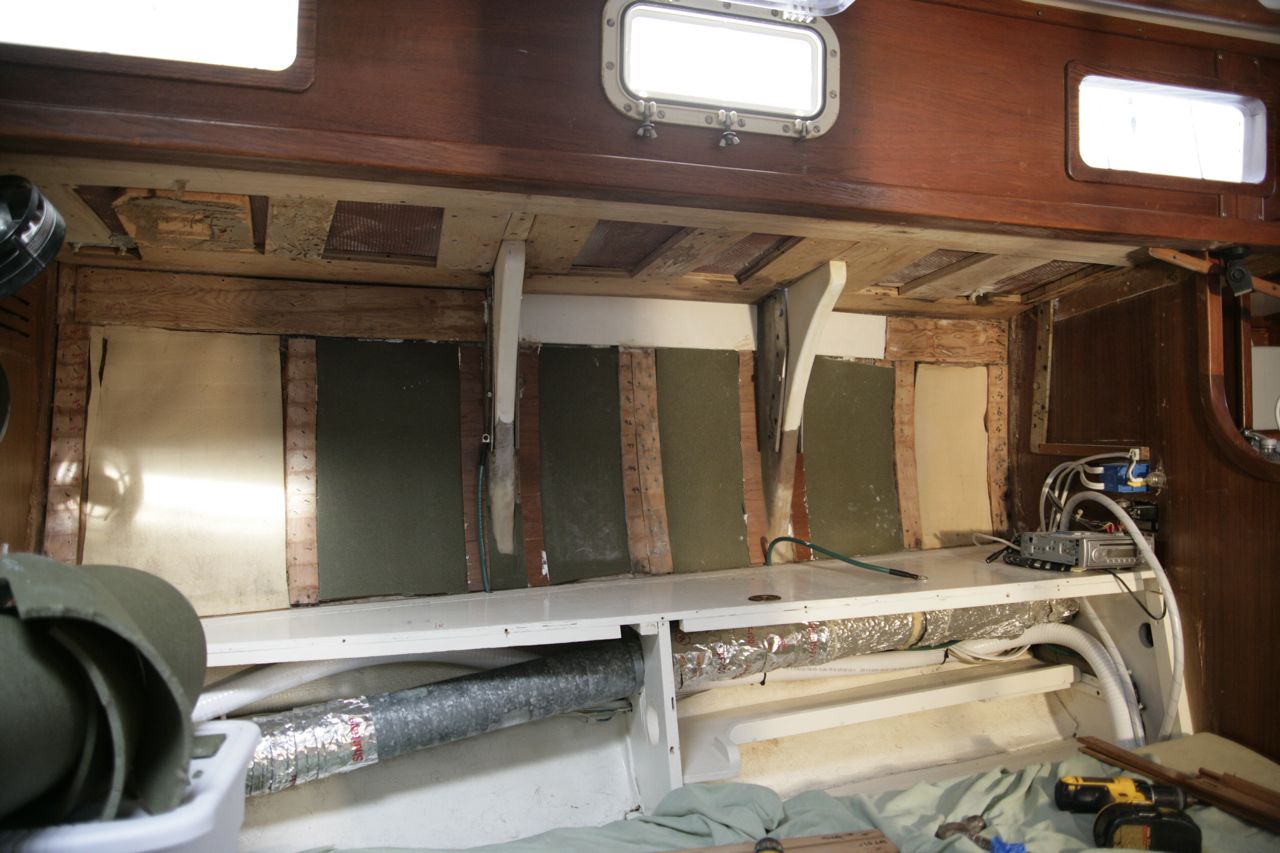
Since moving onto the boat, I have been shocked by the amount of condensation and mildew generated just by our breathing (and cooking plays a part too I guess). The weather has been chilly and wet, magnifying the problem. At night we would get dripped on by a solution of condensation mixed with uncured boat resin from somewhere in the ceiling–nasty stuff.
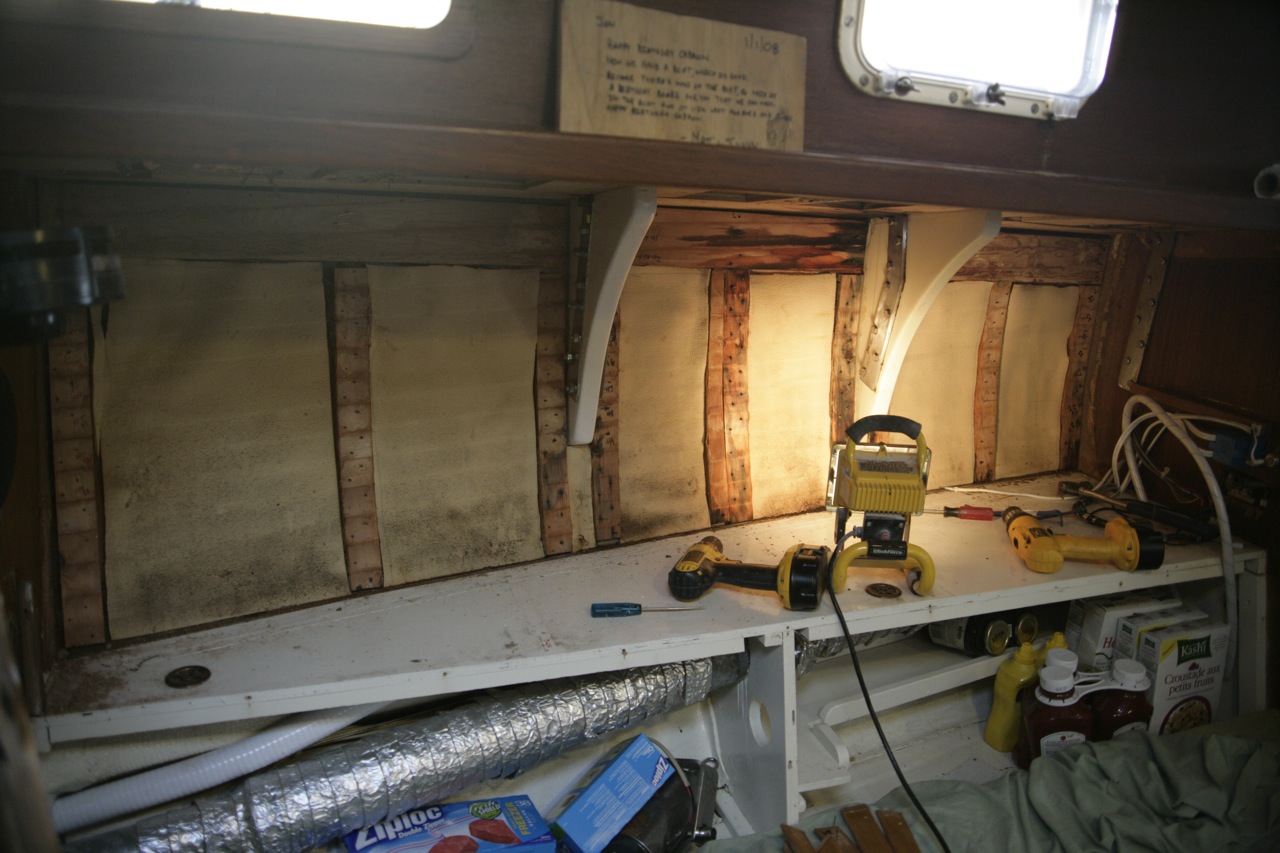
We had the salon ceiling (outboard parts that is) off for the knee project, so I took the opportunity to cut pieces from our leftover ensolite foam to fit in the gaps (leftover from insulating hull after knee repair). We bought the ensolite as old sleeping pads from the army surplus store (army green!) Two layers of the foam were the perfect thickness, and if I was careful with the sizing, they would fit up in there and stay all by themselves, without bothering with the contact cement.
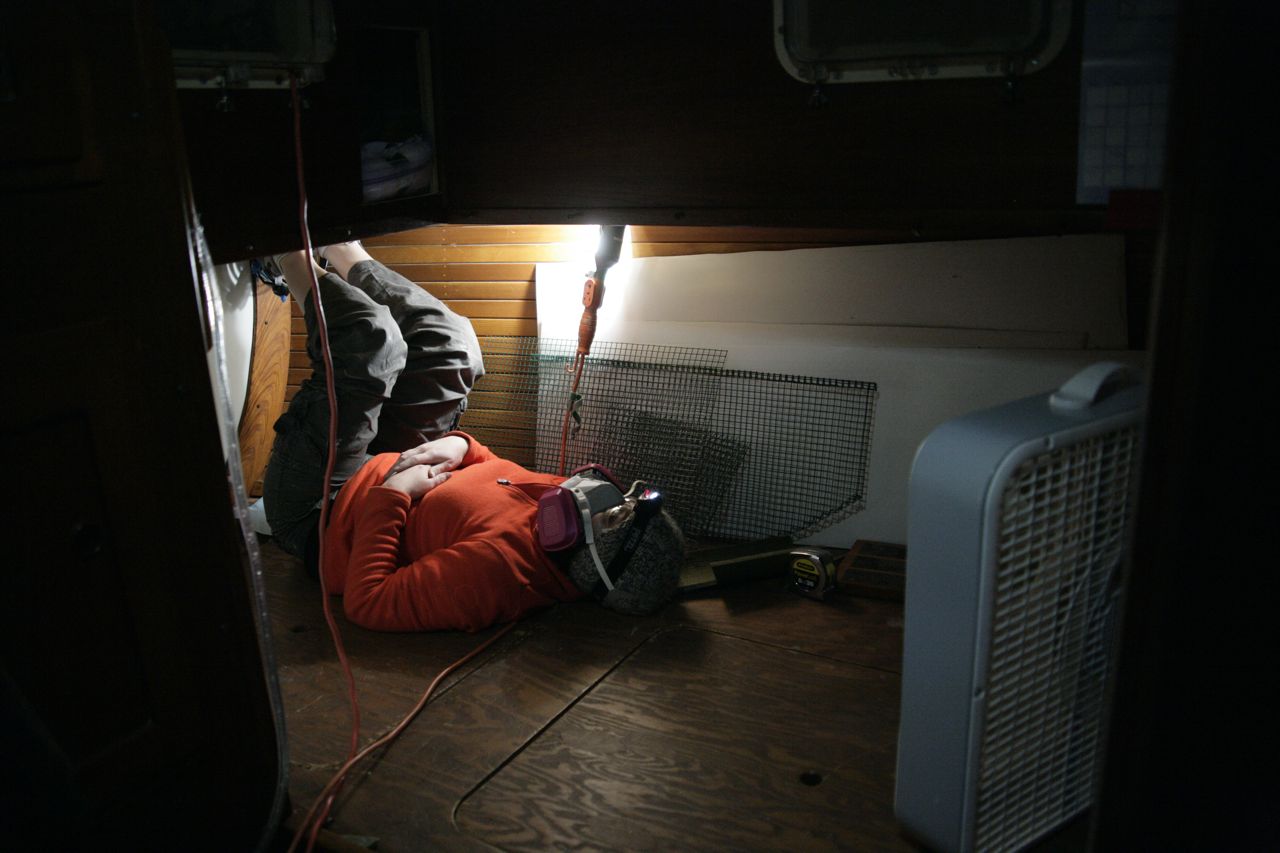
In the quarterberth all the pieces had to be glued in place; Karen spent an arduous day in the respirator with the box fan ventilating the quarterberth, coating pieces and the ceiling with contact cement and trying to get them to stick.
We have had no dripping, or water droplets forming on the ceiling over our heads, since then.

(pictures will be added when I have time to sit down for more than a minute)
Ever since we pulled the old propane locker, opening up the entire lazarette for storage, we had the unexpected problem that everything we dropped into the back locker jammed up against the steering quadrant, preventing the rudder from turning, which is not a safe feature on a sailboat.
When Pete arrived, I put him on that project first, since he is far more comfortable with wood that I am. He made us a bombproof box to block off the area where the quadrant moves from the rest of the stern. It succeeds admirably in the three design criteria: 1) protect the quadrant 2) strong enough to be climbed on 3) minimize amount of space taken away from the storage.
No luck with my previous plea.
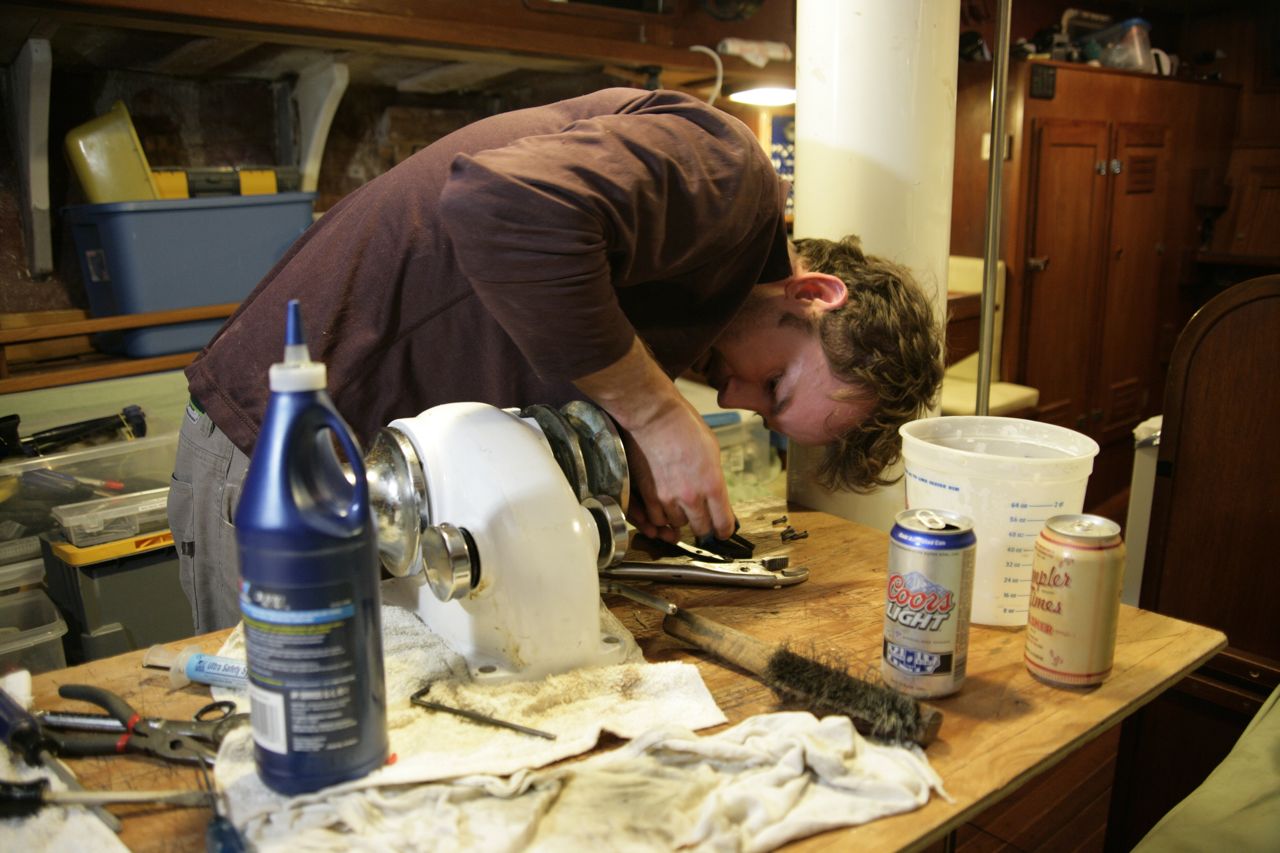
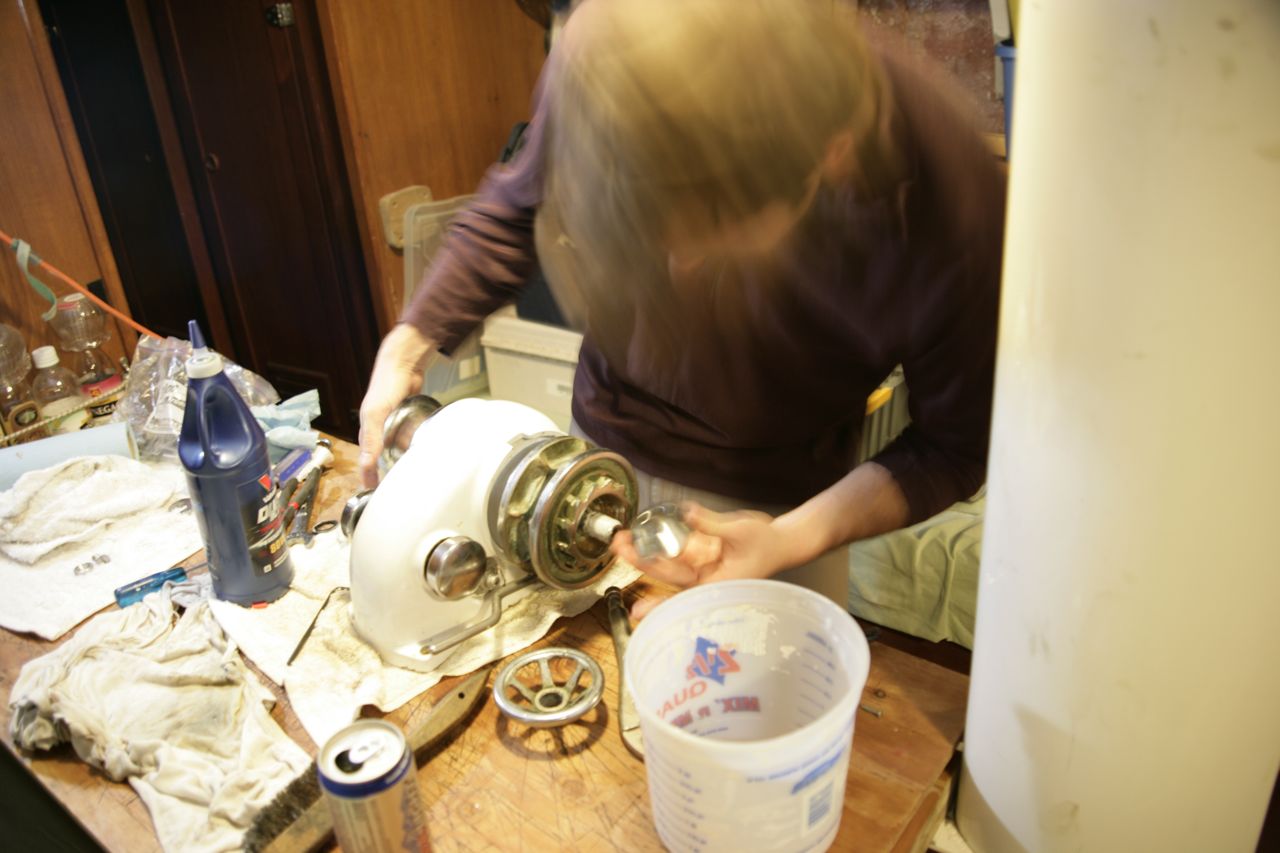
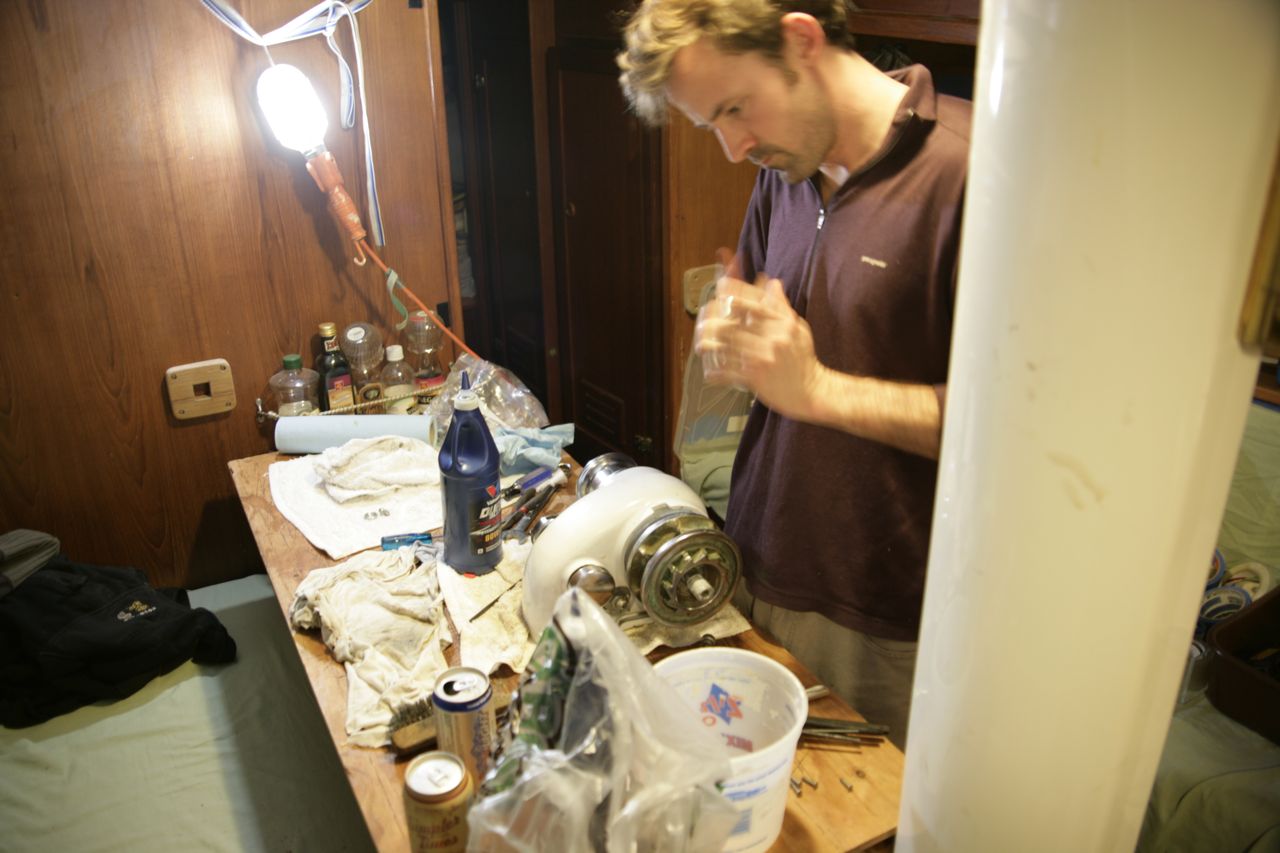
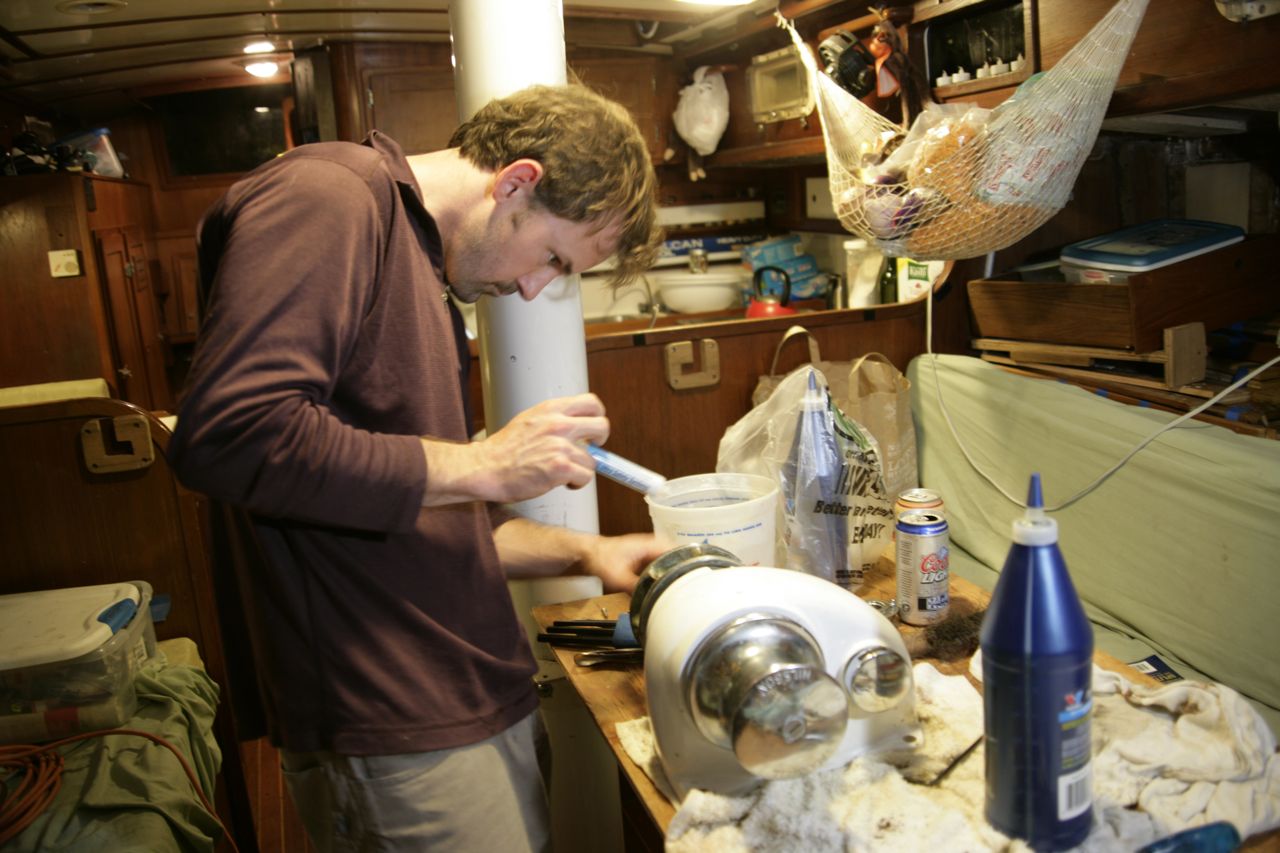
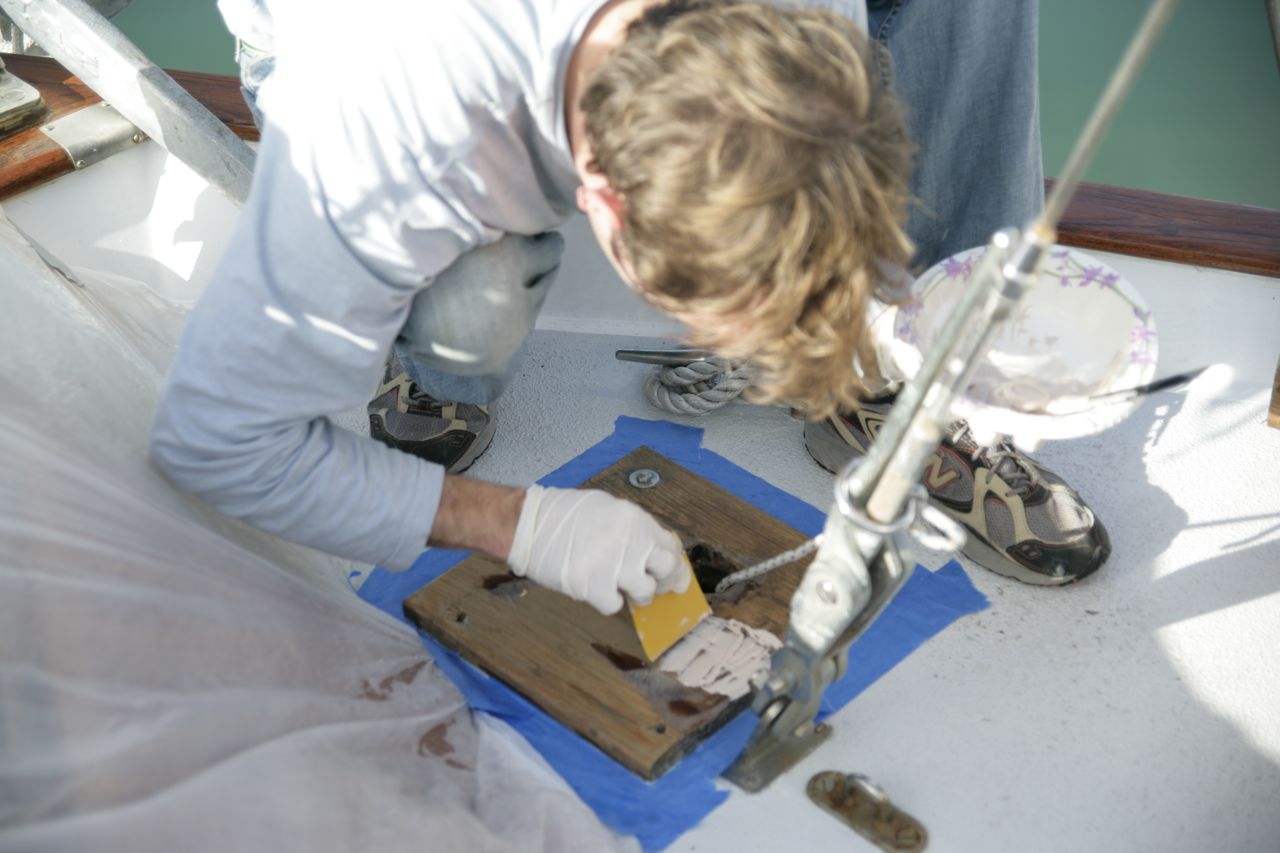
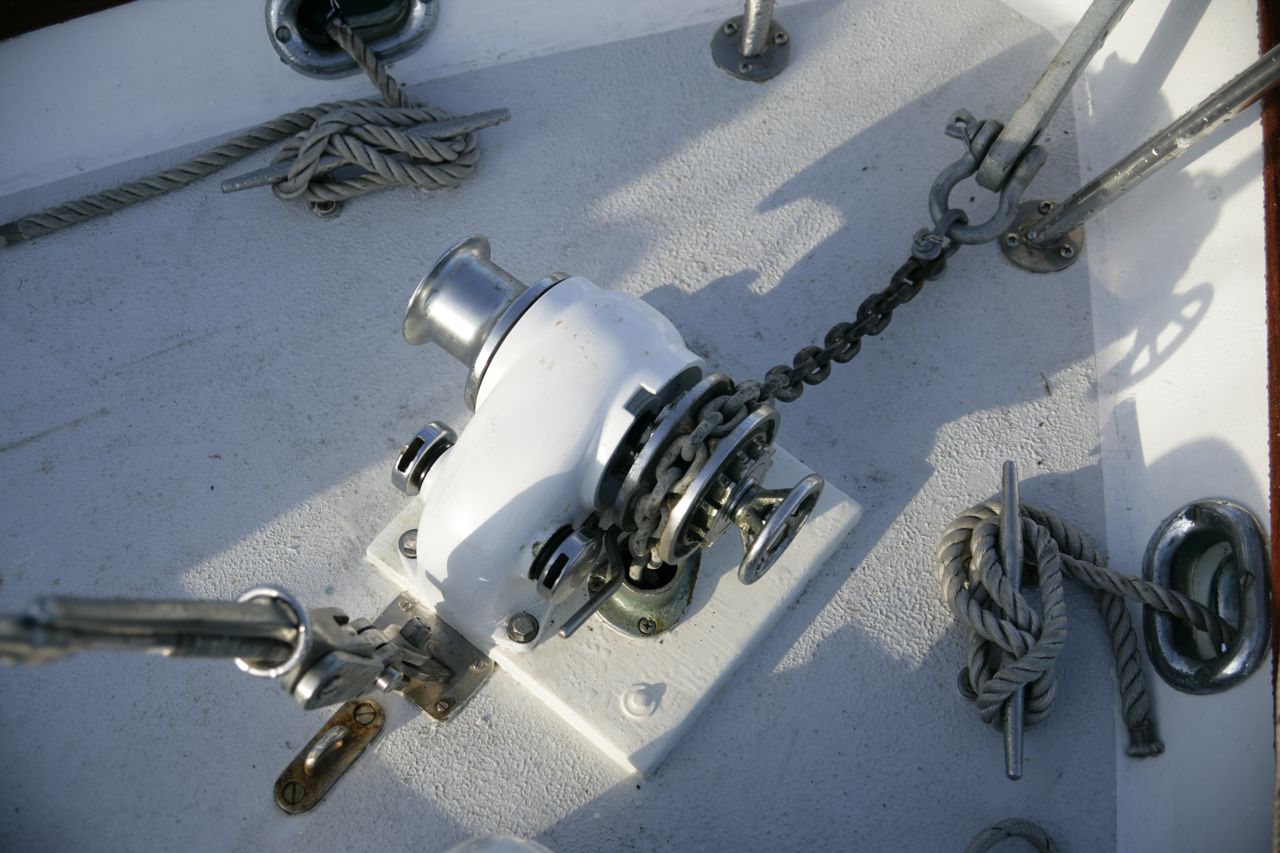
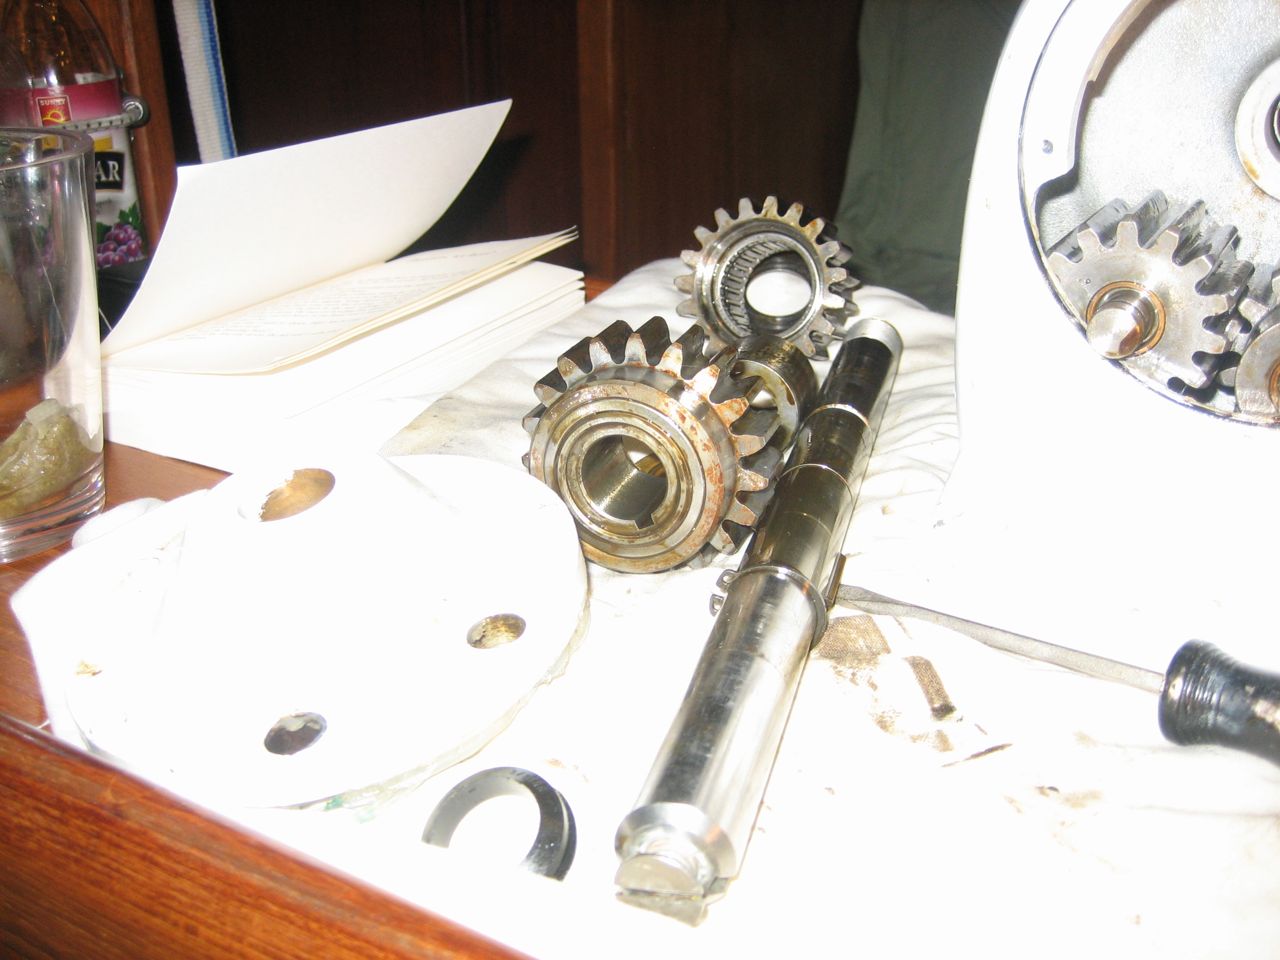
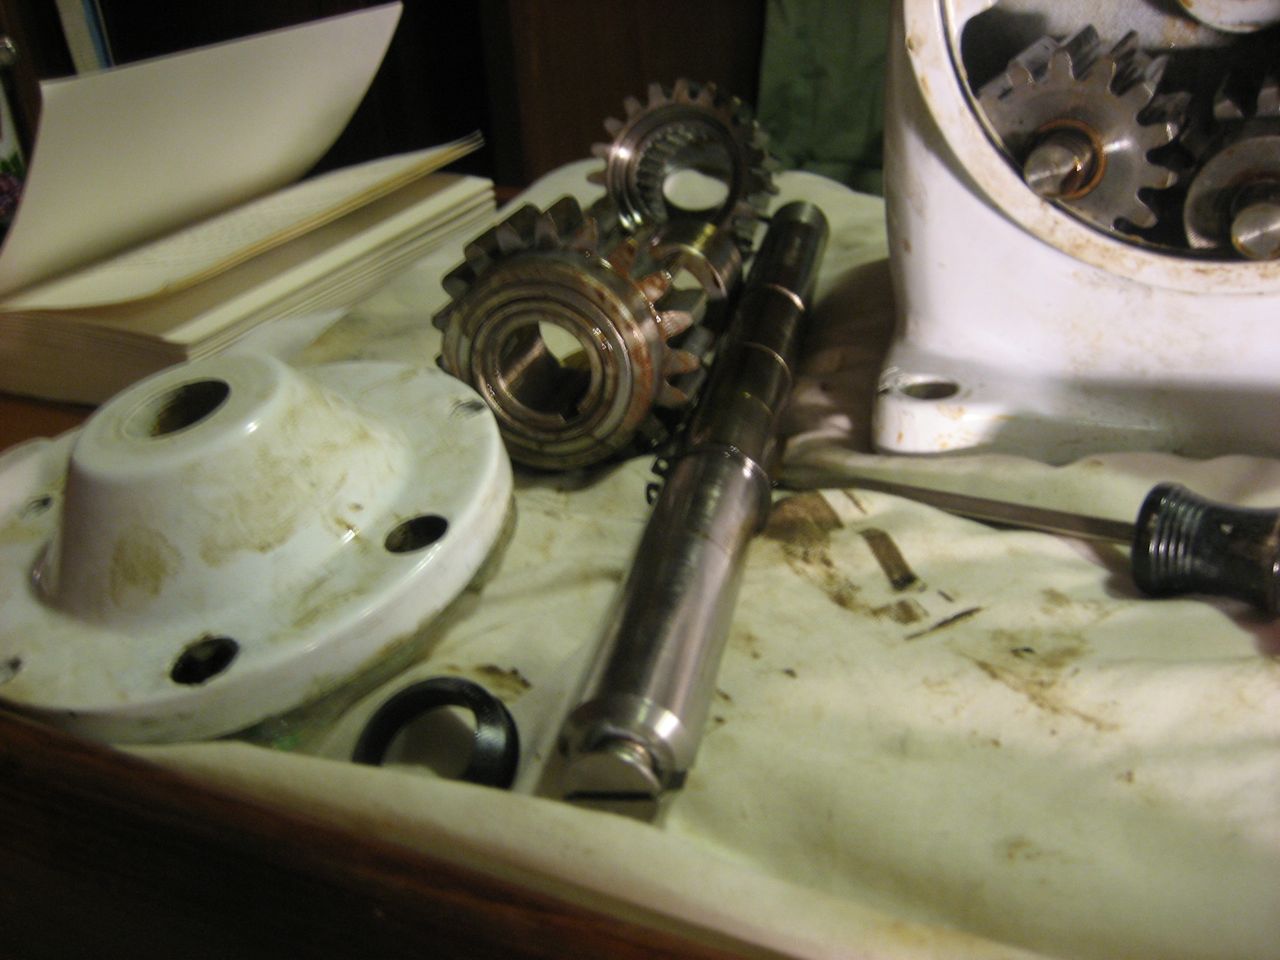
So, between Jonny and I we got the windlass apart, cleaned all the gears inside, and re-oiled the whole thing. Karen cleaned up the wooden pad on the foredeck where it is mounted, then I faired it with epoxy fairing compound (we had taken some big chunks out of it while trying to get the windlass off), sanded smooth, and painted it with an epoxy primer (primekote). Eventually I’ll have to put two coats of something different on it after it yellows, but there’s no time now.
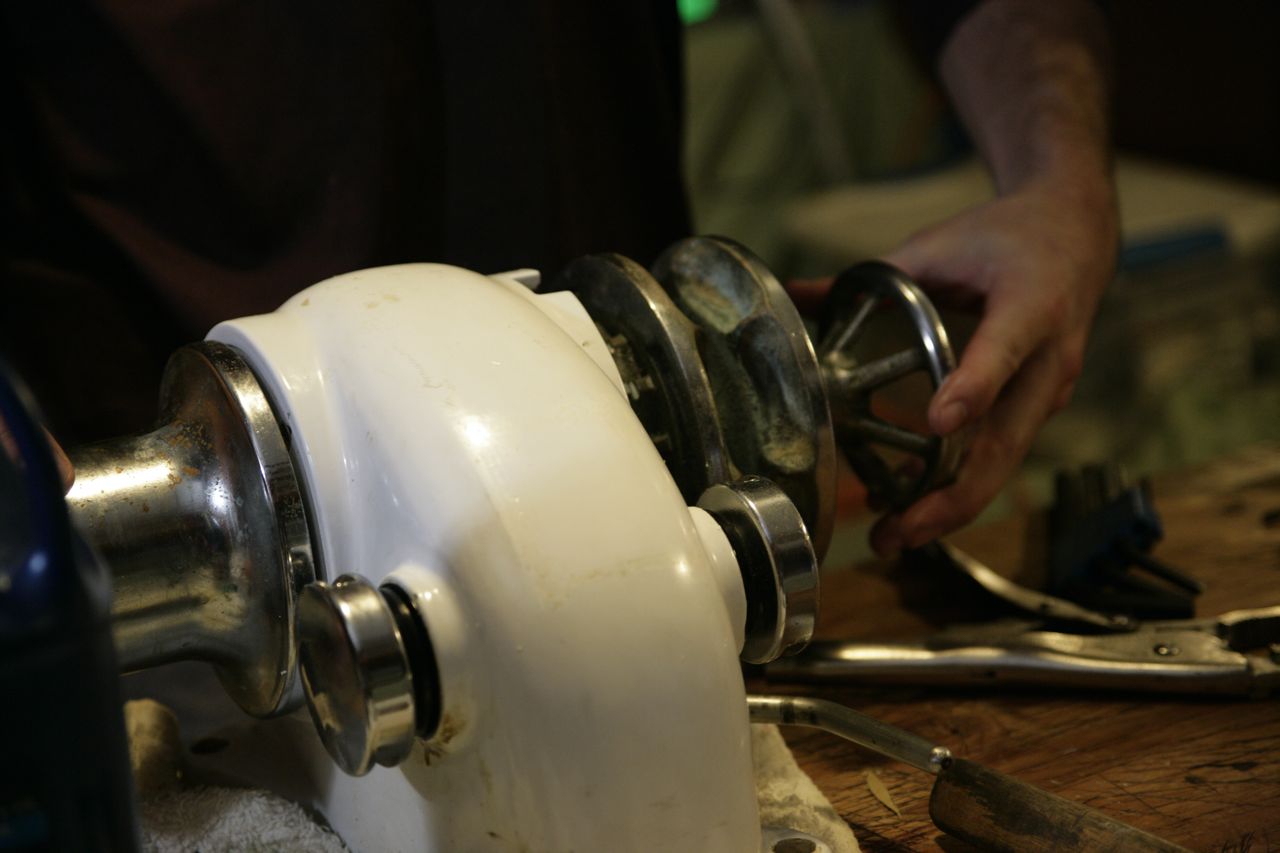
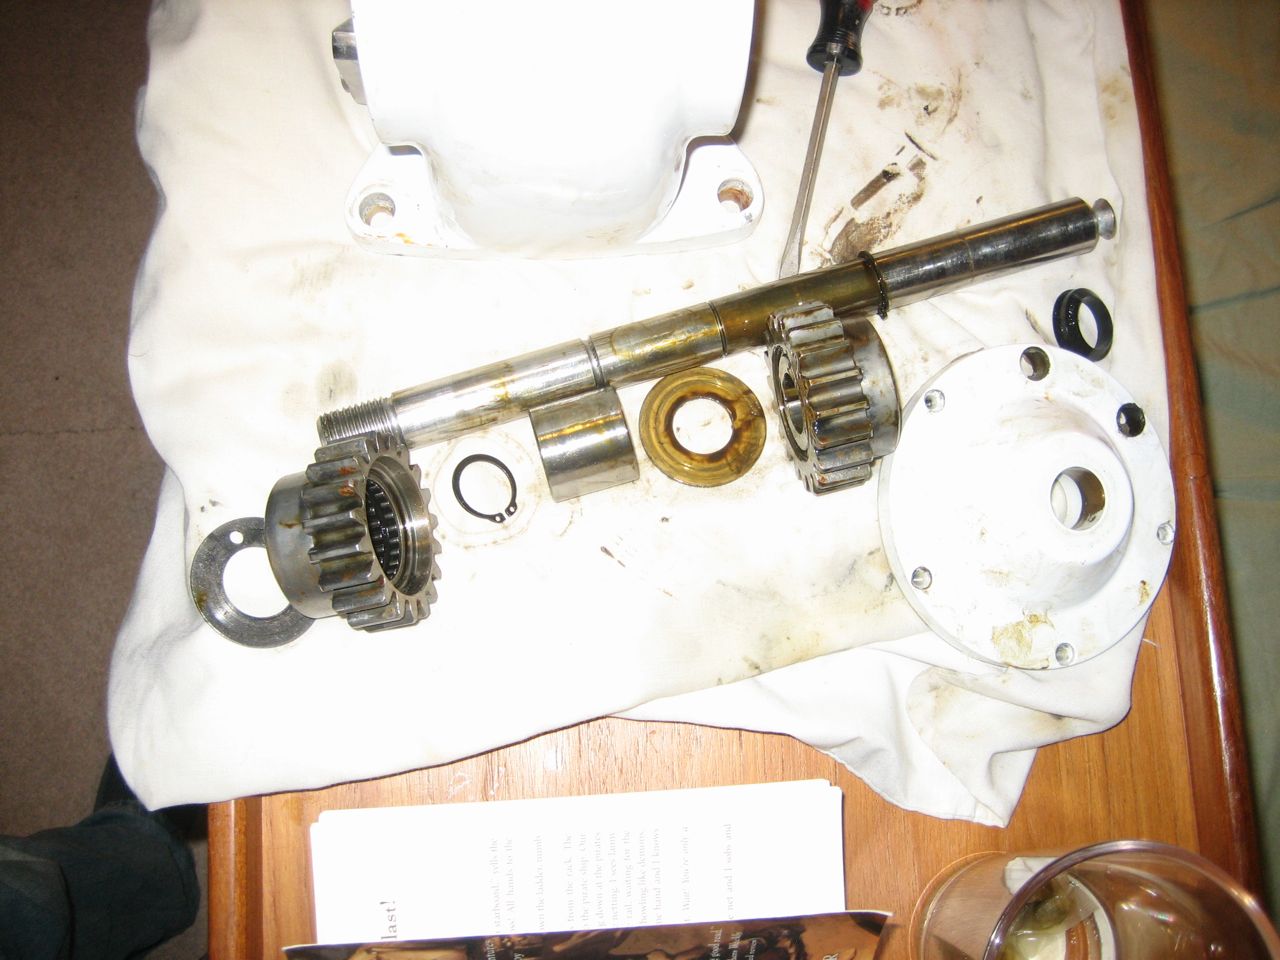
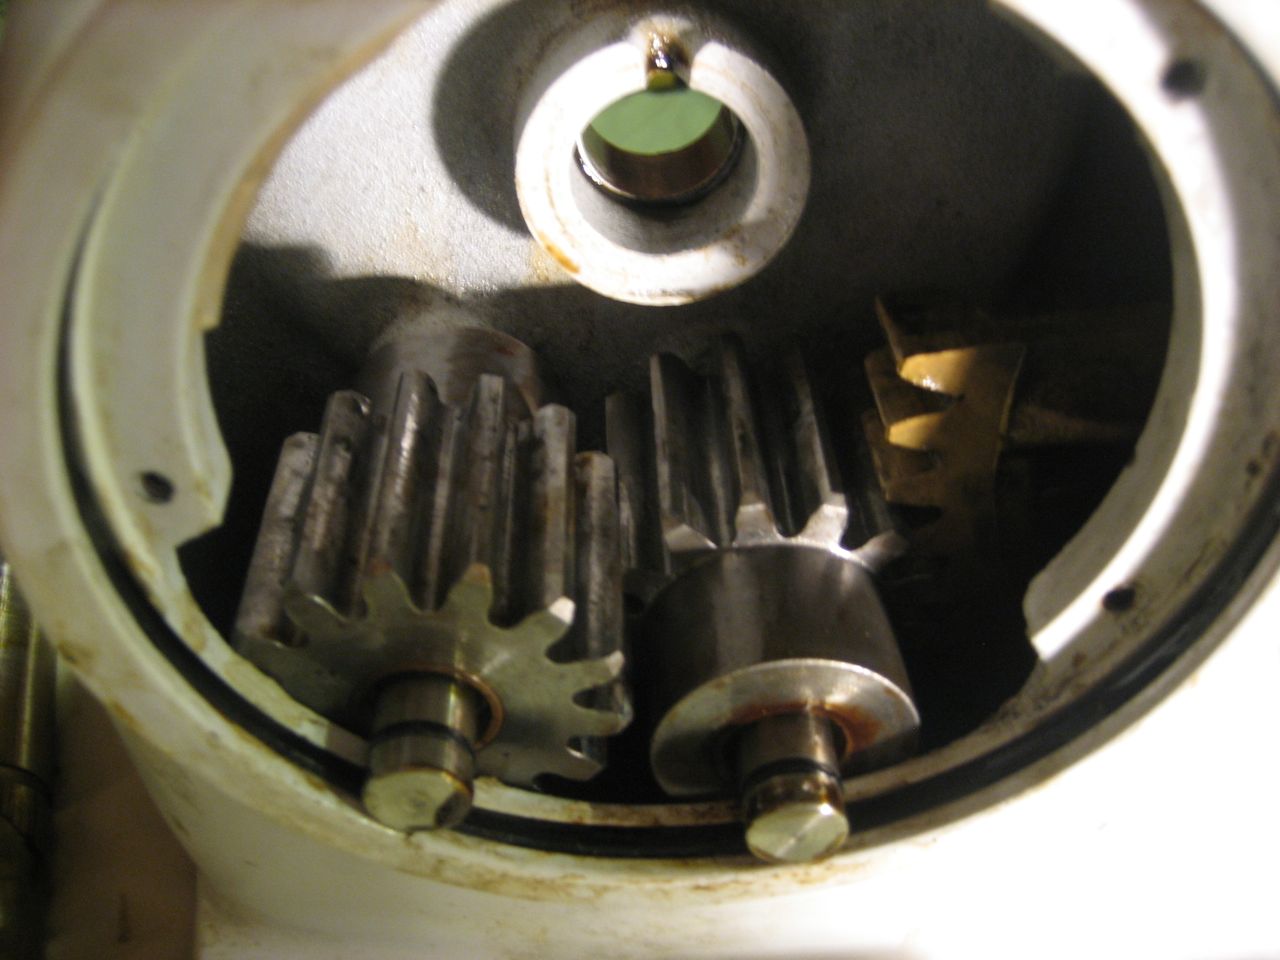
Jonny dismantled the windlass, but wasn’t around when it time to put it all back together . . . boy was that NOT fun. There is no manual for this windlass, anywhere; I spent a long time looking around the internet, inquiring in forums, etc. So just figuring out how the one-way bearings all went back together was a challenge.
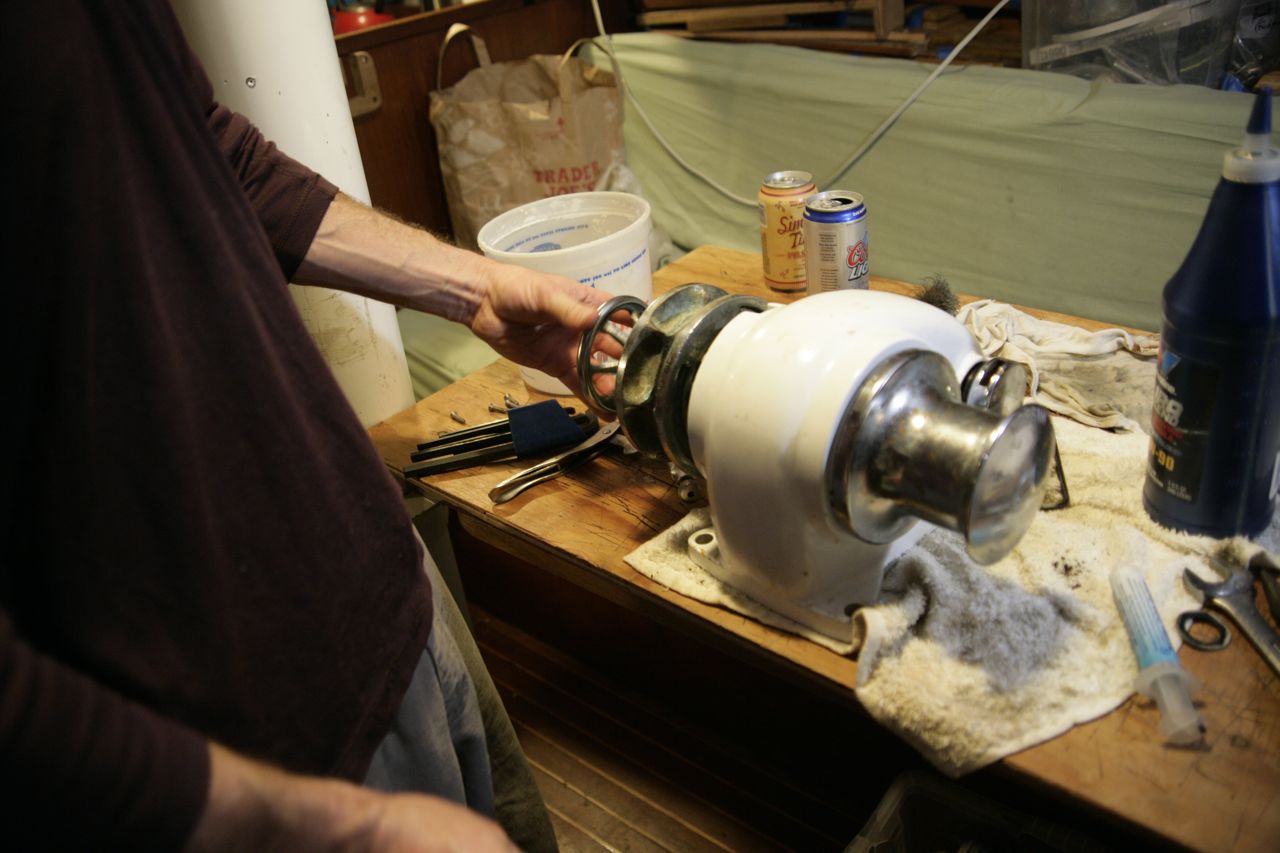
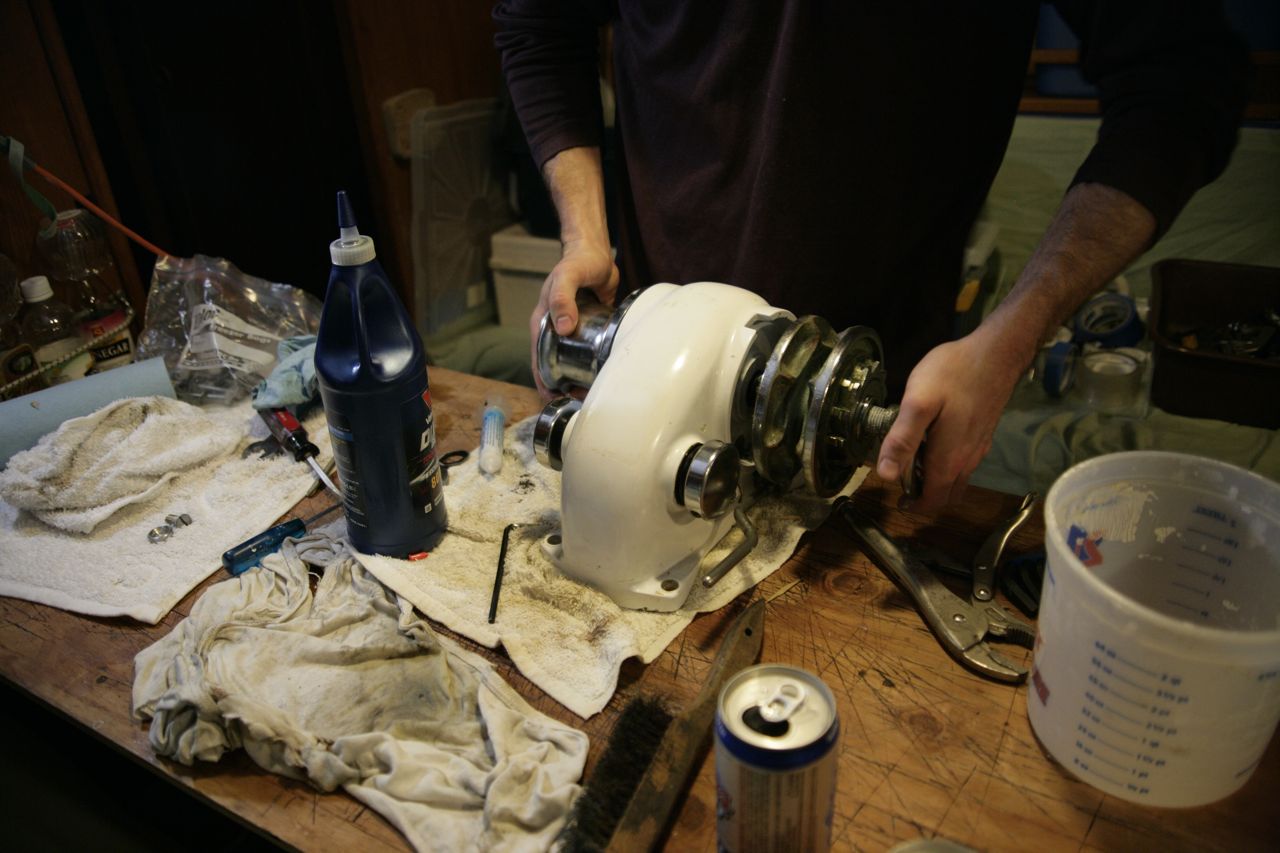
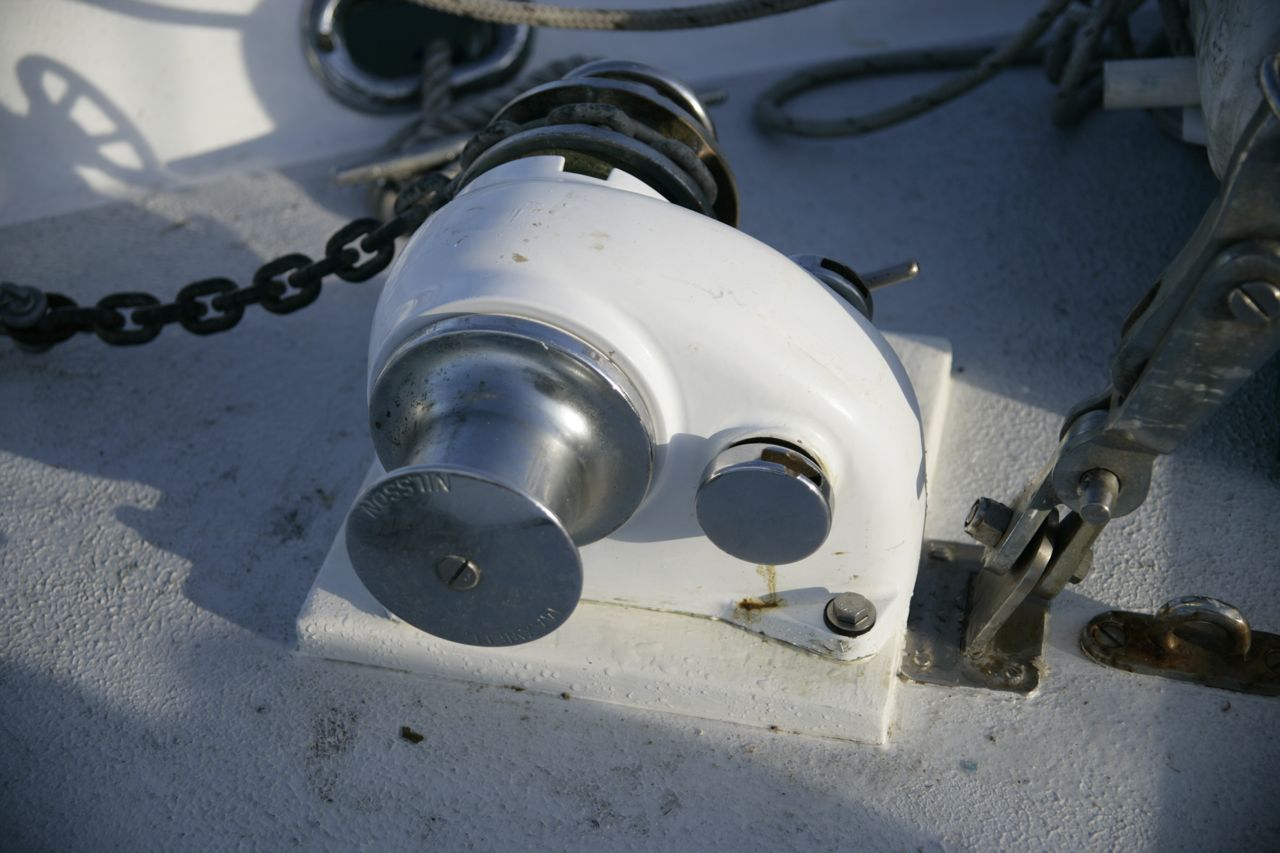
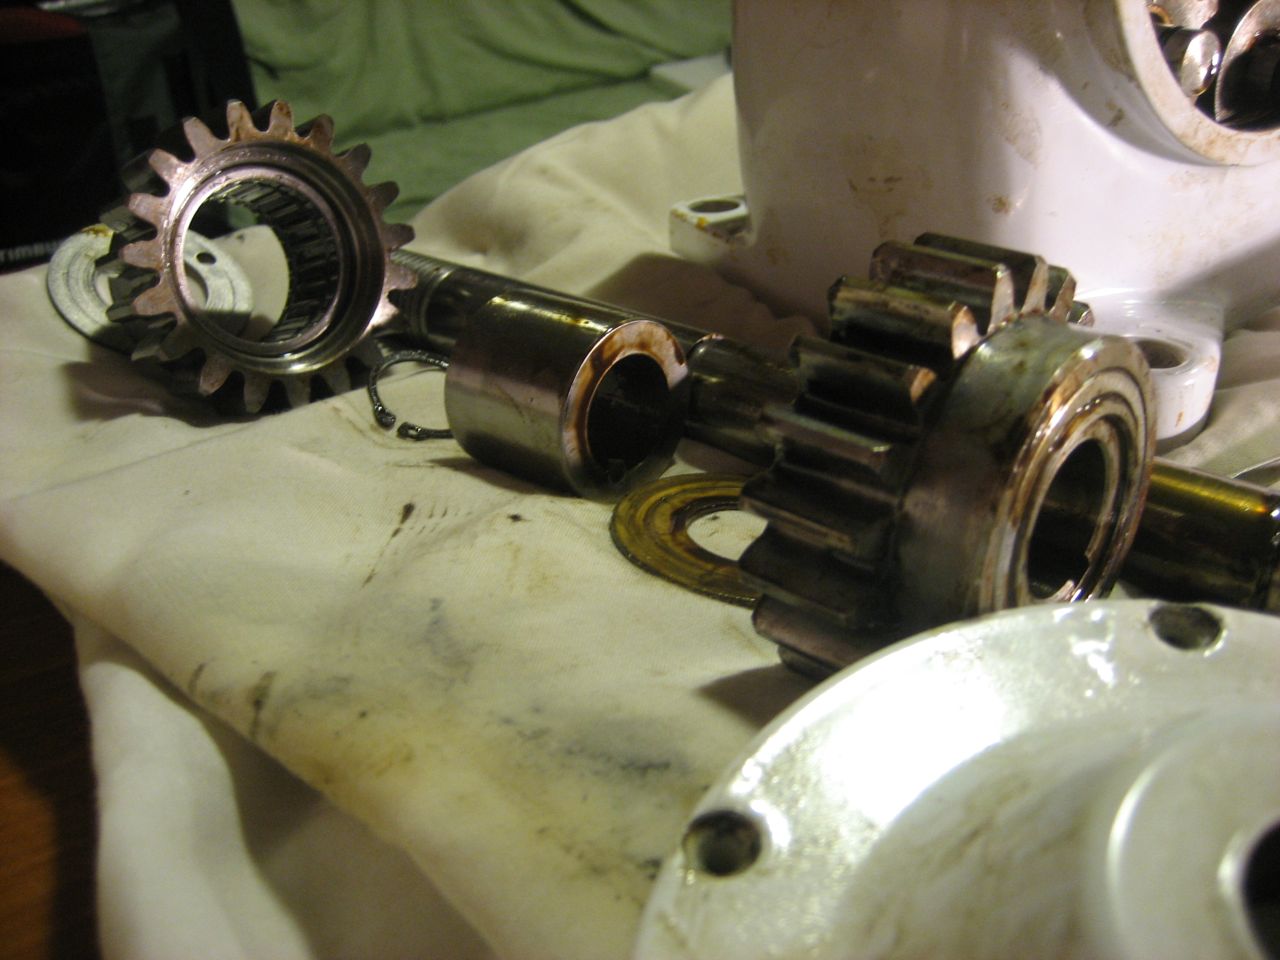
Eventually I figured it out, all the parts got cleaned spick and span, I rinsed out gunk and metal filings from the housing so it was all pristine, put it all back together, and added nice fresh oil.
But the real bitch was the very last step: trying to get the bronze hand wheel back onto the stainless shaft. The threads at the end were all mangled and cross-threaded, and I spent hours, literally hours, just messing with trying to screw the wheel back onto the shaft, without forcing anything. No matter what I tried, including gentle filing to clean up the threads, nothing worked. The shaft was a standard size, but the pipe thread on the shaft was a custom-sized pitch–meaning I couldn’t find any taps/dies online that would work on the threads. I put it aside for a while.
Pete showed up and managed to get the handwheel to thread on the shaft. Didn’t do anything special, just sat there and messed with it and got it to work. Now it’s saying something for someone to best me on a task like this, which is to say that Pete is a phenomenon. I’m just thankful we didn’t have to scrap the whole windlass for this one little problem, especially after I spent so much time making everything so clean and pretty.

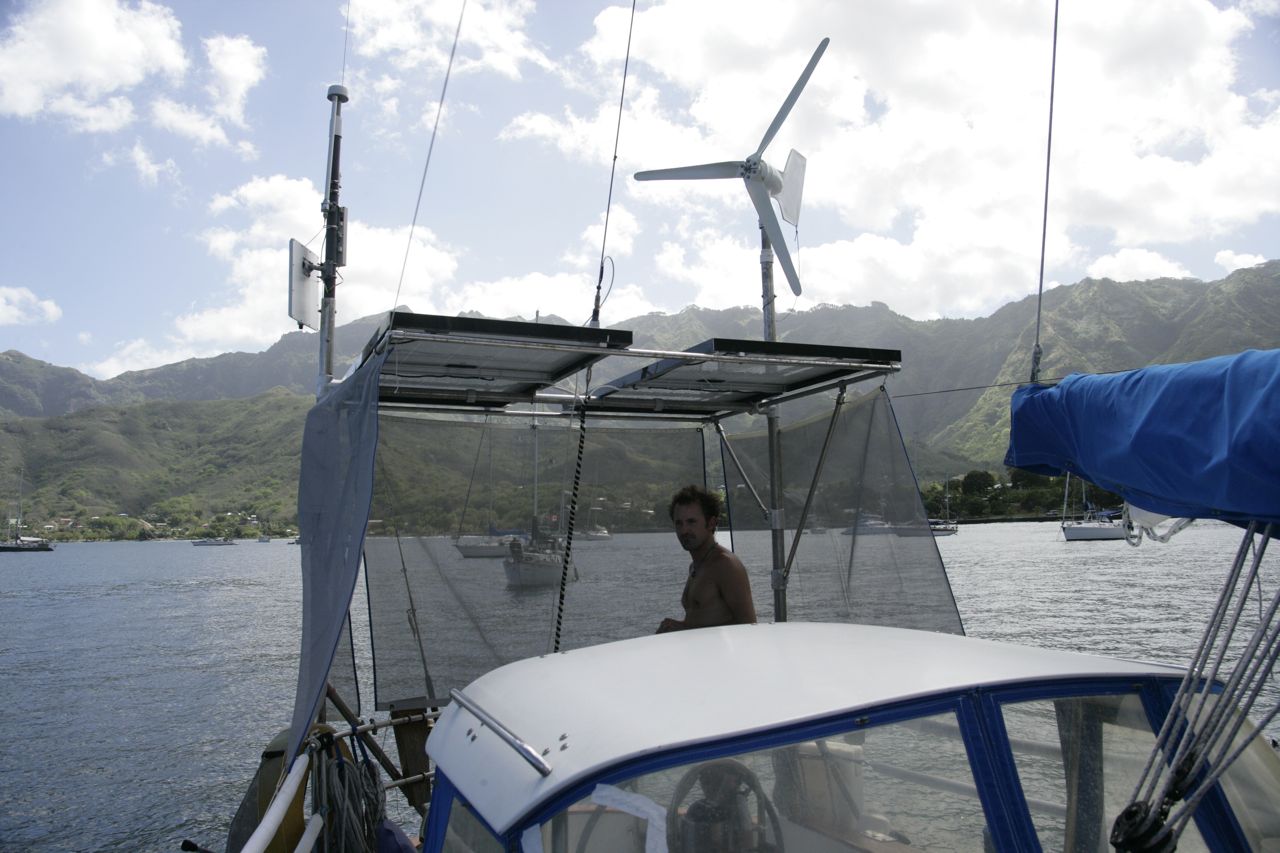
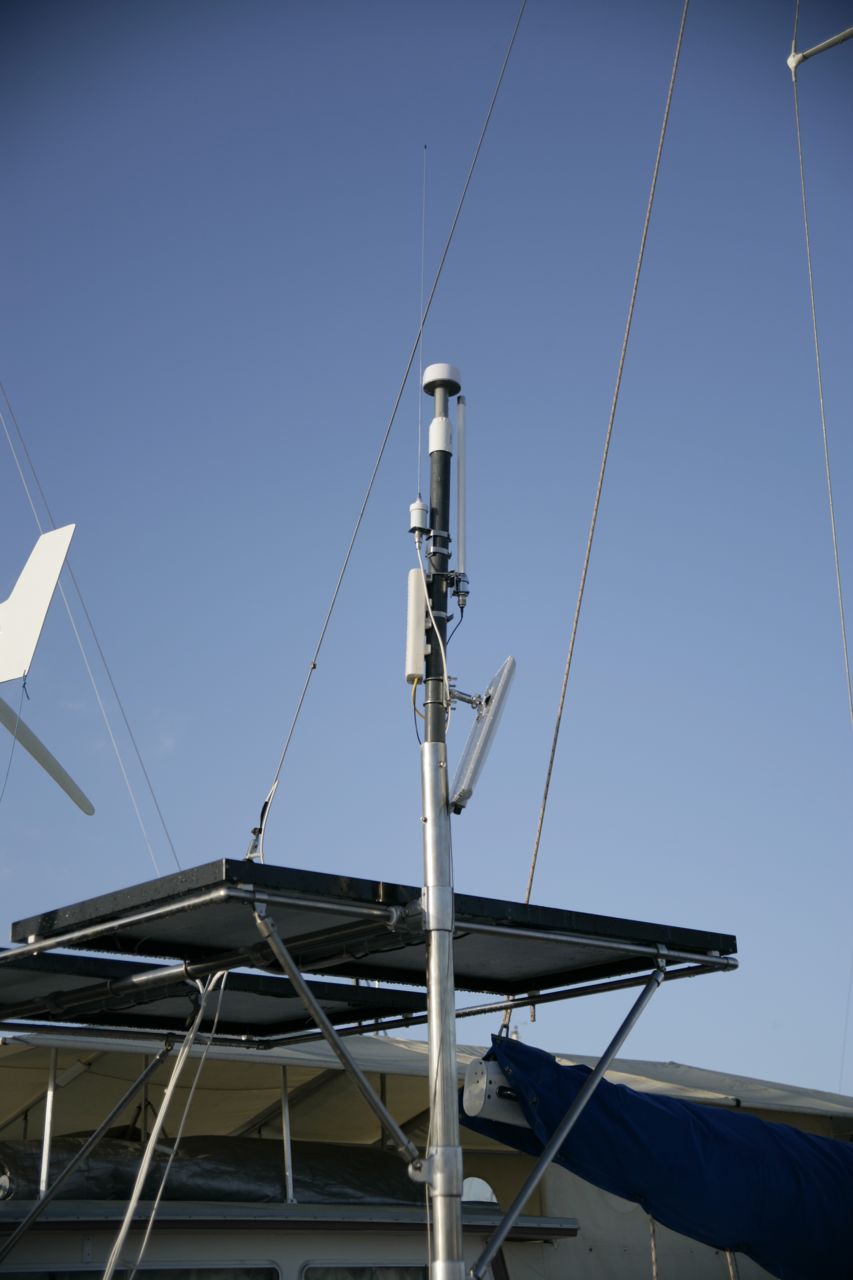
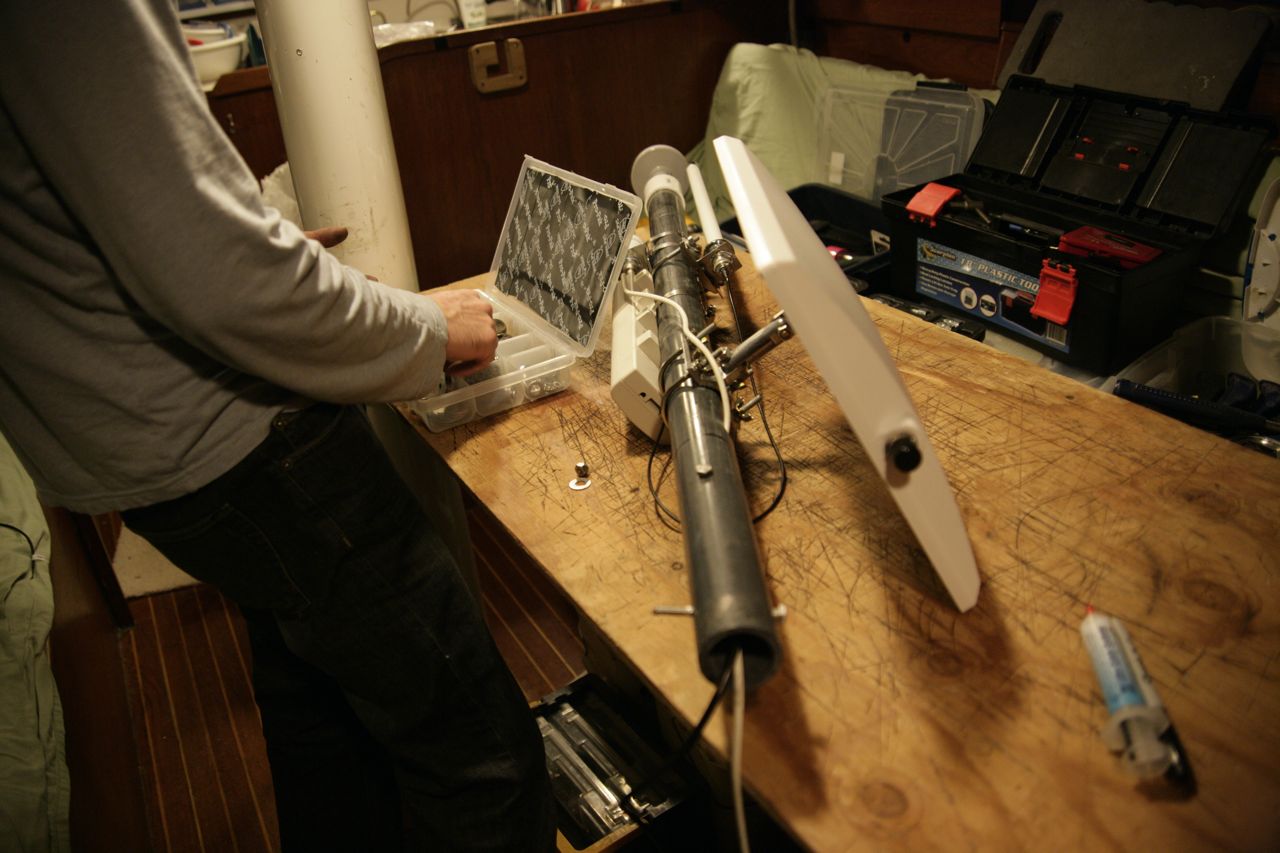
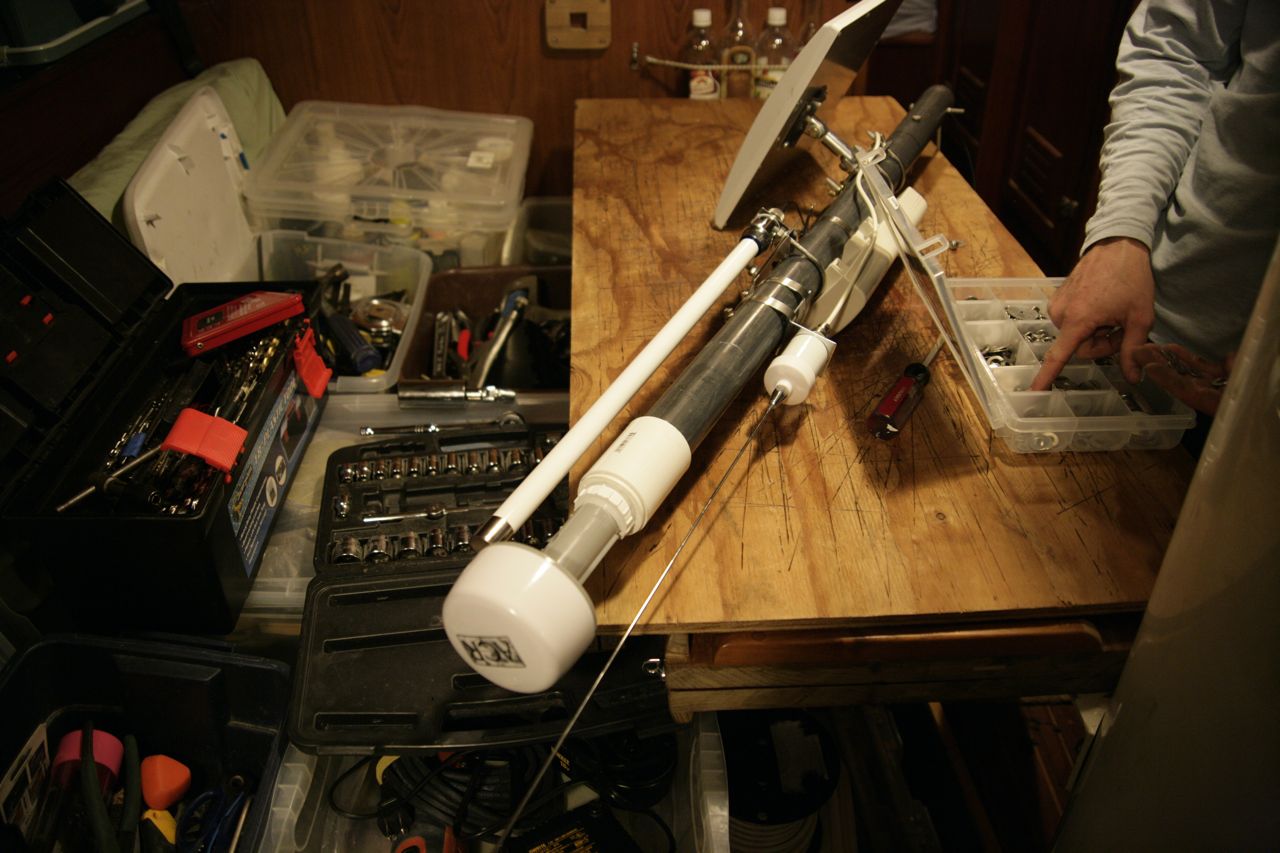
Originally we were going to have the radar mounted on the radar arch (go figure), but when we got the new radar it came with a mast mount and we decided to use it. So that freed up the starboard side of the arch on the stern for mounting our various electronics. The items mounted on this control tower include:
AIS gps antenna (the mushroom shape)
AIS vhf antenna
WIFI access point (the elongated box)
WIFI omni-directional 8db gain antenna (the tall white stick)
WIFI directional 15db gain antenna (the square thing)
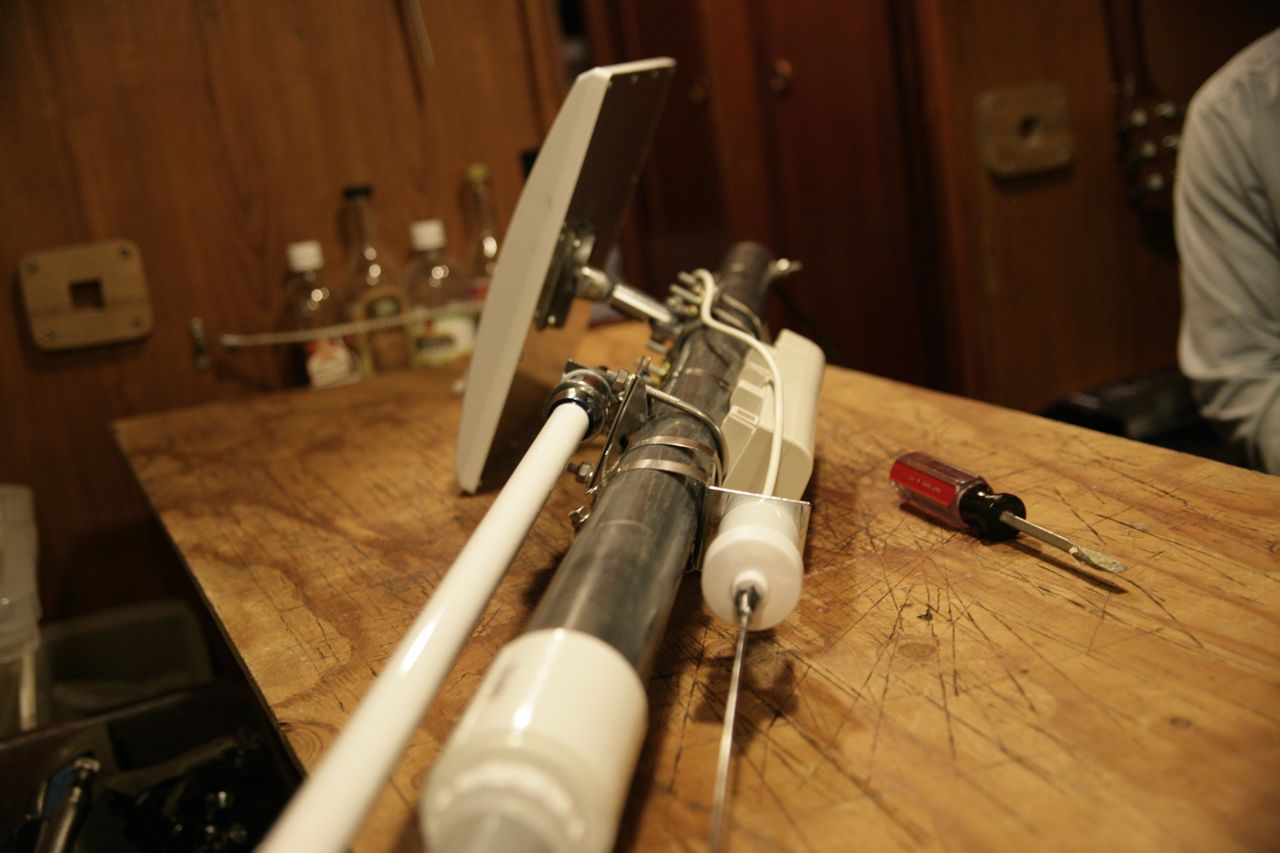
I used a pvc pipe and fittings to mount the various components, then through bolted the gray PVC pipe to the stern pole. Ran the wires into a hole in the pvc, down through the pole, out the bottom, and into the hull through a cable clam. I used spiral wrap on the wires where they went through the hole and out the bottom of the pipe, to prevent chafing against the edges. I used dielectric grease on all connections, periodically refreshed, and periodically sprayed the whole shabang with T-9 to discourage corrosion.
It worked really well. Eventually I ditched the square antenna because it was too directional to be useful with the WIFI setup; the omni-directional antenna worked fine.
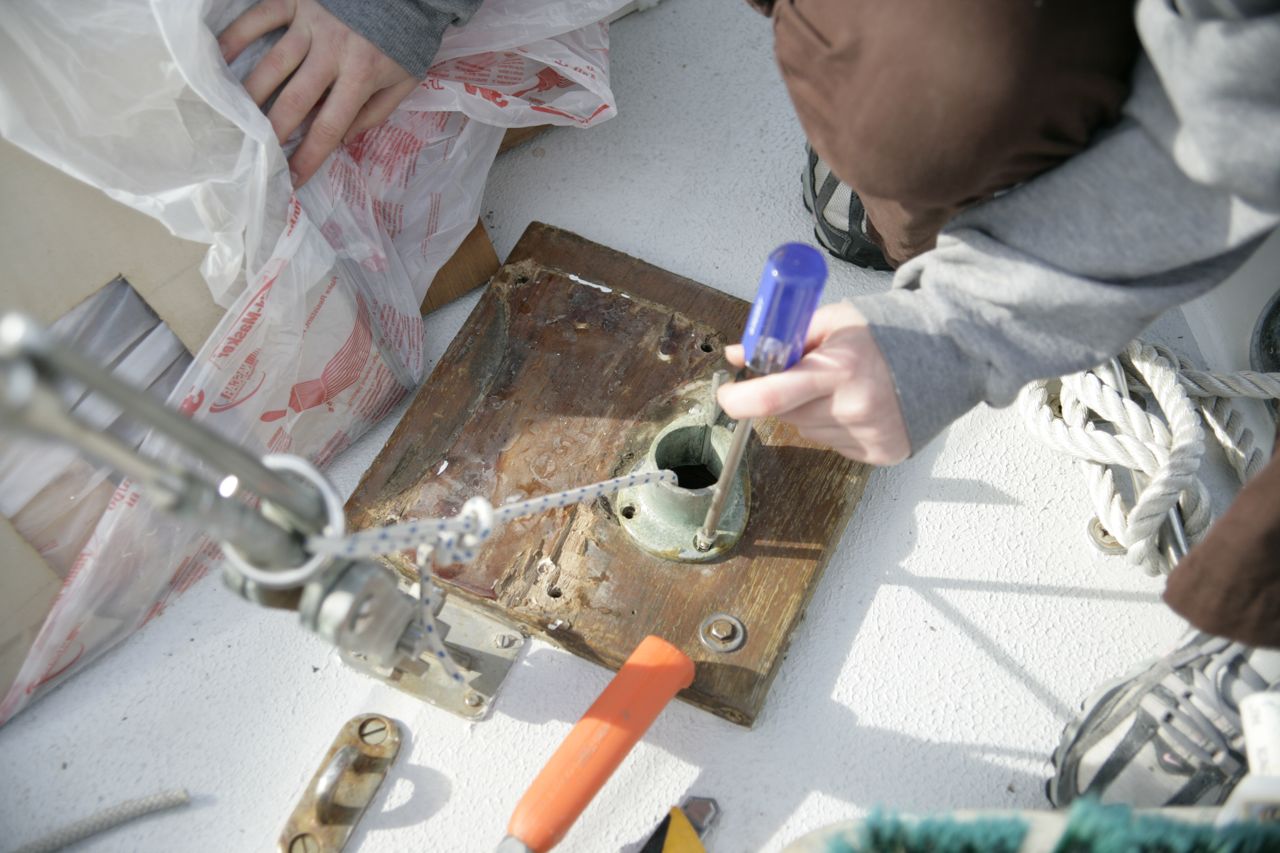
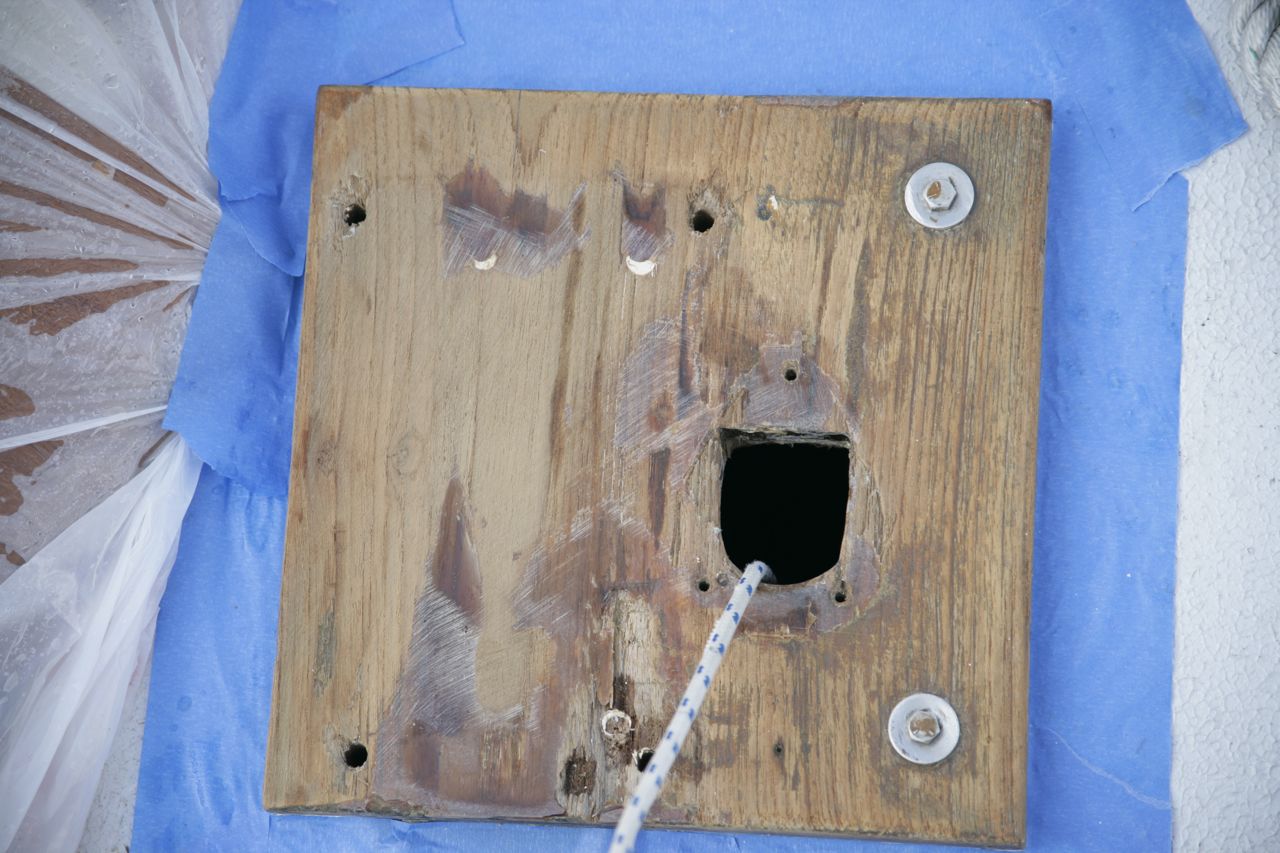
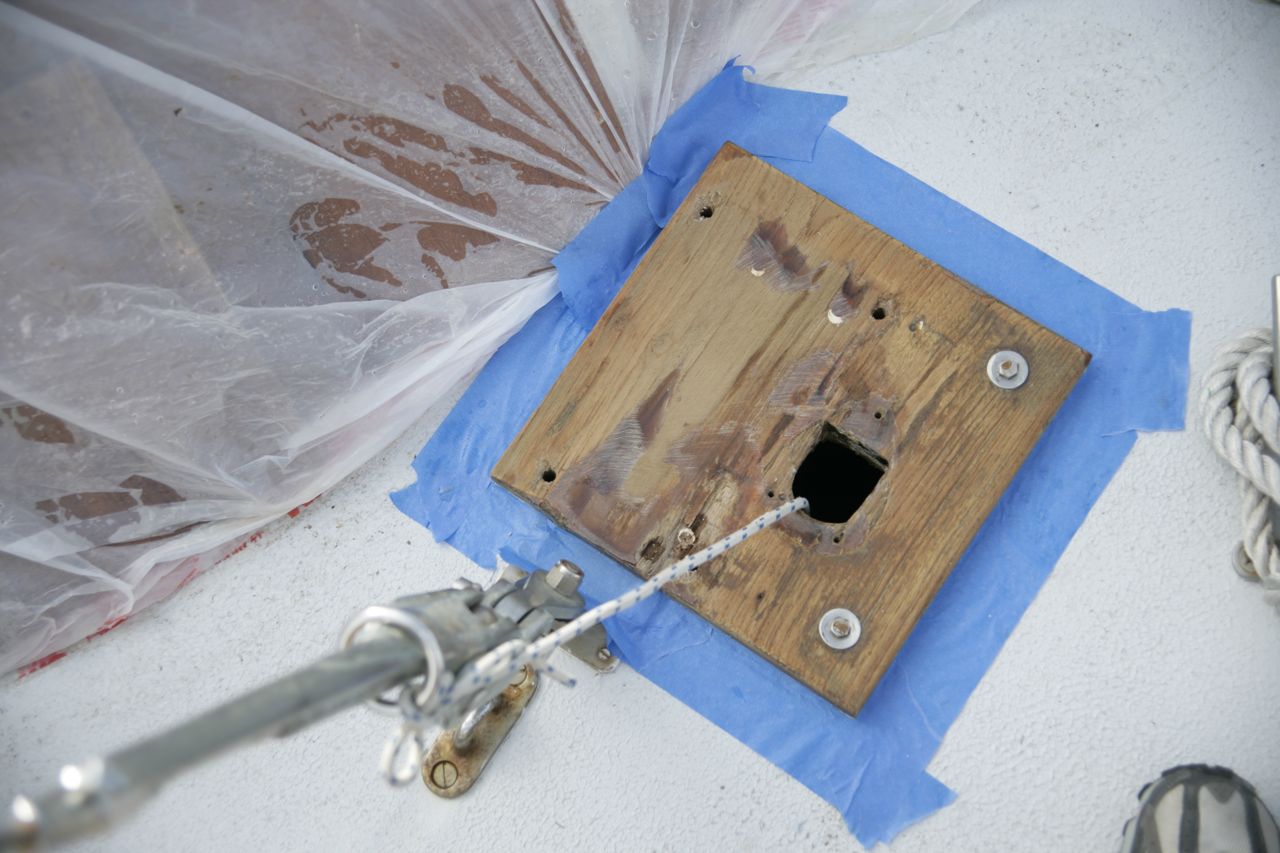
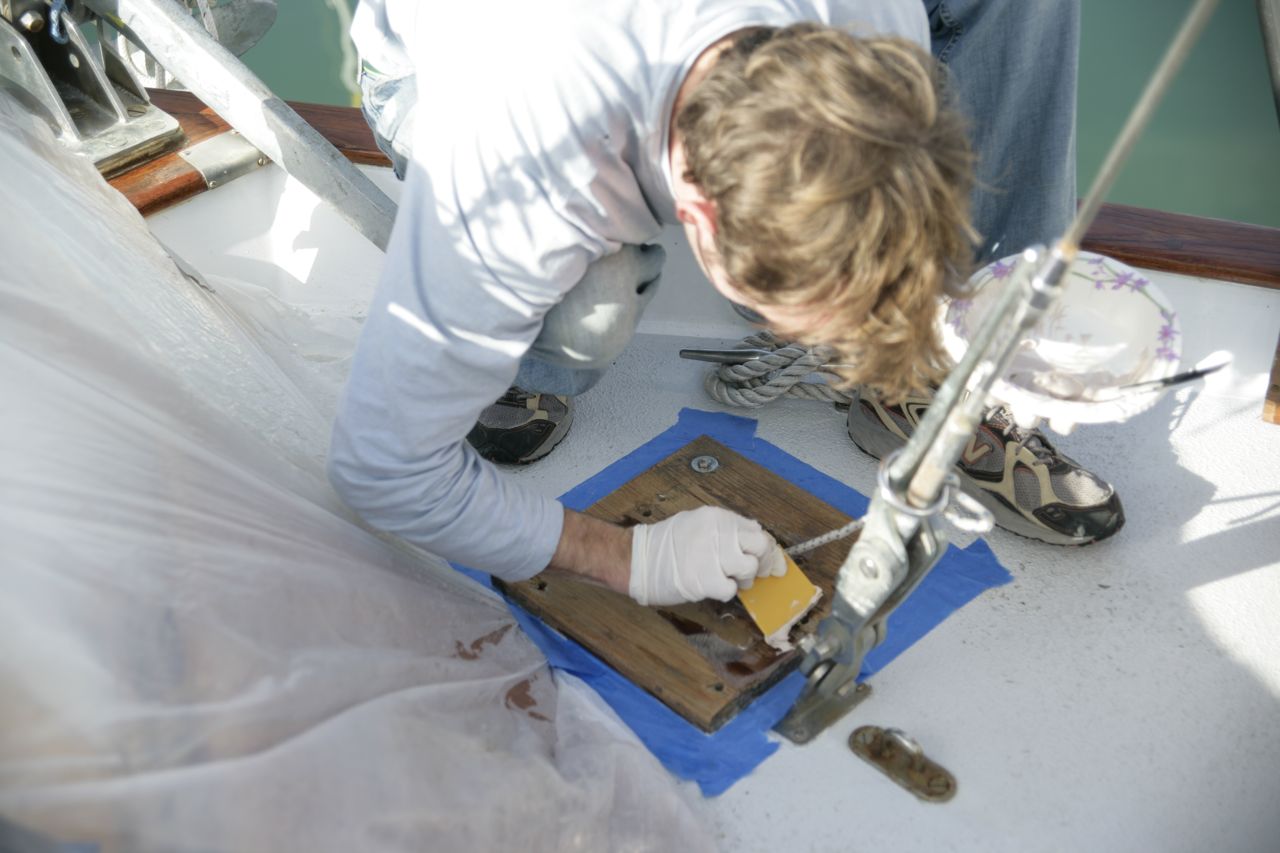
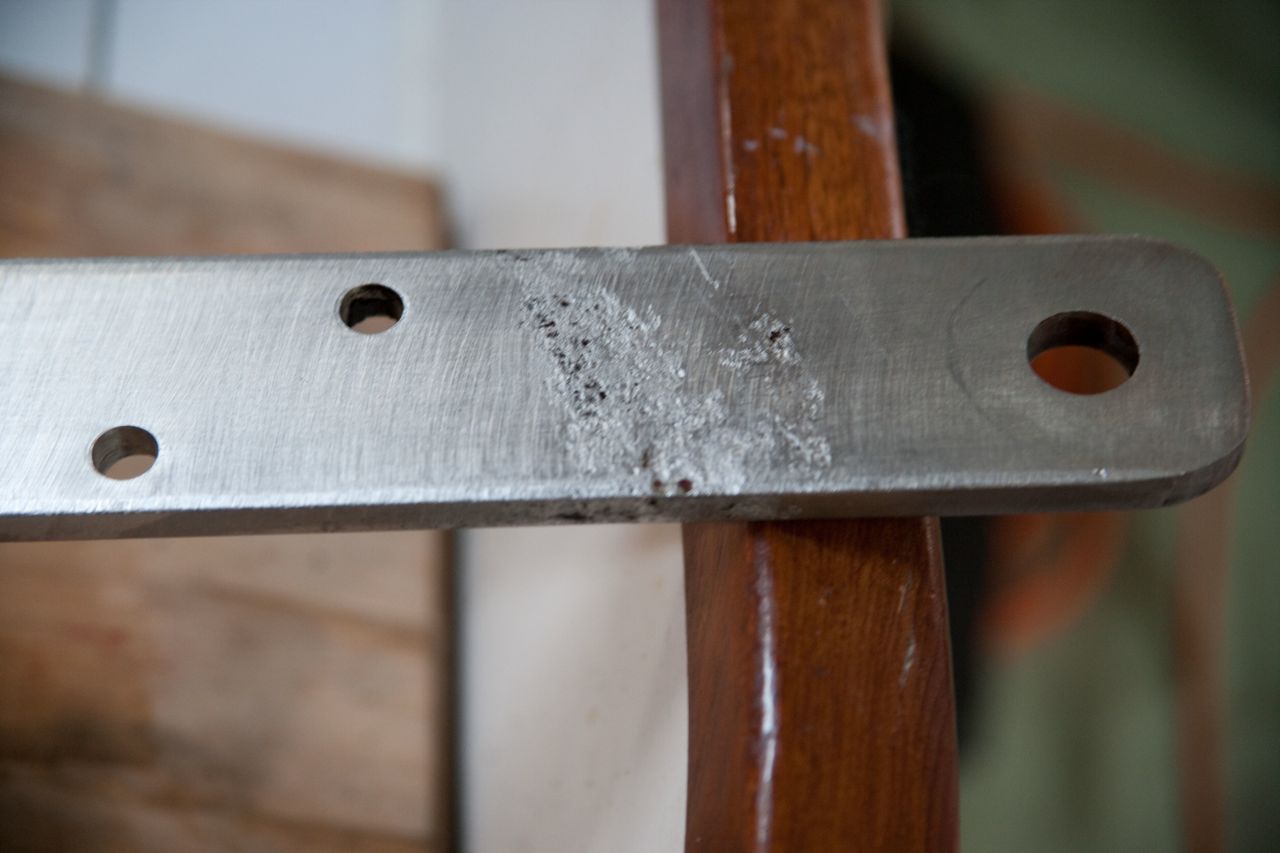
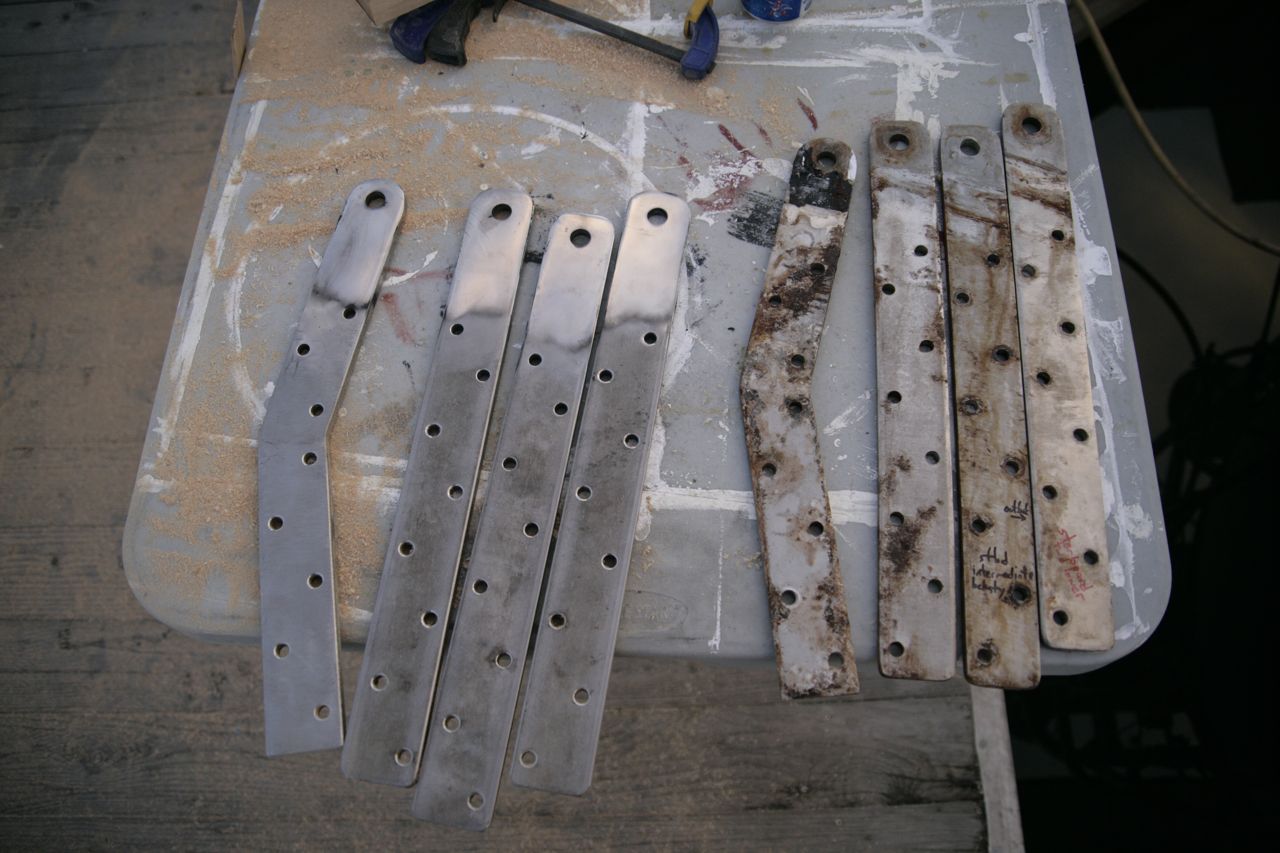
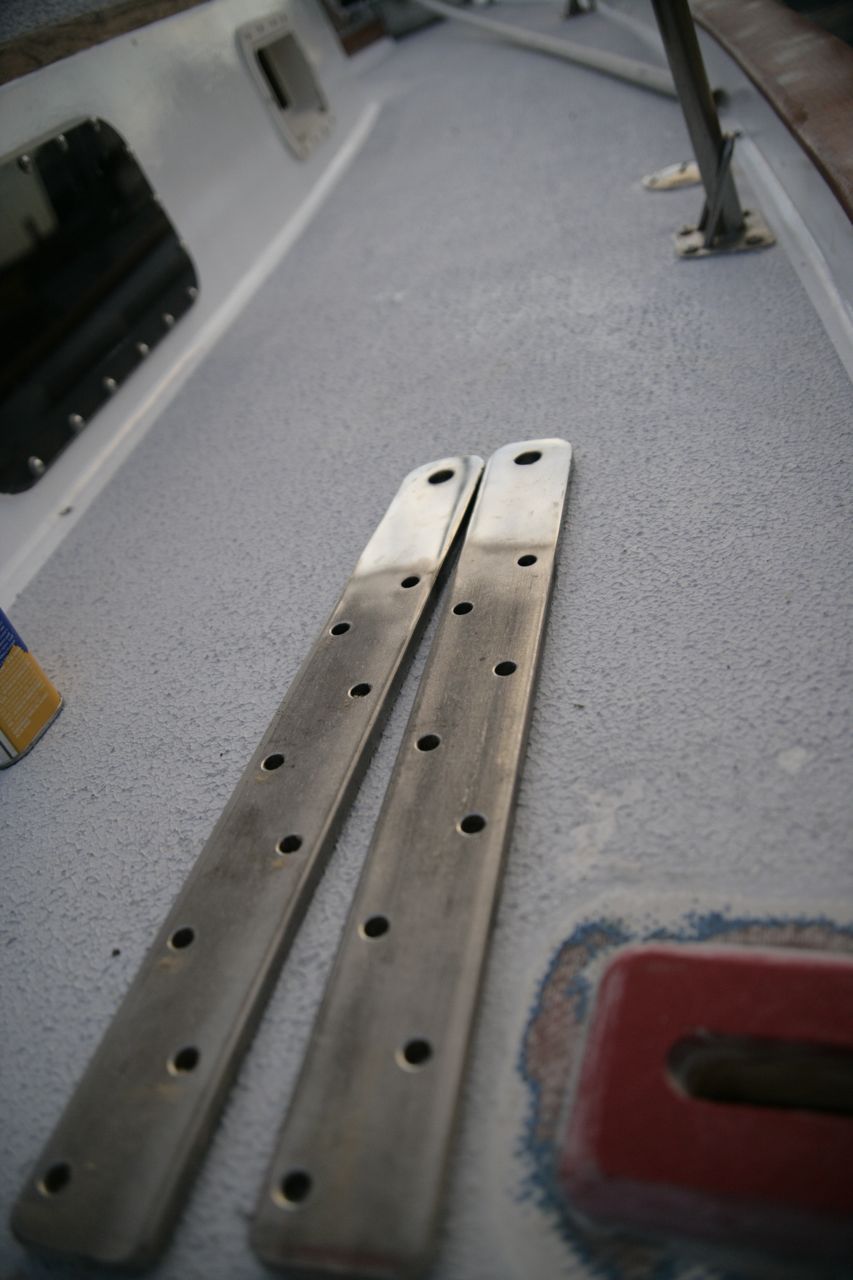
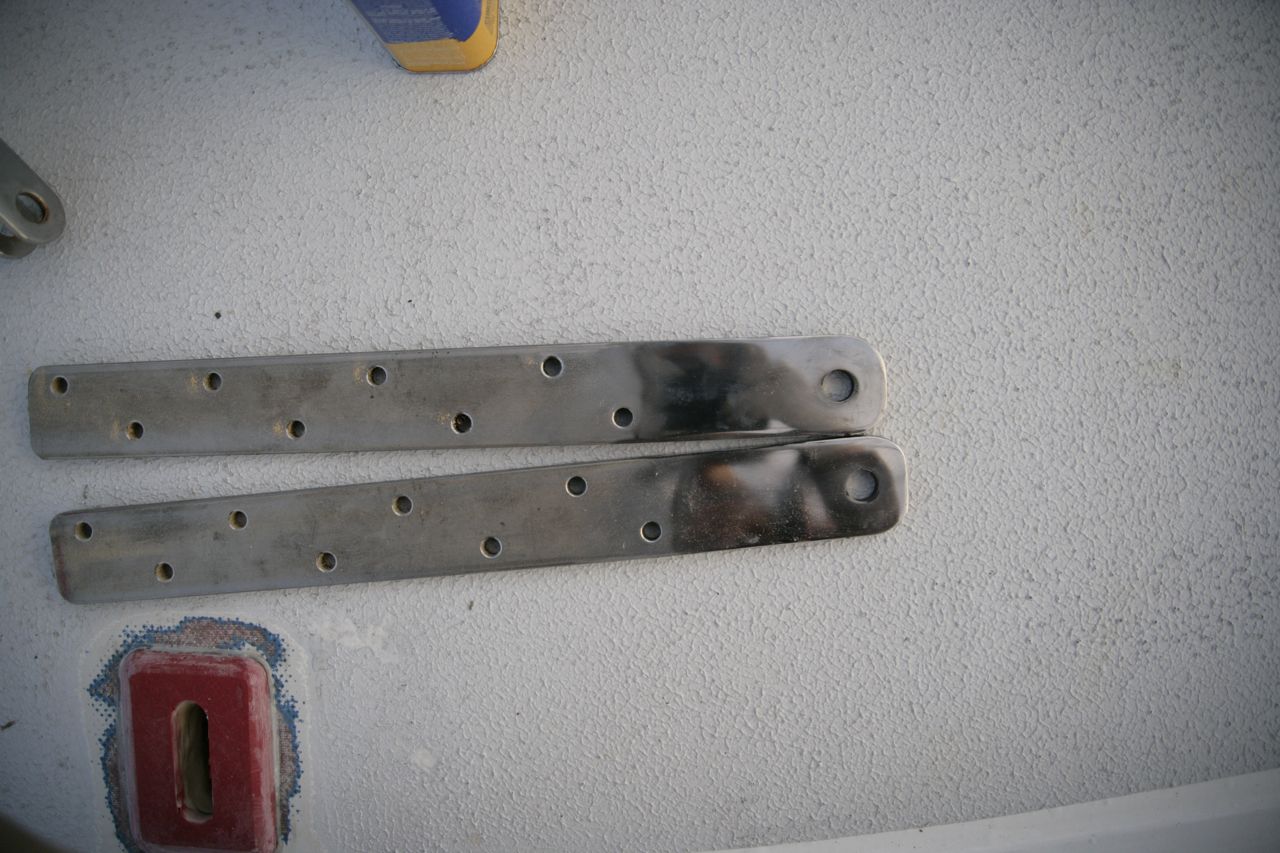
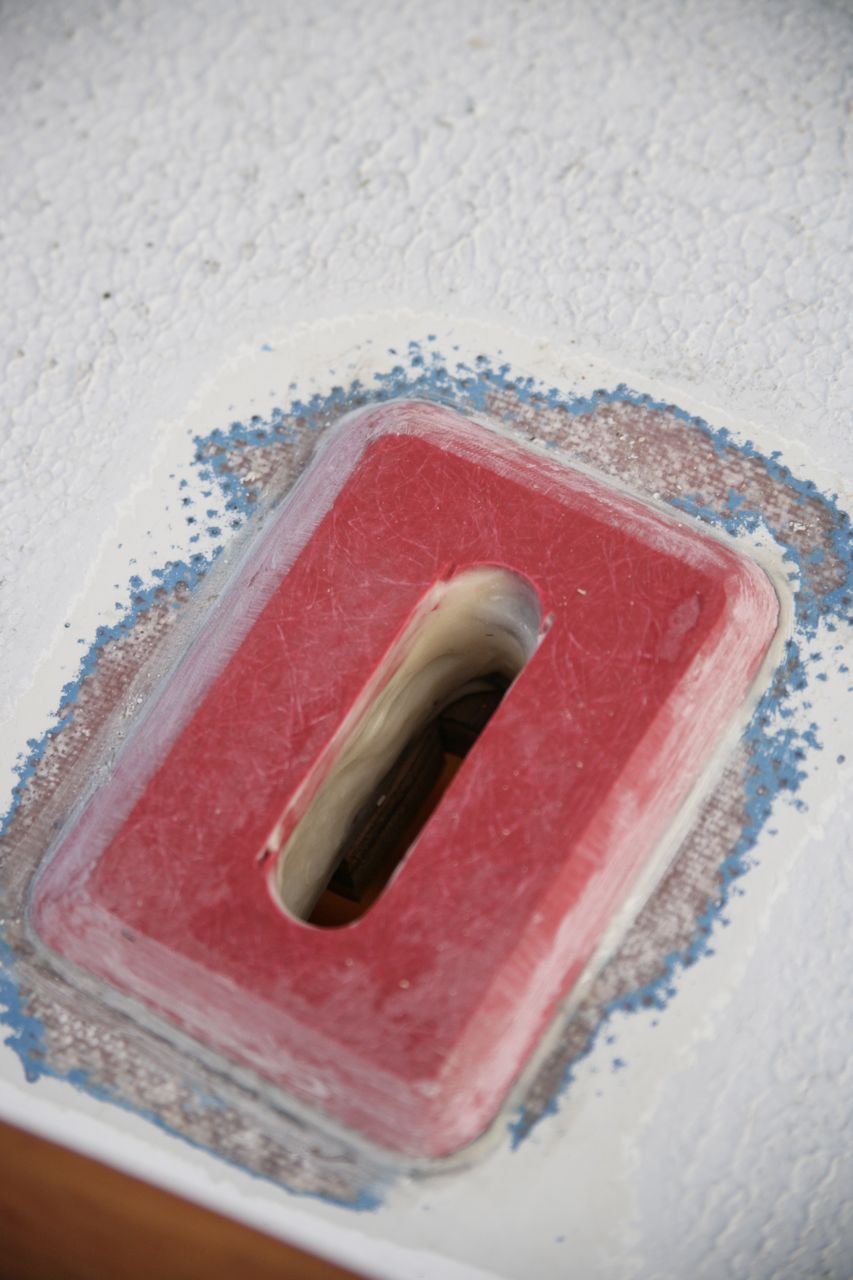
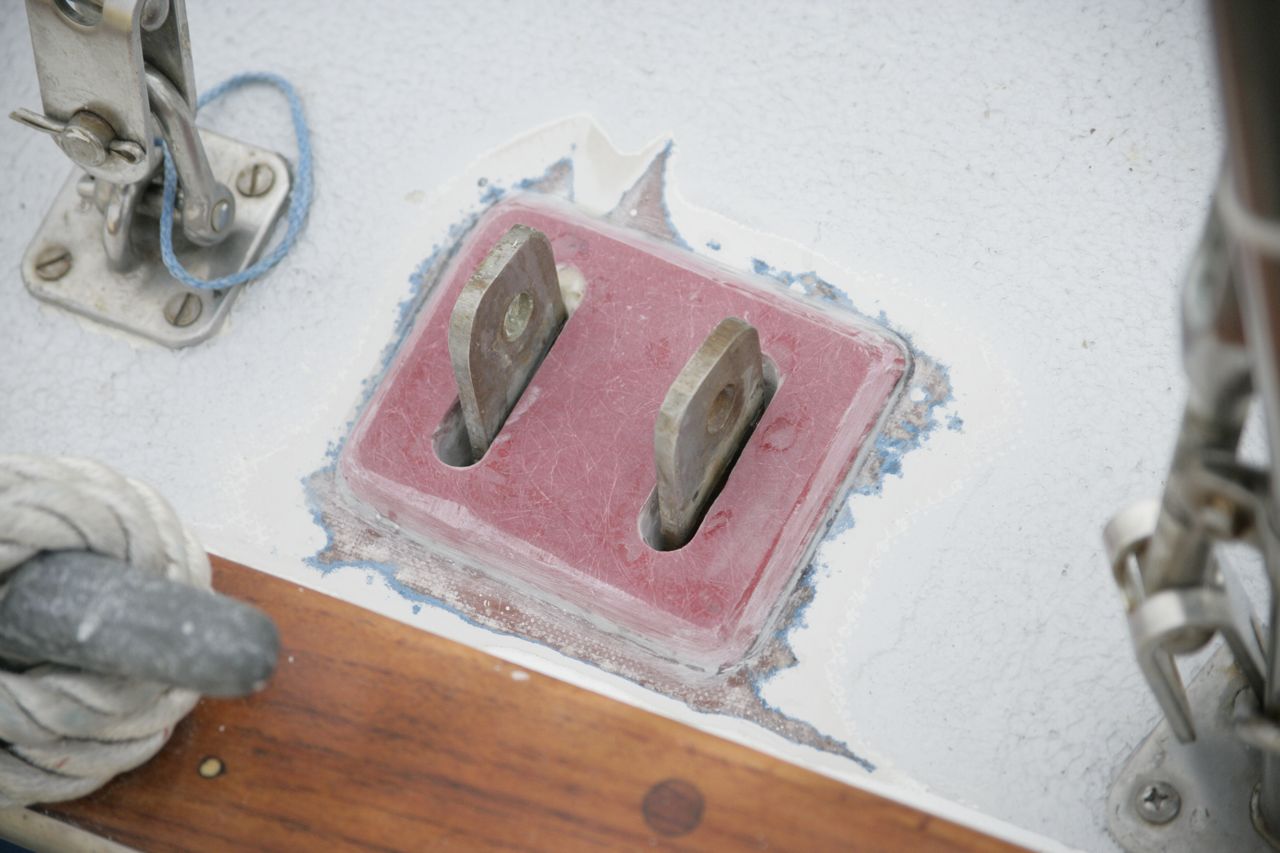
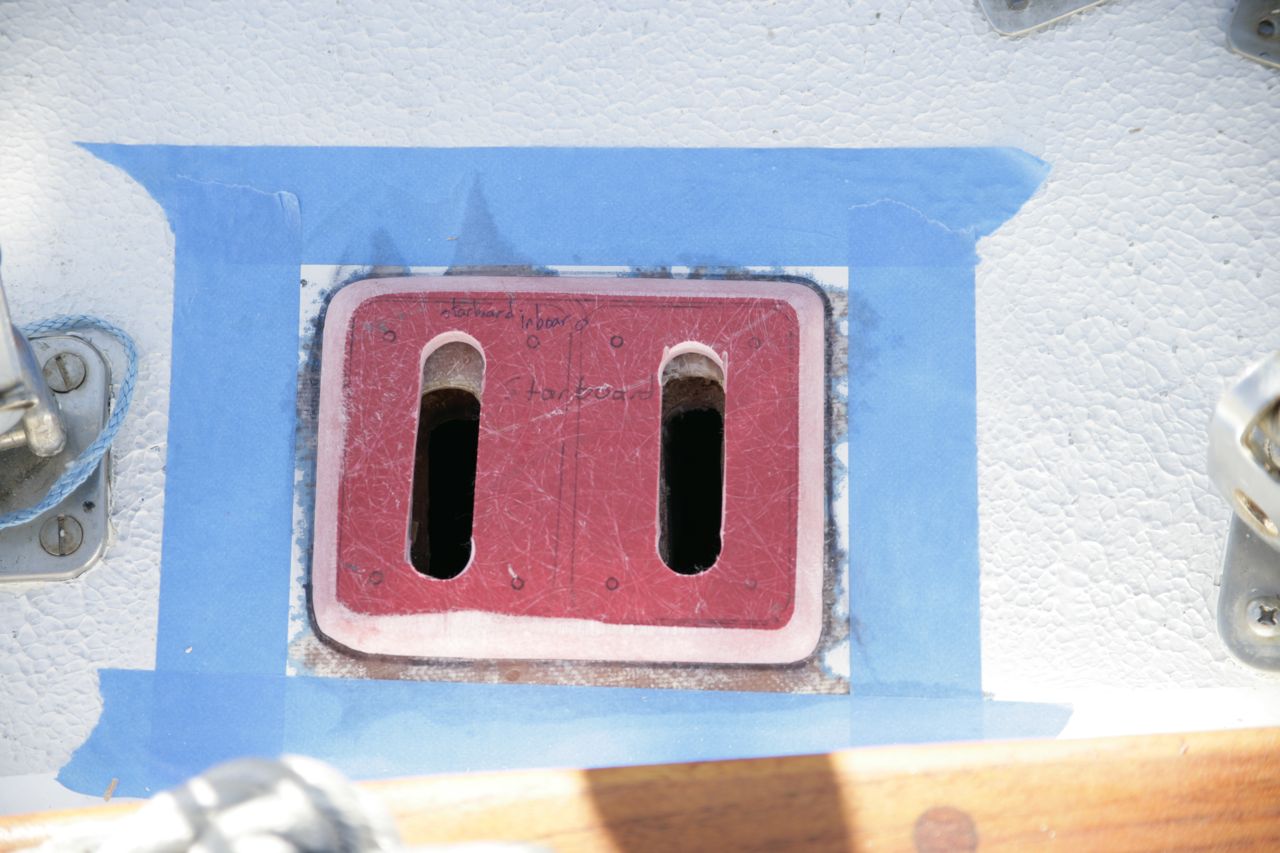
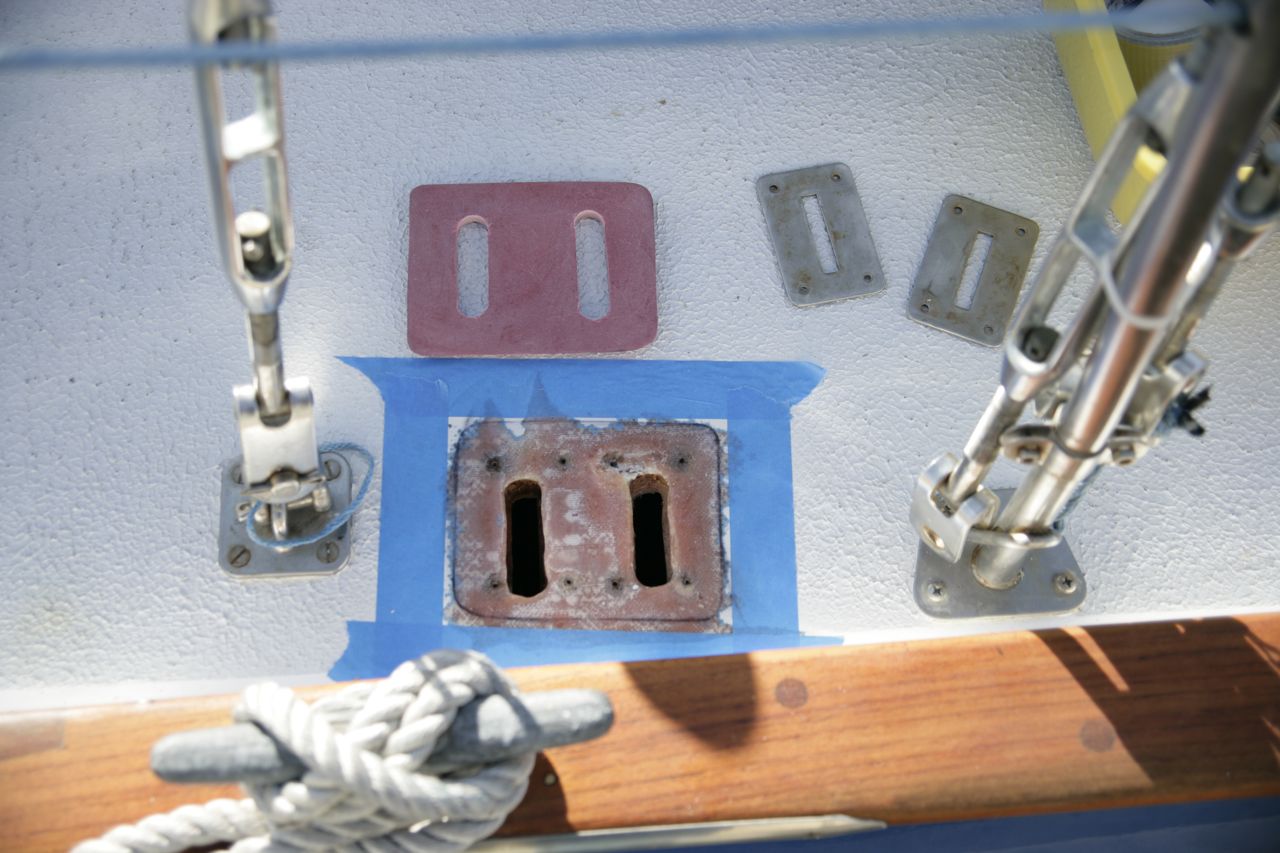
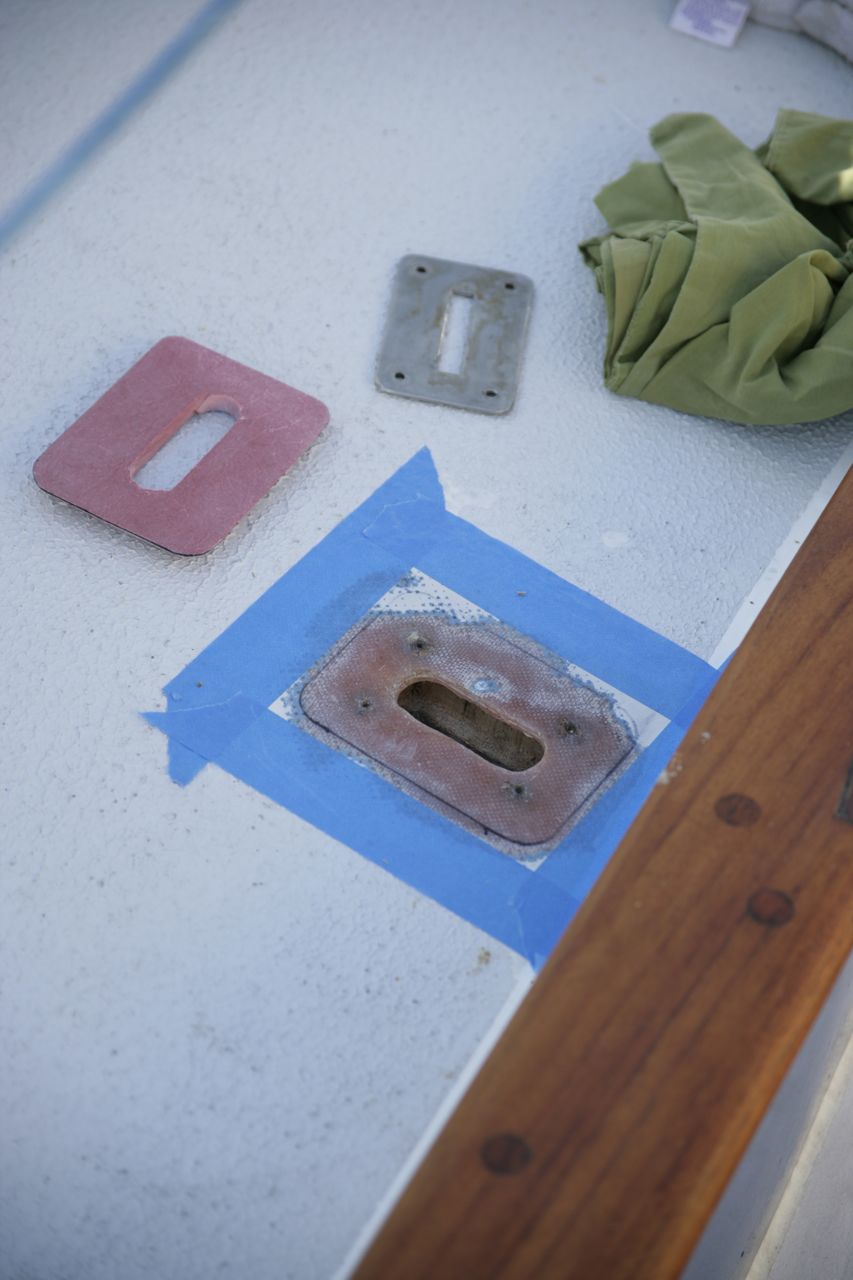
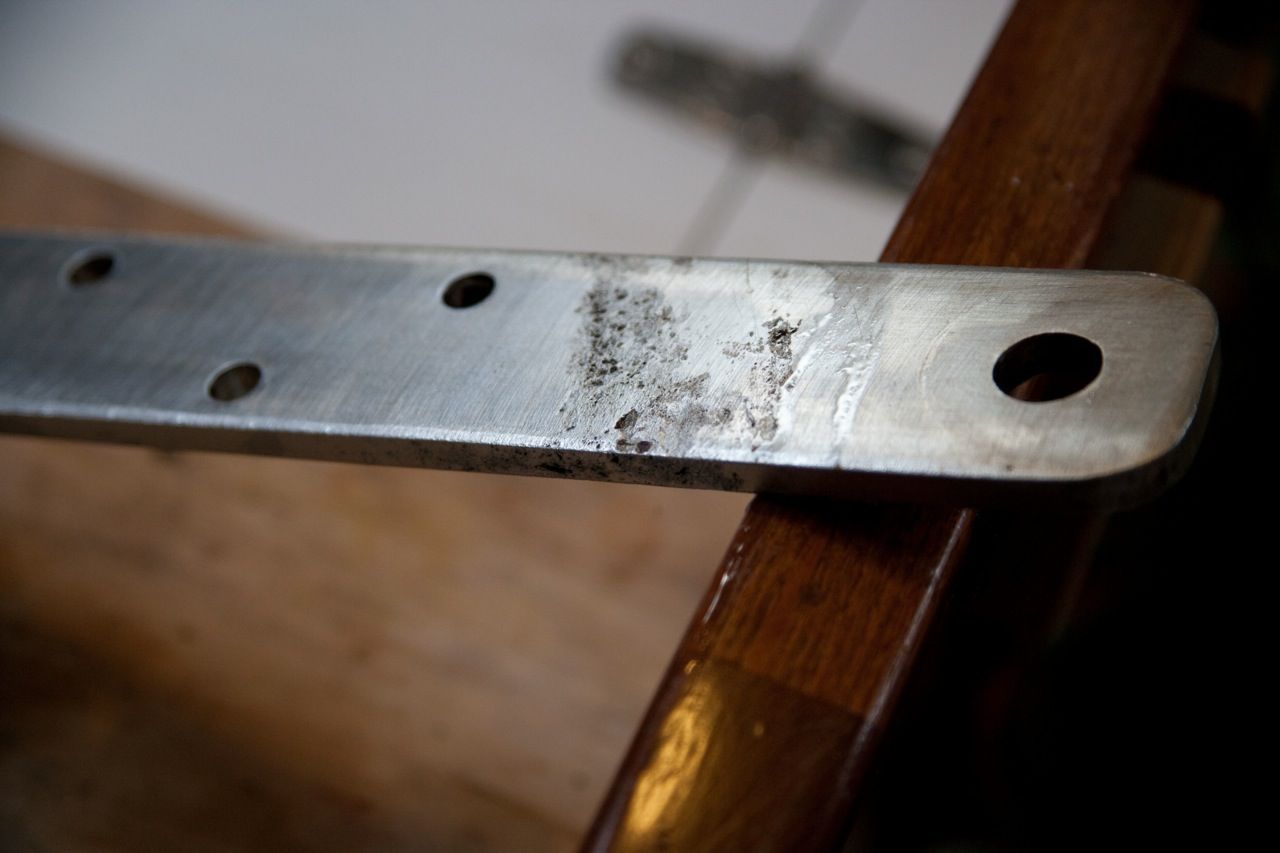
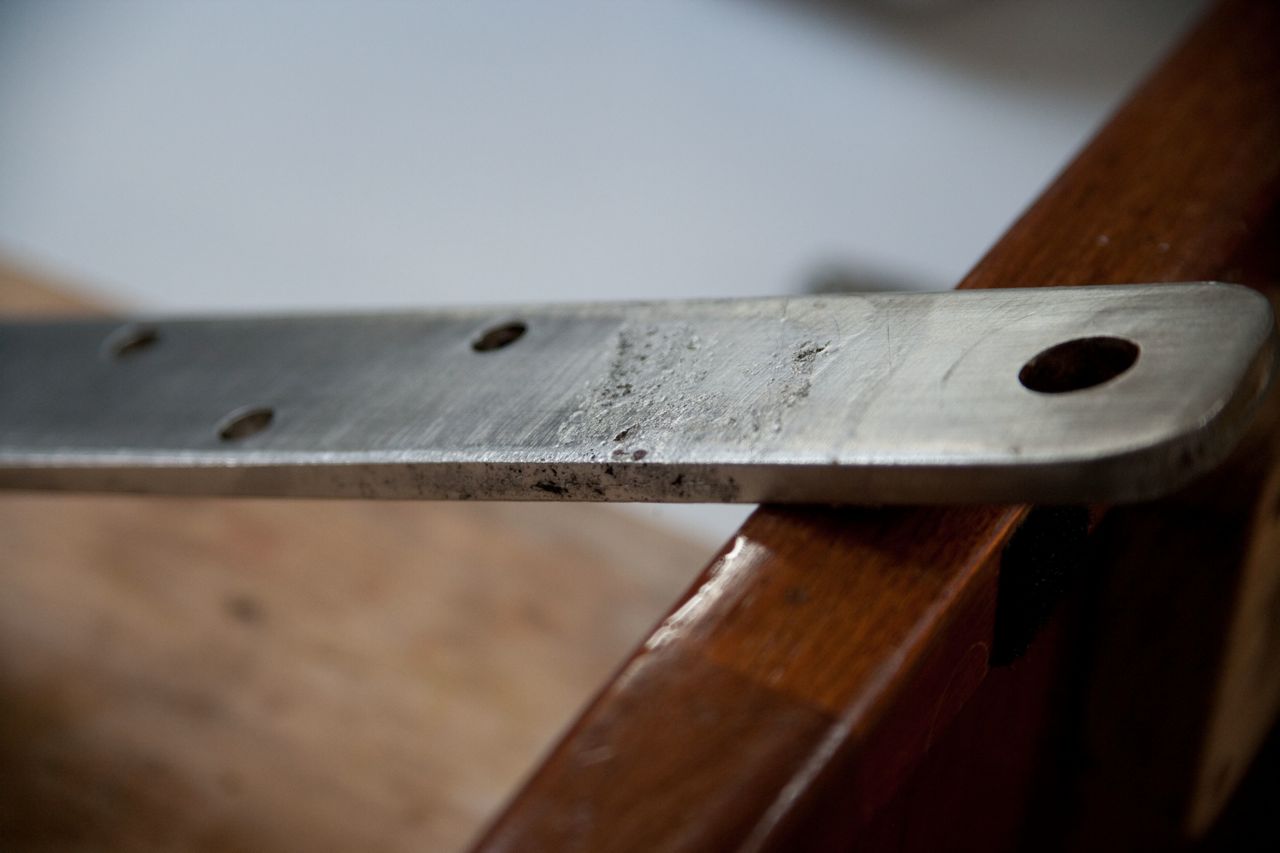
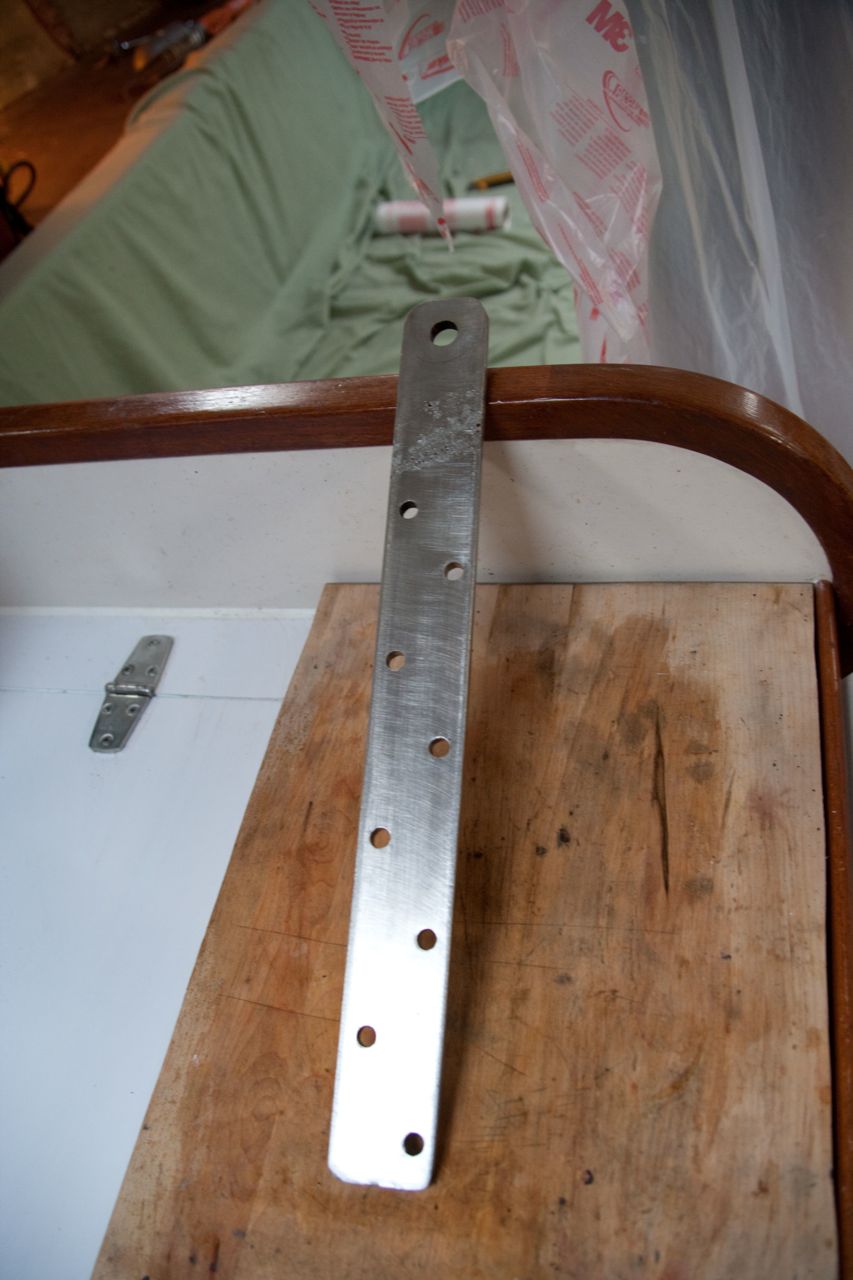
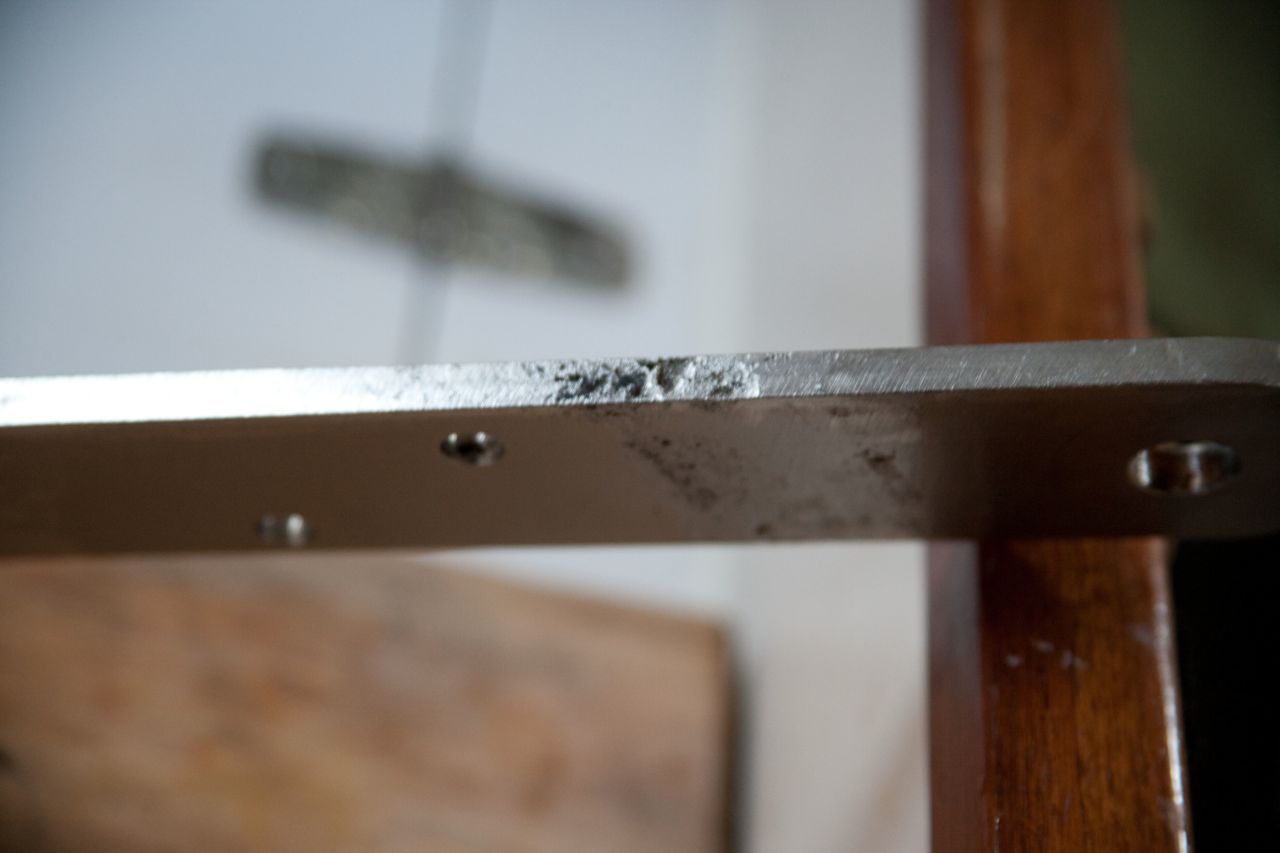
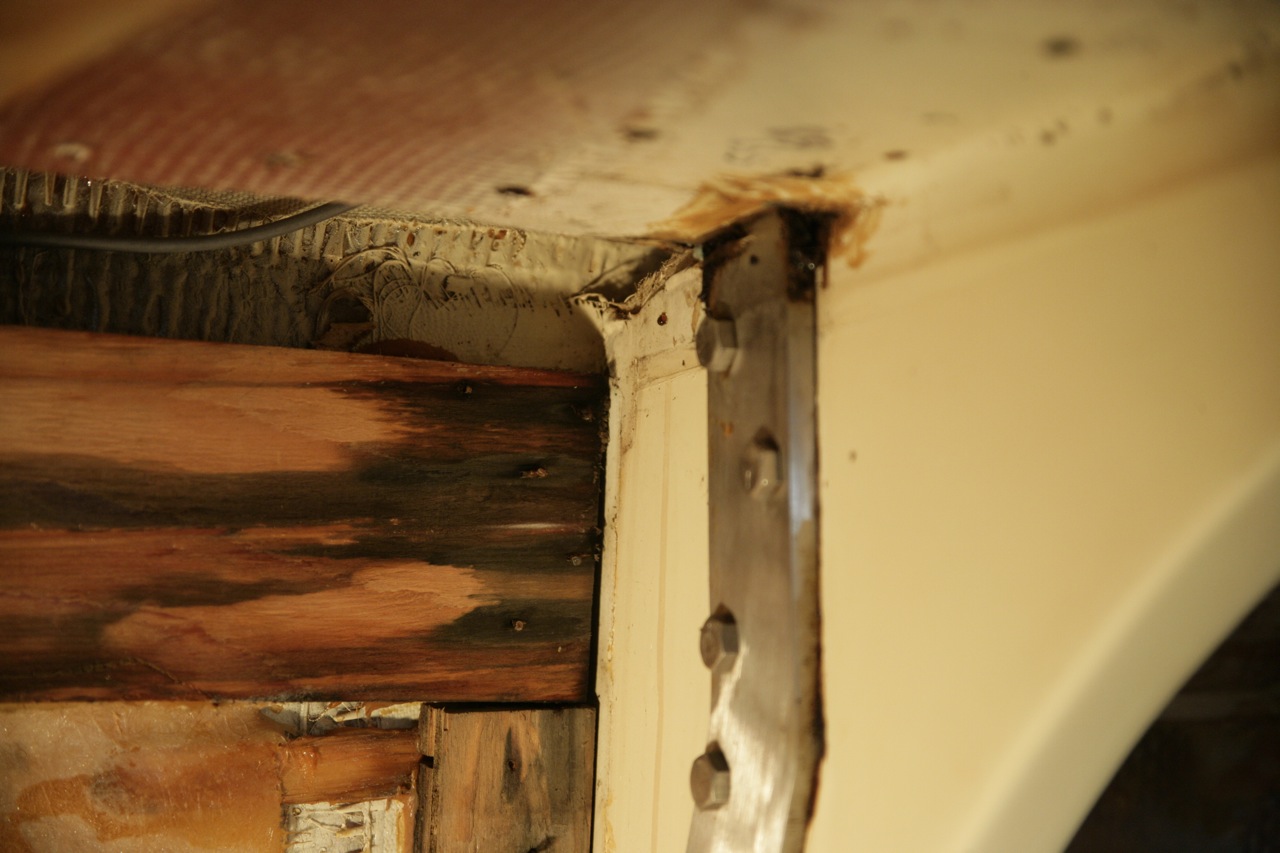
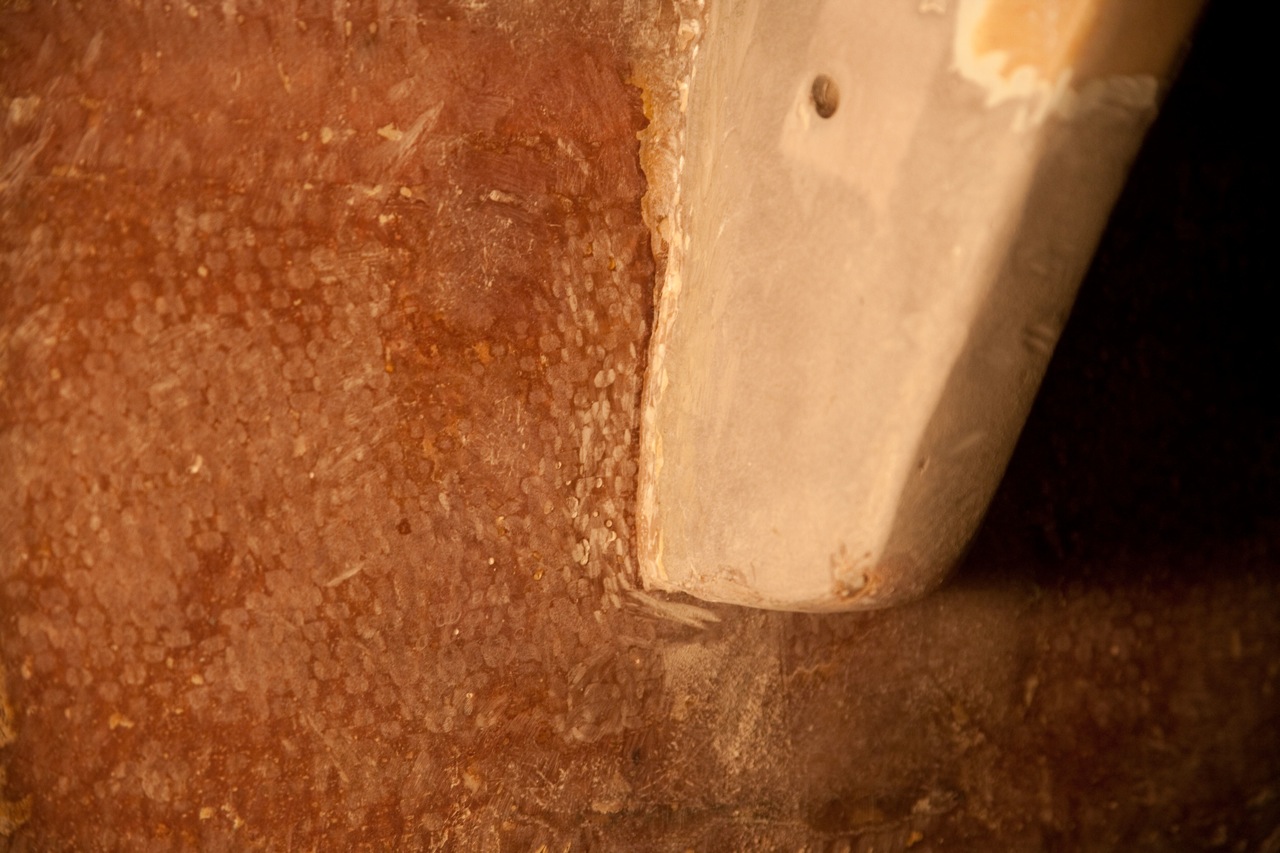
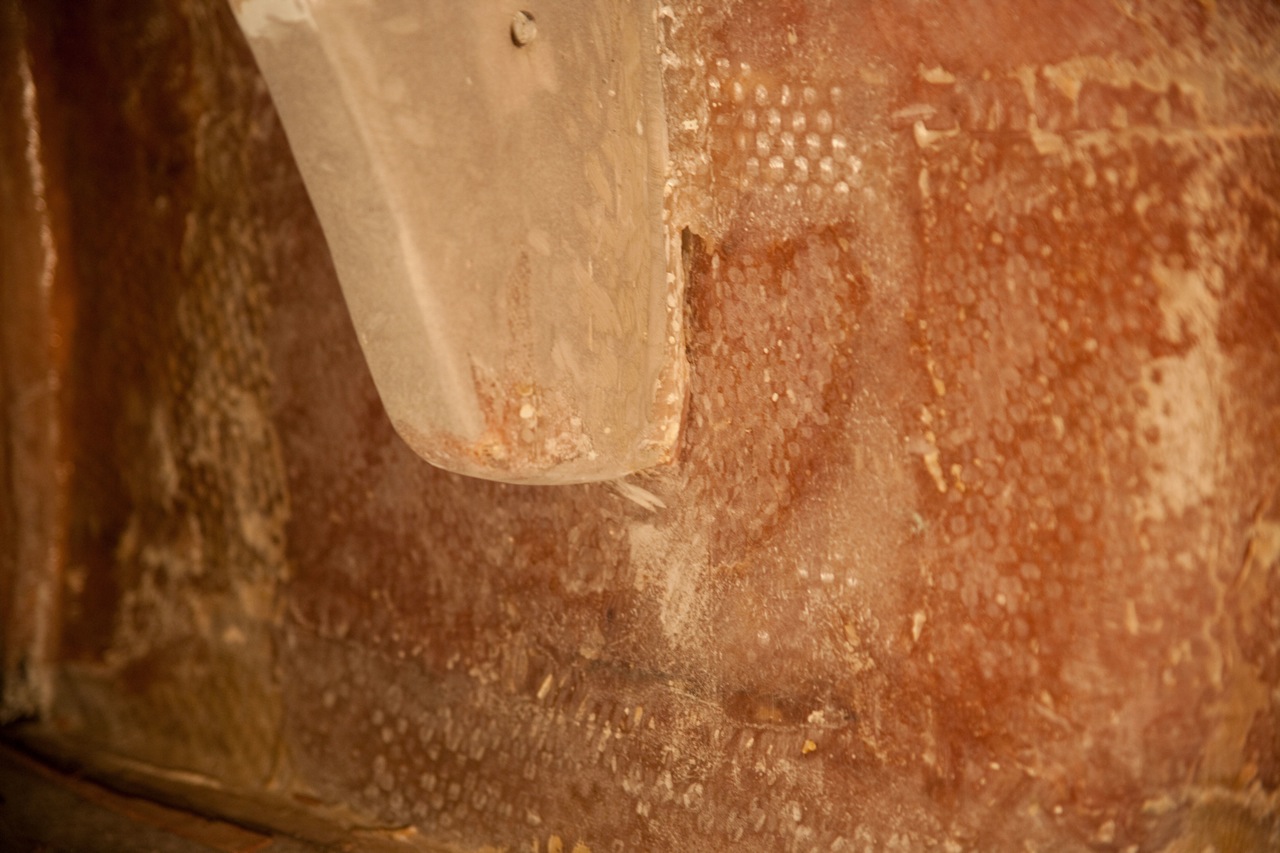
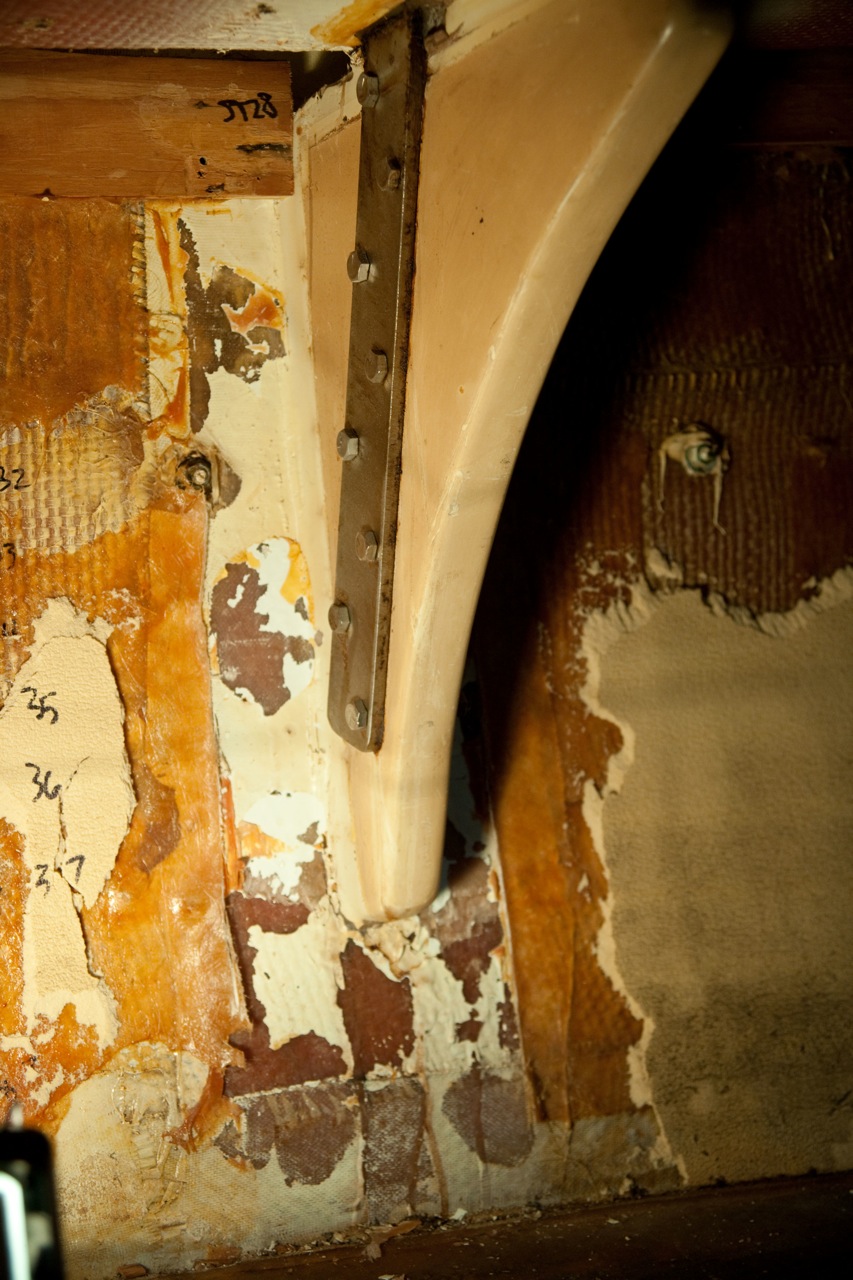
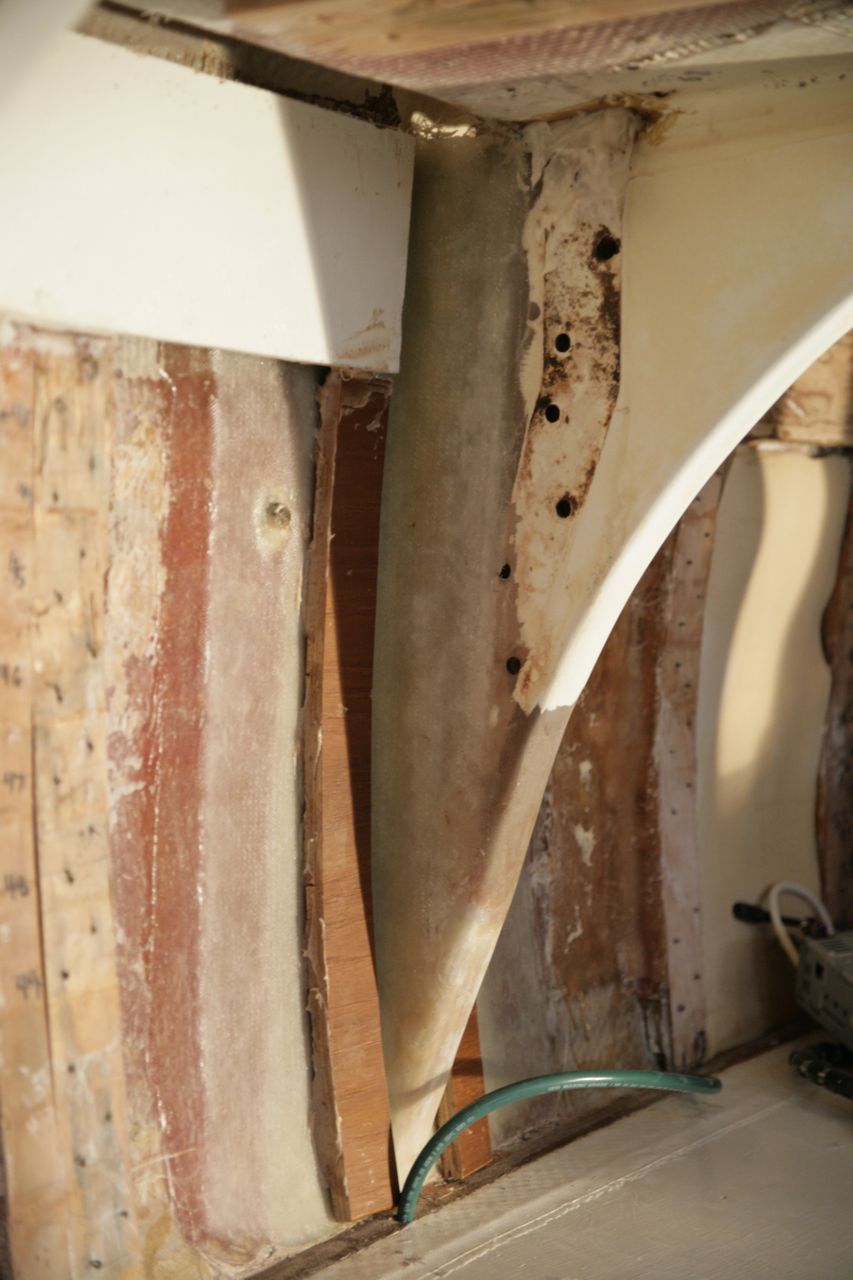
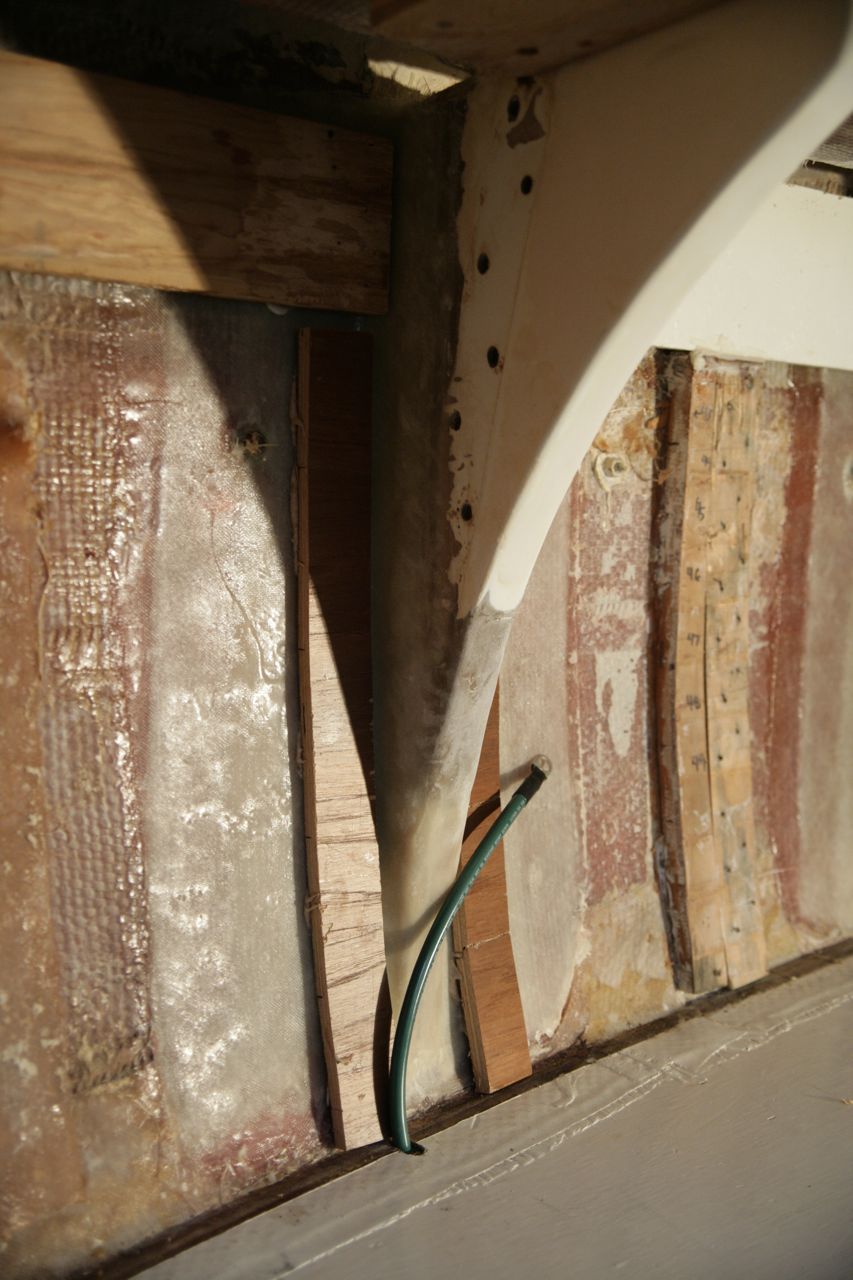
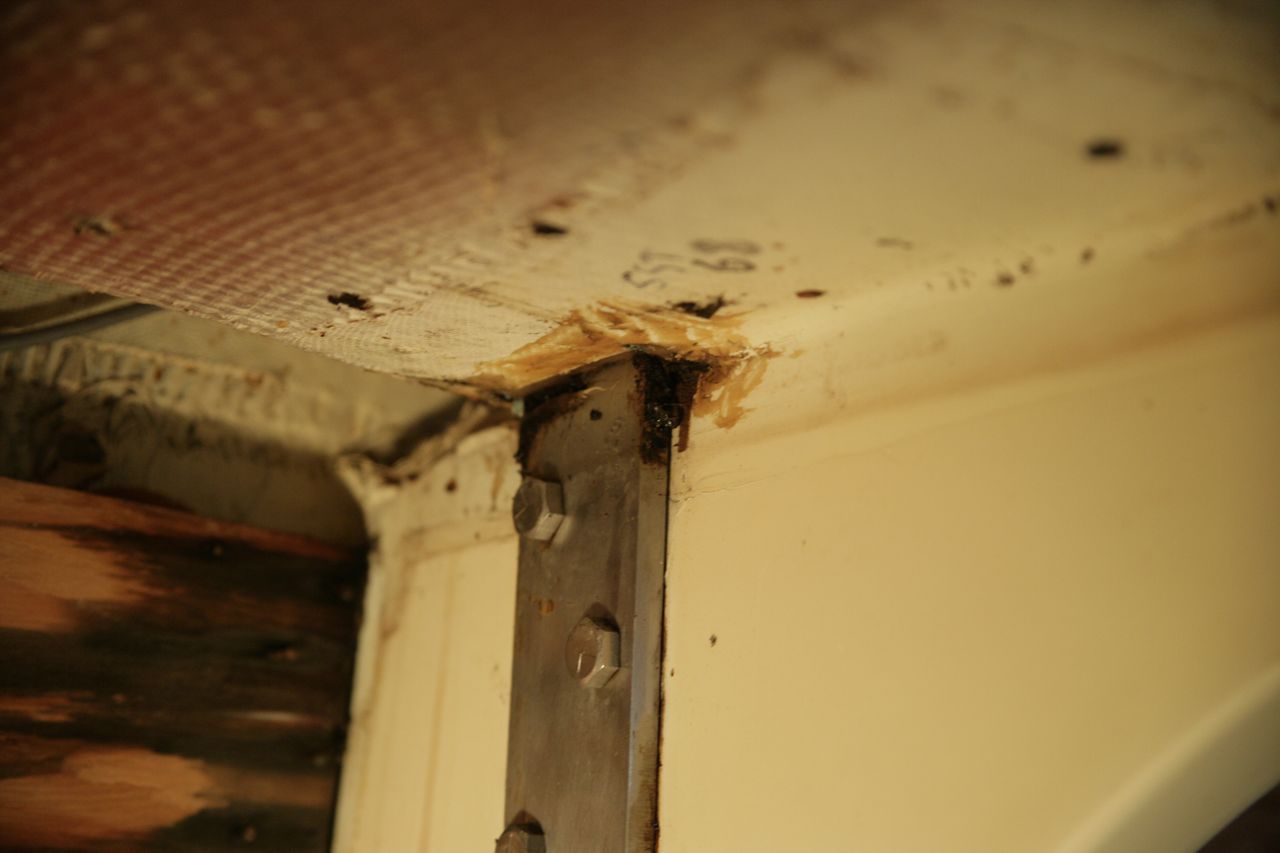
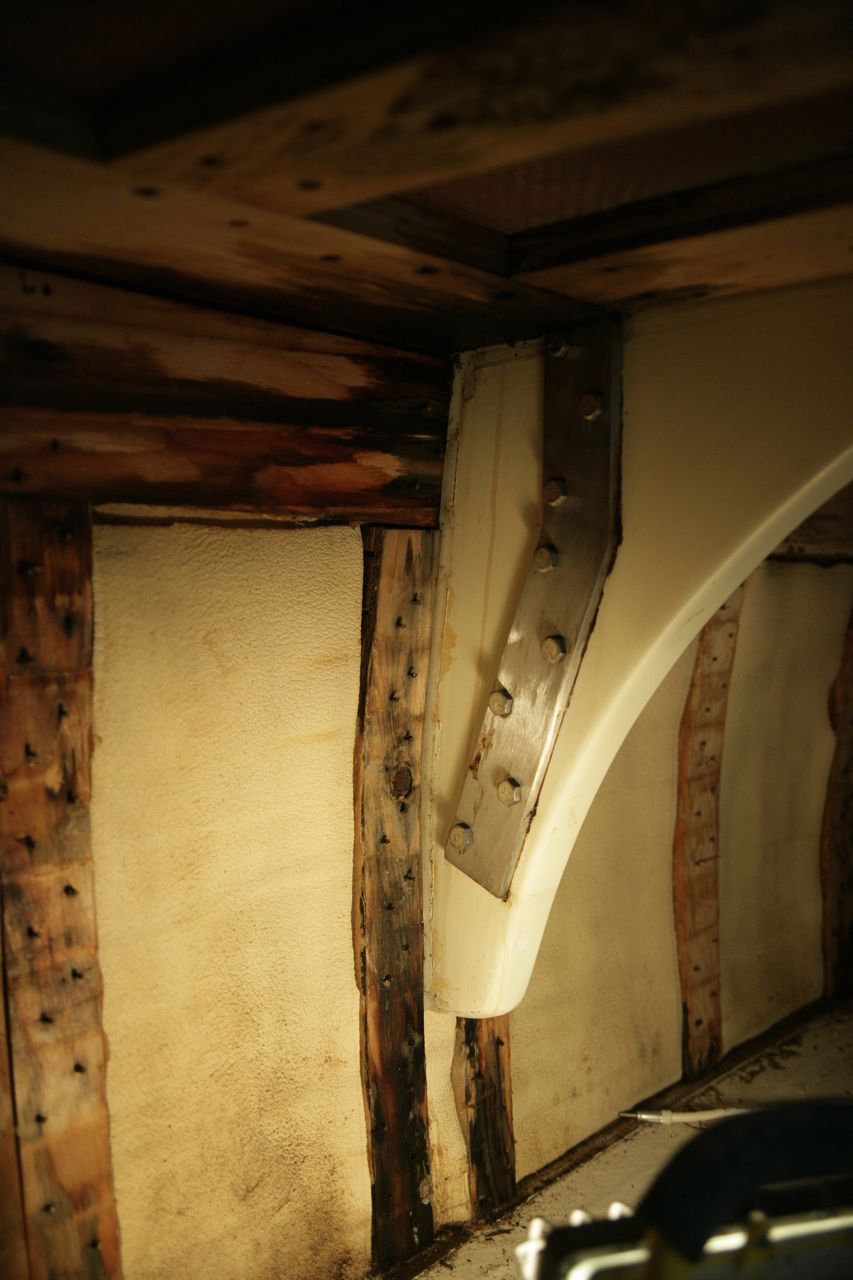
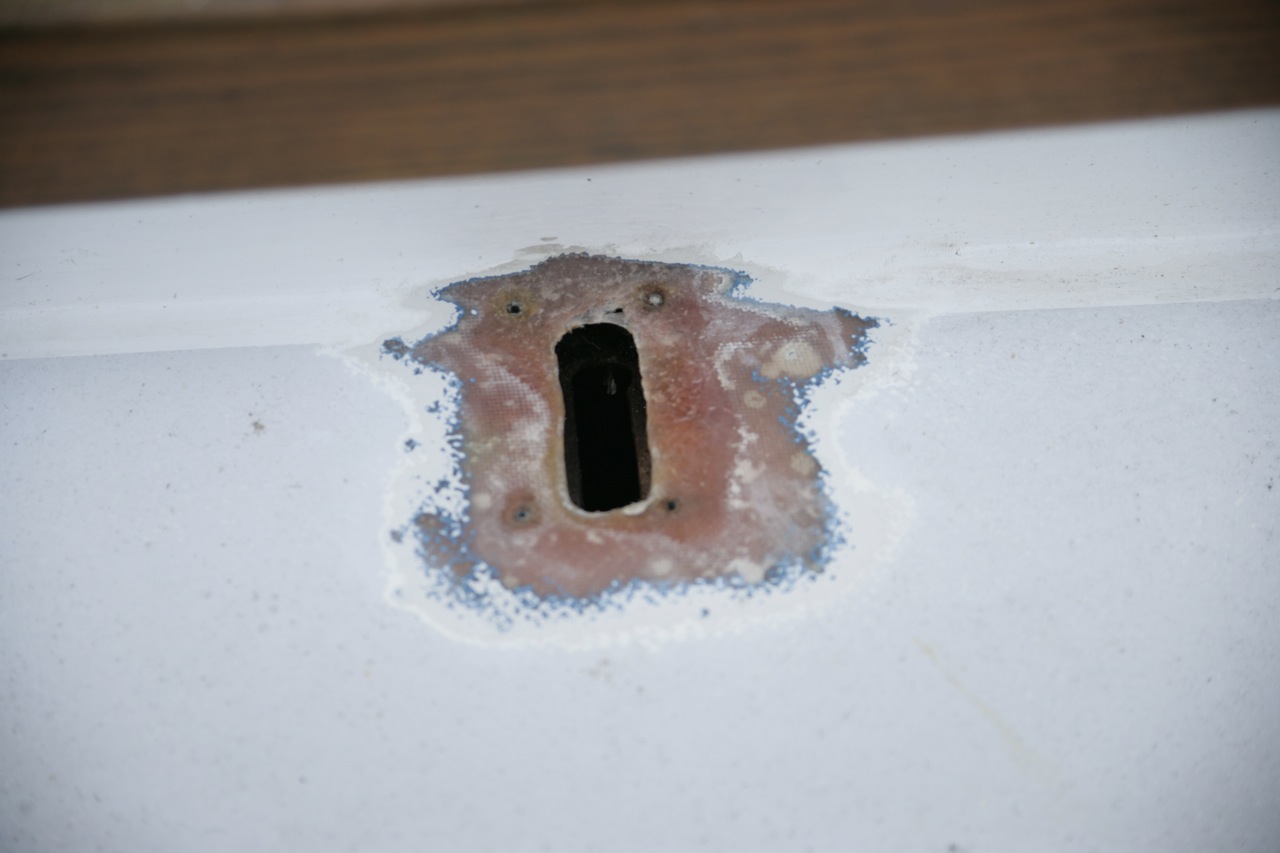
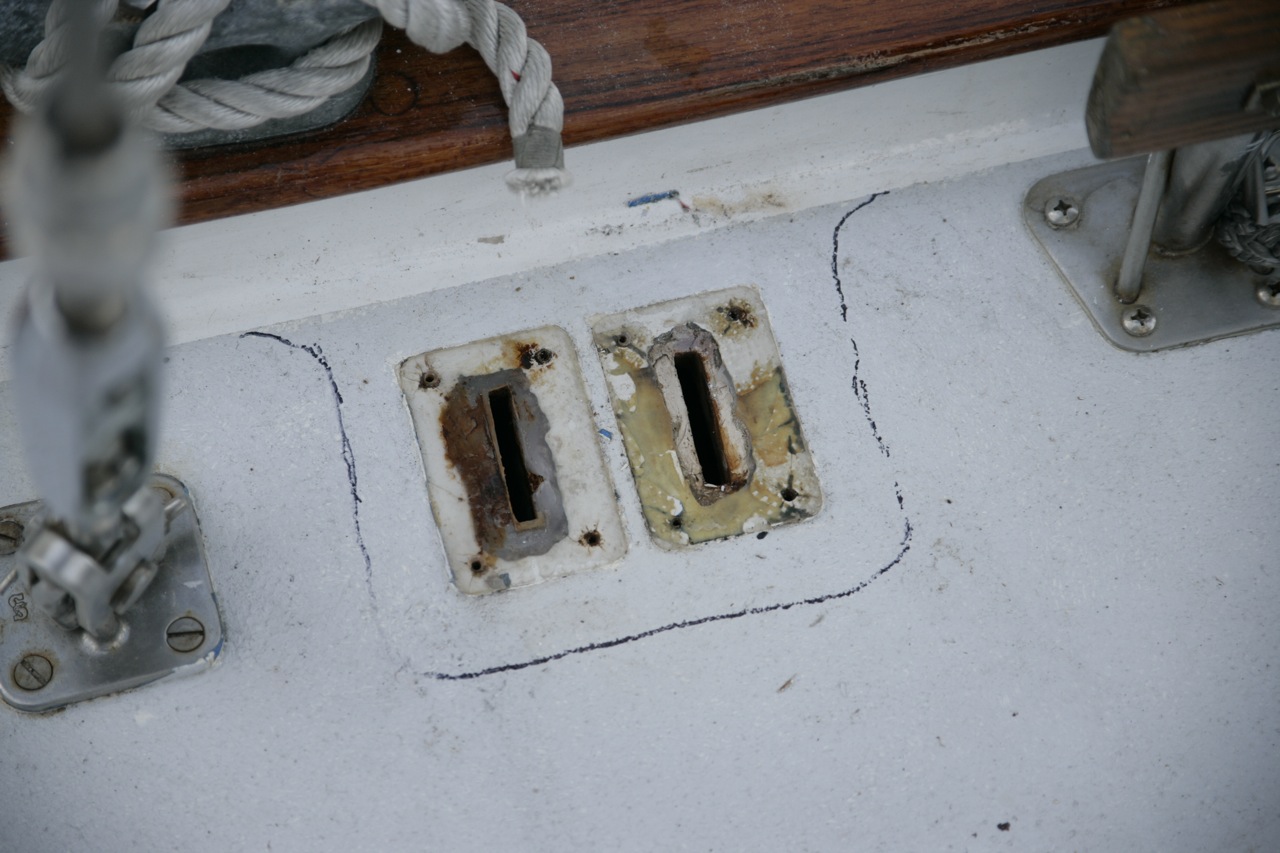
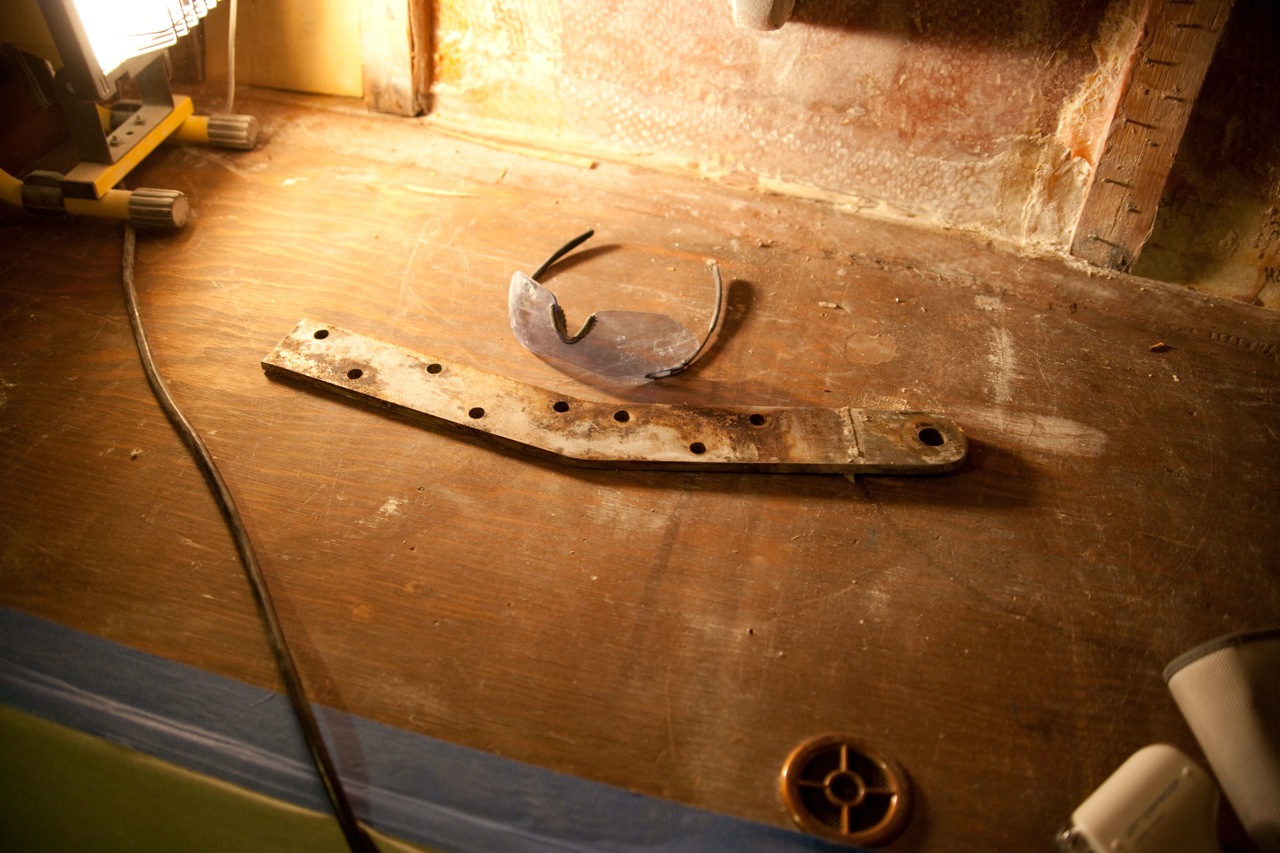
In the process of re-glassing the knees to the hull, we decided that it would be prudent to replace the chainplates as well. Most of the old ones looked okay, though when Jonny cleaned one up really well for inspection there was clear signs of pitting right where the plate passes through the deck (see the pictures). The nature of stainless is that it fails without much more warning that that, and we already had everything apart, and Pete was willing and able to fabricate a new set for me, so it was a no brainer.
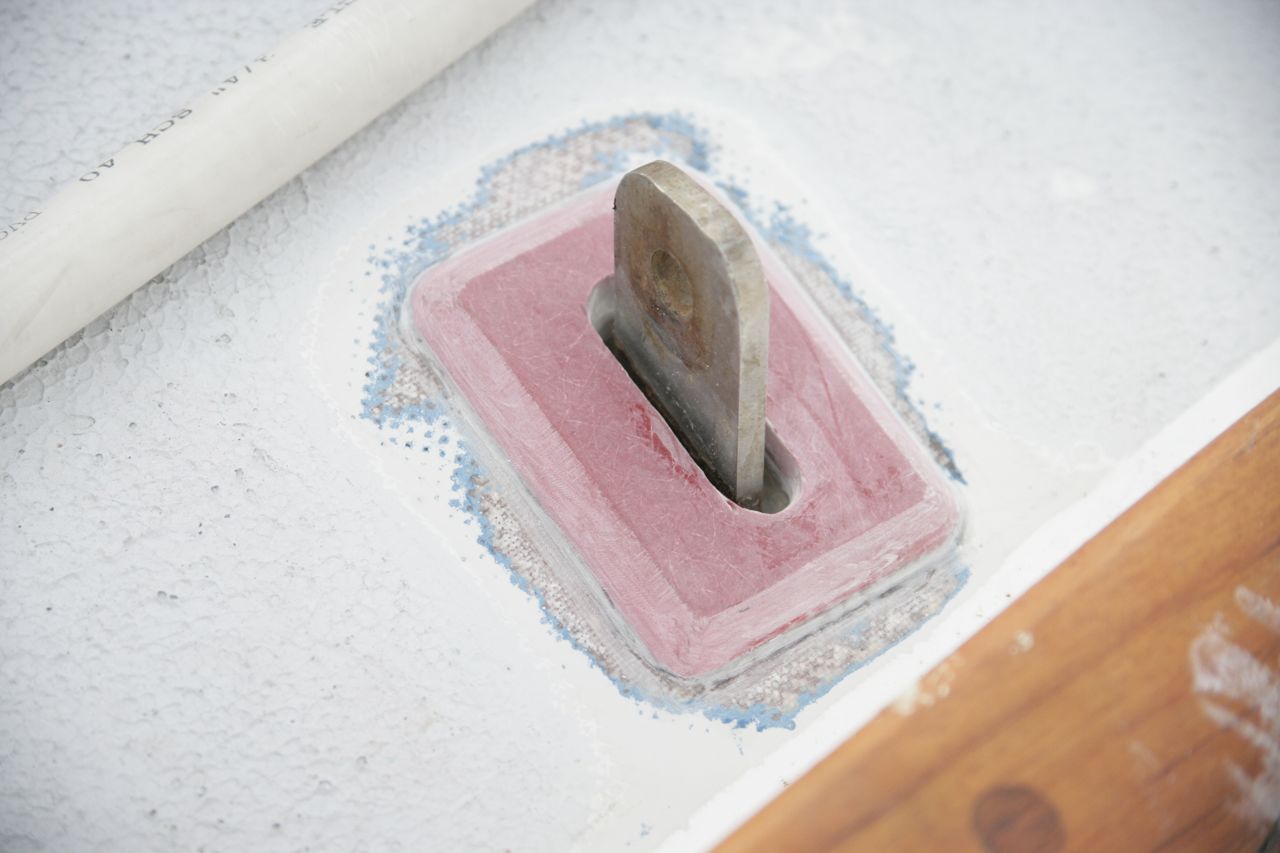
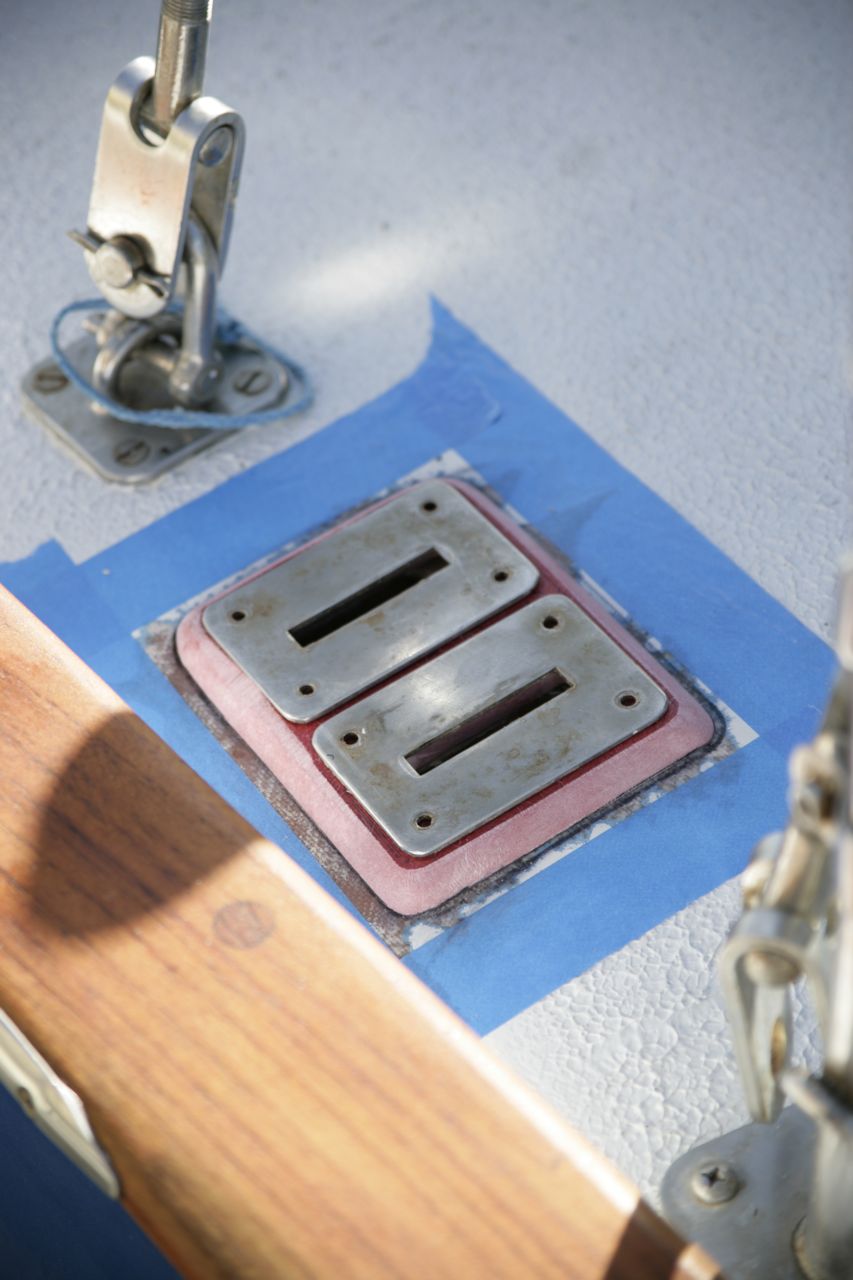
The old plates were 5/16″ thick, the metal yard had 3/8″, so we went up a size. The yard cut the plates to length and Pete drilled the holes and rounded the ends. The metal was mill-finished from the yard, i.e. a roughish matte gray texture, and stainless corrodes where it isn’t polished, so I spent 2/3rds of a day polishing just the upper 4 inches of each plate–the portion that lives through the deck and above deck. If we weren’t two weeks away from departure, I would have done the whole surface, because I finally figured out the fastest way to do the polishing (after a few years and many different stainless polishing project attempts) and goddamn the mirror finish on that stainless is gorgeous. There is an immense satisfaction in taking a gray flat metal and taking it to the point where you can see yourself in the reflection. But there is no functional reason to polish to portion that is below deck–it’s only the portion inside and above deck that is susceptible to the corrosion.
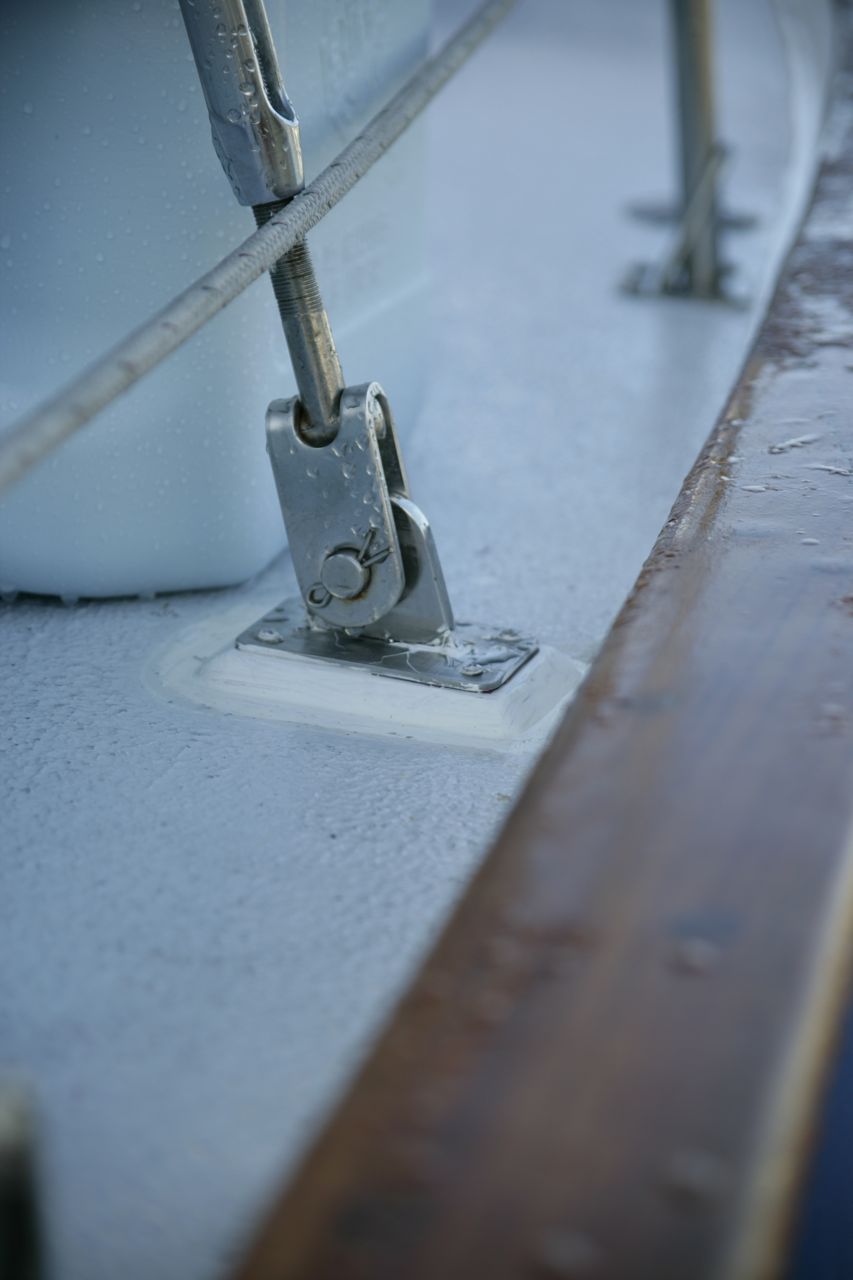
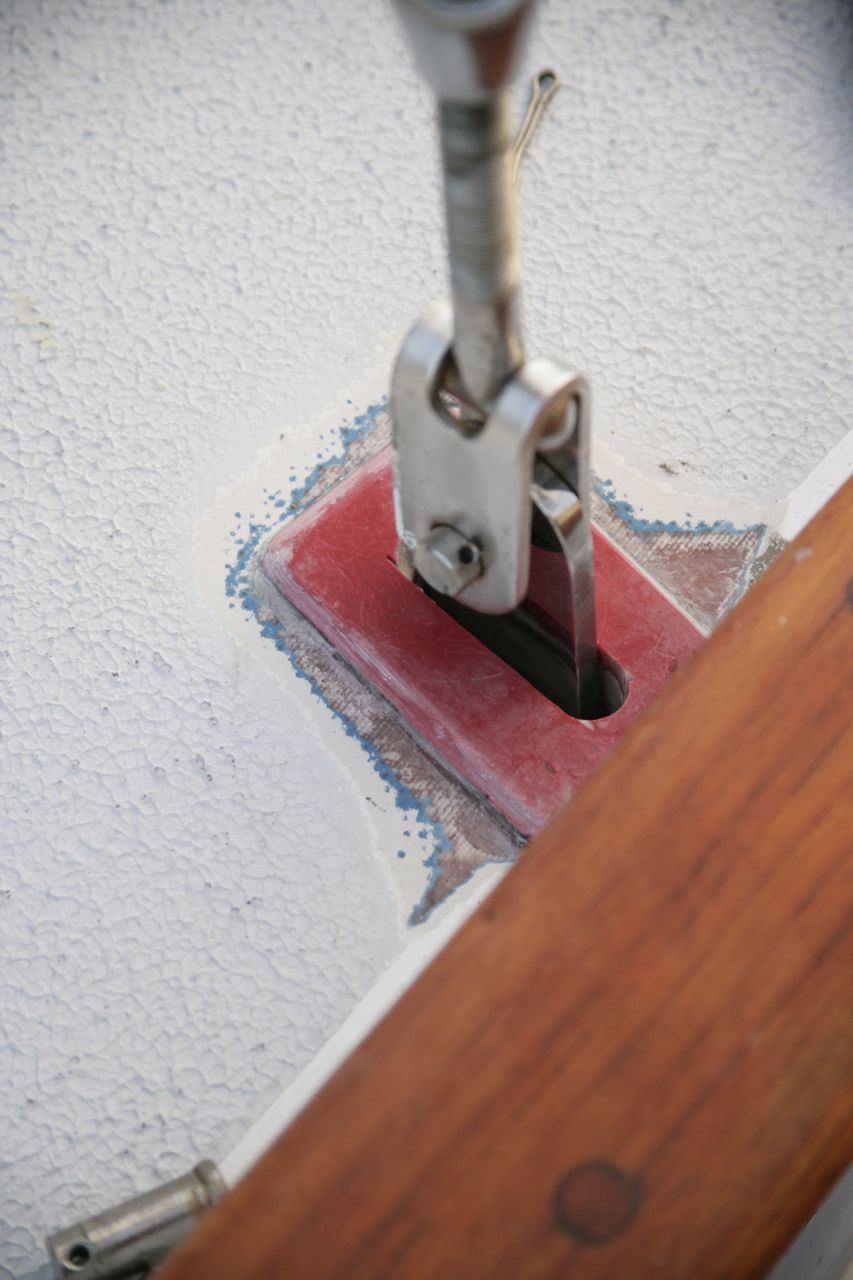
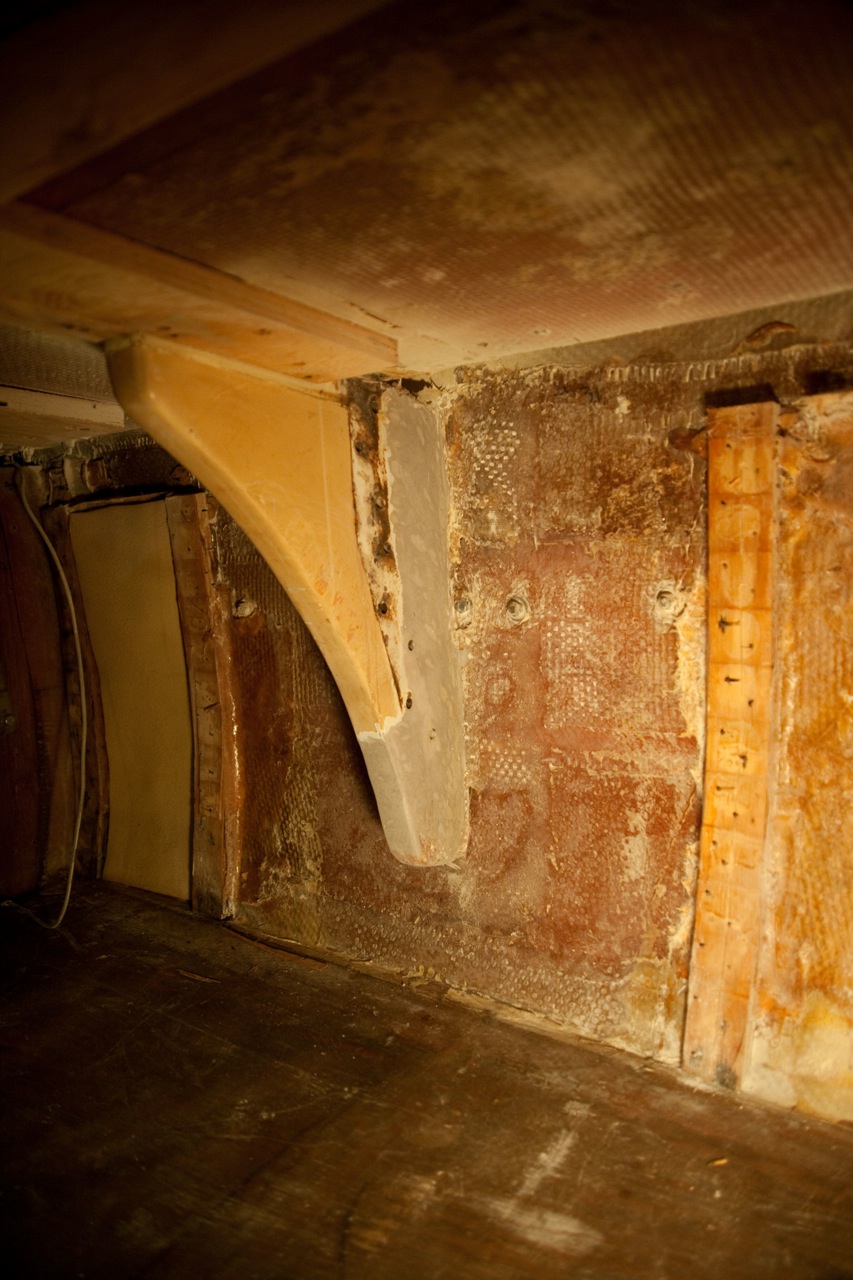
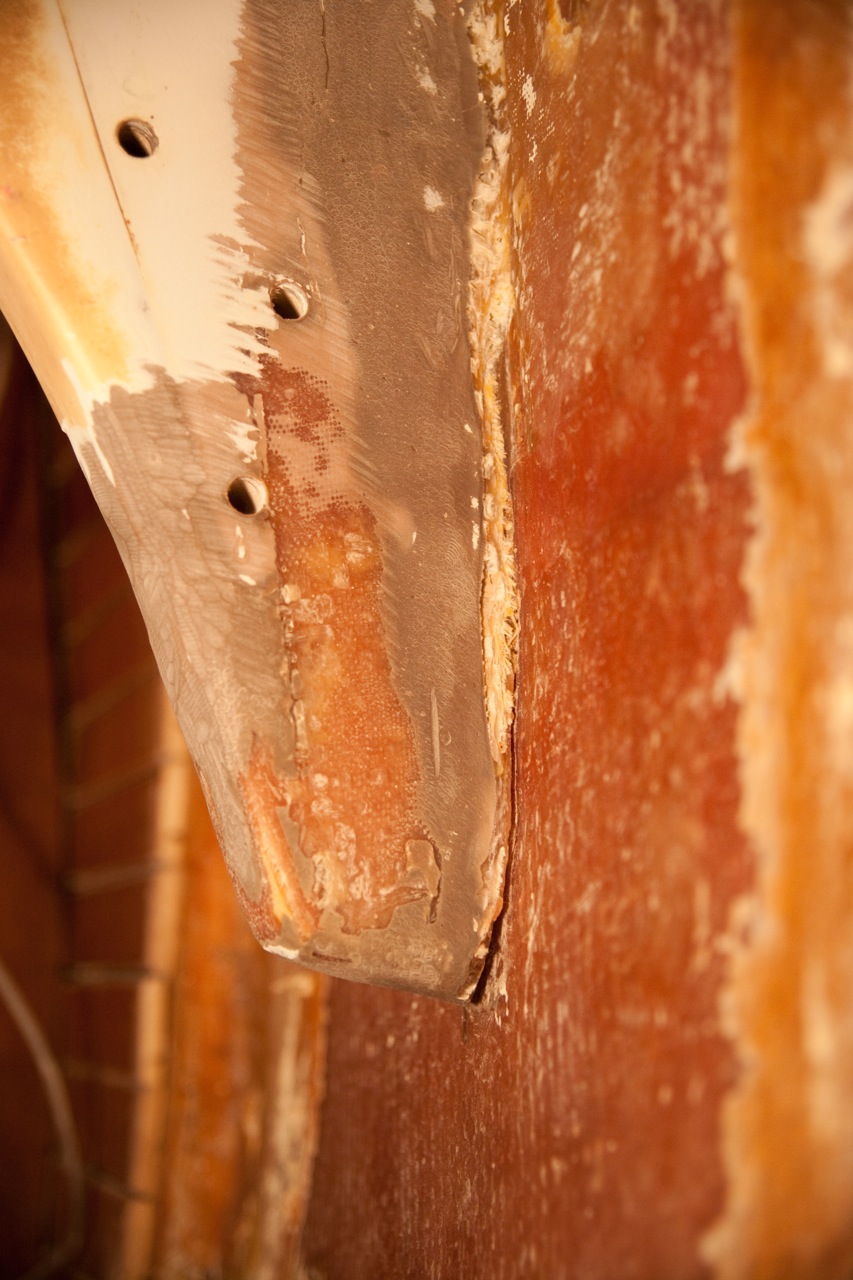
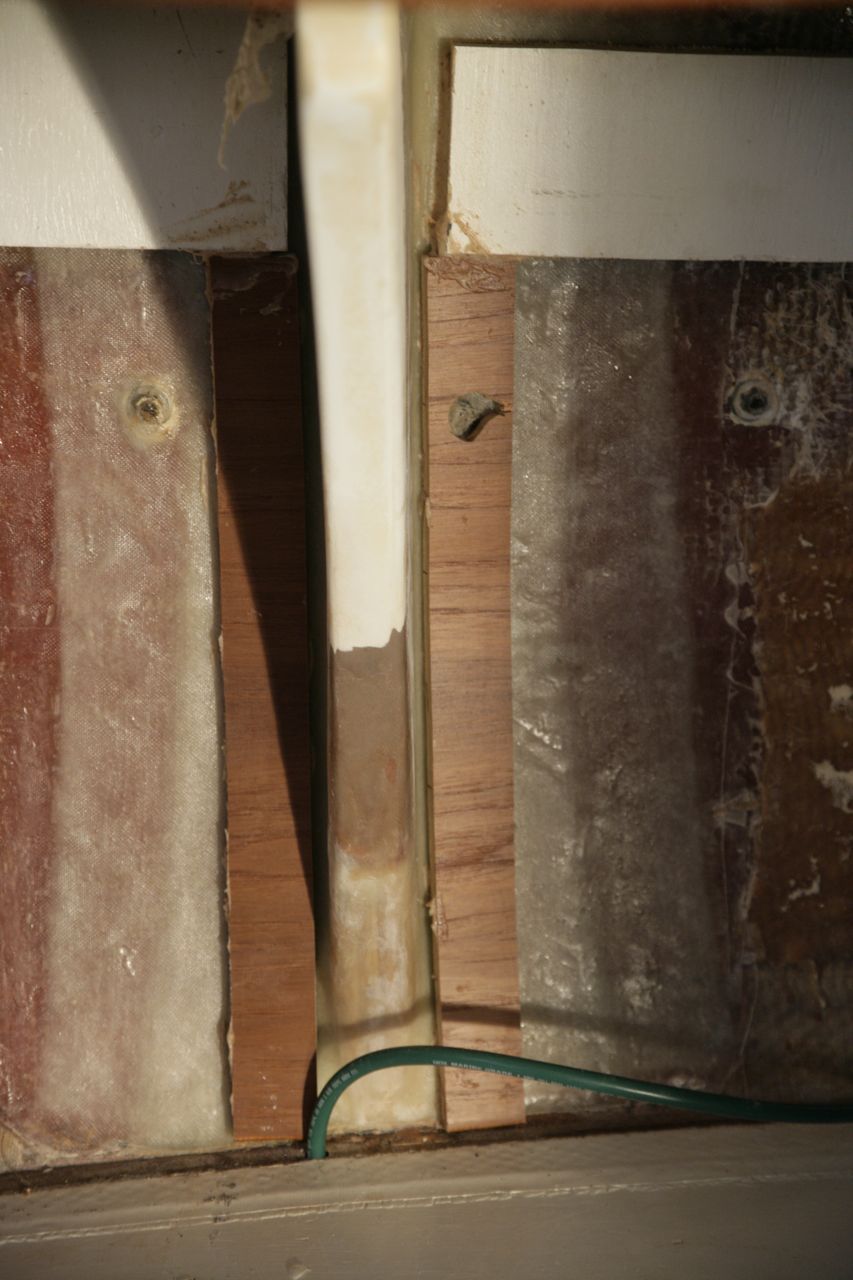
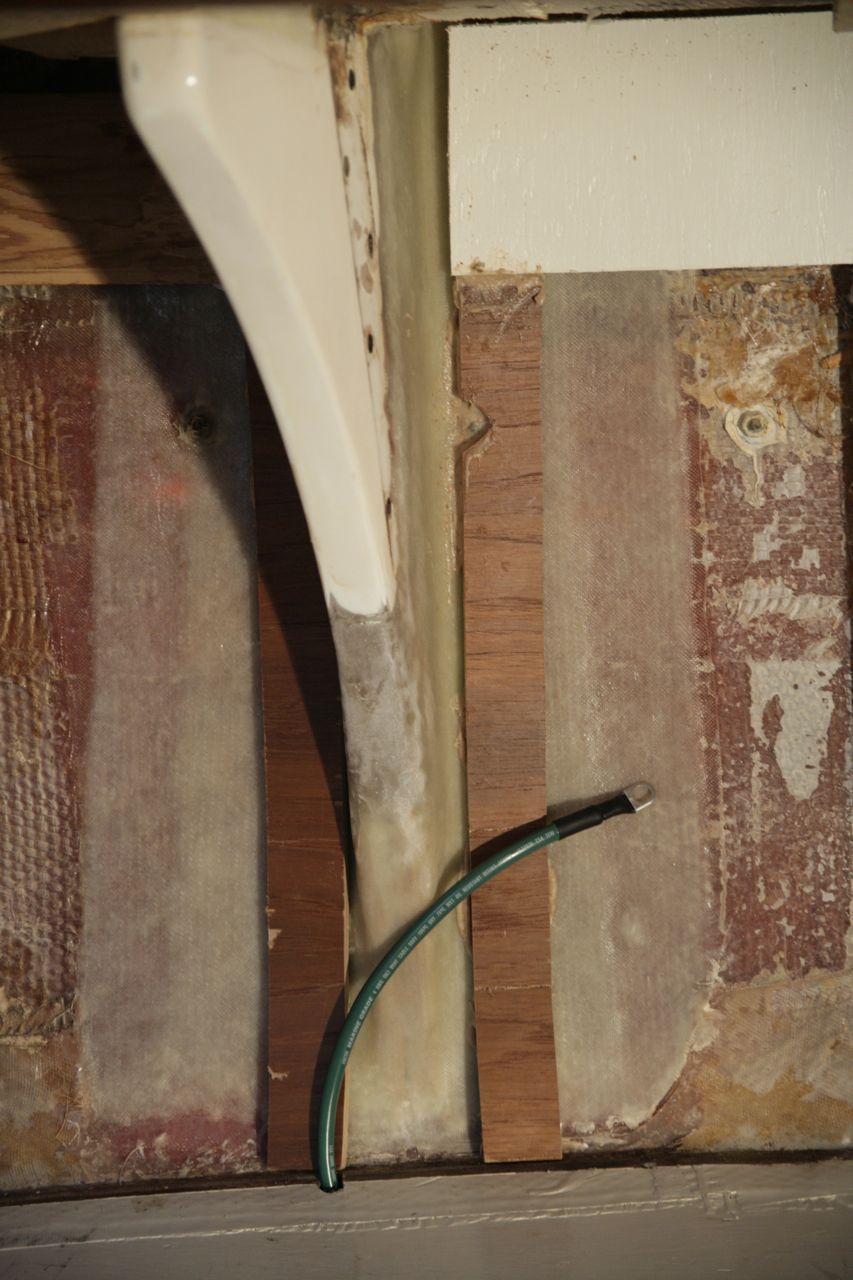
Jim Hassberger from Kanga suggested that we add plinths to the deck, through which the chainplates protrude, in order to prevent the plates from ever sitting in water. At first I didn’t want to do the extra work, but good sense prevailed and we took the extra time to do it. Jon cut rectangles from a leftover piece of 3/8″ thick FRP (pre-made sheet of fiberglass) from McMaster-Carr that we had used in the construction of the lazarette and propane locker lids. He ground a bevel into each side, then I cut an overlarge slot down through the center to admit the plates. I temporarily mounted the chainplates (two bolts each loosely connected), then marked the position of the plinths. Then I removed the chainplates and glassed the plinths to the deck with slightly thickened epoxy (after having sanded down the area under them to bare glass).
While epoxying the plinths to the deck, I filled the voided core area underneath them (from which I had removed the balsa) with thickened epoxy as well. I used a putty knife and my fingers to jam the thick epoxy in the gaps, and roughly shaped the slot with my finger. After it cured I came back with the dremel and cleaned up the slot. Now, if any water penetrates the sealant around the chainplate, it will enter the ceiling of the boat (and be visible) rather than rotting out the core of the deck, to which it has no access.
The plinths didn’t end up adding that much time and effort, and didn’t cost anything since we already had the extra fiberglass plates sitting around, so I’m glad we did it.
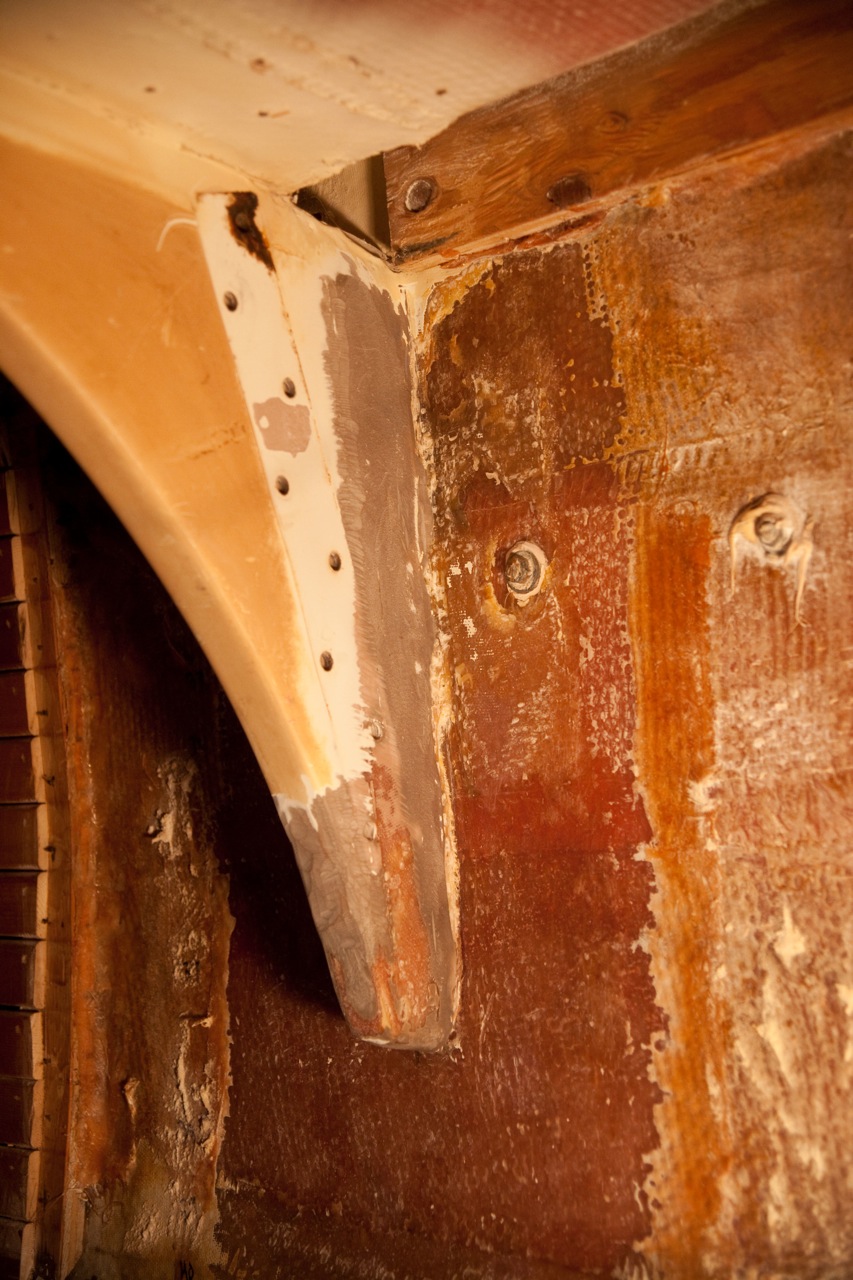
I used new bolts/nuts/lockwashers on the chainplates, stainless of course, and bedded them onto the side of the knees with a light layer of silicon to prevent water from wicking into that joint to corrode them (Pete’s suggestion).


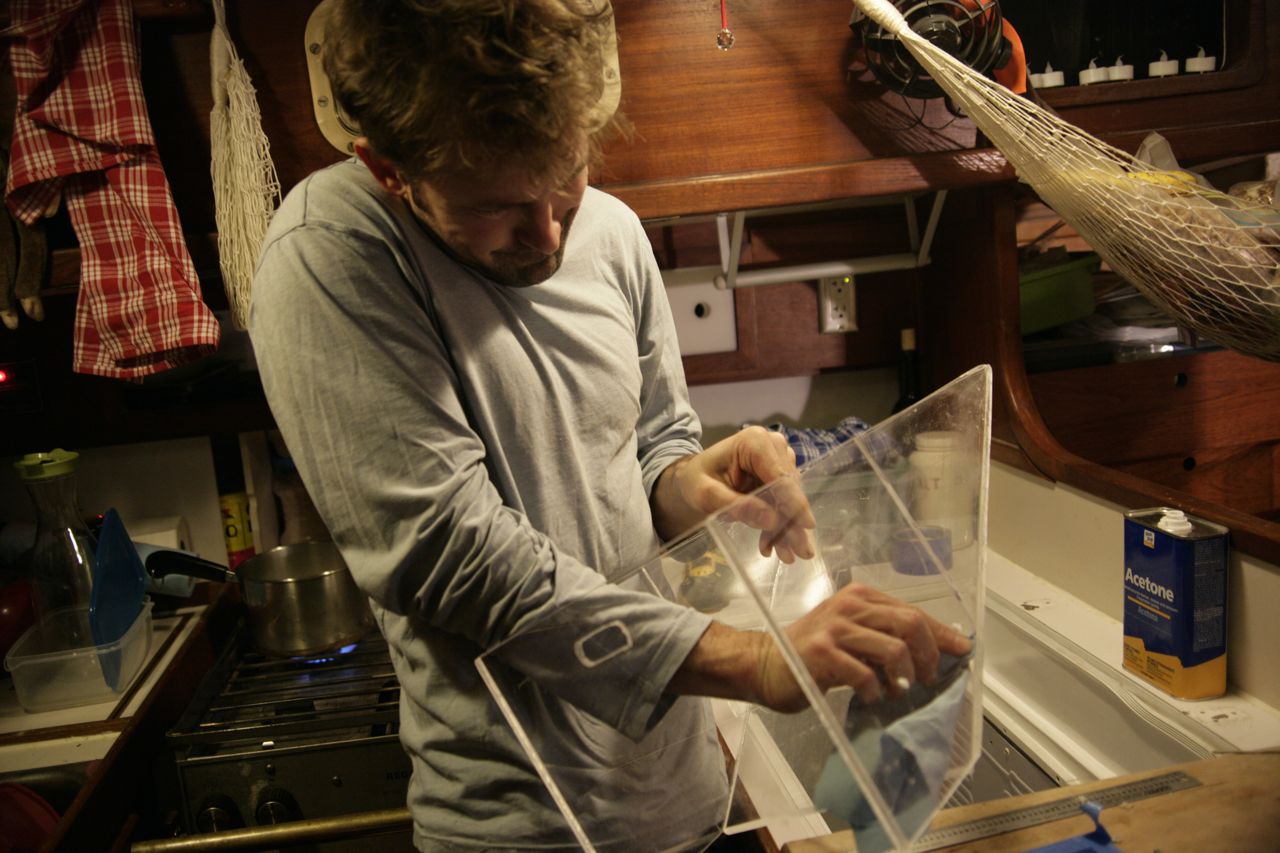
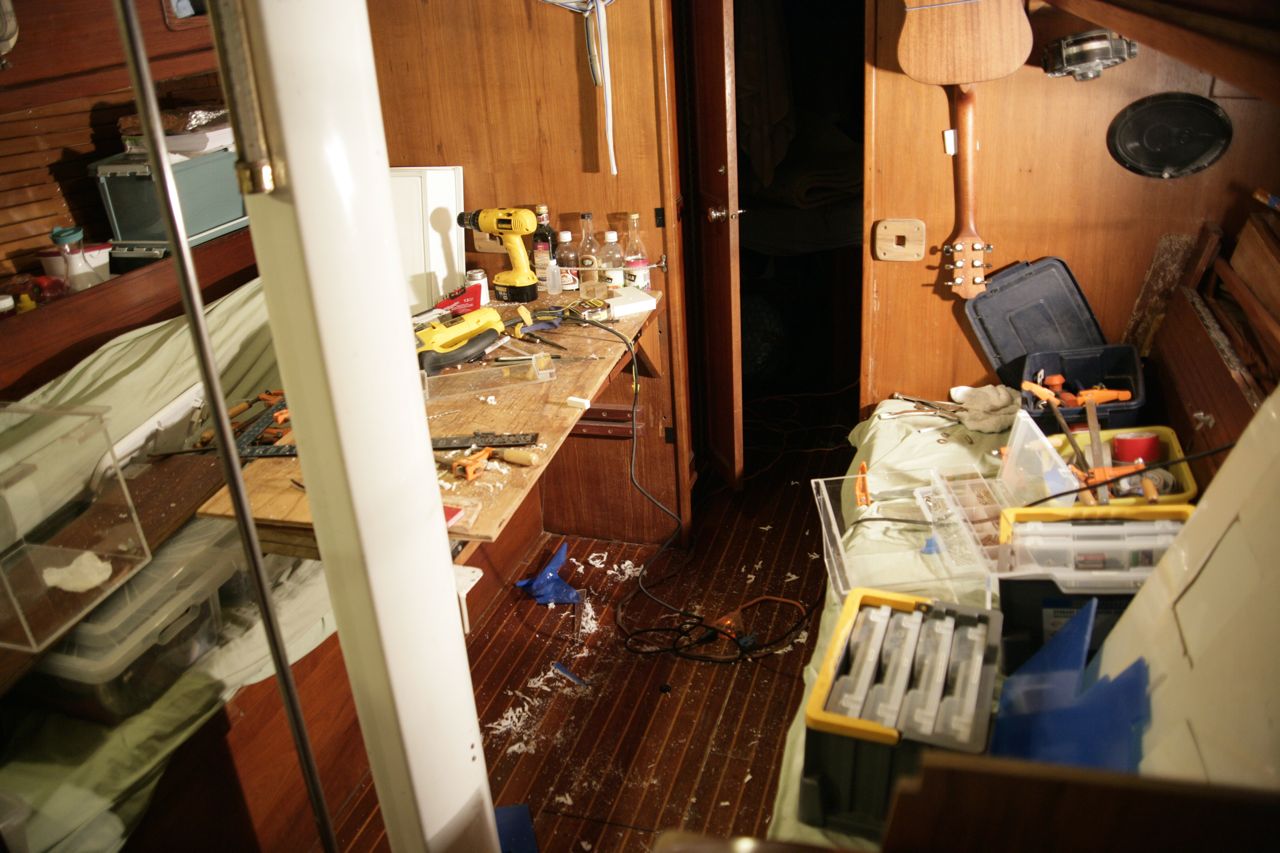
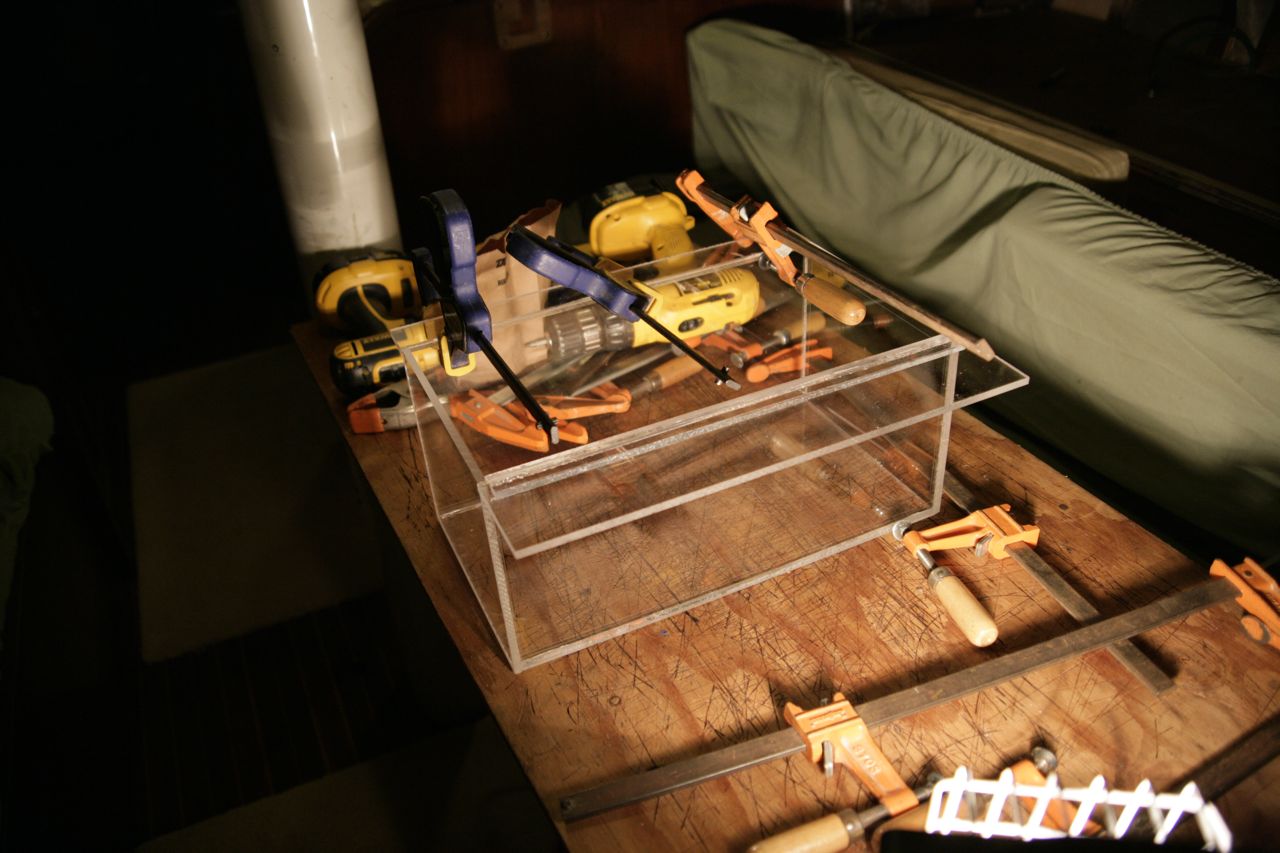
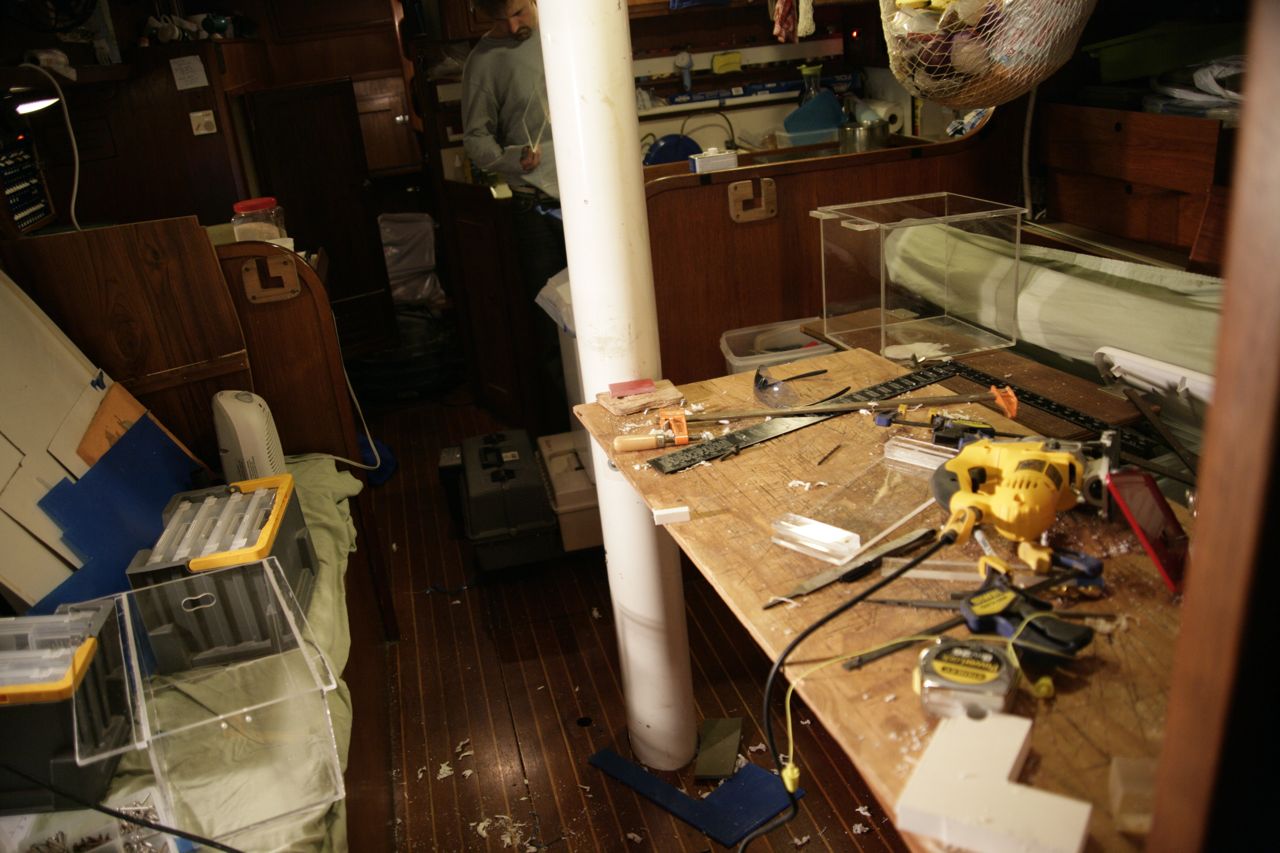
It quickly became clear that a wide open, deep icebox is extremely difficult to use efficiently–you spend all of your time rummaging through a stack of food, or have to remove everything to get what you want, or discover that containers have tipped over and spilled their contents.
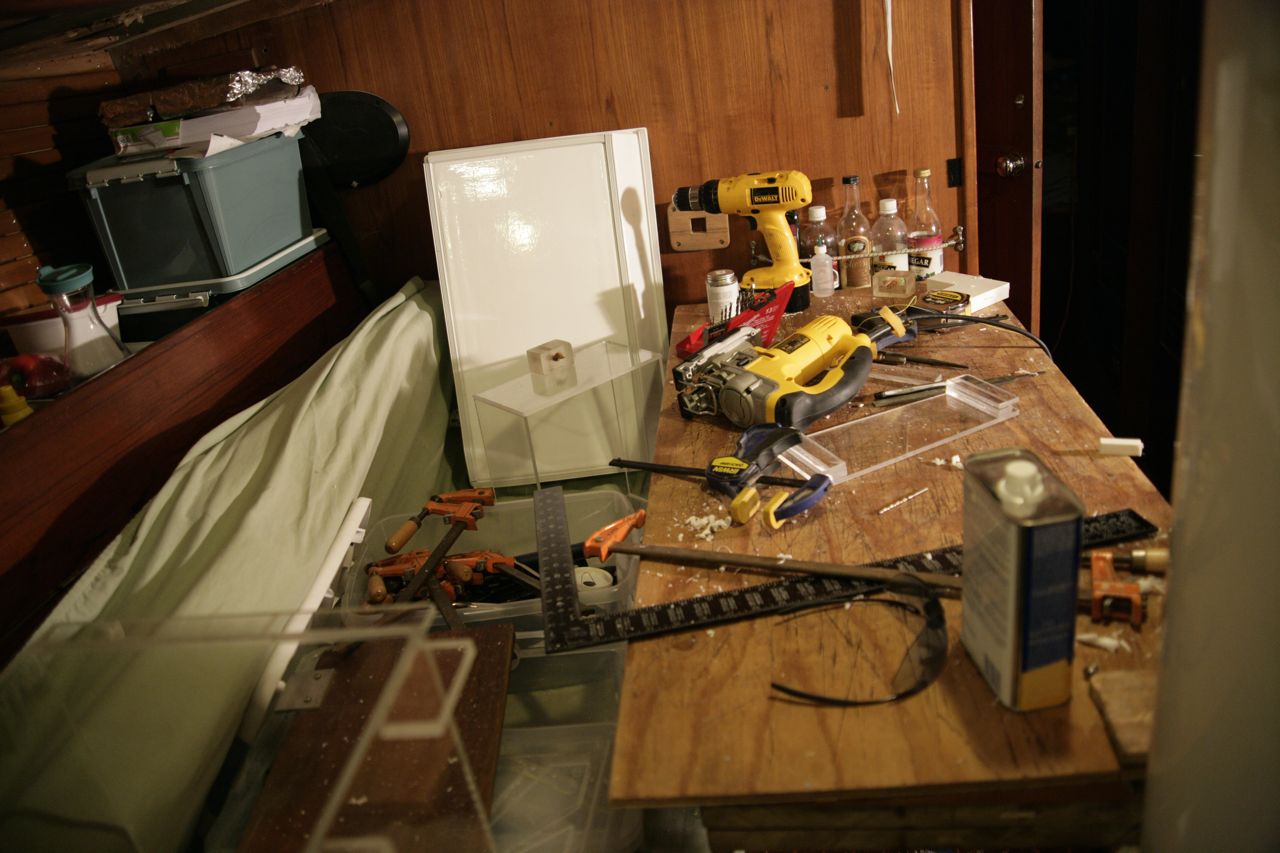
I decided to built boxes out of acrylic, using the jigsaw to cut the pieces, the sander to take off the sharp edges, and the methylene chloride toxic stuff to weld it all together.
This is a process that I have used a couple of times now on the boat for working with acrylic, I believe I explained more of the details earlier. Some of the details worth mentioning: cutting the acrylic with the jigsaw is frustrating, but doable with care and patience. I use the wood scrolling blades; the metal blades seem to get gummed up and stall. The blade just melts a path through the acrylic, which re-seals itself in places after you pass. So then you have to go over the same cut a second time to free it up. The blades get super hot and eventually snap, so you need quite a few of them. There are special blades designed for cutting acrylic, but honestly I can’t tell the difference between them and the wood blades–perhaps they’re a bit more heat-resistant.
The methylene chloride is a nasty solvent, extremely volatile (evaporates very quickly), and very thin. A respirator and good ventilation is a must, or you will surely kill brain cells. The deal is that the methylene chloride melts the acrylic, which then rebonds as the solvent evaporates; the result is literally a weld–continuous acrylic–rather than a glue job. It is important to get the surfaces as flush as possible along the entire length of the seam, which can be difficult when cutting with a jigsaw. Because the solvent doesn’t fill in any gaps whatsoever; so only the areas where the surfaces directly touch will contribute to the strength of the bond.
There is a trick for applying the methylene chloride. You use a little plastic bottle with a syringe cap. You squeeze out the air in the plastic bottle, invert it and stick it into the container of methylene chloride, then let go and it will suck up into the plastic container. You don’t need very much. The you use the same method for applying: hold the syringe bottle upright, squeeze out a decent amount of air, then let go and invert the bottle. While the bottle is sucking air, no solvent will come out even though it’s inverted. Then you take the syringe and run it down the seam you’re welding, squeezing the bottle slightly to let the solvent drain out. You will have 10 seconds or more to apply the solvent before the container refills with air and starts to leak out.
It’s best to clamp the two pieces of acrylic together. But, if you have a second person and steady hands, you can sometimes just hold the two pieces together while you weld them; it should only take about 45 seconds for the bond to set.
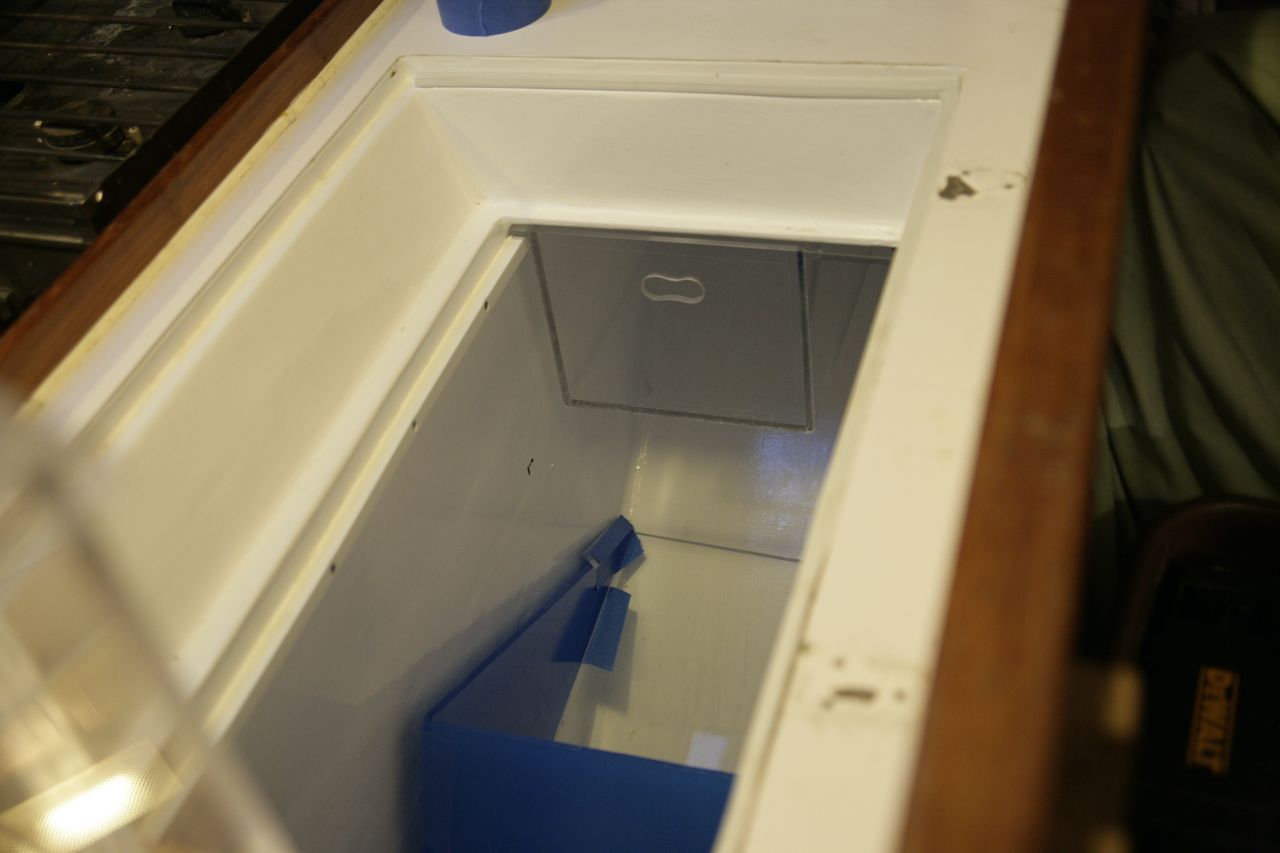
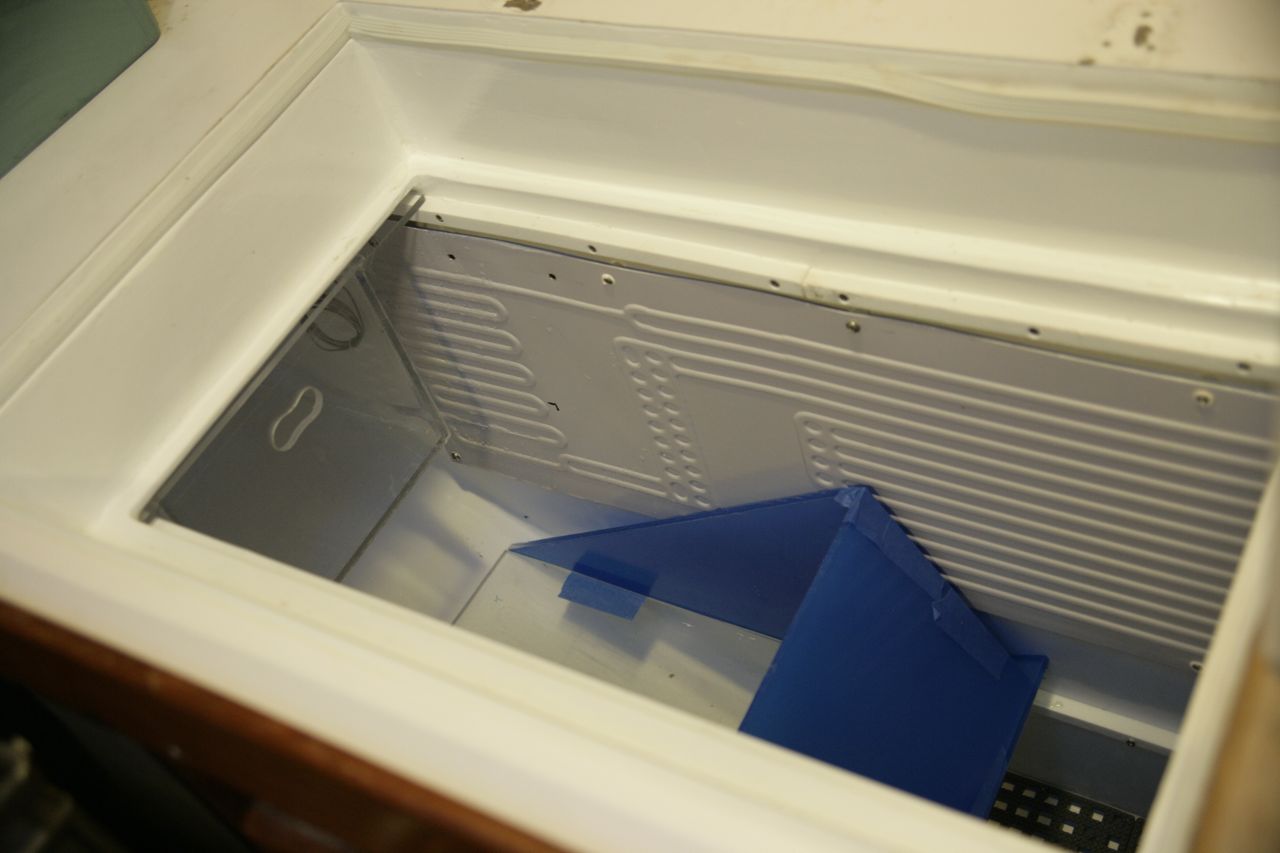
It was a challenging problem, to figure out how to build the boxes such that they would fit down in the icebox. At least one of the boxes I had to finish assembling inside the icebox–so that one will never come out without breaking it apart. I put all of the boxes on rails–I used strips of starboard for this, nice and slick–so they slide back underneath the inaccessible sides of the box. And I was paranoid about the box banging on the evaporator plate and damaging it, so I put extra effort into making blocks and stops that would prevent the acrylic from touching the evaporator plate. After our first sail I discovered that I also needed to come up with a way to prevent the boxes from sliding back and forth while the boat rocked, so I used some cotter pins with keeper cords–works like a charm. All in all, a very successful project. No space is wasted and the system is easy to use. It took a damn long time, but what’s new.
See knees part 1 and knees part 2.
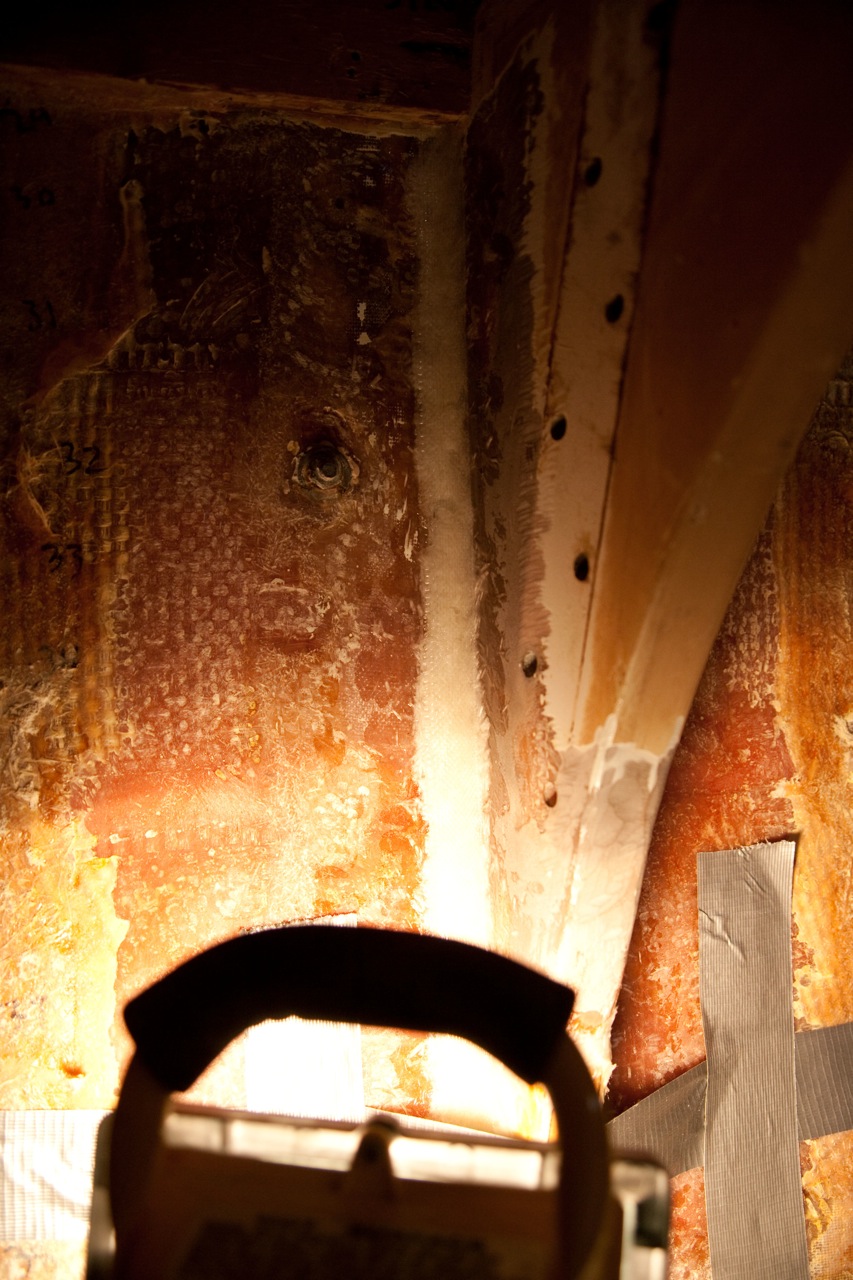
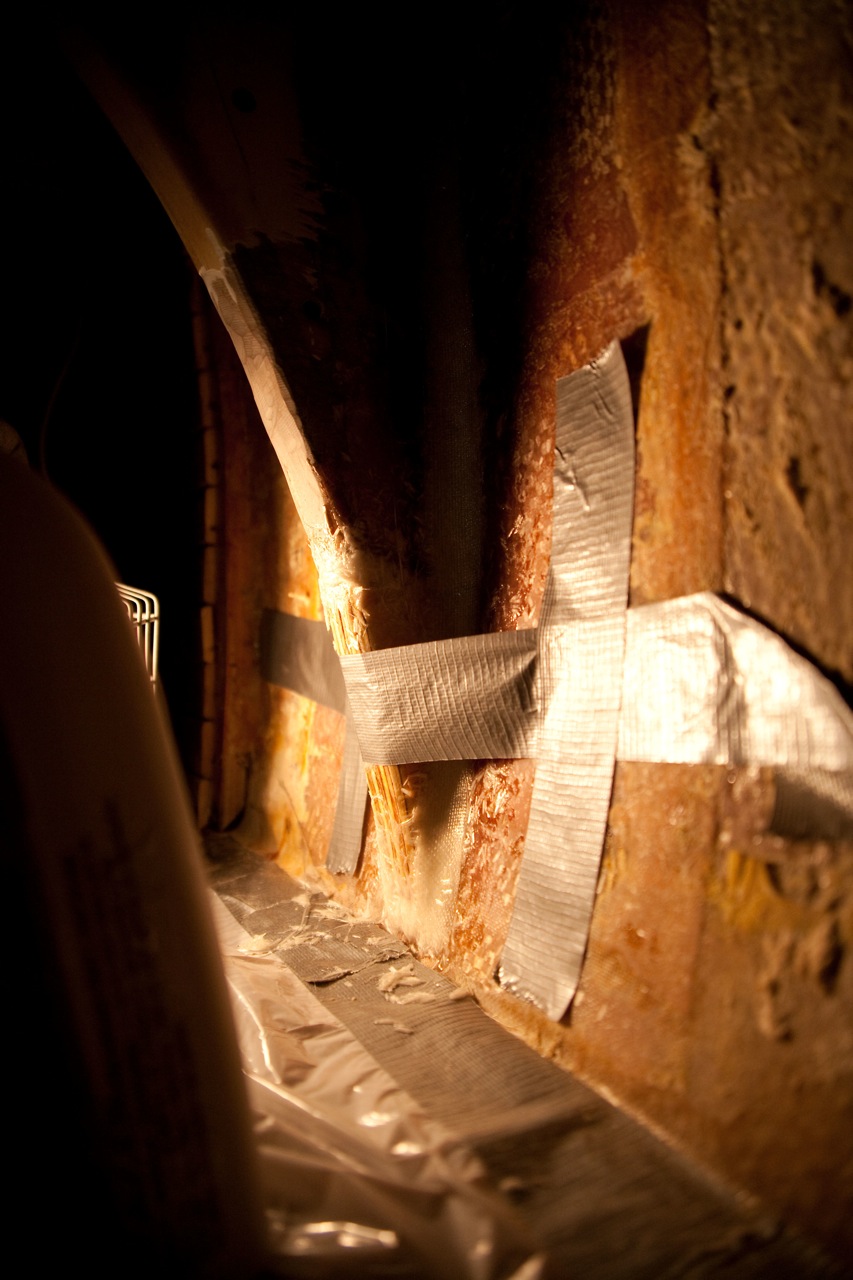
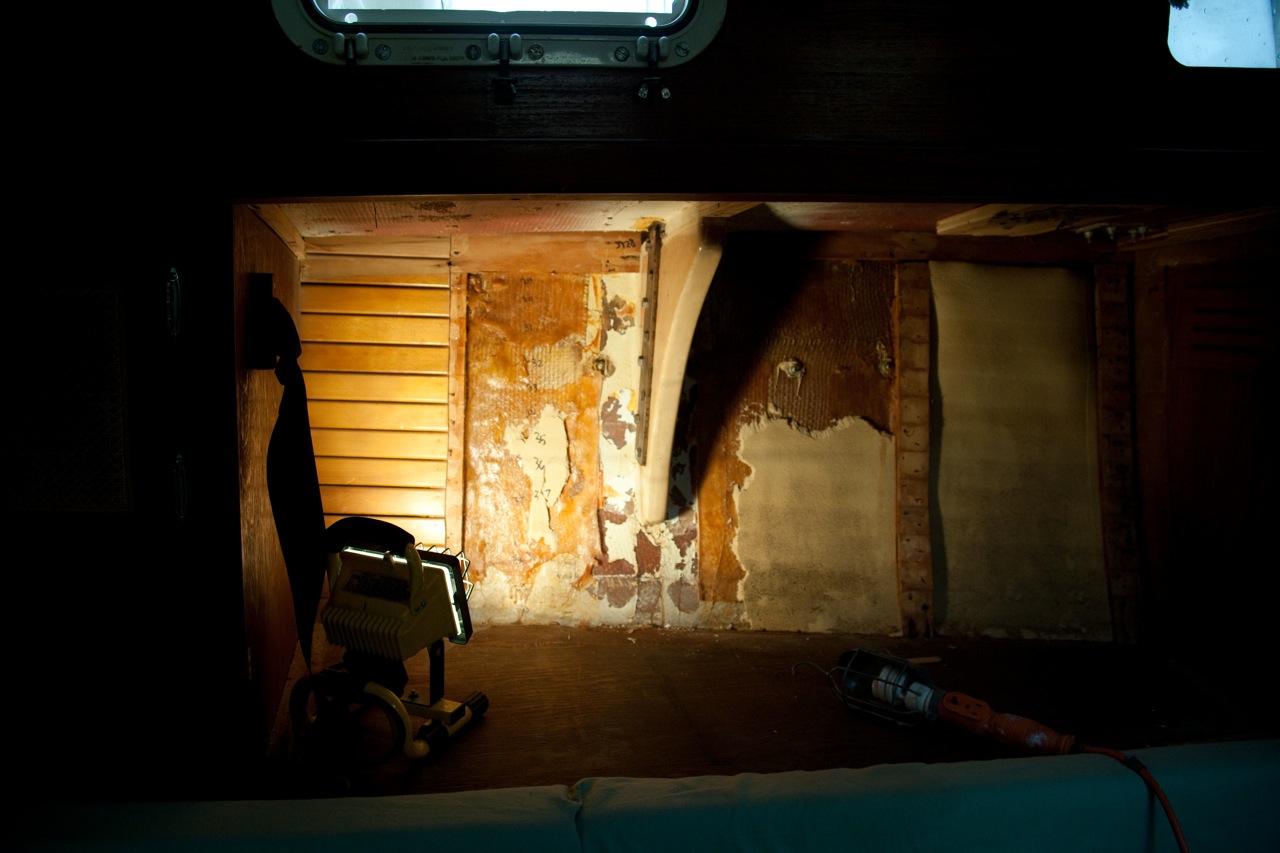
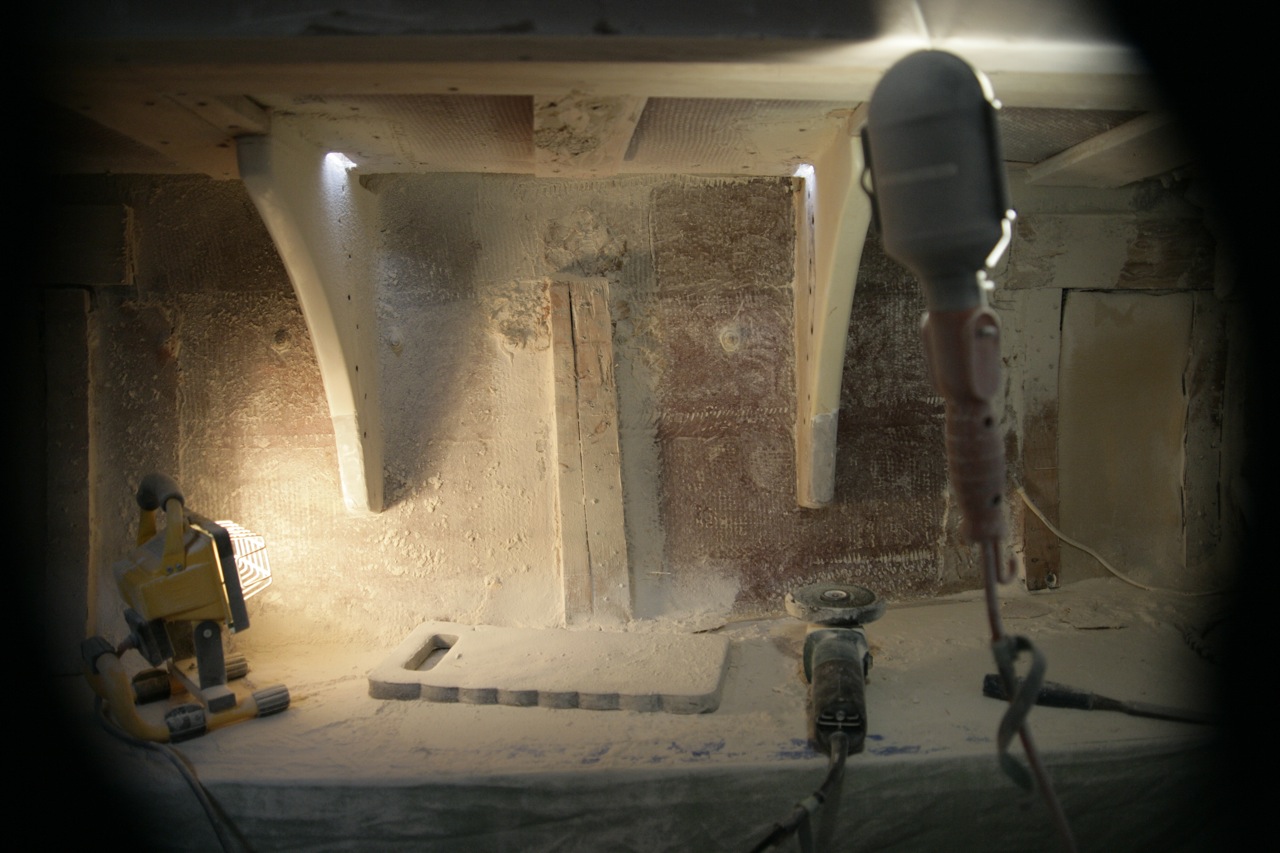
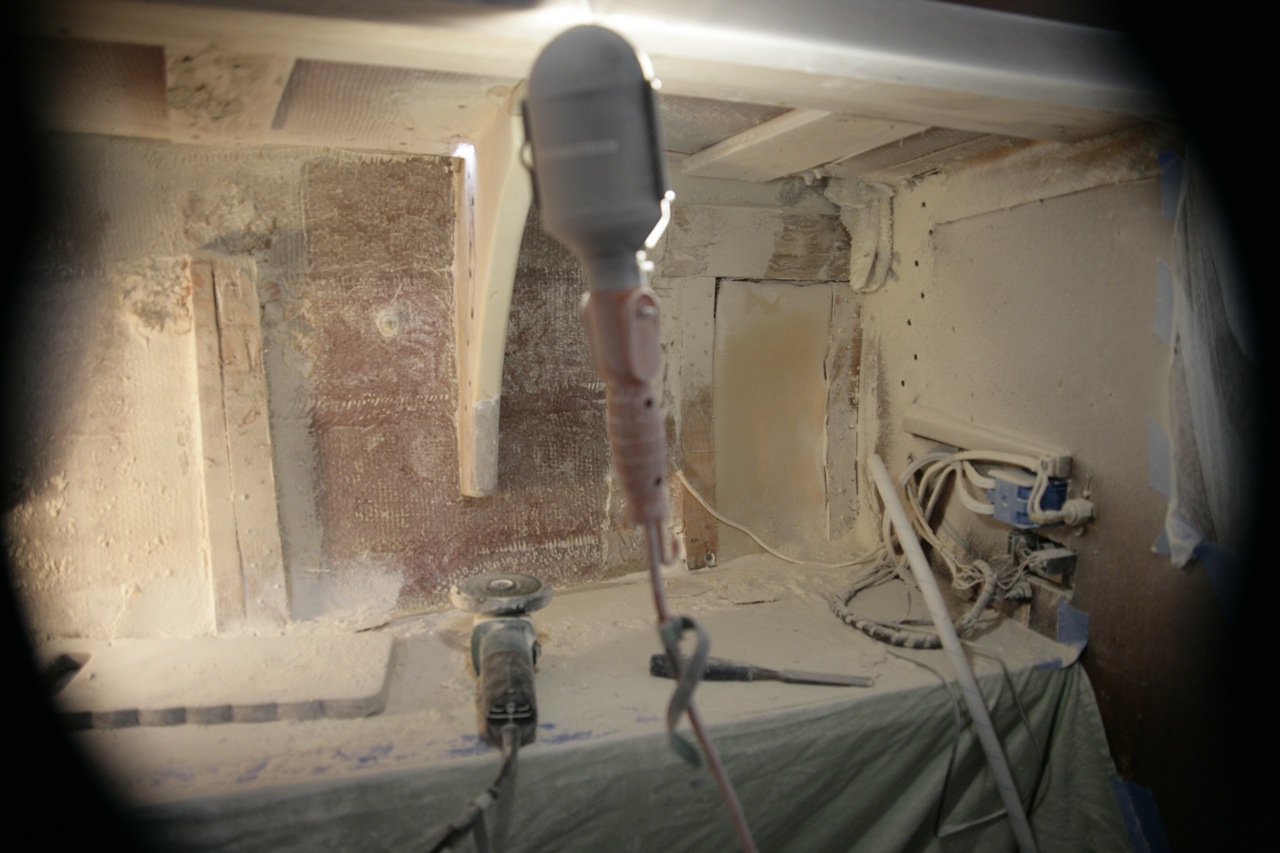
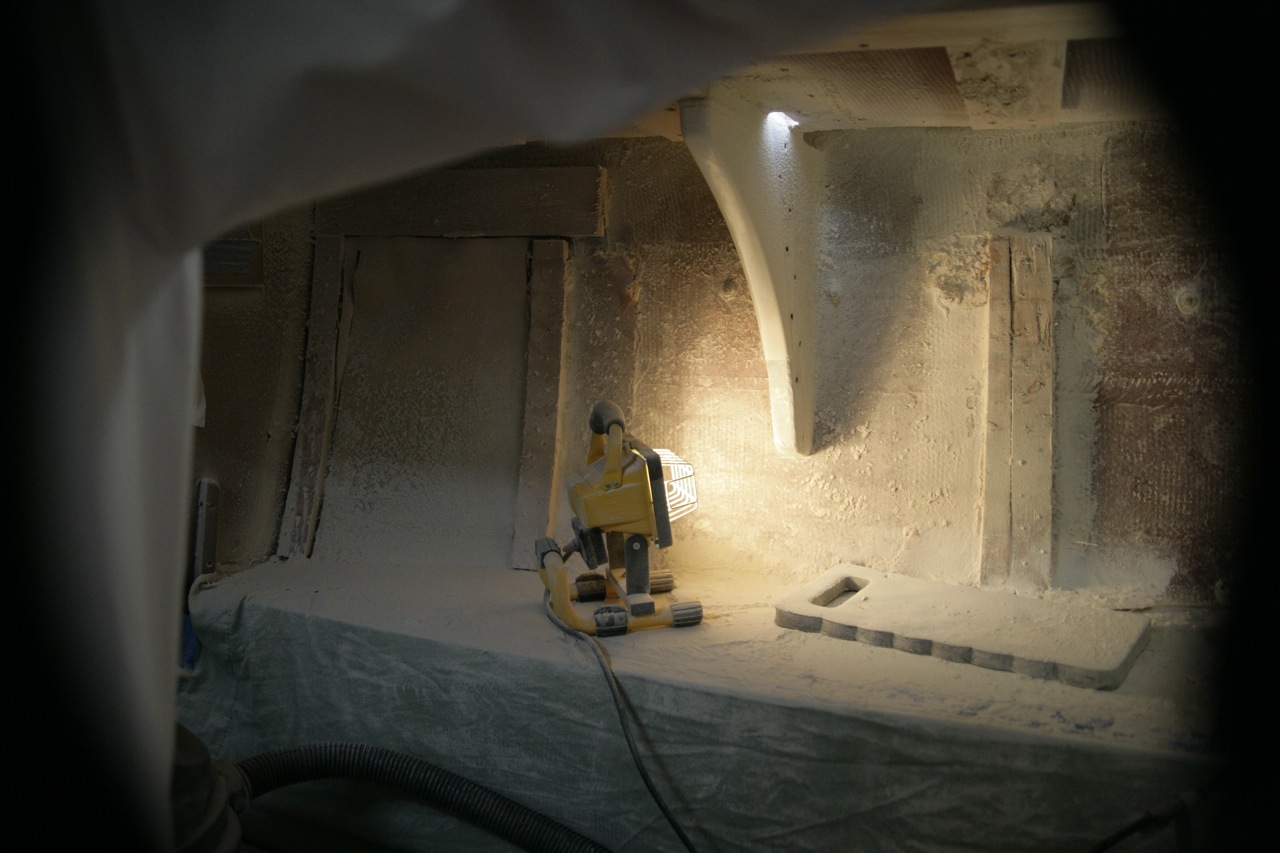
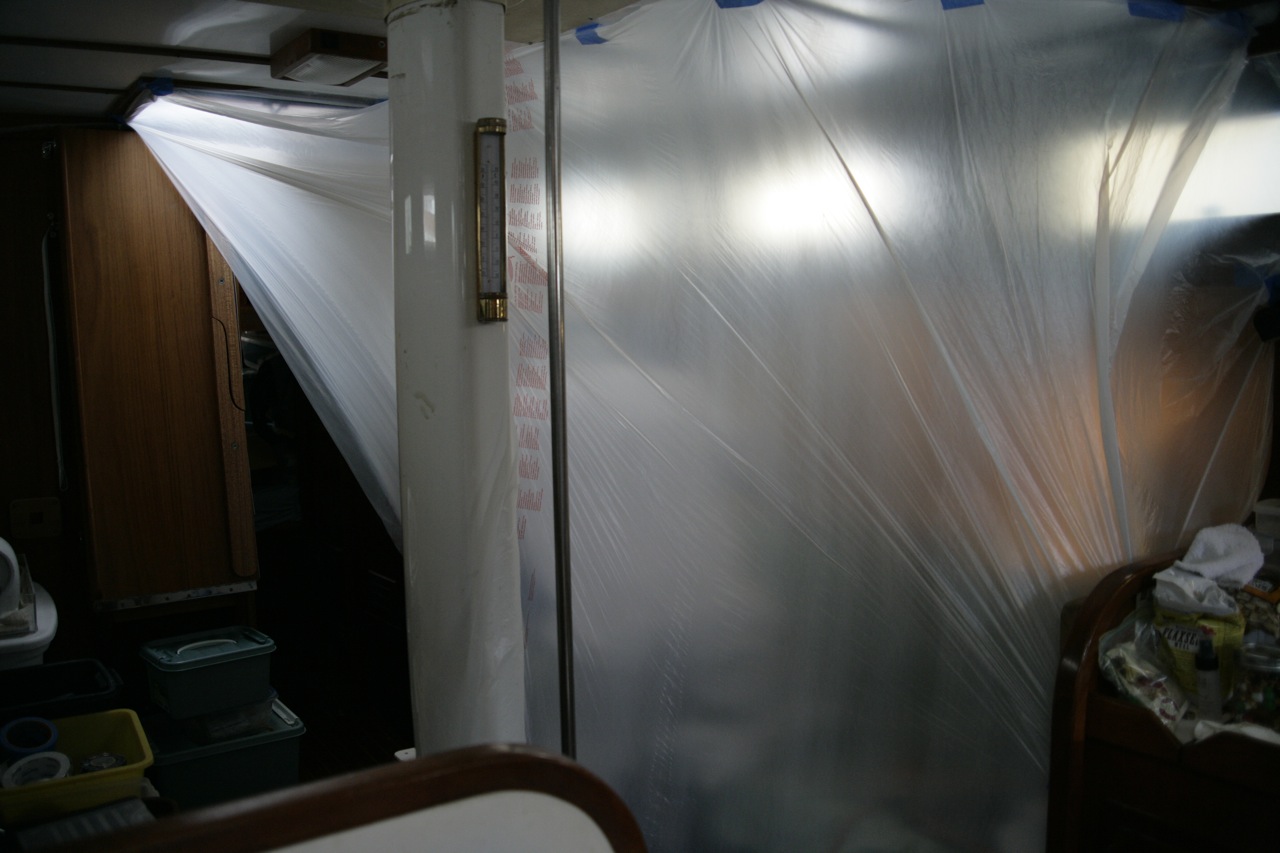
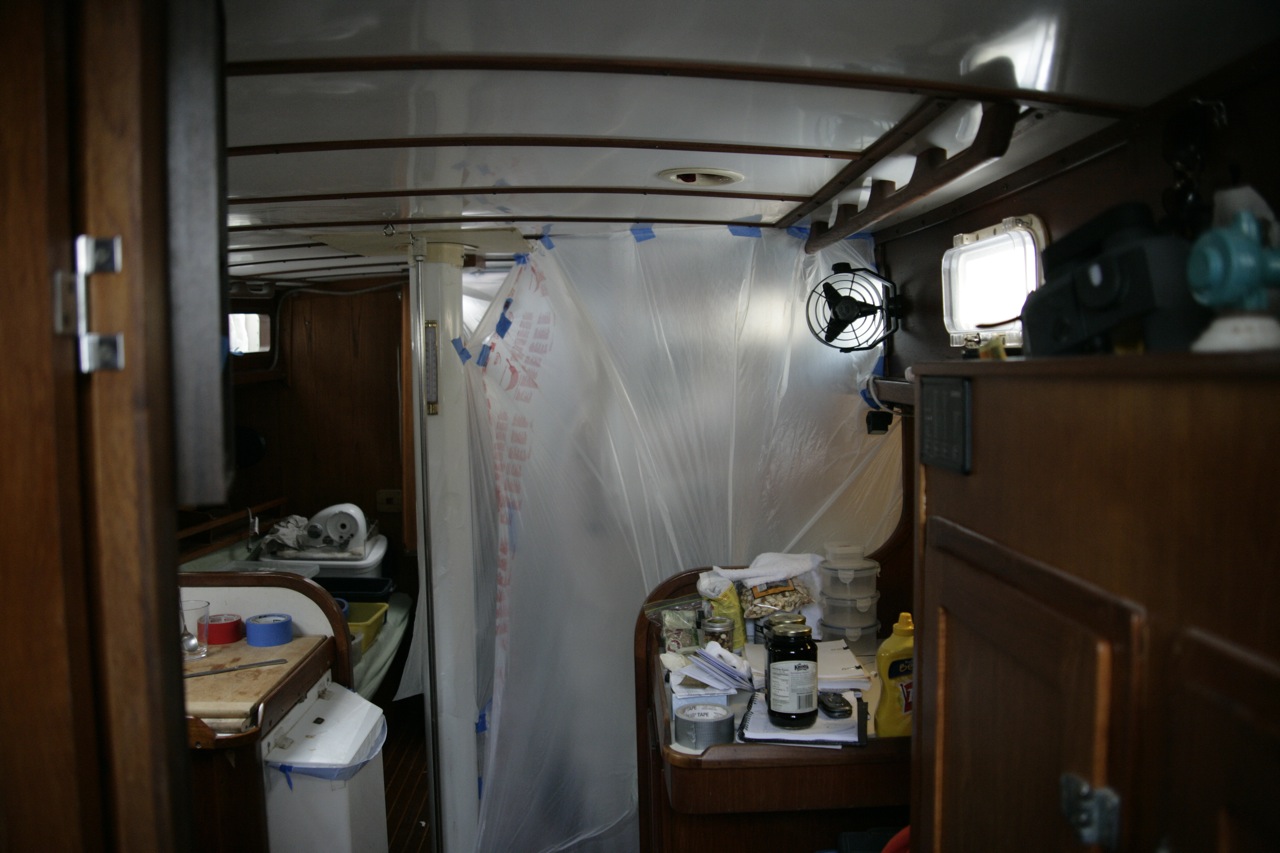
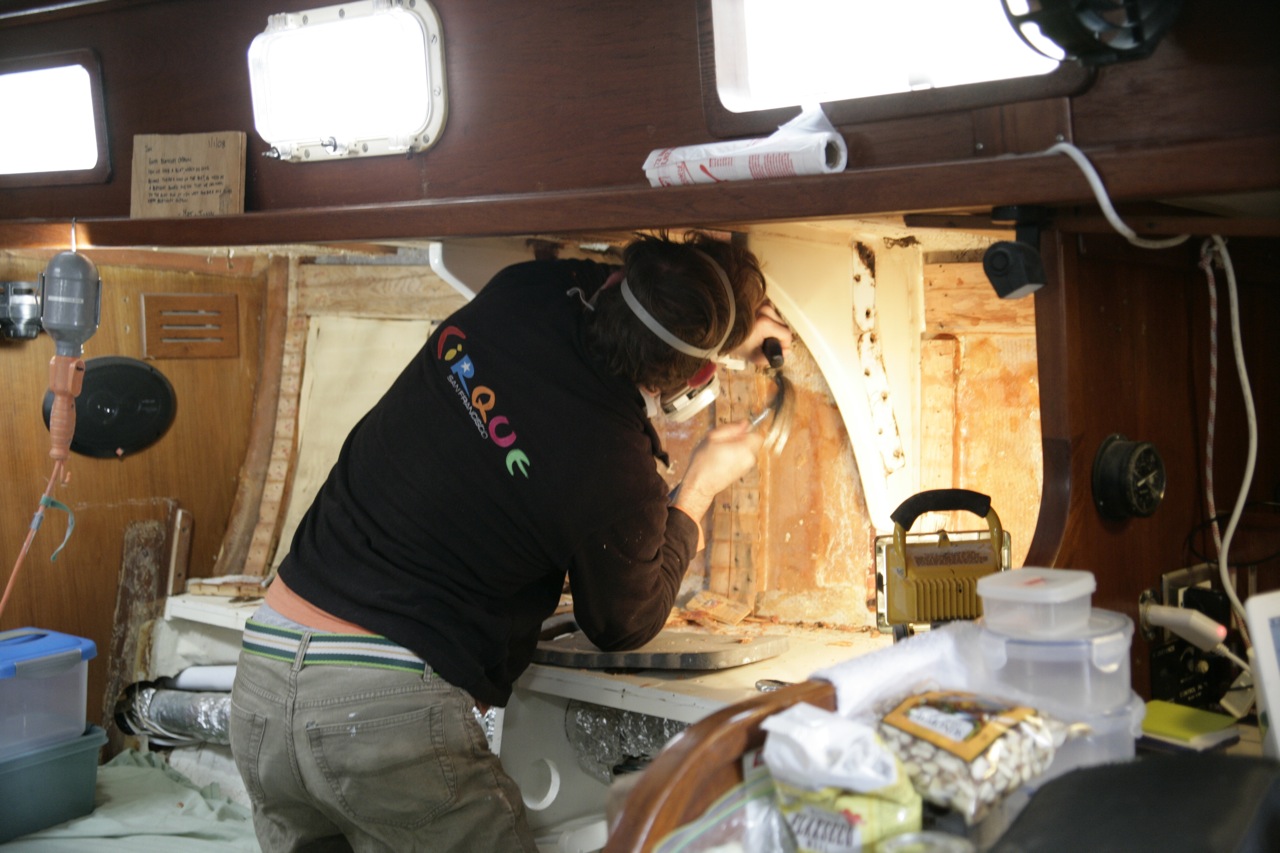
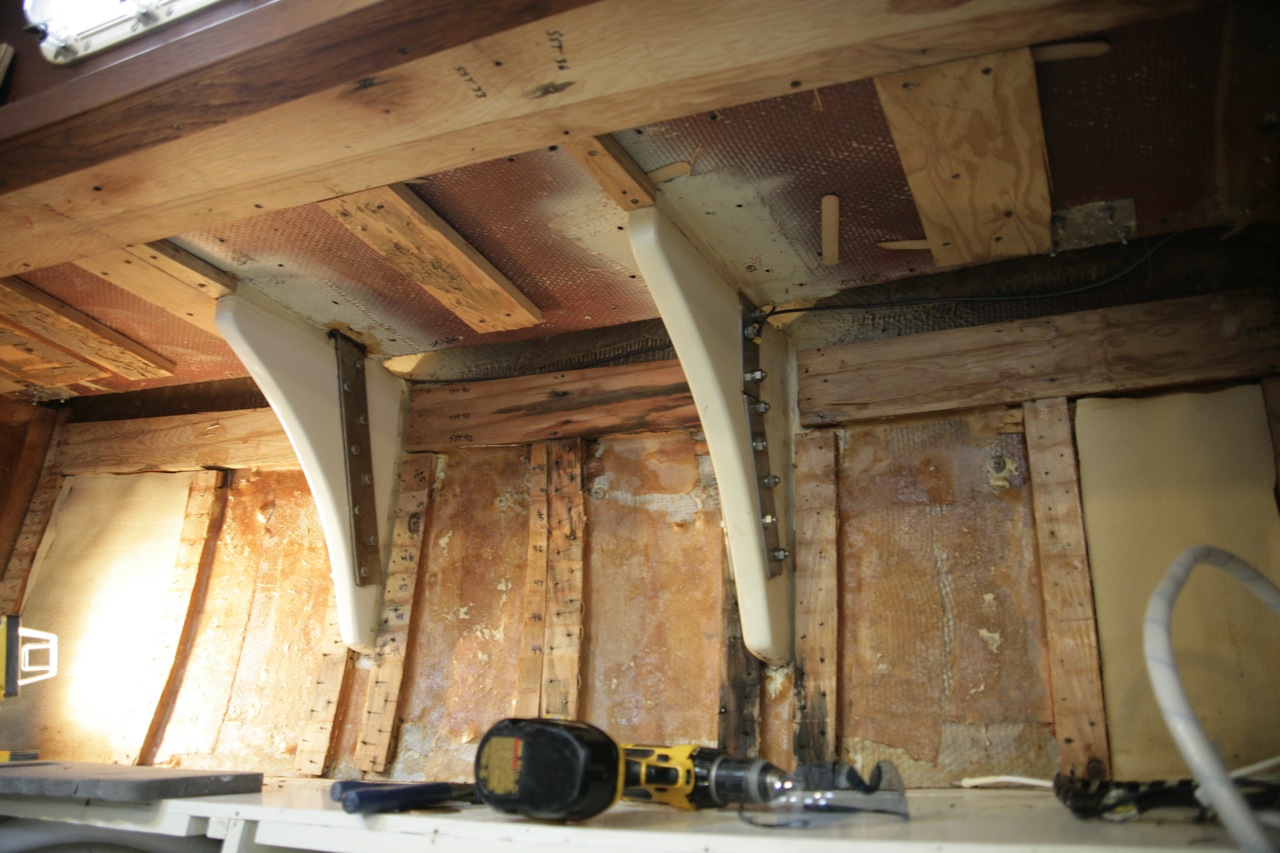
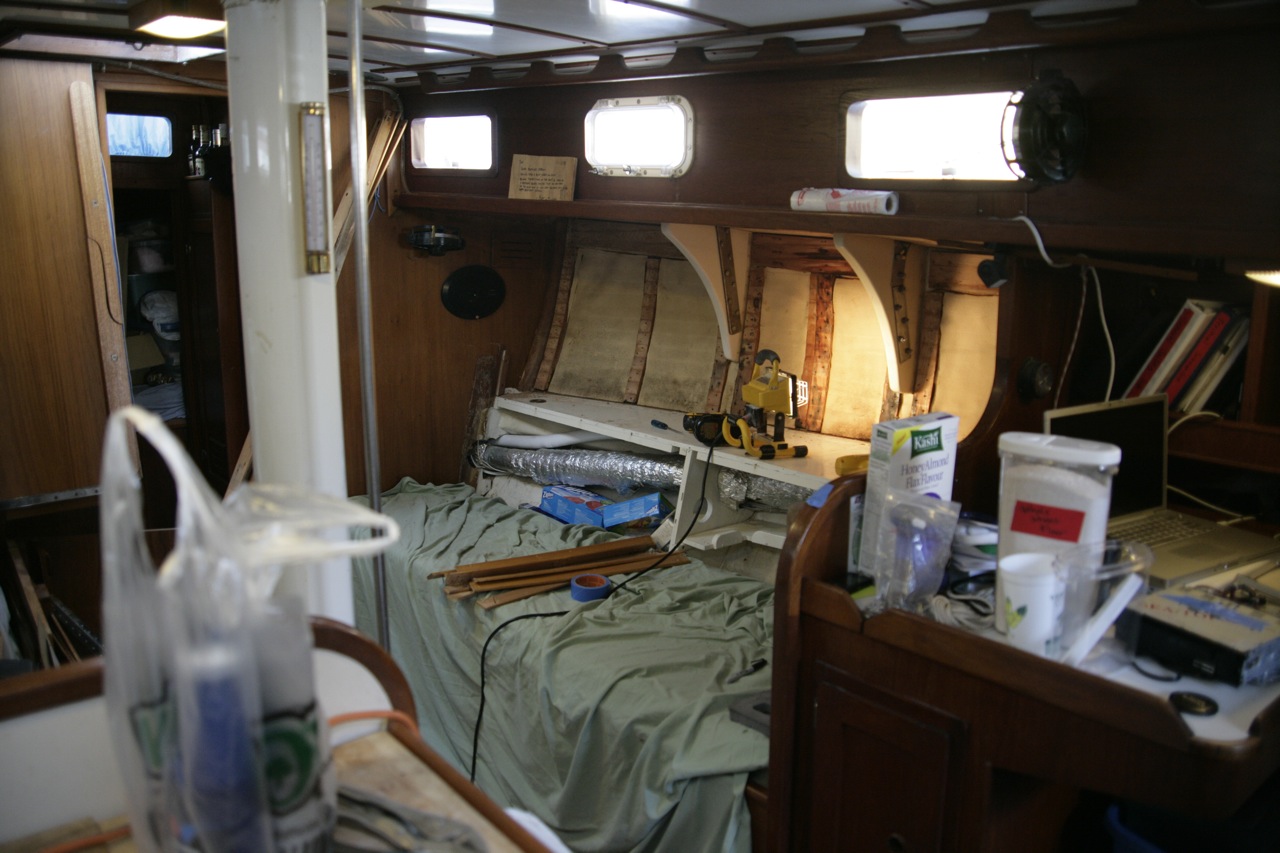
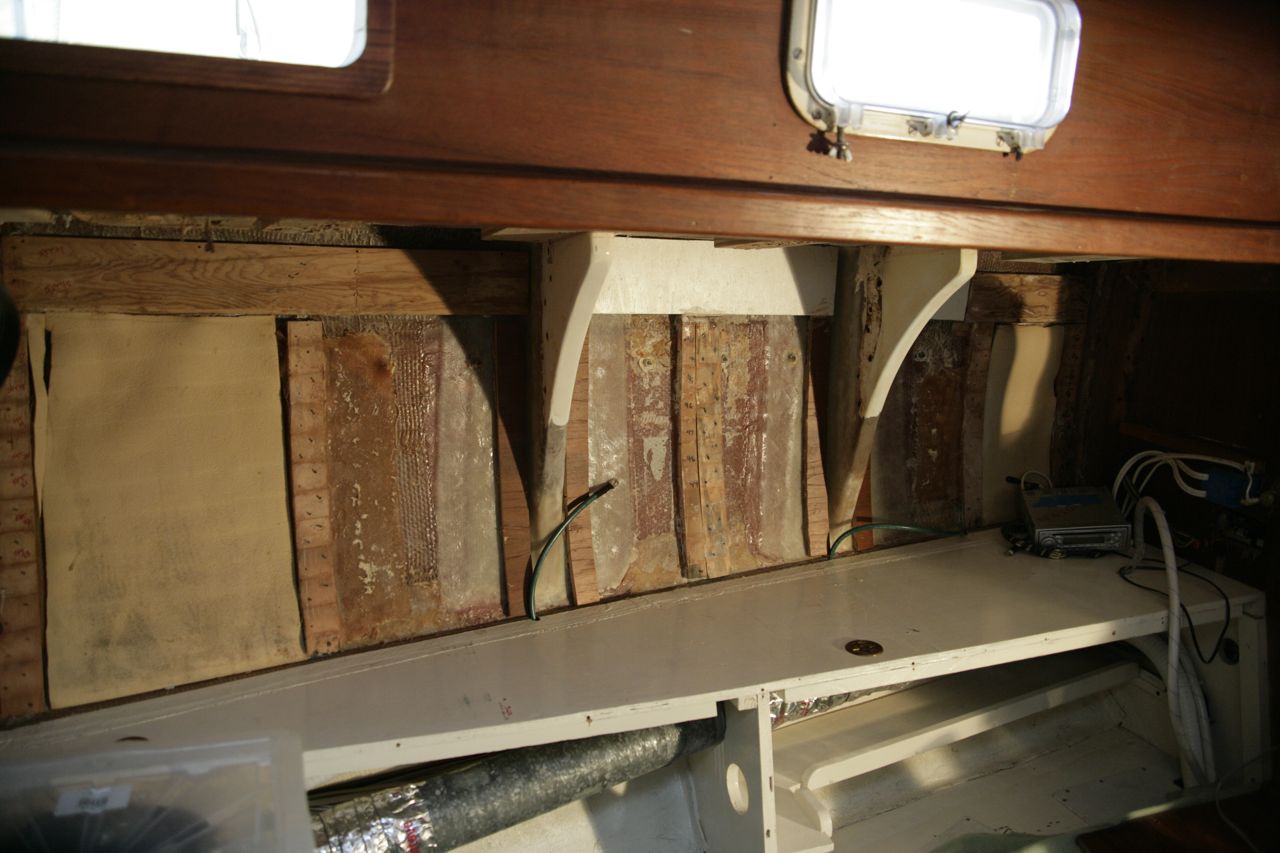
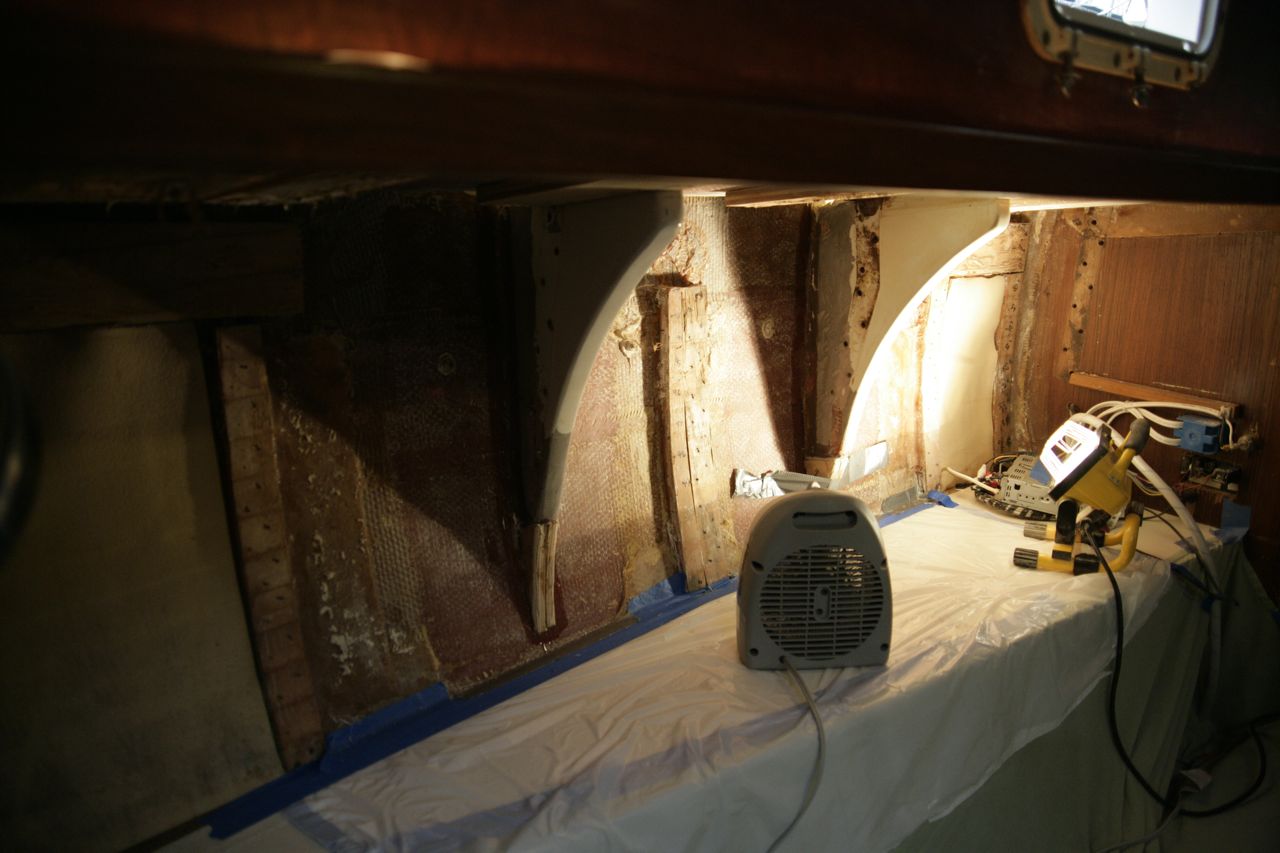
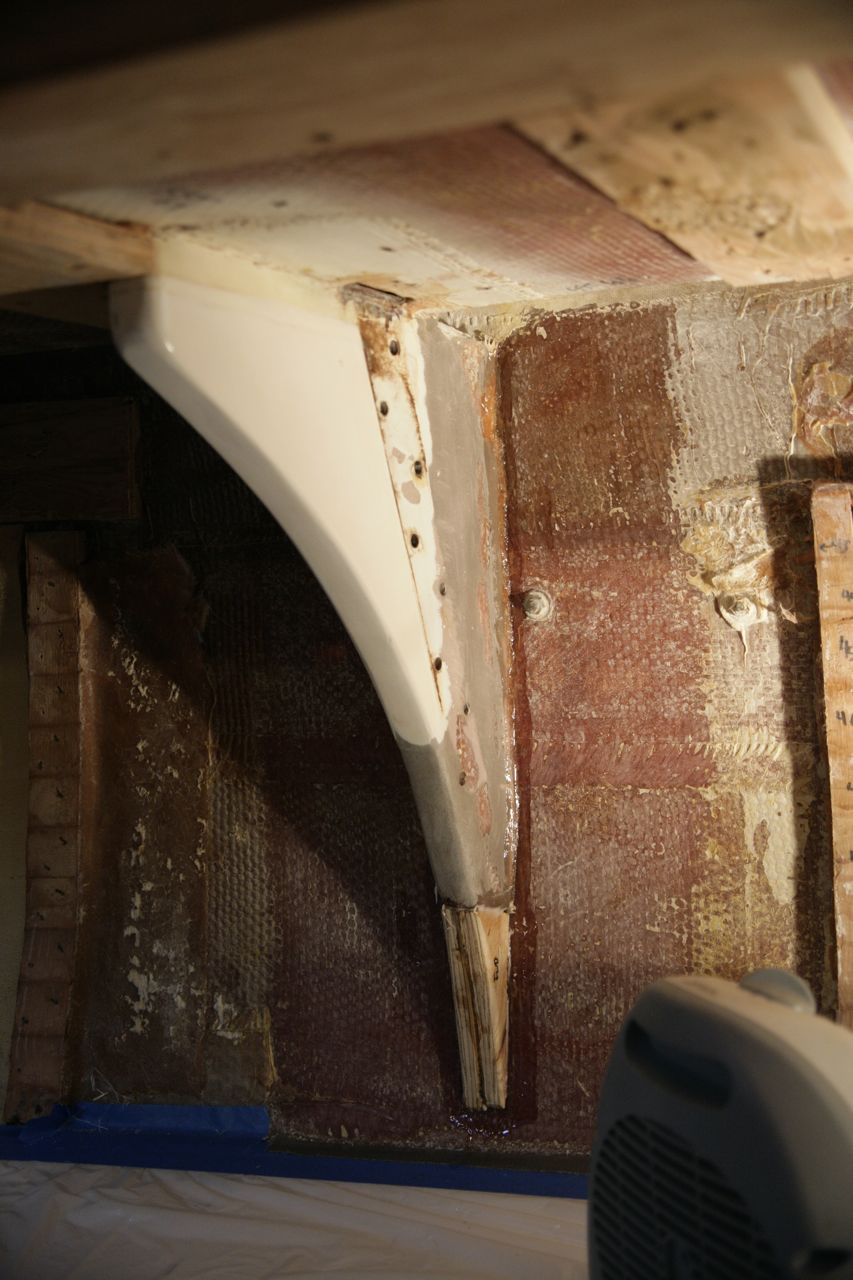
This job was massive, and I didn’t have the luxury of time to sit back and consider. I forged ahead, ripping out the cabinetry on both the port and starboard sides, then the slats, and then going to town with the grinder. Making fiberglass snow a 1/2″ thick that covered everything–thank god I taped it all off with plastic. Even with a box fan in the hatch sucking it out, it was still insanely uncomfortable.
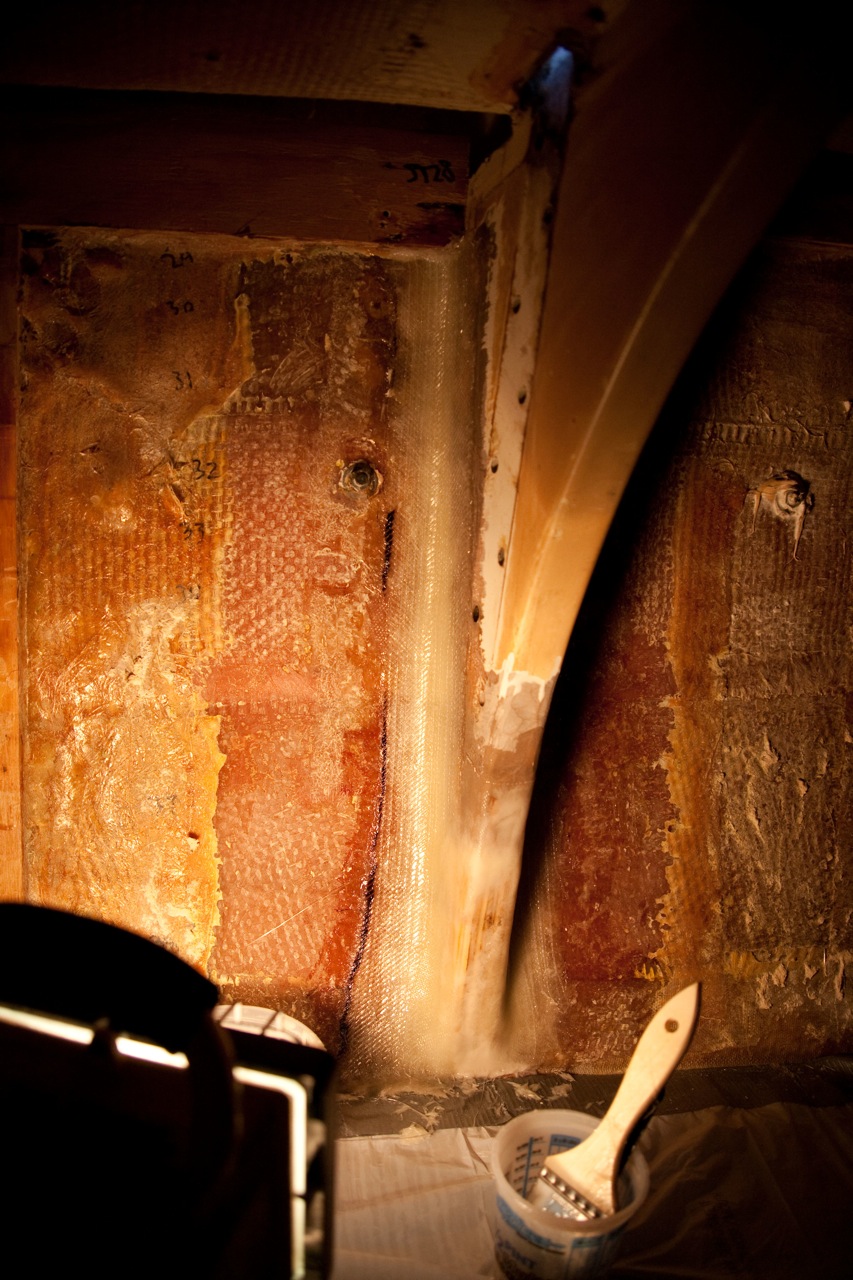
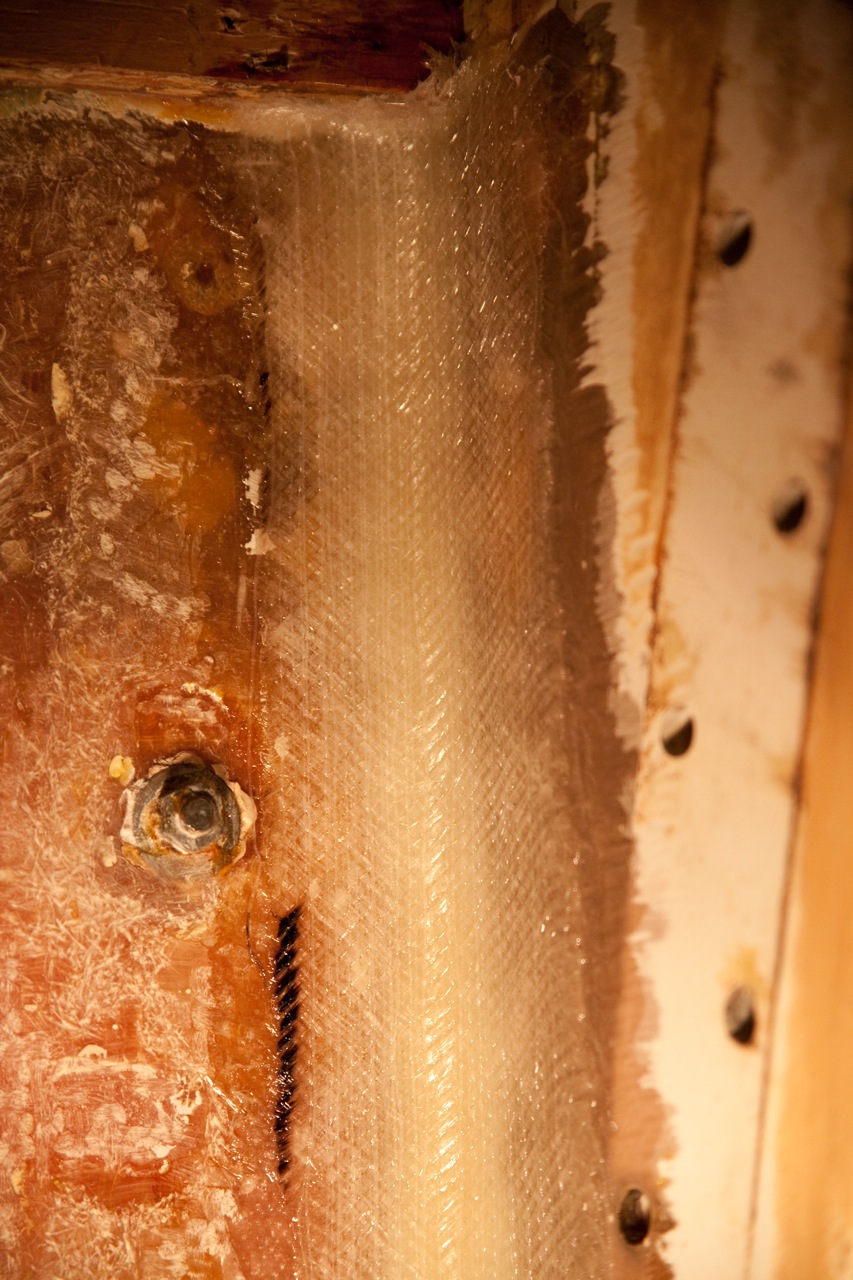
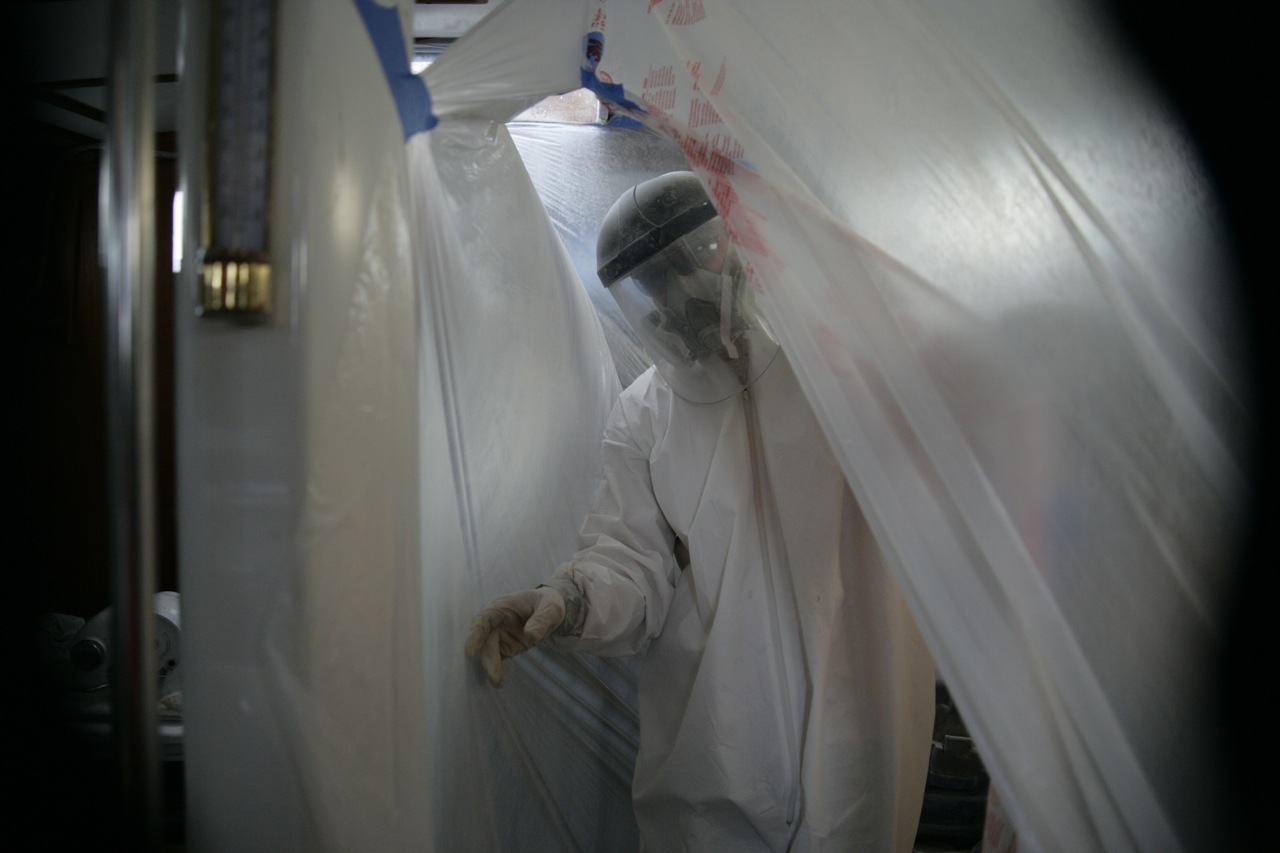
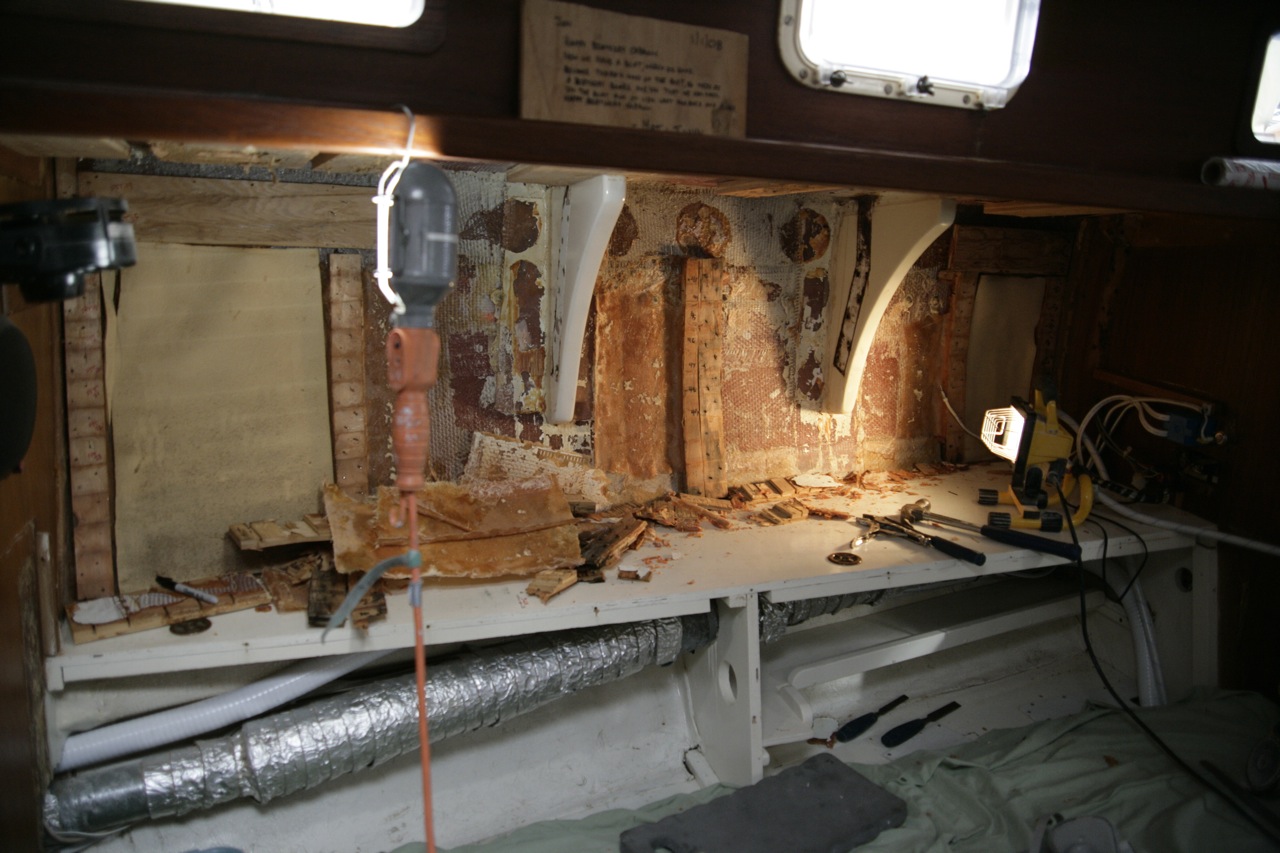
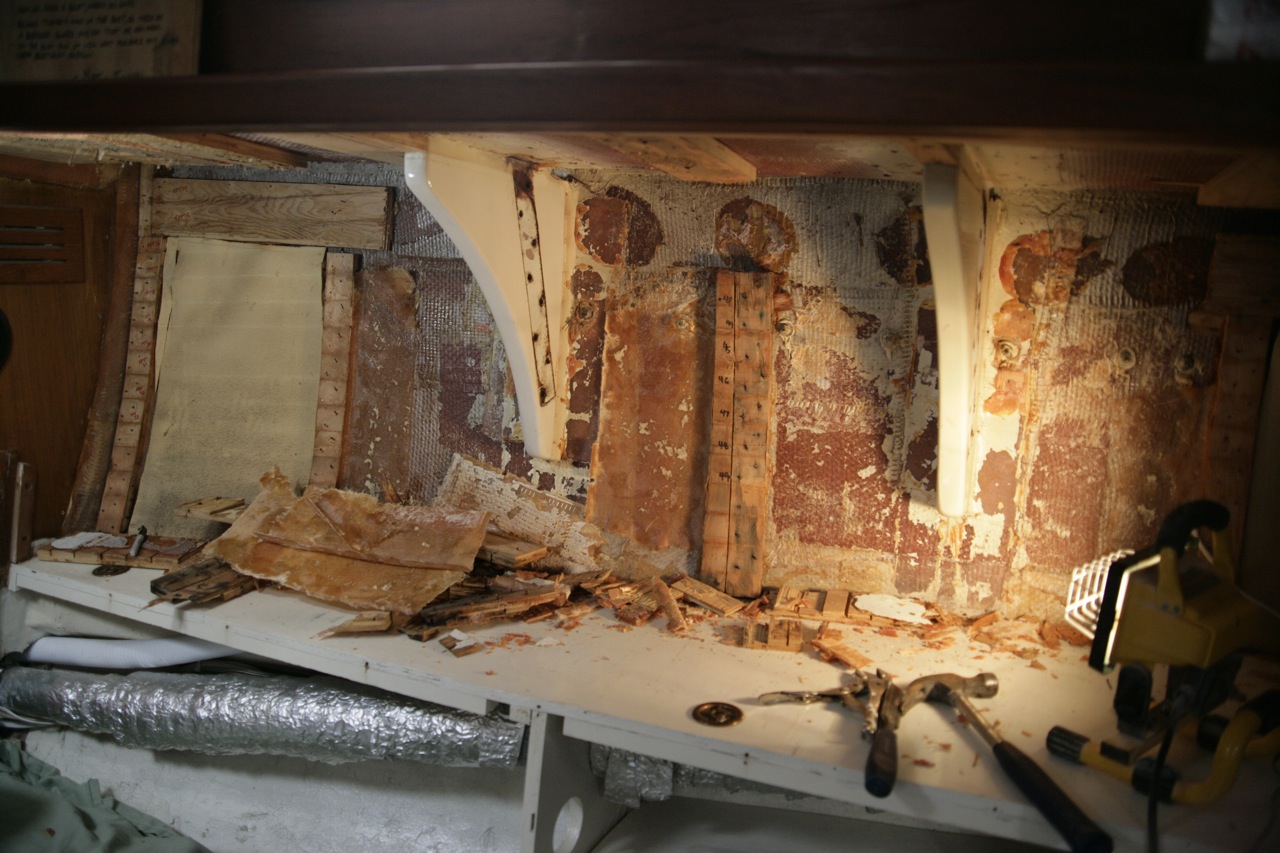
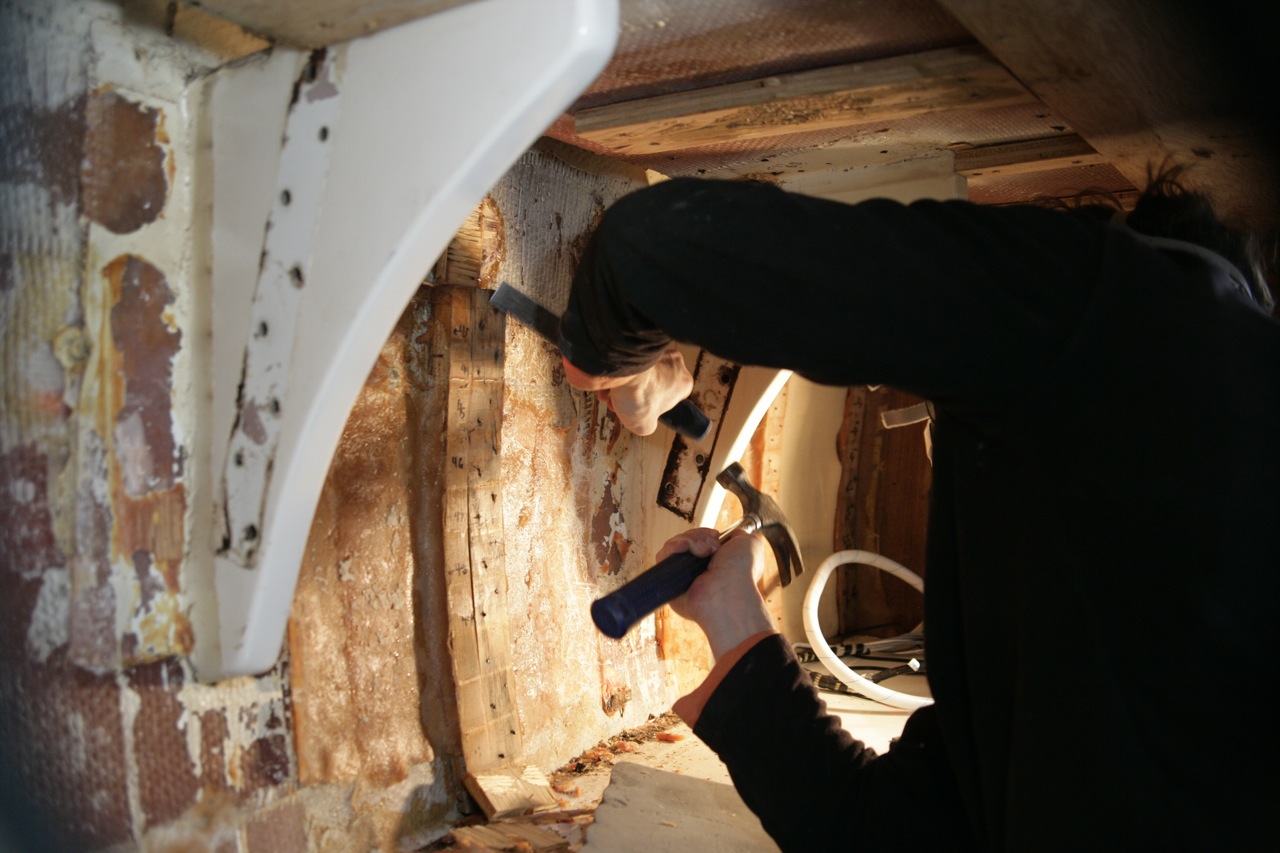
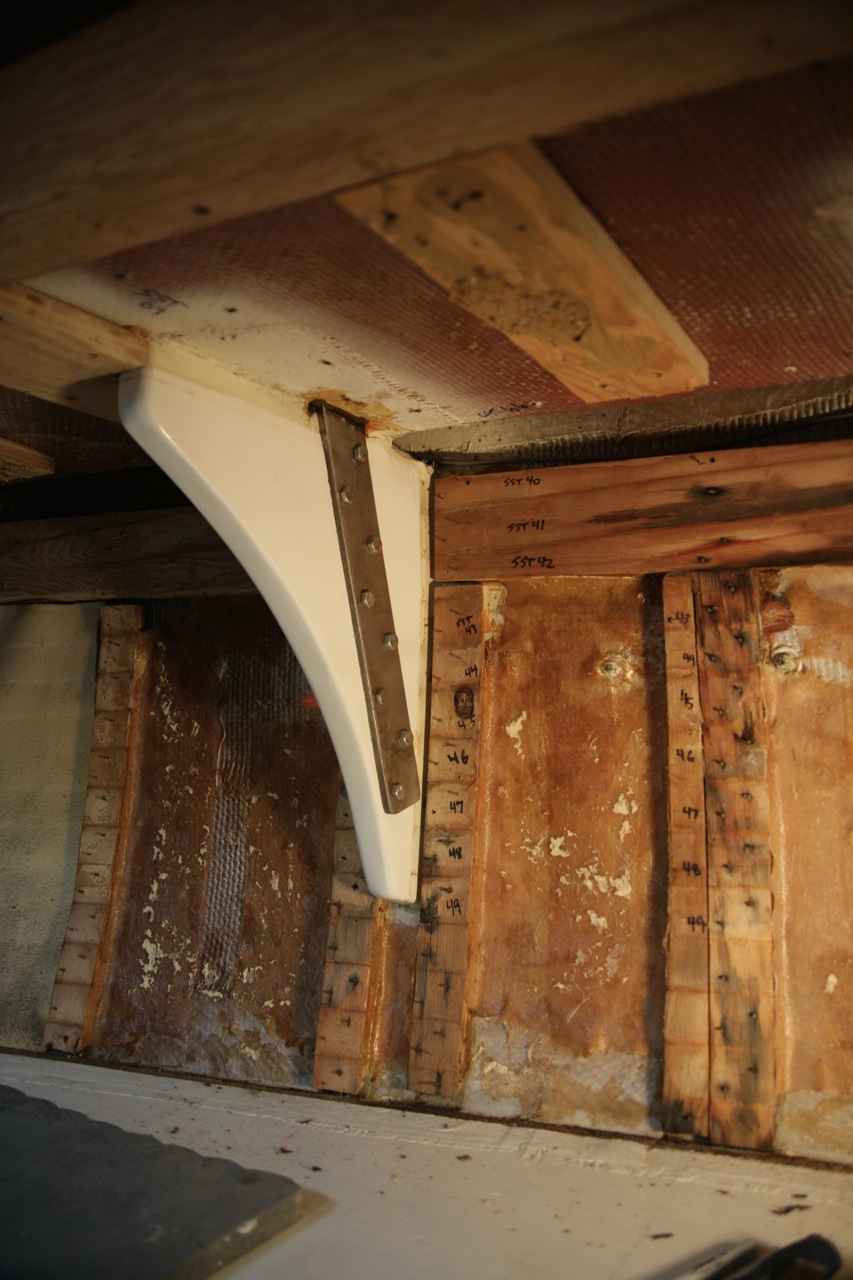
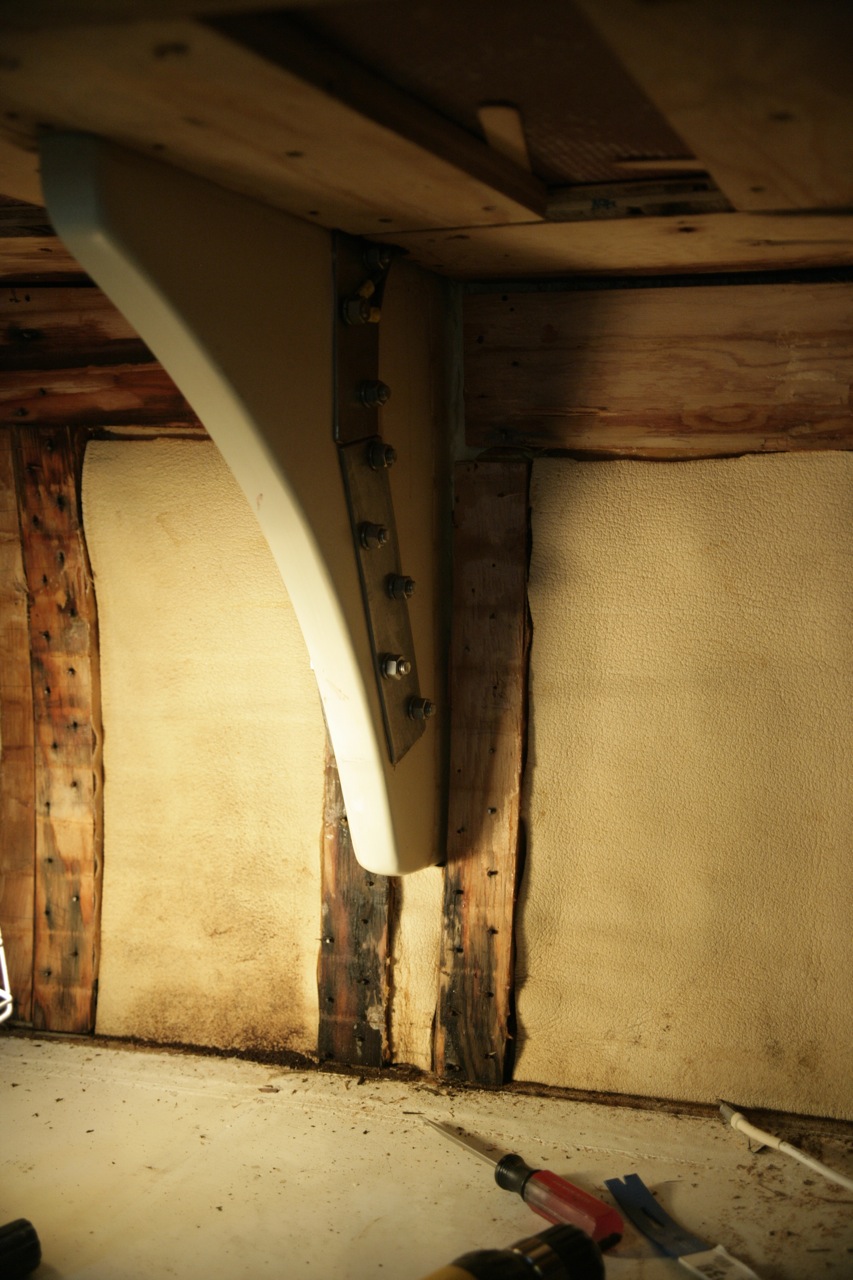
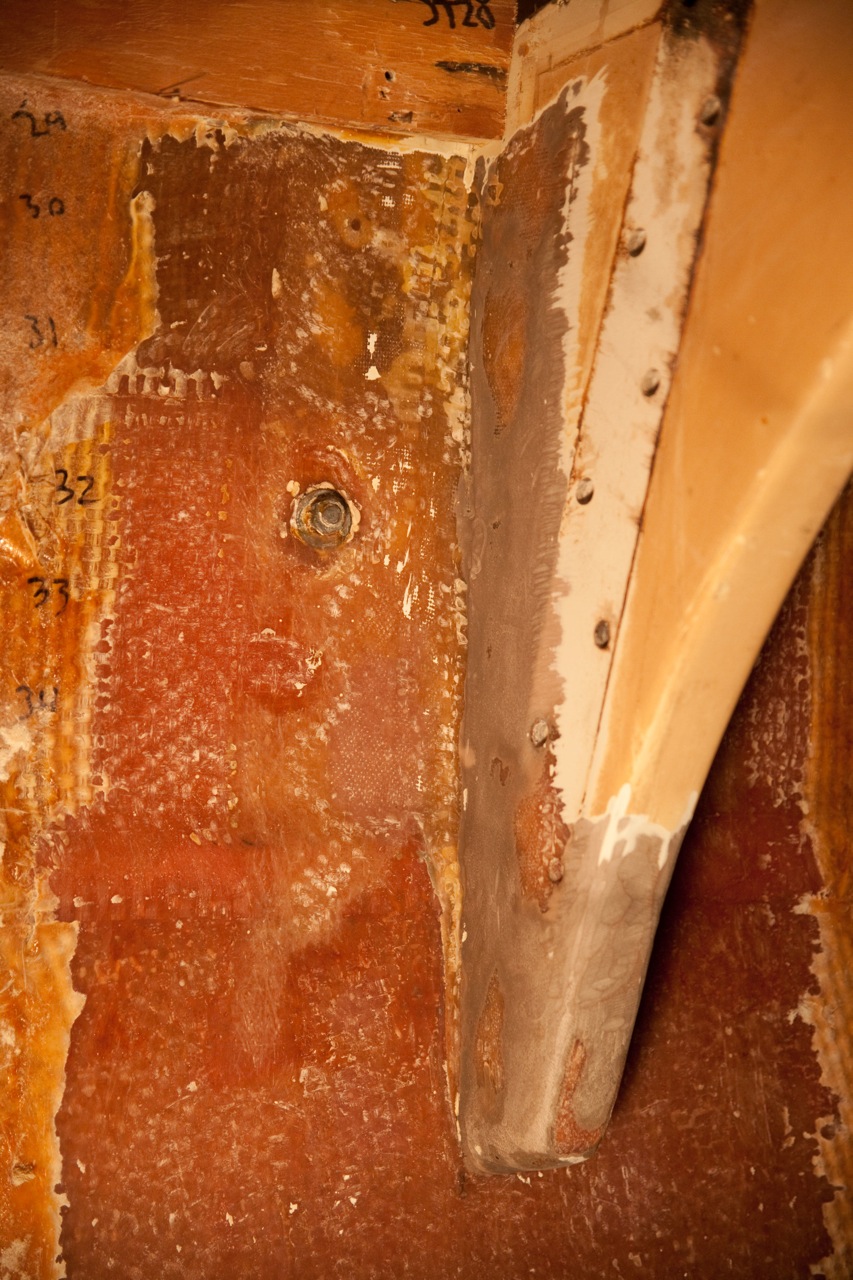
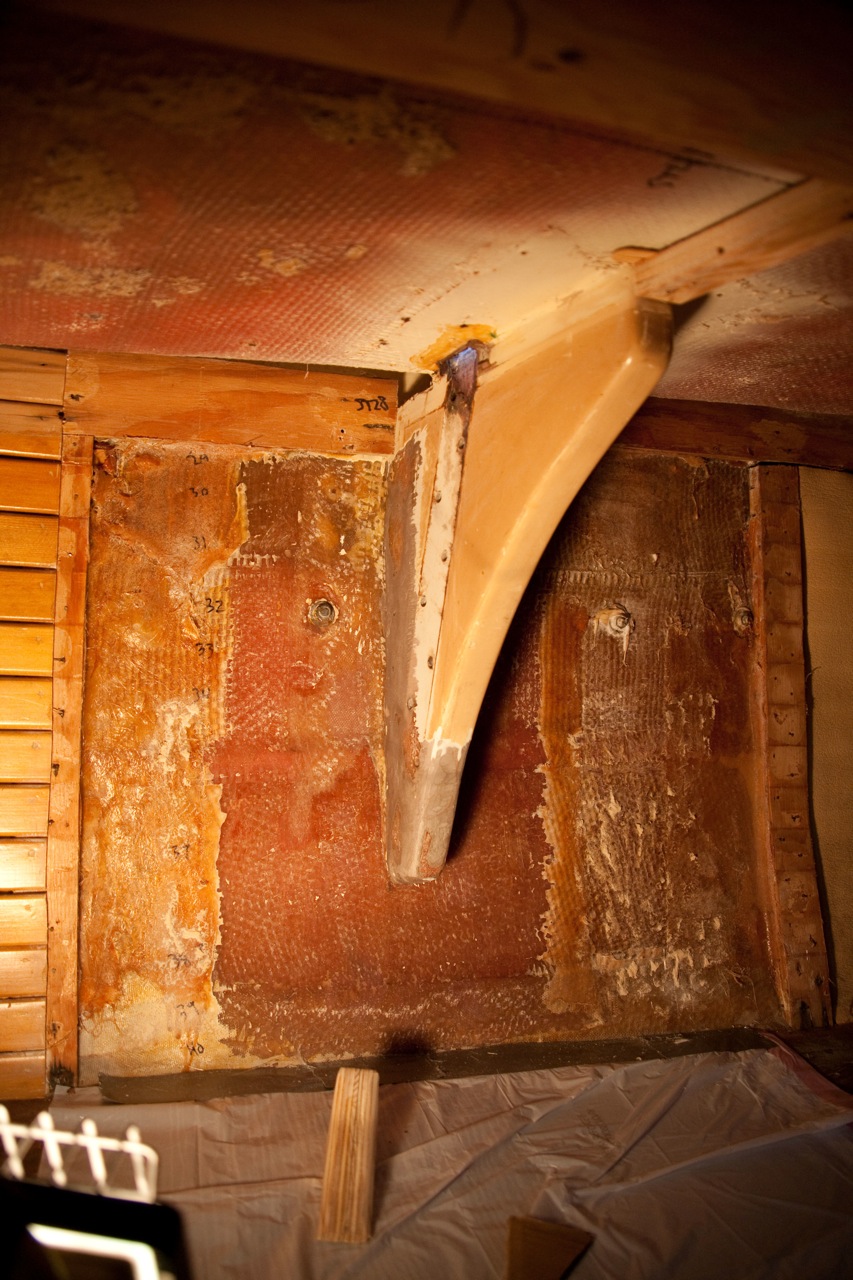
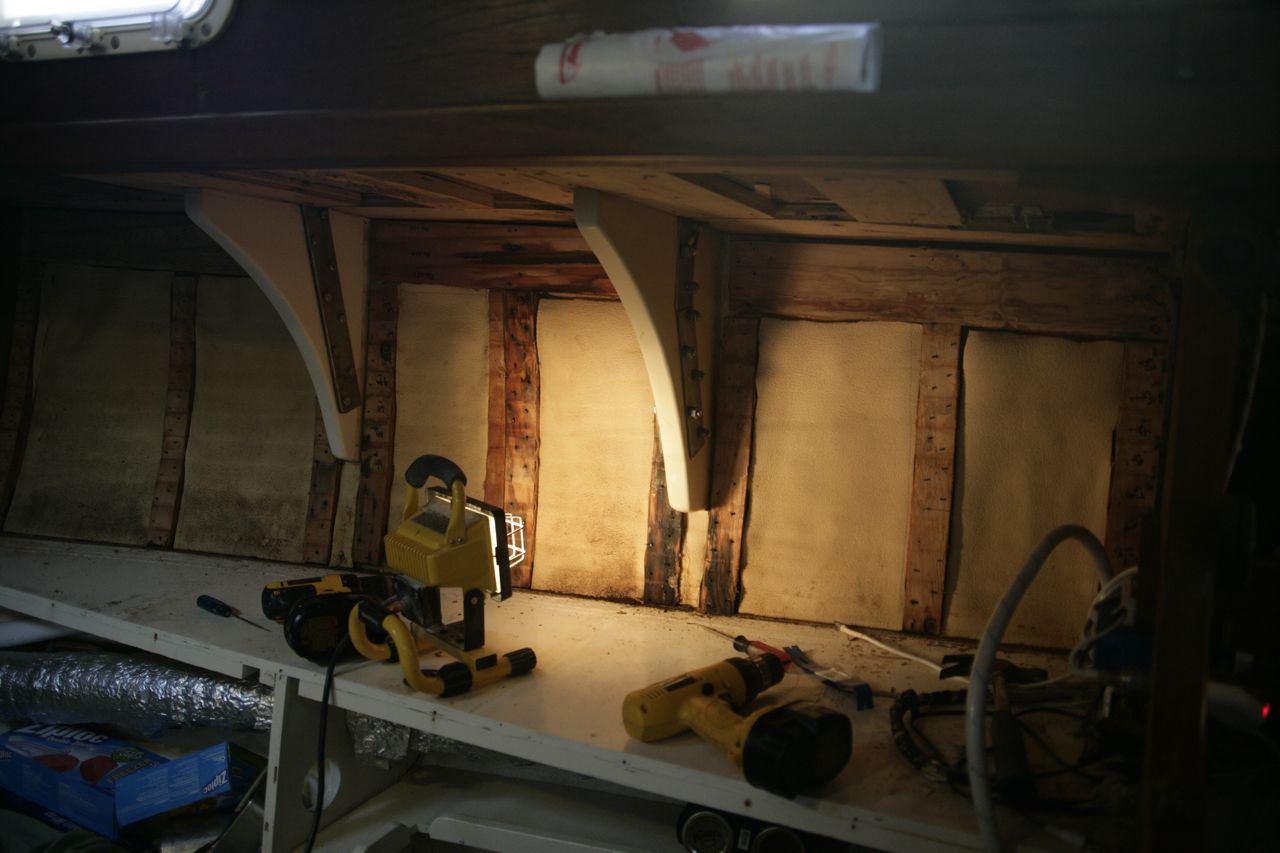
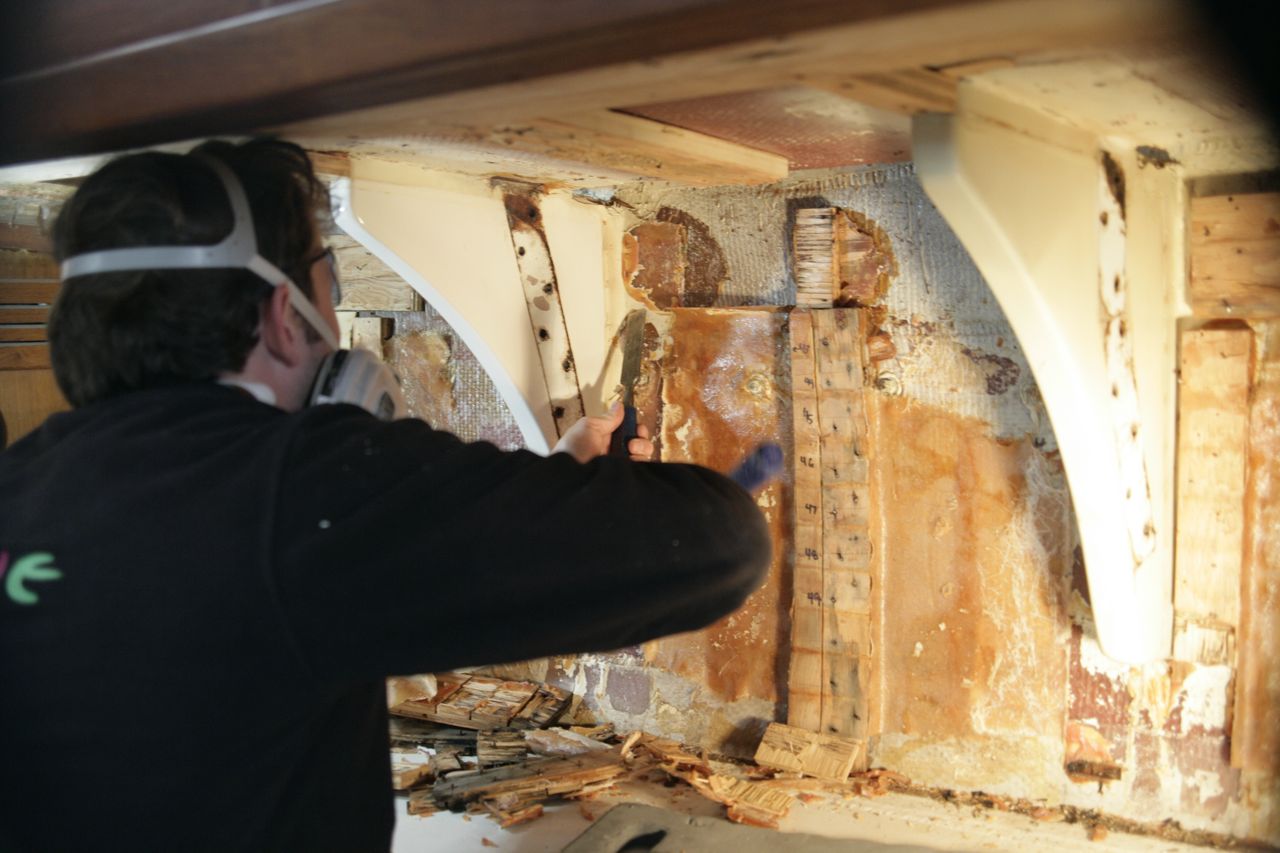
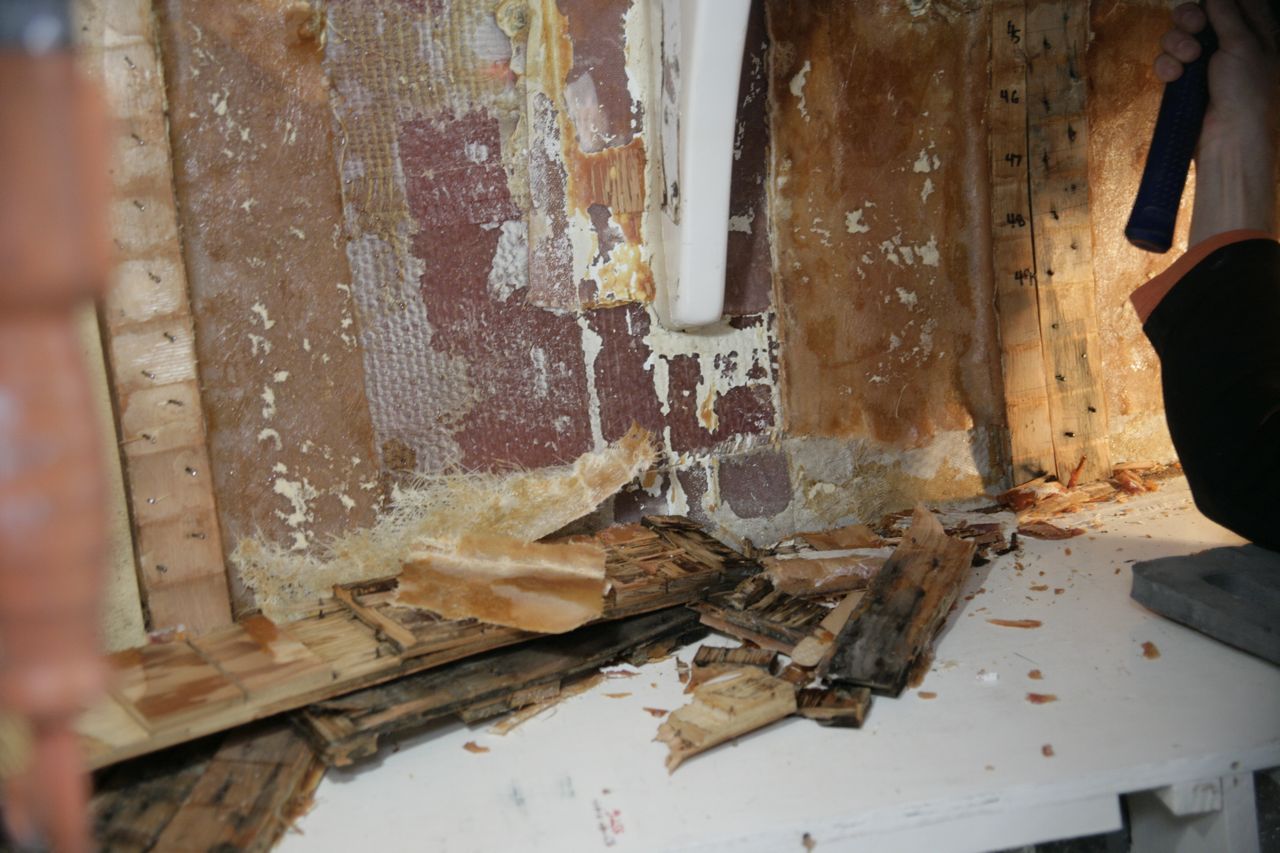
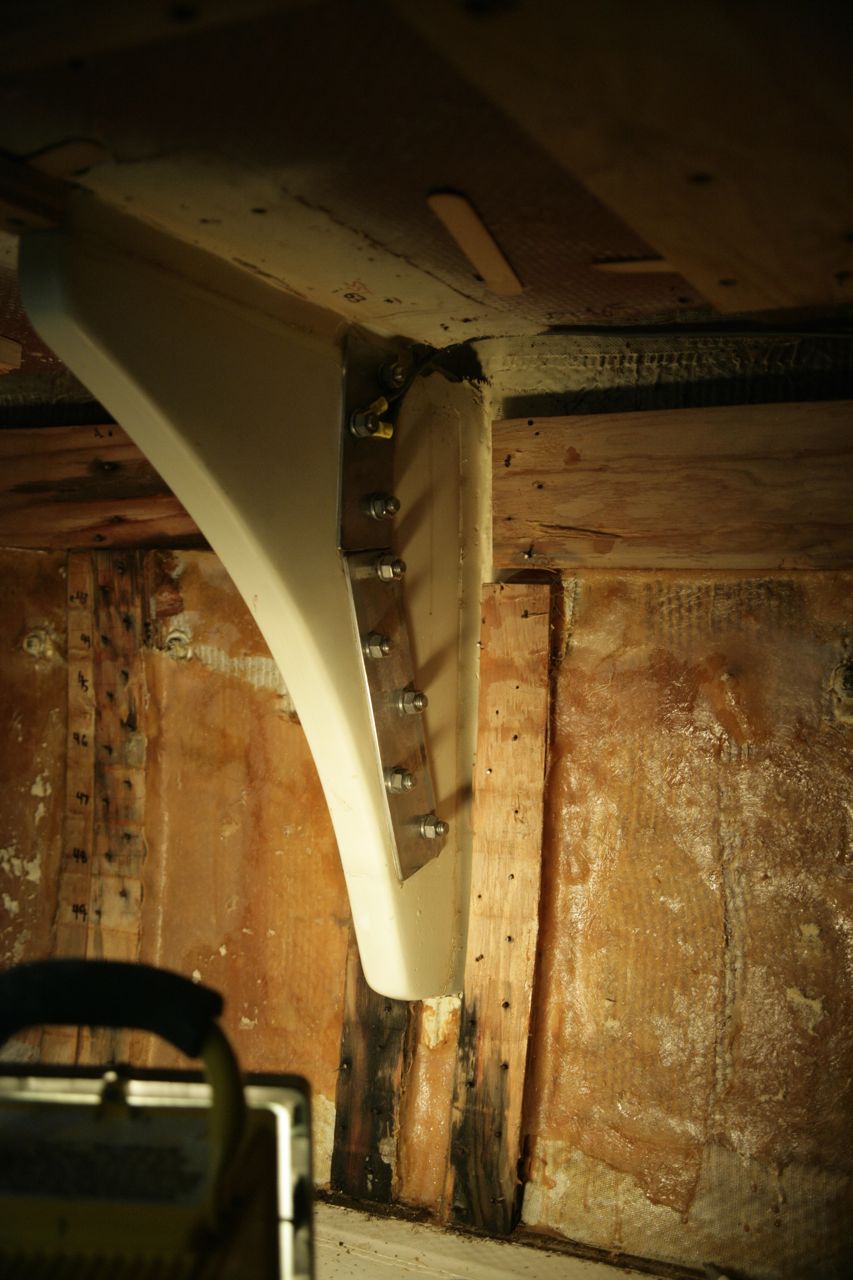
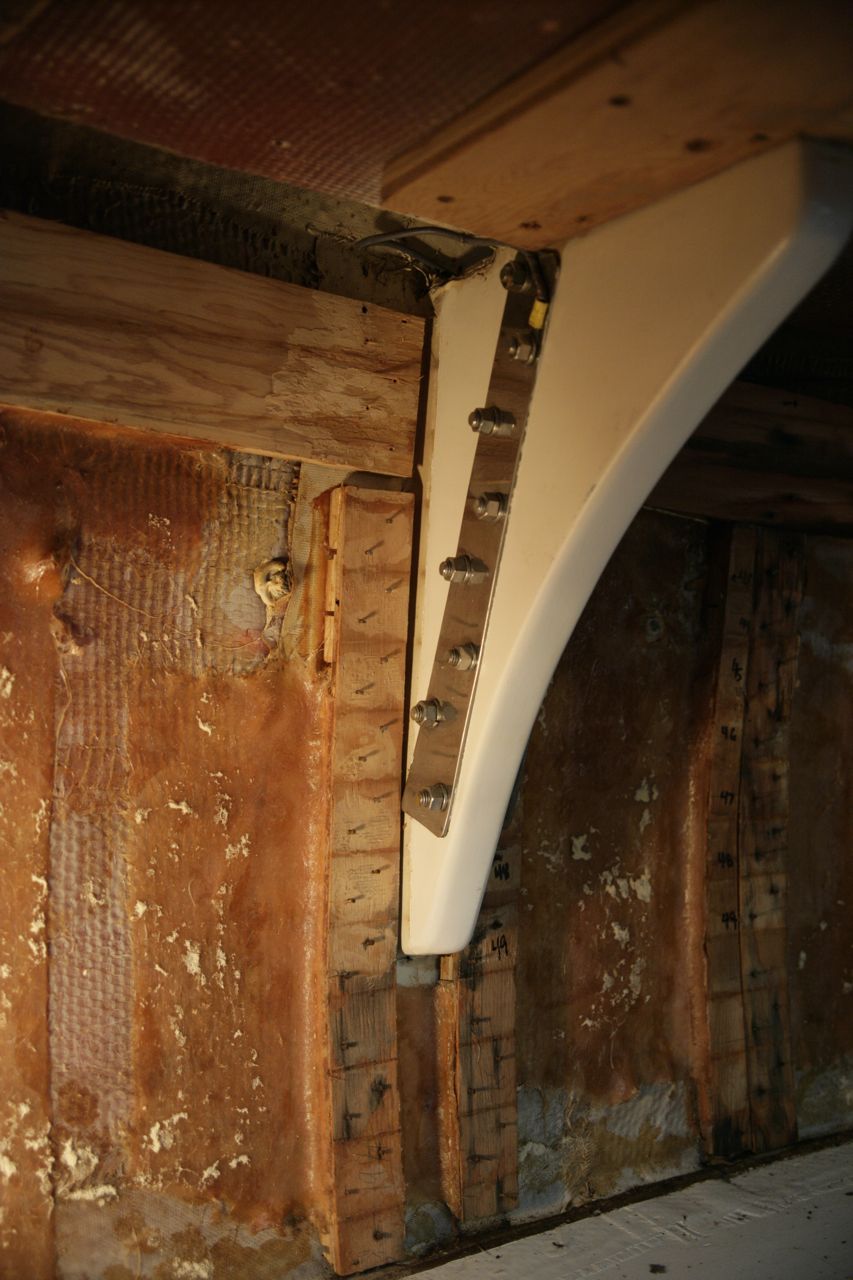
On the starboard side the cabinet didn’t come out so easily: I ended up breaking it a little in the process. On immediate inspection, both of these knees showed a small gap and cracking between the bottom point and the hull, indicating that they had indeed parted from the hull somewhat. After chiseling off the old kerfs (those vertical pieces of wood on either side of the knees, to which the horizontal trim battens were nailed) I was able to see that they used entirely too little tabbing to secure the knee to the hull. In the process of grinding off the old, bad stuff, I discovered that at the lowest level the tabbing had delaminated from the hull along its entire length, so I ended up having to grind off all of the old tabbing from the hull (I wasn’t that bad on the port side). I was in the bunny suit with the respirator and ear plugs and safety glasses and full face shield over that for 6 straight hours grinding away–it was a very unpleasant day. By the time I was done I had created a 1/4″ of fiberglass “snow” over every single surface inside my bubble (as karen called it).
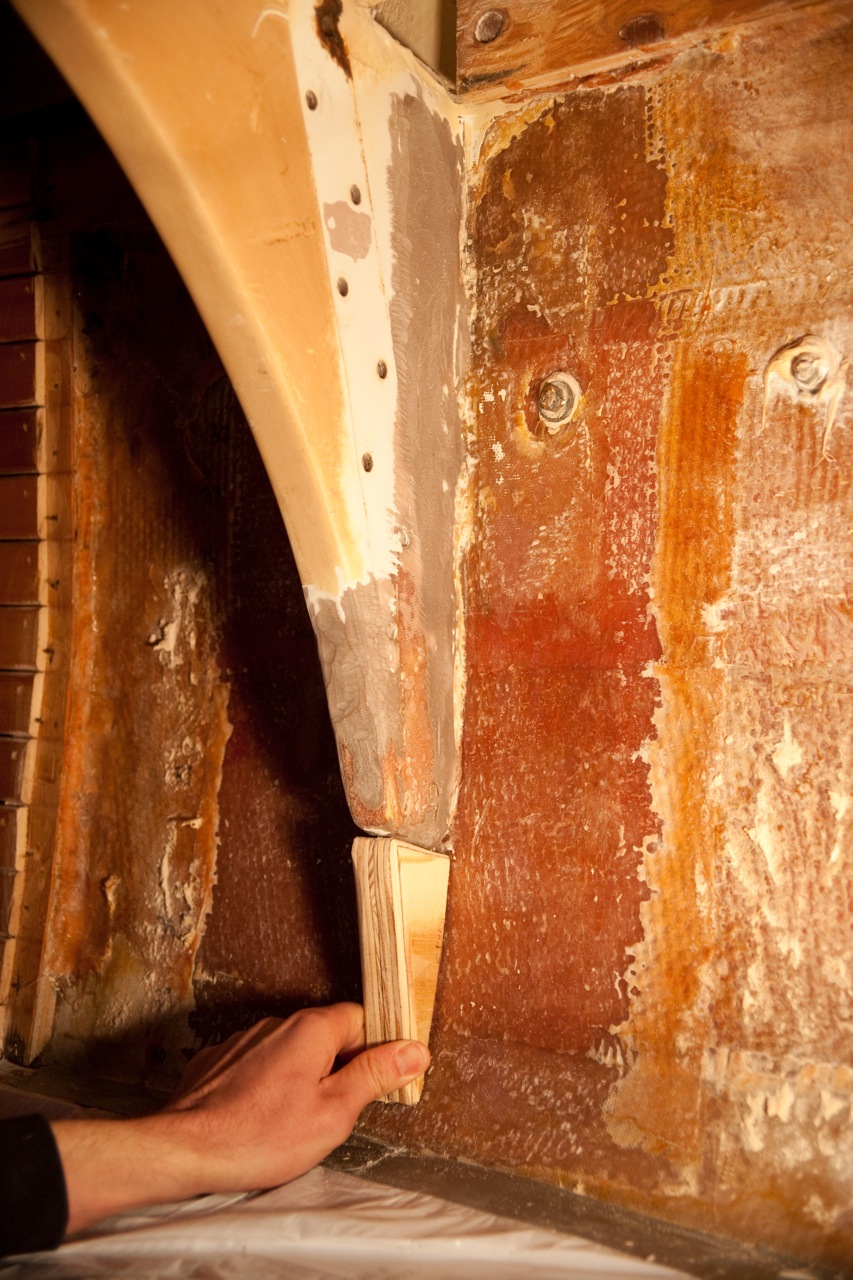
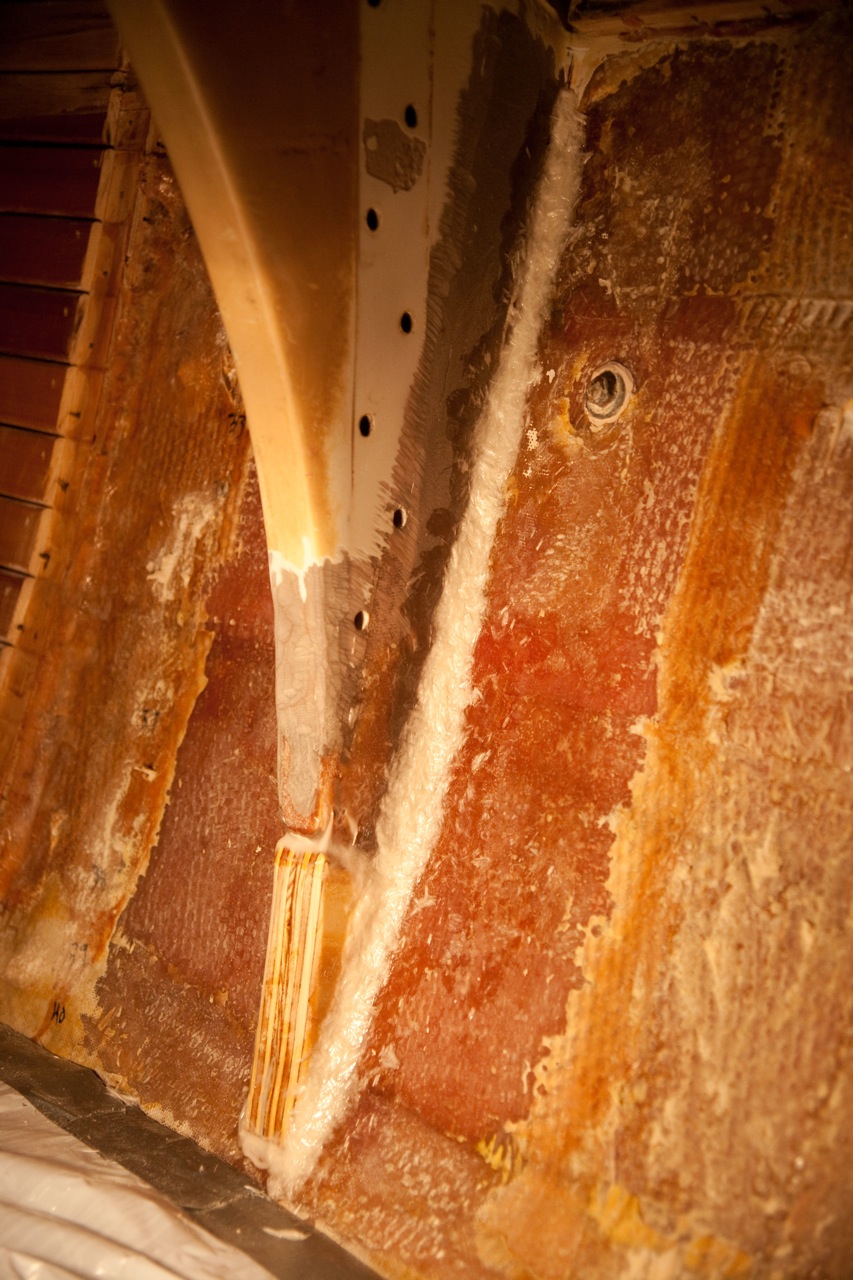
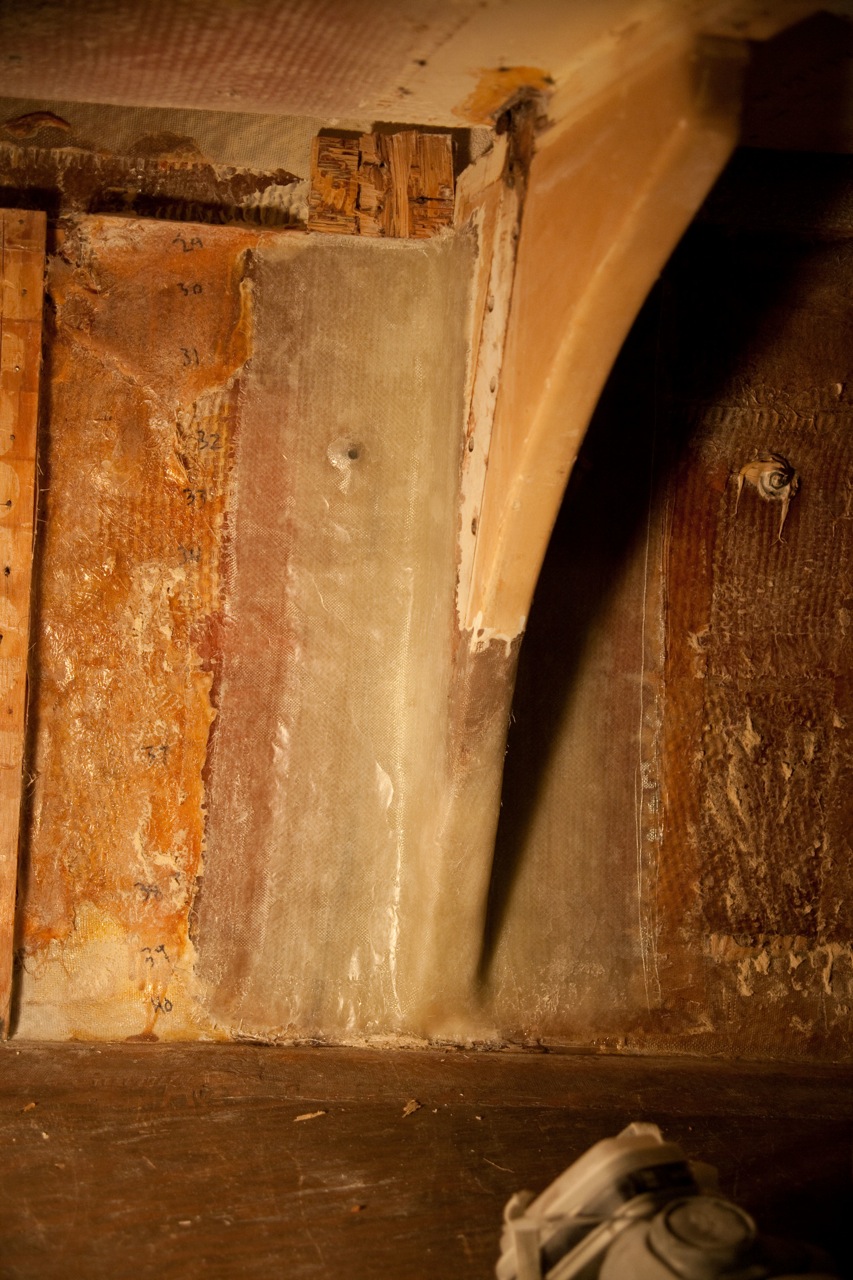
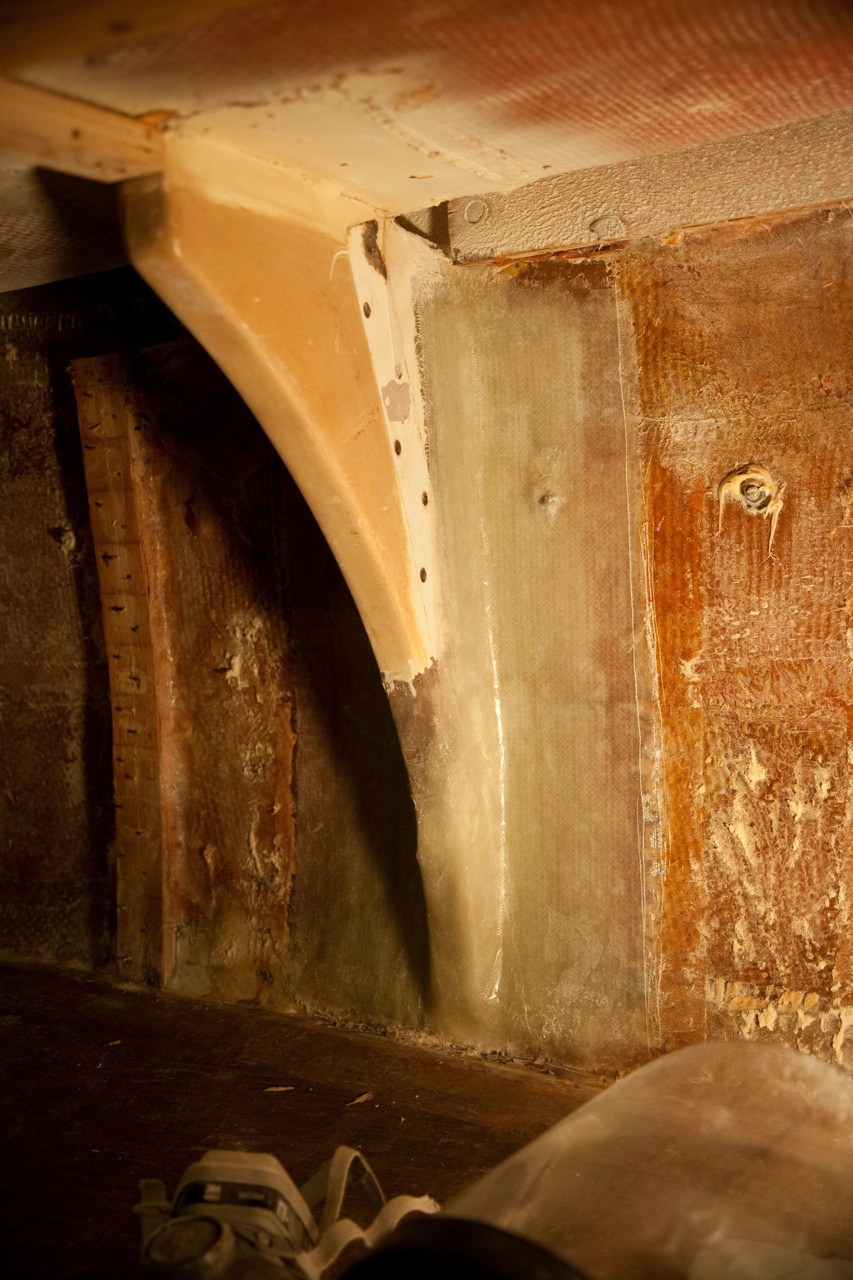
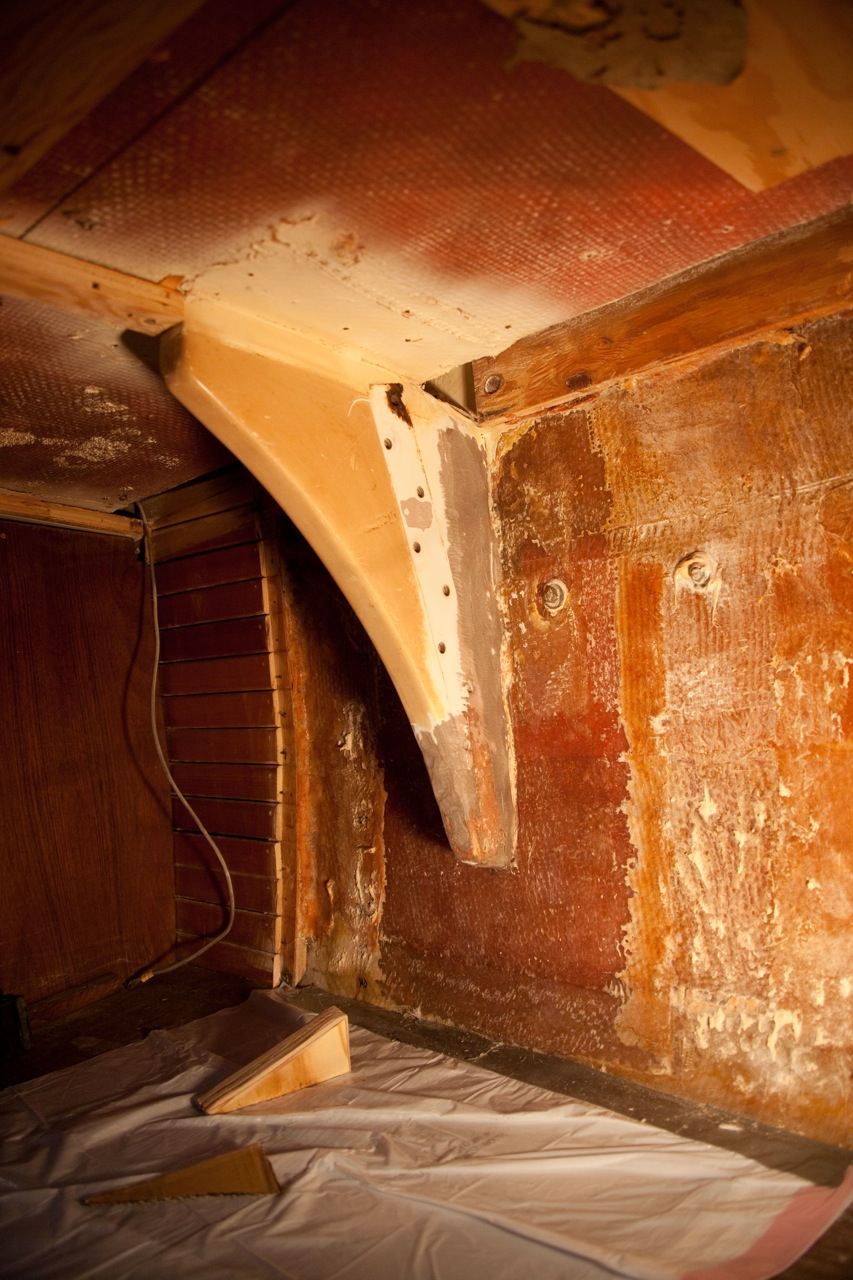
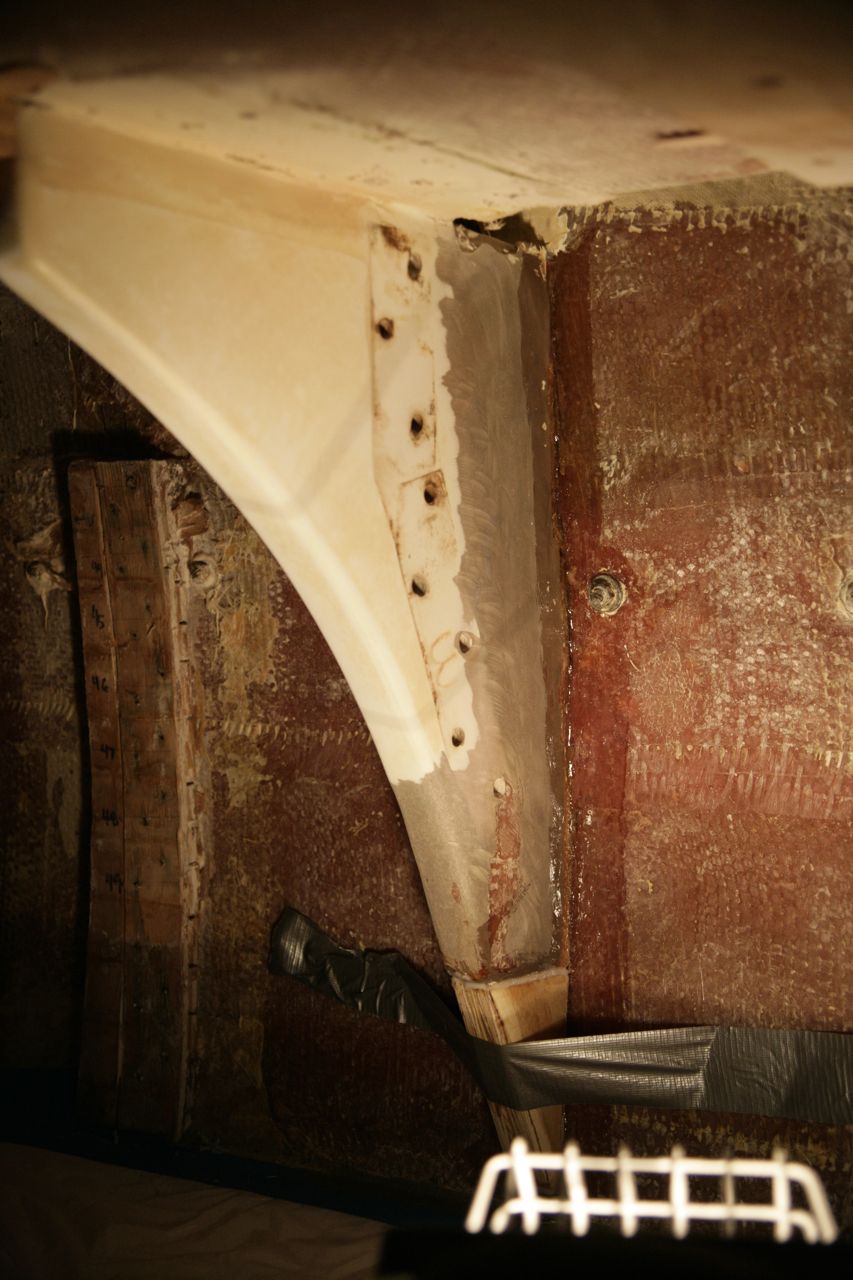
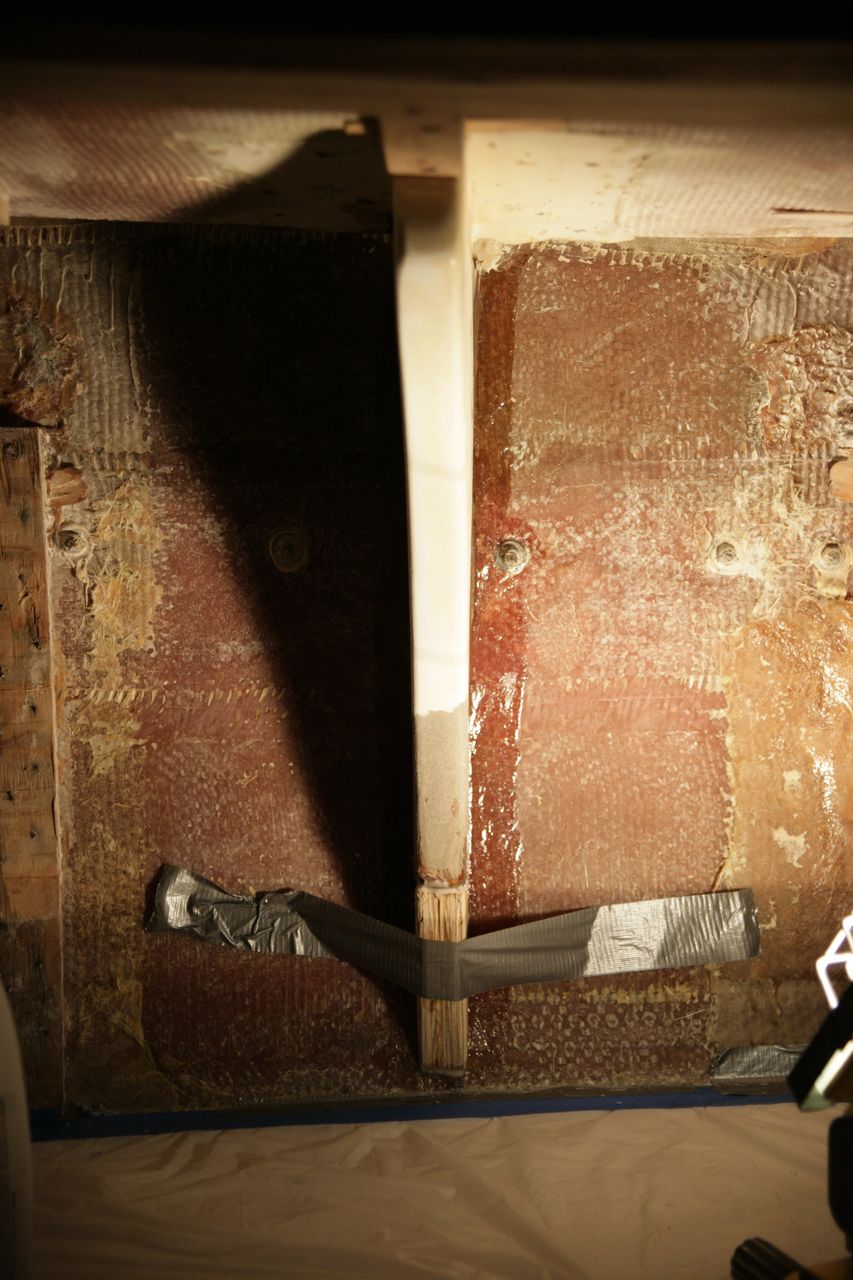
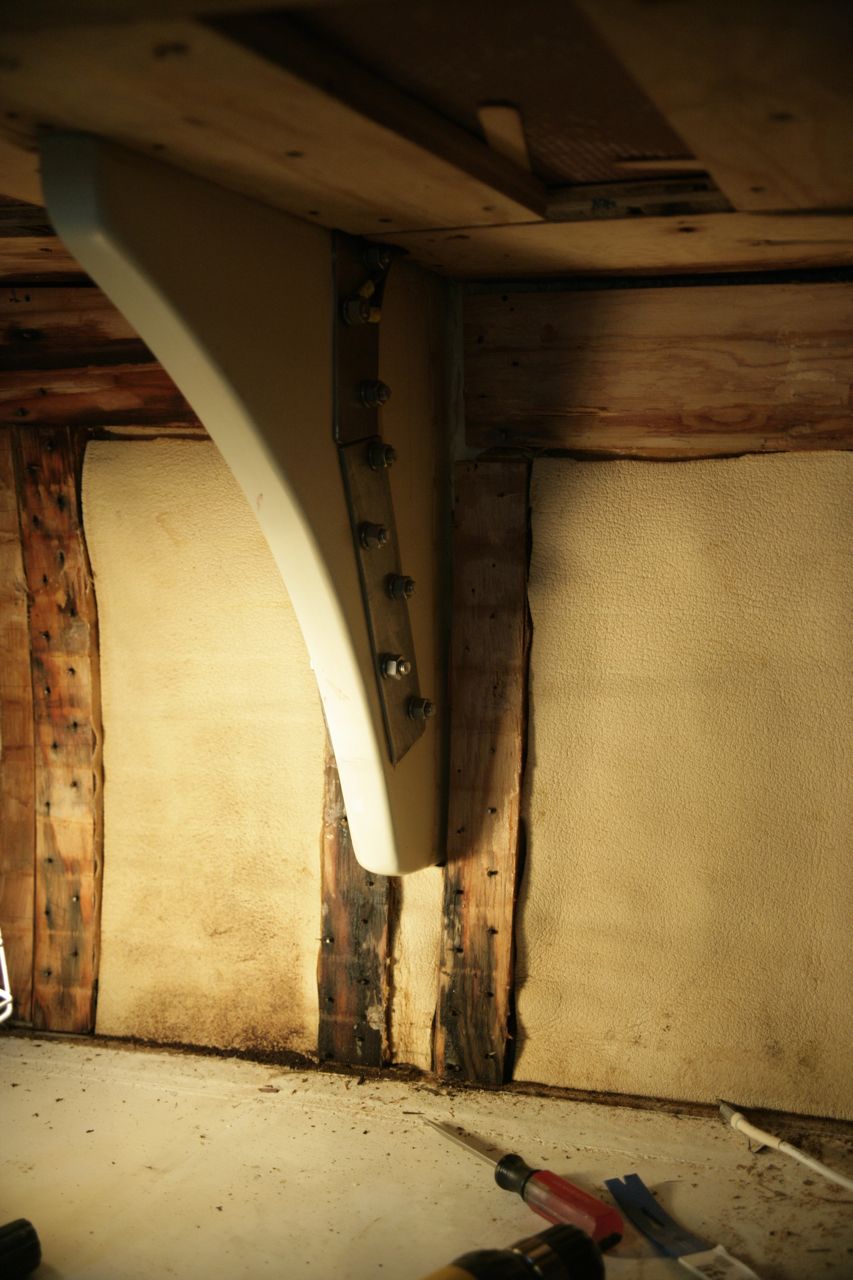
As on the port side, I fabricated triangular extensions out of plywood to extend the knees farther down the hull.
I used the same method and layup as I did on the first knee (in part 2).
As usual, putting it all back together took an eternity.


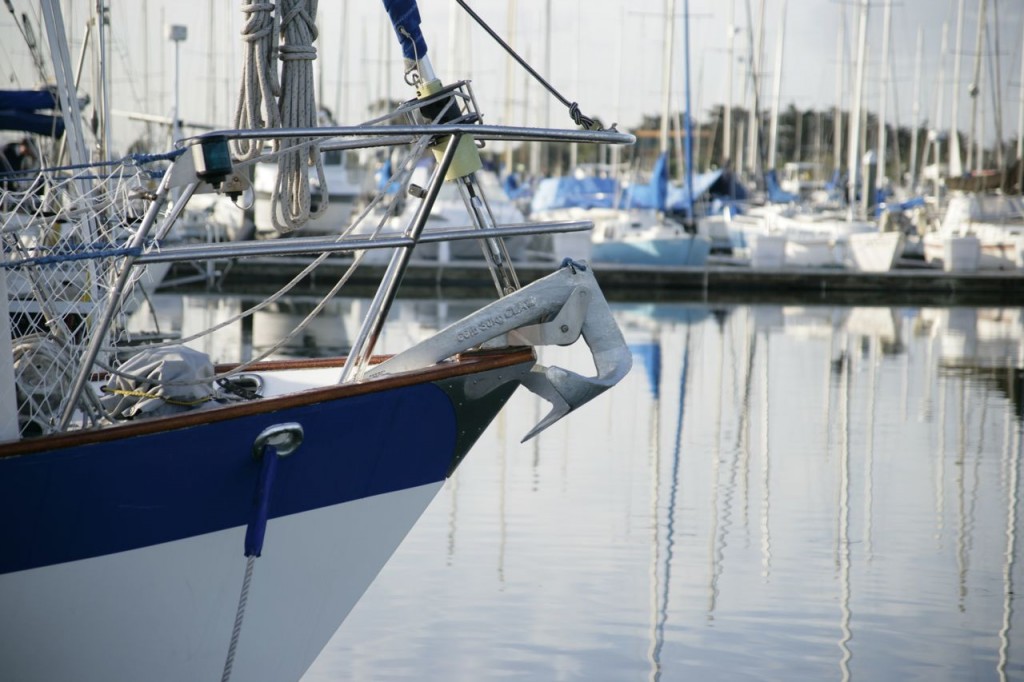
The bow anchor was a 44 lb Bruce (genuine forged bruce). I wanted a heavier anchor for general use. I sold the 44lb and bought a 66lb cast bruce look-alike. Supposedly not as strong as the genuine thing, but I’ve never heard of an anchor breaking. It was a great decision. It worked well for us across the whole pacific, and almost never dragged.
See knees part 1.
Jon cut two triangles of 3/4″ plywood that I sandwiched together and used as an extension to the bottom of the knee–this was an excellent piece of advice I received from Paul Rosenthal (justifying the cost of having him out for a consultation by itself). He also convinced me (or pointed out) that there was no good reason for putting a reinforcing pad of fiberglass between the knee and the deck. As he explained, the deck should only take the load if the construction is wrong–the hull should be taking all the load.
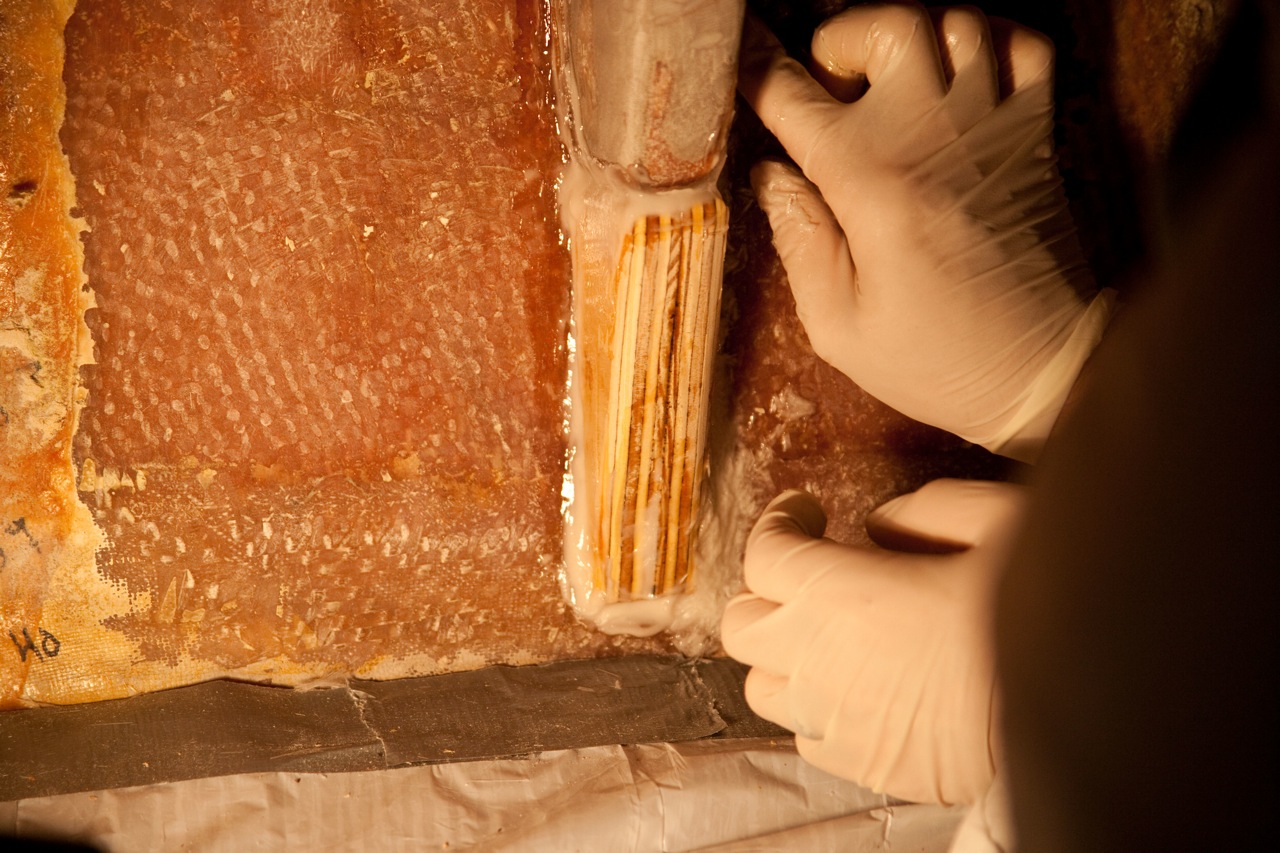
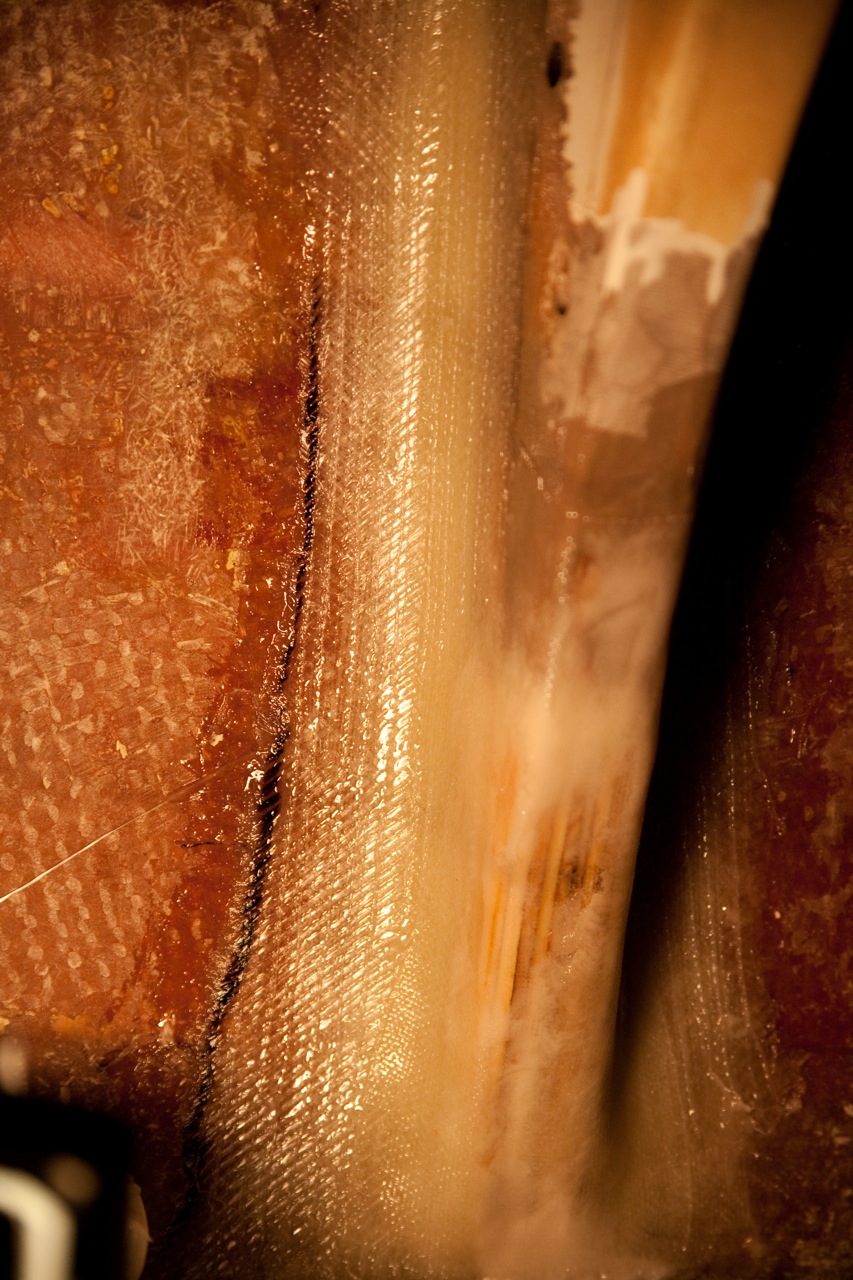
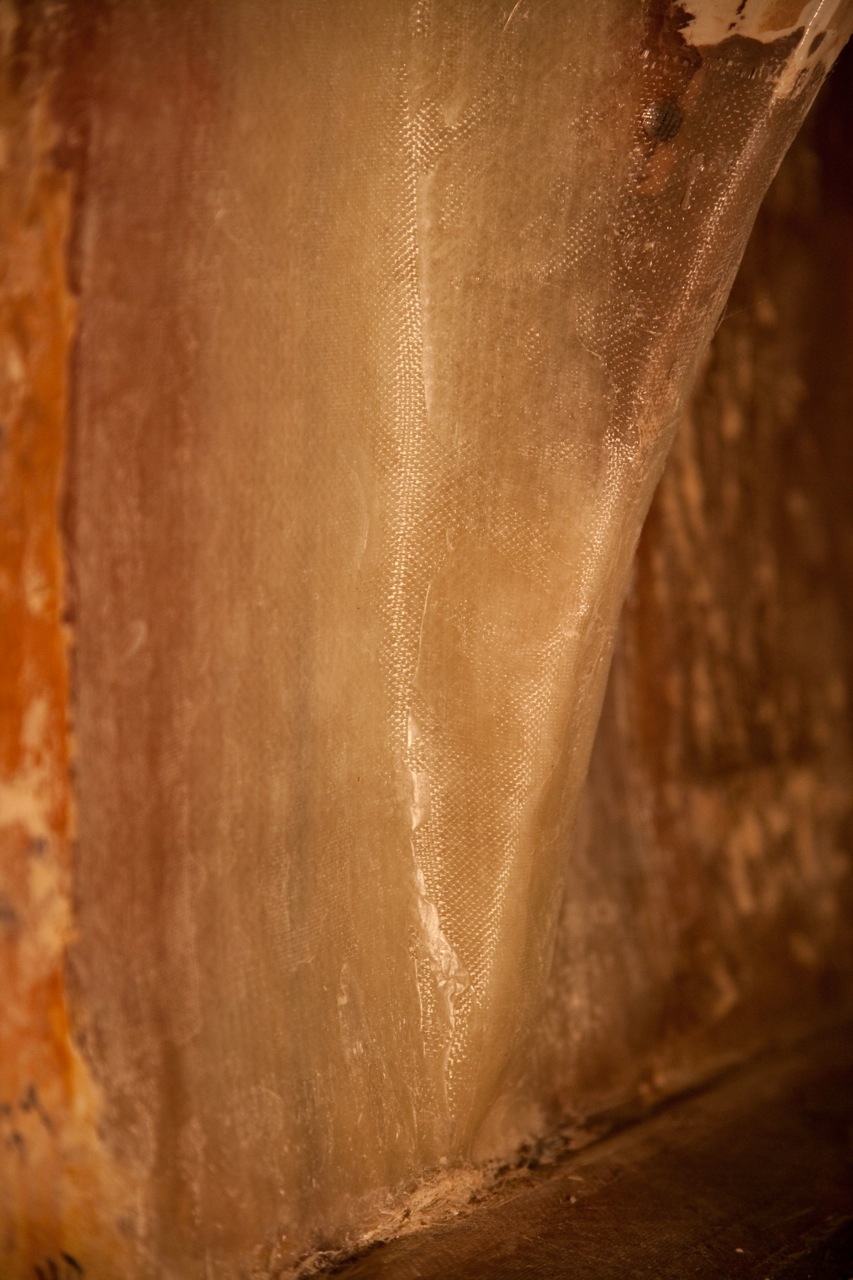
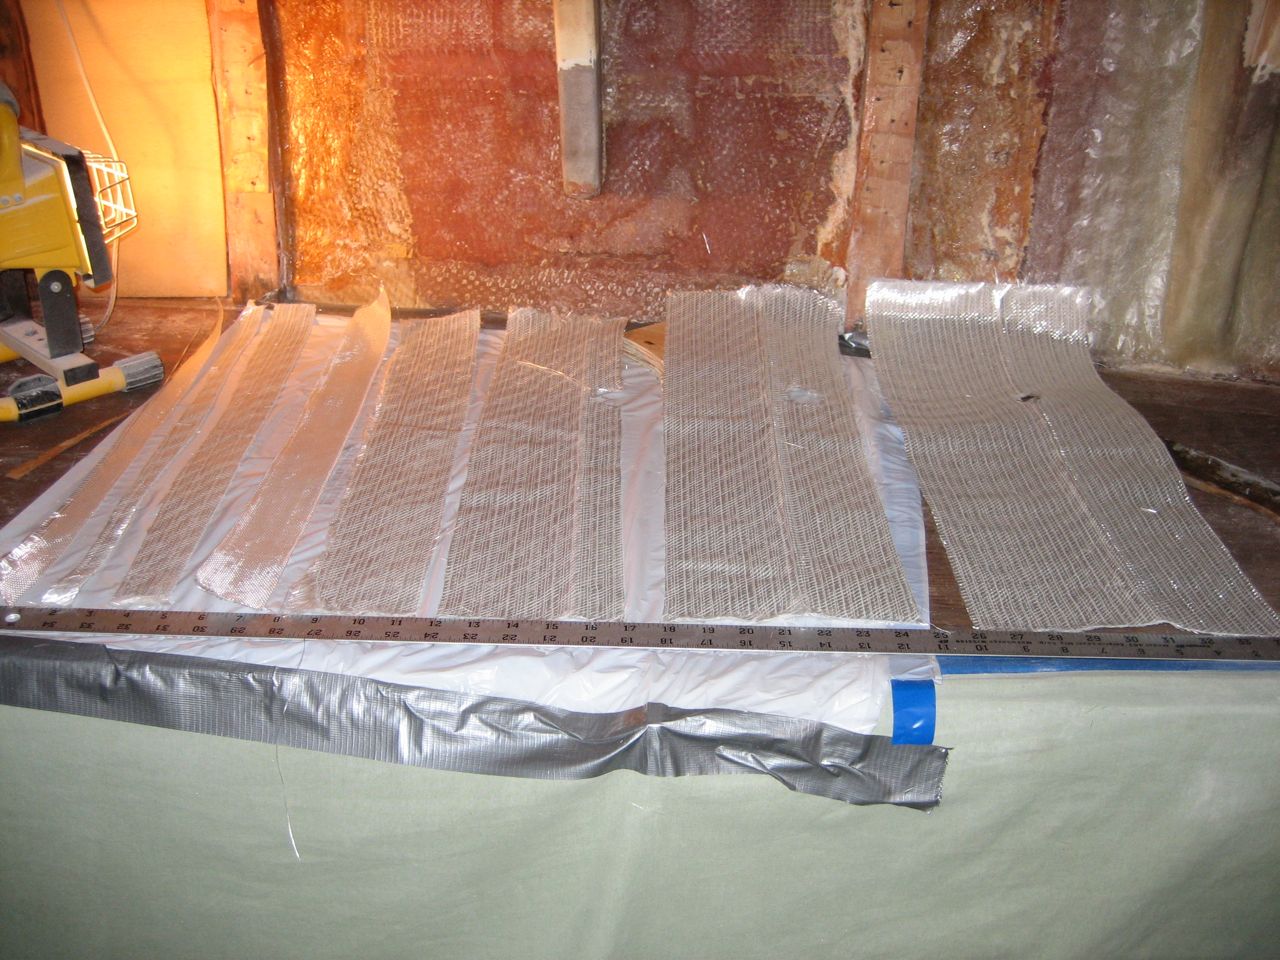
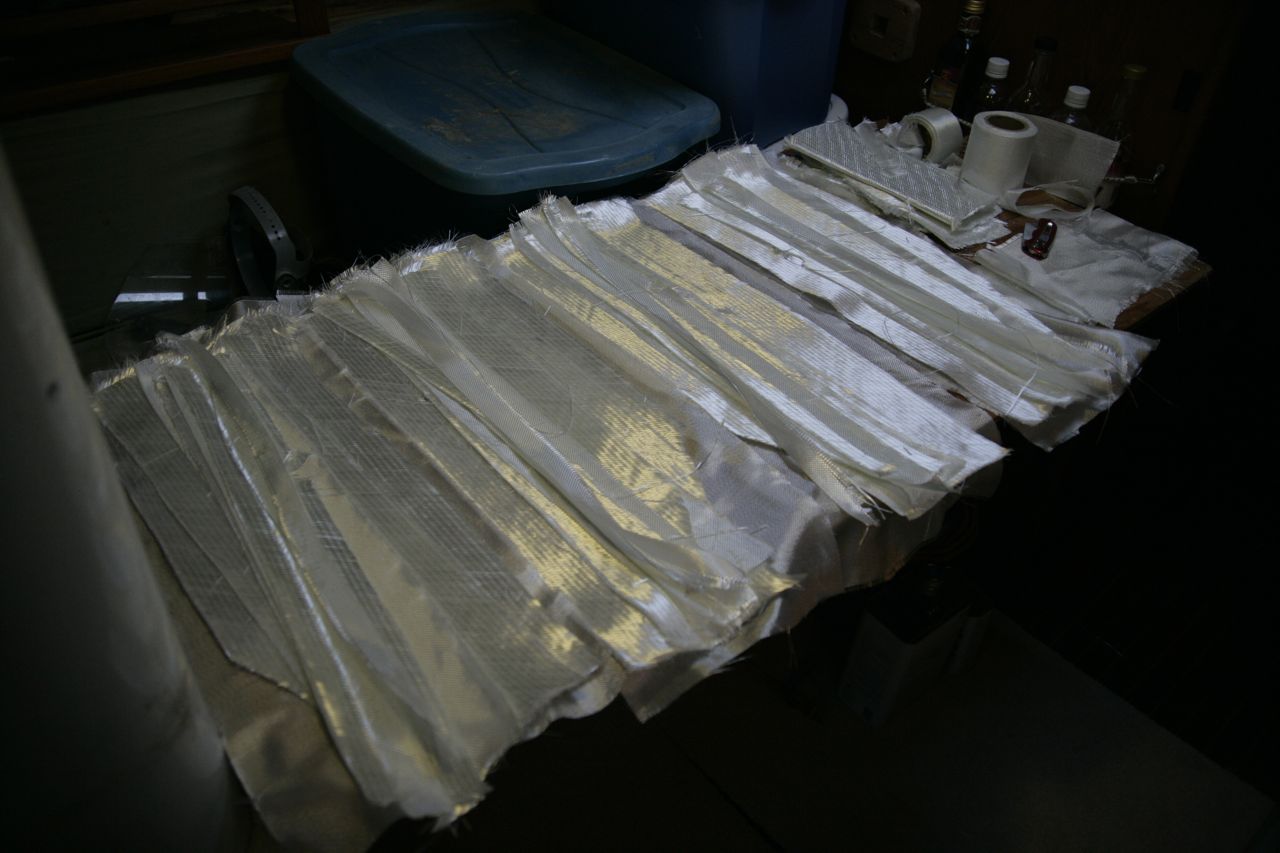
This was my lay-up (so that I remember two days from now when I do the next one):
large fillet of epoxy thickened with chopped glass (a container of ready-made chopped glass from TAP plastics).
Strip of 6oz glass ~1cm
strip of knytex ~2cm
6oz glass ~3cm
knytex ~3in
6oz glass ~5in
knytex ~6in
knytex ~7in
knytex ~8in (4in each side)
6oz glass ~9in
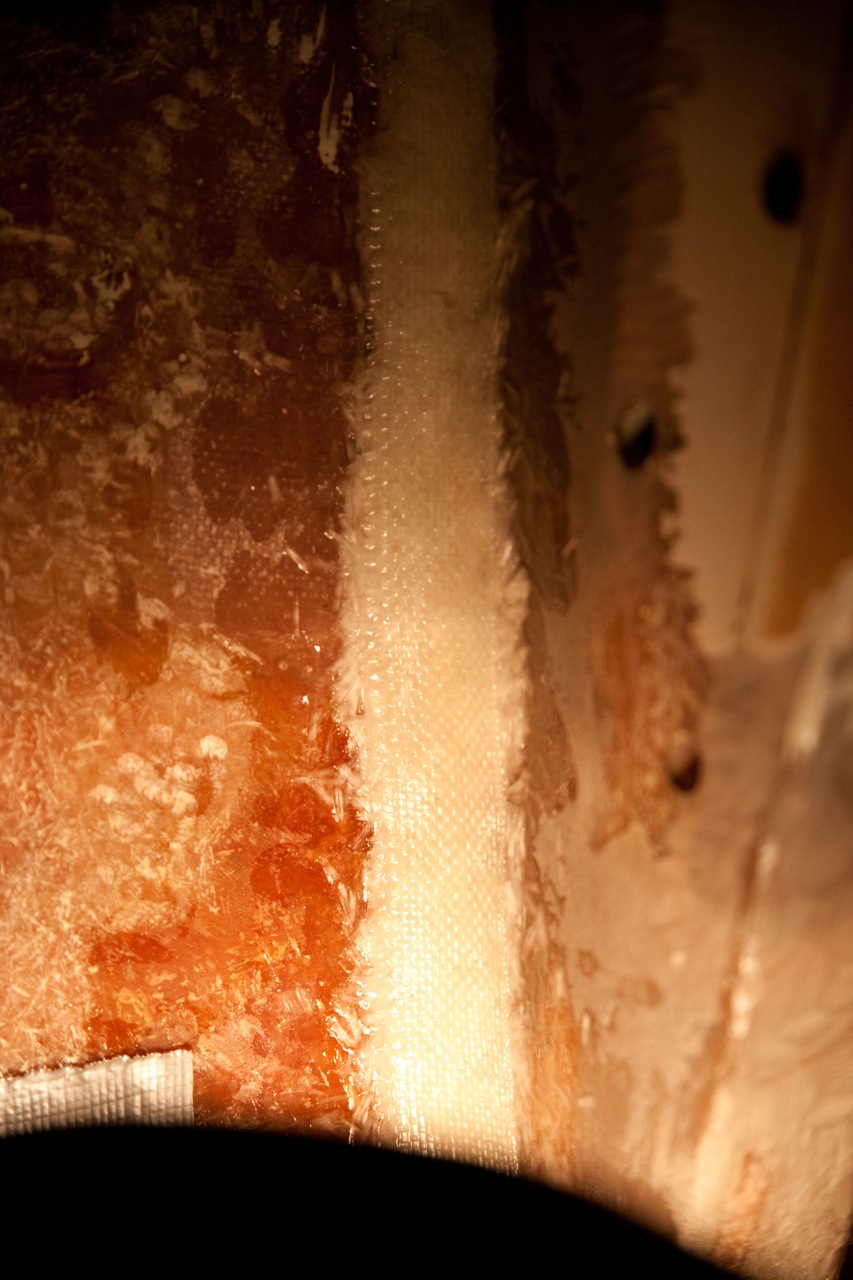
The knytex is a layer of mat and biaxial fabric bonded together; it is thick and extremely strong. It does not like to take corners at all–hence the thick fillet. If not for the thick fillet, the knytex would pull away from the joint and leave a gap (and weakness).
I think the job is strong enough. I am not a fiberglass professional and so I worry about various things, like whether I use too much resin, and other small things, but until someone smarter tells me what to change I have to plow forward with what I’ve got.