Author: jharadon

  • Strong Track Repair

    I (Jon) finished this job on May 7th .

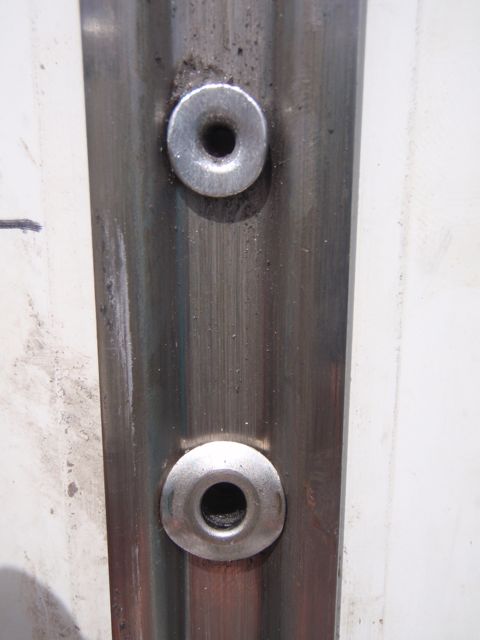
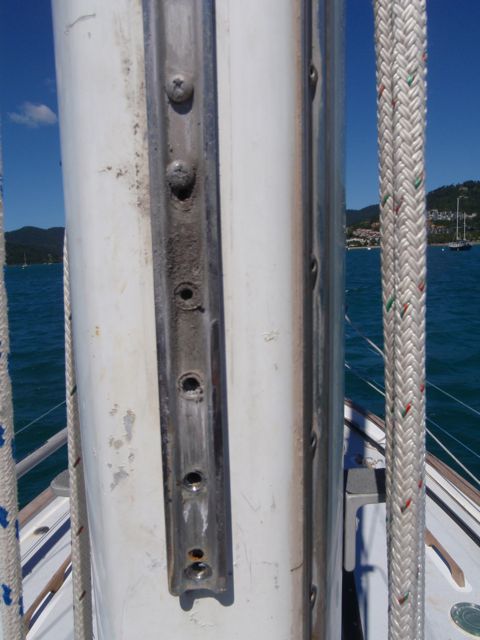
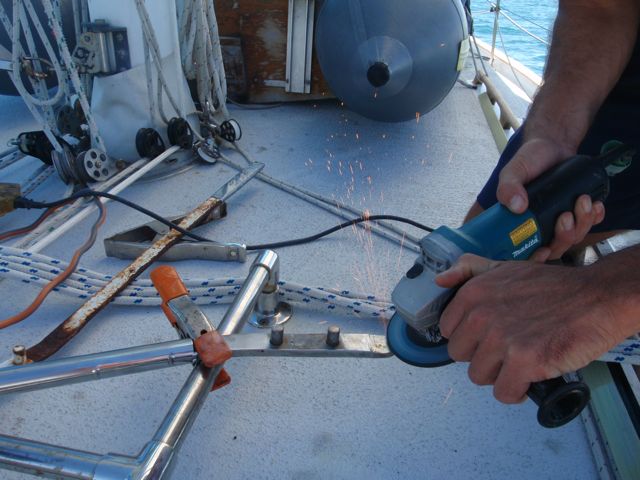
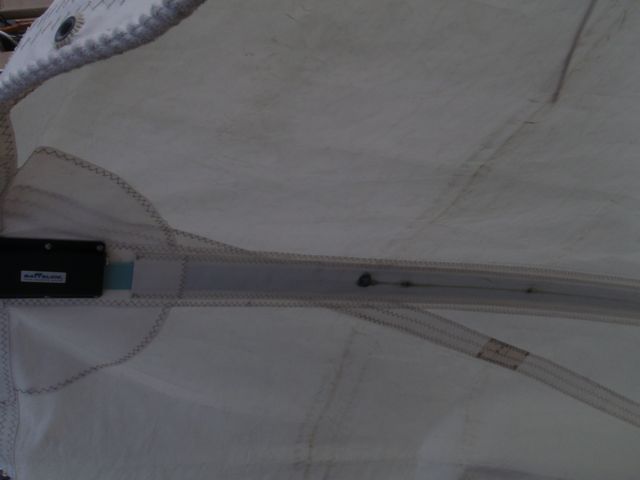
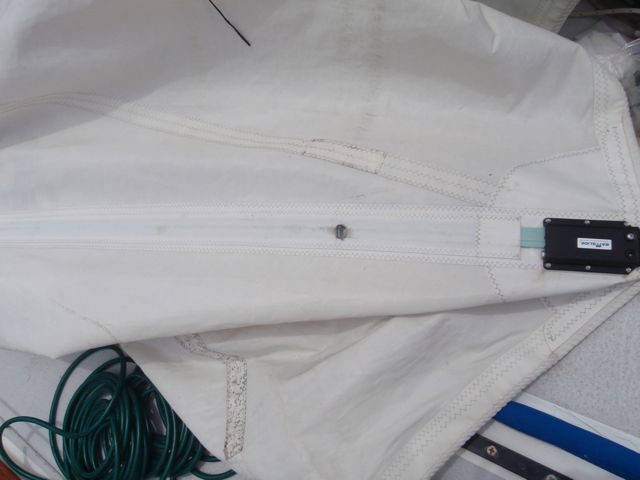
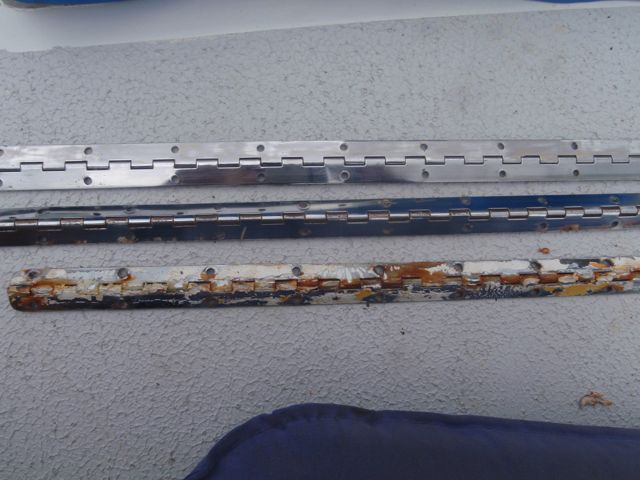
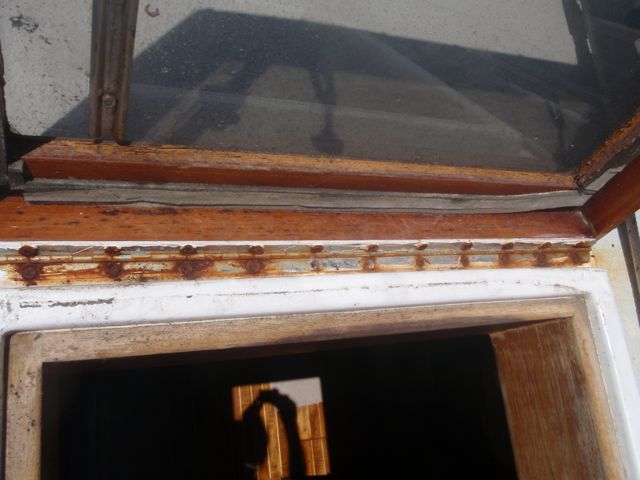
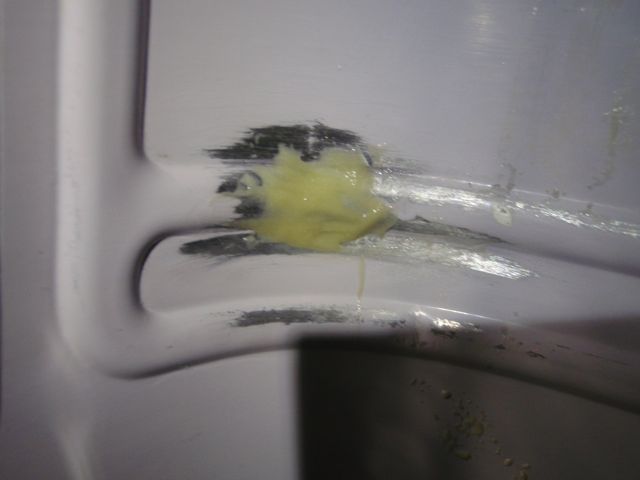
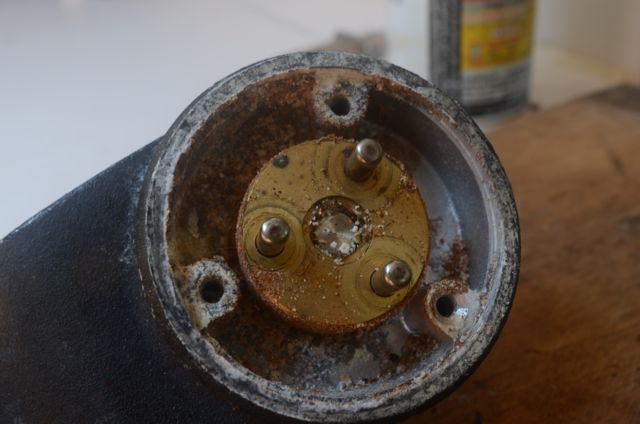
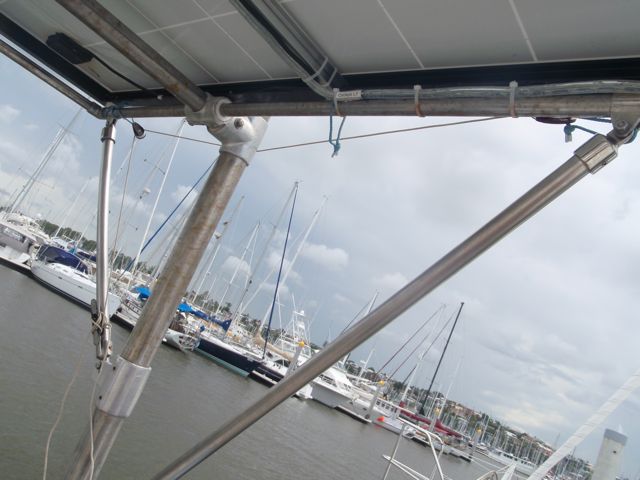
    When starting to sail away from Lady Musgrave Island in heavy winds, I raised the main sail to the 2nd reef and began tightening on the 2nd reef clew line. I then tightened up the vang as the boom seemed unusually high. Somehow something that I did, in combination with the heavy winds, caused about 8 rivets to pop out from the mast. These rivets held in the metal track which holds the plastic sleeve the main sail slides up and down on.

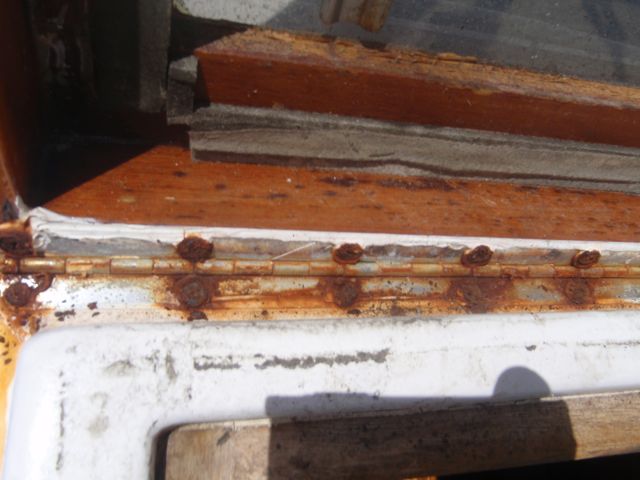
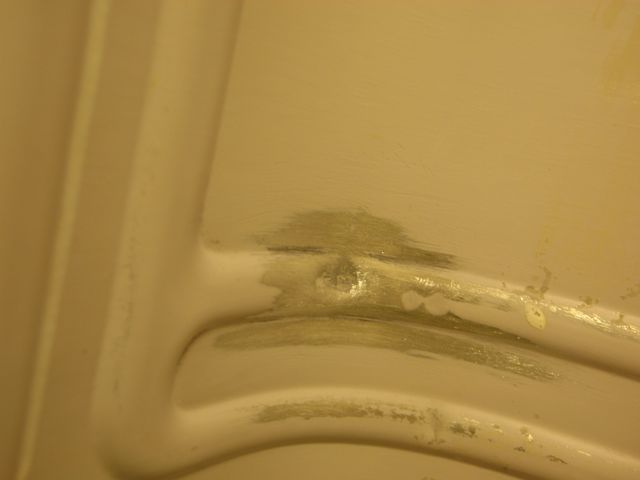
    I pulled the plastic sleeve off from the bottom of the mast. In order to do this, I had to remove the boom. There was very little room for it to over the fixture the boom attaches to, and I was skeptical that it would be able to make that bend. It somehow did, and so I pulled all 50 feet of plastic track off. I then drilled out the rivets that had broken but had partly remained in their holes. I also drilled out another 8 rivets that had not separated from the mast but were closest to the separation.

    Drilling was miserable, as our bits are getting old and worn down. Also I was hanging in a harness for some of them and didn’t have much leverage.  On a side note, at one point I fell from about 8 feet up while hanging from a tibloc that was attached to a halyard. The failure point was a knot in the amsteel line running from a carabiner to the tibloc. Thank god my feet were only 8 feet off the ground and I wasn’t up much further. As it was, my wrist and back hurt for a few days.

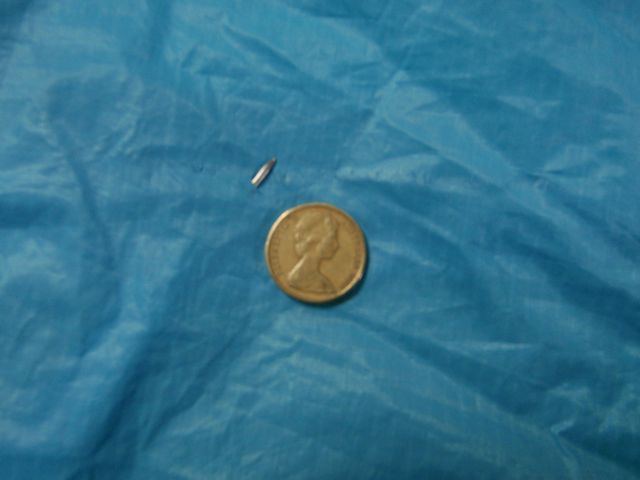
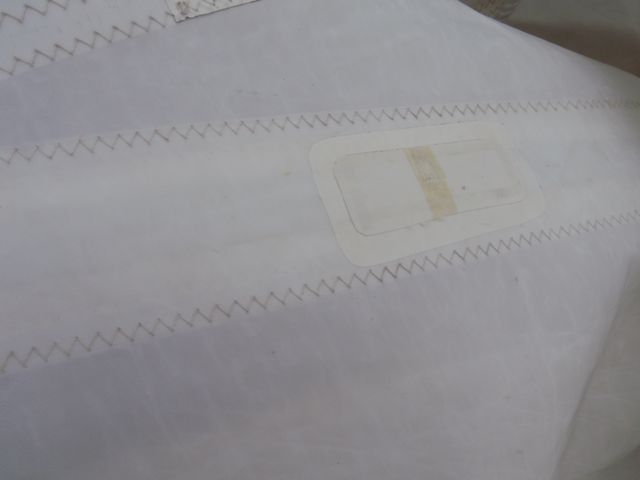
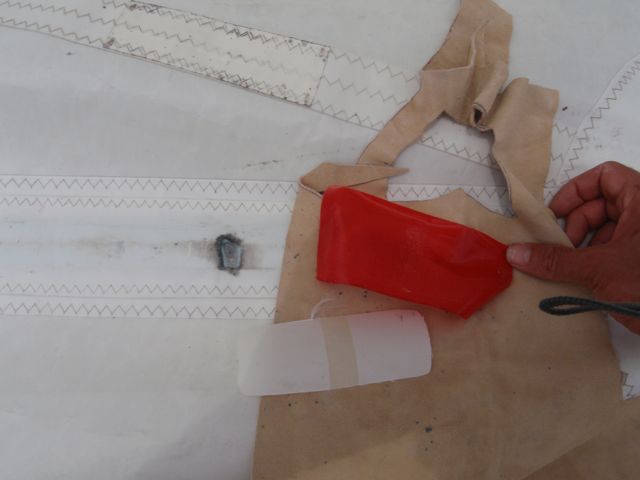
    We didn’t have the original size of grommet, which I think was 3/16 inch thick, but I used one size larger that we had about 20 of. We originally used these for the installation of the mast steps. One size up meant that each hole had to be drilled out with a larger bit. Luckily we had the perfect bit for the rivets, an F bit, which is .257 inches. Not .250, not a ¼ inch, but exactly .257 inches.

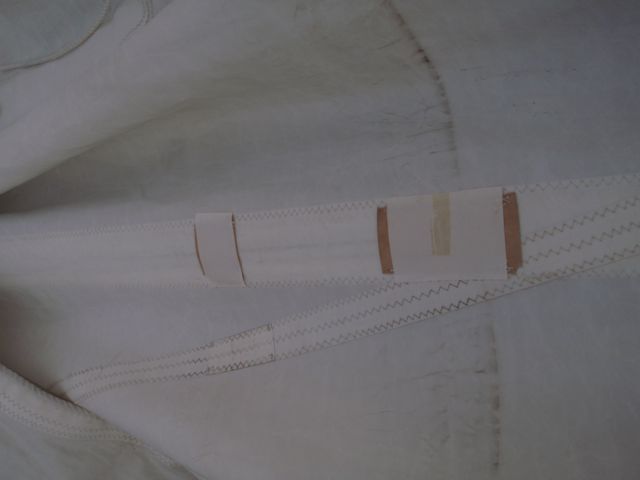
    One size larger didn’t quite fit flush on the outside of the metal track, but once compressed with the rivet gun, they seemed to fit fine.

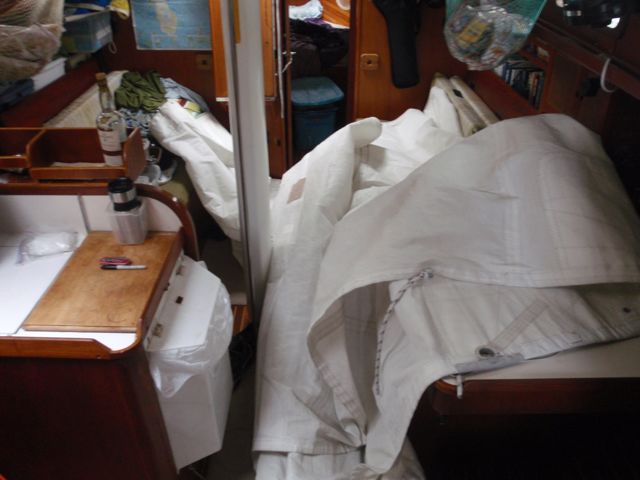
    Once the holes were drilled out and the new rivets installed, I slid the plastic sleeve back on. This involved using attaching a line to the top of the plastic strong track sleeve and winching for the entire length. the friction was pretty large and the winching was not fun, particularly after a exceptionally miserable conversation with people back home.

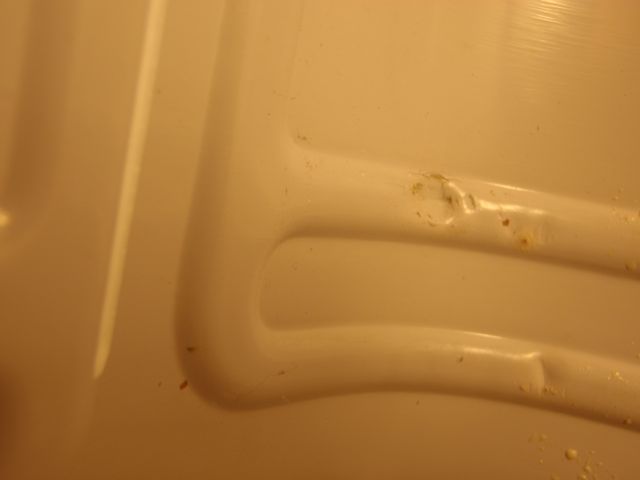
    And that was about it. The job was much easier than I had expected and everything seems fine for now.

    In the oddest of coincidences, another Valiant, Gizo, is currently cruising the coast of Queensland, in fact as I write this we are both in Cairns. They just replaced their Strong track within two days of when I was fixing ours. On Gizo’s strong track, one of the slugs that moves up and down the plastic track pulled out. Small world.

  • Utterly Miscellaneous

    Other completely Random Shit

    I (Jon) finished these jobs variously between November and April.

    I replaced the o-rings on all the deck-fills.

    I painted the leading edge of the dodger where the paint was peeling.

    I replaced the lines that held the rigging for the whisker pole with beefier line.

    I added distilled water to the batteries.

    I adjusted the bridle for the outboard engine.

    I replaced the ethernet cord with a longer one.

    I serviced and cleaned up the valve for the propane line to the BBQ. I also bought a new valve. It doesn’t fit the line. Fuck me.

    I added another line to keep the fenders in place in the engine room.

    I replaced the fuse for the wind generator when it blew because I was messing with the wiring when adding the splash panel.

    A board on the dinghy that sits behind the mount for the engine came off. It seems to have been held on by a single nail. Justin put it back on with 4 wood screws.

    Justin broke the bungee line that holds the monitor servo paddle out of the water while it is not being used. It got replaced. The bungee line, not Justin.

    I replaced a spring on one of the hatches that broke.

    I put a patch on the dinghy to try and stop a leak in one of the corners. Matt declares that it will forever leak, but I believe it can be stopped. The patch I applied is about 99% effective, so I’m at least glad for that.

  • Holding Tank Issues

    I (Jon) finished this job on Apr. 25th.

    An awful smell began emanating from the front of the boat. At first I thought it was the head sink, and broke things while ascertaining it wasn’t that. The smell remained, not constant, but it was definitely there. And soon it became clear that it was shit. Somewhere, something was wrong with the holding tank.

    It ended up being the old vent from the holding tank. An elbow bend is welded onto the tank where a hose can be attached that leads to a through hull. The elbow had completely corroded through where the hose attached to it. When I pulled the hatch off in the V-berth, there the vent hose was sitting, hose clamp around the hose, and the corrosion all around the vent. It smelled something awful. Additionally, the vent and the hose were badly clogged, with what I can only presume was dried shit. I was nauseous and had a headache after dealing with it for a couple of hours.

    In the end, I dug out as much of the blockage as I could with a stiff wire (a coat hanger I think). But I couldn’t be sure I was getting to all of it because of the 90 degree bend. The hose also had blockage in it which I simply cut off and through away, as there was enough slack in the line to allow for it.

    I then put the hose back on, having to nearly melt it with a heat gun to get it pliable enough to fit back on. I took it off from the through hull. I poured toilet blockage cleaner down the hose and through the vent to unclog anything else that might still be clogging it. Then I poured some water through and it seemed to drain perfectly quickly, so I think I removed most of the blockage.

    The smell has completely gone away.


  • Injector Nut

    I (Jon) finished this job approximately April 20th.

    One day we pull into Bundaberg Marina after having motored extensively for the previous four days. The next day we go to leave because the Marina is $54 a night. Ridiculous.

    Unfortunately the engine wouldn’t start. We were in Bundaberg for a week while I tried to diagnose the problem, then made the problem worse, fixed what I made worse, and then with a magic spell and some incantations (mostly four letter words) the original problem of not starting was fixed as the engine roared to life.

    To try and fix the original problem, I bled the engine repeatedly. I also changed both fuel filters. We change the primary filter whenever the vacuum gauge begins to register, but we haven’t changed the secondary filter in like two years. With regular changes to the primary, ti should rarely, if ever, need to be changed. But since it had been so long, I decided to change it. I asked Matt a question about it, and he was like, don’t you remember, you’re the only person who has done it when you changed it like two years ago.

    The problem that I caused was that when trying to crack open the injector nuts to bleed air out of the injector lines, instead of the injector nut turning open, the injector adapter loosened. I subsequently couldn’t get the injector adapter to retighten. I also couldn’t get the injector nut to loosen.

    The fuel line from the injector pump to the injector was obviously getting stressed with all the torquing. So eventually I had to take the injector line off at the fuel injector. This also involved taking the fuel return line off and pulling out the injector from the engine with fuel line still dangling on it. With the line and injector off the engine and sitting nicely on a cutting board I was able to attach a vice grip and a wrench, add a pipe to each handle to lengthen the leverage and yard with all my might on the injector nut. It finally loosened. I screamed in satisfaction.

    The Perkins dealer in Bundaberg informed us after a day of calling around that there is no Perkins 4108 injector nut in all of Australia, but the dealer was able to pull one from another engine that fit.

    With the injector adapter, injector nut and fuel line back together, I put the injector back in and reconnected the fuel line and fuel return line. I tried again to bleed the engine properly, and again, it didn’t start.

    I tried again, It didn’t start. I tried an hour later, it didn’t start. I tried again, it didn’t start. And then an hour later with a few more 4 letter word incantations directed at the engine, myself, the boat, Justin, my ego, everyone who I wasn’t getting along with at the moment because they were ignoring me, the counter person at McDonalds (j/k) and basically the entire world, the engine decided to start.

    The engine has now been running for a month absolutely perfectly so I’m pretty happy about that. I figure I just needed to keep bleeding the engine properly.

    I also replaced the shitty plastic bleed valve on one of our primary fuel filters with a real metal screw. Fuel used to almost continually ooze from this bleed valve. It no longer does. This was not the entire problem, though may have been contributing to it.

    For another rendition of this story, see the main Syzygy blog here.

  • Windlass handle

    Windlass handle

    I (Jon) finished these jobs variously on March 10th, Apr. 20th and Apr. 25th.

    Somewhere across the Pacific the handle used to crank up the anchor windlass broke about 3 inches from the bottom.

    Multiple welding shops here in Australia said they didn’t want to bother. Another wanted to charge me $75 just to weld the 3 inch piece back on. Finally I found a shop willing to do it for a reasonable amount $20.

    This worked great for two months at which point the handle broke again, this time one inch further up, 4 inches from the bottom.

    At this point, I was beyond extreme frustration levels. Syzygy was headed to Bundaberg after this and it was unfortunately most reasonable to use the welder right next to the marina. This meant I was probably overcharged even with respect to Australia’s over-inflated prices. He charged me $120 to weld on a new 6 – inch stainless bar onto the cylindrical pipe forming the entire handle. (this is, of course, what Matt said I should do originally, but I tried to get away with something cheaper.) This stainless bar was supposed to be exactly like the old one. The next time we went to go use the handle to crank up the anchor, Justin finds that the stainless bar that was welded on was not exactly the same, it was nearly twice as wide. And it didn’t fit into the slot made for the handle on the anchor windlass.

    So a week later while sailing along at 2.5 knots on completely flat seas, I pulled out the grinder and took off enough so that it fit.

    Done.

  • Sail Maintenance

    I (Jon) finished these jobs variously on Nov. 29th, Dec. 4th, and Dec. 10, and May 15th

    On the main sail:

    I added a variety of different patches to areas where the sail was wearing through. This would happen where the battons would hit the spreaders.

    On some patches, I first added a layer of dacron, covered that with a layer of adhesive sail tape and then hand sewed a leather patch on top of that.

    On other patches, I added a layer of leather, then a layer of dacron  and finally a layer of adhesive sail tape and sewed that sewed that.

    I’m not sure which is best. I suppose visually, the white adhesive sail tape is the least noticeable. But I think the patch with the leather on top will have the longest resistance to wear before something else needs to be done.

    I also added adhesive sail tape patches to chafe points from the strong track attachment points. The rings that keep the pins in place for attachment points had bent and were exposing the ends of the rings. These ends would chafe the leach edge of the sail. I replaced all of the rings that had become bent.

    I checked every single stitch in the main sail. Surprisingly, all stitching was still doing fine. I was expecting to have to do some repair stitching in some places.

    I added a leather patch at the head of the sail, which was becoming worn through in some areas.

    The main was a bitch to work on because it rained in Brisbane non-stop for three months while I was motivated to be doing this. So I had the entire main sail down below, hanging across the salon for three days while I worked on it

    On the jib:

    I added new leather patches to the jib where it was chaffing through at the tack, head, and clew. At all points, I made a leather piece the same size as the original.  Additionally, at the clew, in the area of largest chaffe, I reinforced that area with two additional smaller pieces of leather. So now instead of one layer of leather there are three layers.  At the head and tack of the jib, the chaffing wasn’t quite as bad, so I only put put one additional piece of leather at the point of highest chaffe.

    I sewed a new patch onto the luff edge of the jib where it had chaffed some from hitting the spreaders.

    I sewed a 20 foot part of the sunbrella back to the edge of the jib (5/25). In just a short side note of commentary, someone who saw me doing this commented that wow, that seemed like a big job. In perhaps an indication of how far I’ve come, I thought to myself, not really, I’m going to bang this out in about 2 hours and only curse maybe a couple of times doing it. Then someone else saw me doing it and offered to pay me to do theirs. I have to admit to a little bit of pride and esteem because of those two things.

    On the drifter:

    I sewed a 8 inch by 8 inch patch onto the drifter where a one inch line of tiny pin holes had developed.

    I sewed a patch on the bag we hold the drifter in where it had gotten a hole.

    There is a pulley at the top of the drifter on which the line for bringing the sock up and down runs. Somehow while sailing in April, it broke, I don’t know how it was even originally attached, though it looked like it might have just been zip tied. So I re-zip tied it up and raised the drifter again to see if it would work. It immediately broke and the sock began to slide down from the top while we were sailing, nearly unfurling the drifter from the top in the process, with no way to sock it. Having the drifter filled with wind with no sock and thus no easy way to get it down would have been a nightmare. Only a quick shout to Justin to immediately drop the drifter, combined with light wind that didn’t catch the sail allowed us to get the sail down with no problems. It took hours to figure out what to fix and how to do it at anchor at a reef miles from land, but eventually I tied the pulley to grommets in the sock with amsteel. It seems to be working fine.

    Not exactly about the sail, but there is a block at the top of the mast where the port spinnaker halyard runs. We also use this line to raise the drifter. It broke. I found a double block in our spares.  I put the double block on one of the blocks at the base of the mast, and used the block from the base of the mast at the top.

    I re-sewed a bunch of seems on the main sail cover where the stitching was failing.

    And because I have no where else to add this to, I’ve added a bunch of patches to the anchor windlass cover where it keeps developing small tears.

  • Go sailing, stuff breaks

    I (Jon) finished these jobs variously on April 5th.

    While sailing along soon after Justin arrived, one of the pulley wheels on a jib sheet block completely exploded into four pieces.

    A entirely new block would have cost an obscene fortune here in Australia, but I was luckily able to buy just a pulley and make it work.

    Also, the cover for the emergency tiller had been slowly breaking and finally I accidentally stepped on it and crushed it through. I bought a new one of those, left the threads from the old one in the deck, and just used the male threaded lid.

  • Scuba Tank shelf

    I (Jon) finished this job on April 4th.

    Justin and I had grand designs to go scuba diving dozens and dozens of times. Syzygy already had two tanks that Matt purchased in Mexico for $? dollars each. (100?) Justin and I each purchased an additional one for $400 dollars each. Per usual, Australia is obscenely more expensive than elsewhere. So now with four tanks, there needed to be a better storage system than just laying them down in the port cockpit locker. So I built a small shelf in the port locker to accommodate them. Now they all stand up straight.

    Two of the tanks fit great. the third tank in fits with a little bit of maneuvering to get it under a lip that is on the locker lid. The fourth one…. goddamn it if the fourth one doesn’t quite fit. Actually it fits if you take the hard plastic protector off the bottom of the tank. This nets you an additional millimeter or so of space and that allows the fourth tank to fit.

    I had to cut a small section of a shelf that was already in the port locker that was holding spare flotation vests. The vests still easily fit and the tanks now use what was once dead space in the locker.

    Awesomely, we had thought that the cockpit locker was over-flowingly filled before. Matt and I had both swore at the locker at various times as we tried to pull the drifter out and put it back in while sailing across the Pacific. Now, with the shelf in place, it arranges the tanks into a better position; they create less dead space then when they were lying down flat and they take up some dead space that wasn’t being used previously.  I also rearranged some of the sails already in the locker. Voila! Now everything that used to be in there is still there AND there are two more scuba tanks that fit inside the locker.  AND I actually think getting the drifter in and out of the locker is easier.  Boomsticks. On rare occasions, things just work out.

  • Sink issues

    I (Jon) finished this job on April 2nd.

    The starboard side kitchen sink drain has to make two 90 degree bends in order to clear the cabinets it sits above and get to the through hull. Not a particularly good set-up, but not much can be done about it. Scum and grossness has built up inside the horizontal part of these bends. I pulled the plumbing (as per what I remember from the times I got my first water heater repair near Plano), and fully cleaned and scrubbed all the parts. There was a complete blockage at both 90 degree bends and all along the horizontal tube. It smelled disgusting.

    You can see this post on the main Syzygy site for a more humorous take on it.

    Also, at some point a smell began emanating from the forward part of the boat and which seemed to be coming from the sink in the head so I thought the same thing might be happening in the head. In trying to take apart the plumbing, I sheered the metal fixture off the bottom of the sink. Fuck me. Now the only way to appropriately attach a hose to the sink so that it can drain is to buy a new sink.

    Currently I have a through hull attached to the sink.  The through hull sits at the bottom of the sink and goes down beneath it to the hose that connects to the through-hull. This is supremely sub-optimal as now a small layer of water can’t drain out the sink. It sits in the sink and nastiness develops since we use it to brush our teeth and what not. But it was the best I could do while out at sea.

    And oh, the sink was not the cause of the smell. It was the holding tank. More on that later.

  • Varnishing

    I (Jon) finished these jobs variously on April 1st.

    The varnish on both rail boards was cracking and peeling. Also, I had fully broken off a part of one of the whisker pole mounts that had started to crack. Finally, the outboard mount had a bunch of grinder marks all across it from when we needed to chop the bolts that stuck through. This had to be done to accommodate the new outboard engine we had bought in Tahiti, but I had done a poor job of grinding and chewed up a bunch of wood.

    I coated all of them with six layers of Defthanes’s polyurethane, which is three more than recommended. One of the rail boards was newer, less than a year old, but the polyurethane on there was already wearing through, so I decided to just go well above a reasonable amount and I was able to do two coats a day.

    I also made some additional wood pieces to mount at the ends of our old rail board where it was cracking from the u-bolts that held the board to the stanchions (check out these boat rentals ).

    I’ve also started sanding the coamings, caprail, and handrails in preparation for varnishing them when I take the boat back to Brisbane in a couple of weeks. All of the easy areas are sanded and now I’m just hand sanding the hard to reach areas.

  • Rusted Stuff that go Replaced

    I (Jon) finished these jobs variously on Dec. 22nd, Dec. 23rd,  and April 1st.

    The galvanized screws that held the hatch hinges were all replaced. All 700 of them. Ok, there was about 70. I pulled the hinges off, most of the old screws had to be drilled out. I filled the old screw holes with epoxy, drilled new holes, glued the hinge down with 4200, and added 4200 to every screw as I screwed it in. I also touched up some of the varnish on the hatches edges that was cracking. Not sure how effective that is going to be.

    I also took quite a bit of time scrubbing away rust stains from various places. The hatches and port lights both had rust stains running from them. There were also rust streaks running down the hull from the radar arch. The sinks were all quite rusty.

    The set screw on the starboard pedestal pole got replaced.

    The galvanized U-bolt brackets holding the life sling were the rustiest things you’ve ever seen. They were replaced with stainless U-bolts. (April 1st)

    All the set screws on the radar arch were replaced with stainless set screws.

    A lock washer for one of the bolts holding the whisker pole mount was apparently not stainless. It got replaced.

    A washer holding one of the nav light screws was apparently not stainless and completely corroded. The other right next to it was fine. The rusted washer was replaced.

  • Miscellaneous Engine Work

    I (Jon) finished these jobs variously on Nov. 25th, Dec. 22nd and March 23rd.

    The oil pressure alarm sensor stopped working so I bought a new one of those, and got it wired up properly. We bought an adjustable pressure sensor. Based on the recommendations from the Valiant Owners Group, the pressure is set higher than what Perkins ships sets their alarms when at the factory. This gives you just a little bit more time to get the engine off if there is a sudden loss of oil pressure.

    The alarm the oil pressure sensor is wired to used to have a time delay function so that it would take about 10 seconds to sound after turning on the switch to start the engine. This allowed you time to try to start the engine. The time delay no longer works, so when you turn the key before starting the engine, the alarm sounds. This is annoying.

    My hope is to add a new switch that operates independently from the current switch key used to turn on the engine. You would turn this on after the engine has started, and then the alarm would sound if while the engine was running the oil pressure dropped dangerously low. We’ll see if that happens.

    I cleaned the air filter. (twice)

    I replaced the zinc in the main heat exchanger. I also checked the zincs in the oil cooler and in the tranny oil cooler. There wasn’t really anything left of the zincs there, but the coolers are too small for a proper zinc, you can only put a tiny nub of zinc in them. Since the whole system is connected, Matt and I decided one zinc in the main heat exchanger would be fine. Since there is only one zinc, we just check that one more frequently.

    I re-attached the leads from the tachometer to the alternator as it wasn’t working. I then rewired it again (April 5th) a couple of months later, as it was only intermittently working. It’s finally working consistently.

    I also bought a new fresh water pump to have as a spare.

    I also re-routed the engine blower hose as high as I could to prevent water from coming in. It had been coming in and dripping very close to various electronics.

  • Splash Panel for Engine Room Electronics

    I (Jon) finished these jobs variously Dec. 23rd, Jan. 10th and March 17th.

    I made a splash panel to cover all of the electronics for our power generation. Water had been dripping onto the solar regulator, which is bad, so I covered the wind gen, solar, and tow gen regulators and shunts with a clear acrylic cover.

    There is a perfect hole cut in the panel for the wind generator switch which allows you to apply the brake to the wind generator. There is a less then perfect slot cut in the panel allowing access to the switch to turn on and off the solar panels. I didn’t want to put the switch on the outside of the panel as then if you wanted to take off the panel, it would be more of a pain in the ass. The solar switch is mounted to a wood block and screwed to the wall.

  • Refrigeration

    I (Jon) finished these jobs variously on March 15th.

    The refrigerator was malfunctioning in some unknown way. It was exhibiting signs of electrical issues and of having moisture in the refrigerant lines.

    To deal with the electrical issue, I checked all of the connections from the fuse panel to the switch in the fridge. All seemed to be reading fine. I pulled the switch off inside the fridge, fiddled with the electrical connections, and that was about it. I’m not sure if I actually did anything but electrical problems have since gone away.

    Concerning moisture in the lines, we have suspected that we have a pinhole leak in the system. The pinhole was perhaps caused by one of the drawers in the frig not being locked in place and then when the boat was rocking back and forth, the drawer could have hit the evaporator plate.  However, other evidence suggested that there was not in fact a leak. The refrigerant would normally leak out when the icebox temperature rose to room temperature, for example when the top was opened for a couple of hours to clean it out.  However, I went to the States for a month and when I came back the plate frosted over perfectly. Nothing was particularly clear.

    I vacuumed down the system for hours and hours to try and draw moisture out. This did not seem to help. But as the electrical system was simultaneously acting up during all this, I can’t be sure what the problem was.

    I then had a bitch of a time finding more coolant as we were running out. In Australia, you are not allowed to work on your own refrigerant systems. Nobody does, so you can’t buy coolant. The coolant we did have came from Mexico and the tops of the cans were different than the tap we had. I had to spend a week just trying to find a way to usefully open the cans. The fridge topped off a month of hellish frustration at Australia and work on the boat.  Oh, you also aren’t allowed to import to boat to sell it here in Australia if it has a refrigeration system that uses liquid/gaseous refrigerant and can be worked on by you. You either have to pay thousands of dollars to get a certificate stating you are a refrigerant mechanic, or declare that its not a refrigeration system, just an icebox that you fill with ice. Australia is obscenely heavily regulated. Finally, another boat blessedly gave me some of their refrigerant so I could continue this process.

    Since nothing else seemed to be working, I took Matt’s suggestion and tried patching the leak. Kollman talks about using JB Weld to patch tiny holes. Matt said I should go with thickened West System epoxy, as he thought that Kollman wouldn’t have much experience with epoxy and that it might be better.

    So I cleaned the whole thing with acetone, roughed up the area around the possible pin-hole leak, taking off the paint in the process, re-acetoned it, and then put on a larger than necessary splotch of thickened epoxy. I couldn’t make it very smooth and pretty looking, since there wasn’t anything to level it and I just needed a blob of it on one spot.

    Finally, I did a long, long, long, vacuum down.

    The fridge has worked perfectly for the last three months and undergone multiple complete warm-ups to room temperature. The electrical seems fine and it doesn’t seem to be leaking refrigerant or have moisture in the system. So I’m pretty happy that I was able to do the refrigerator repair and get it running perfectly.

  • Running Rigging Maintenance

    I (Jon) finished these jobs variously on Nov.29th and Mar. 14 and Mar. 15th.

    I replaced the port spinnaker halyard with the old main halyard. I cut off fifteen feet or so from the ends as there was easily enough and this was this most abused section.

    To replace it, I taped the ends together and pulled the old line through until the new line came through. When the new line was five feet from my hand, the tape came apart and the entire line went back up to the top of the mast and fell down inside the mast. That sucked. It turned a 5 minute job into a 5 hour one.  I then had to painstakingly work a line back down the mast. This was made less easy because I was at Dockside Marina in Brisbane on the river, where ferries throw up large wakes that rock the boat back and forth every 20 minutes. I believe though I was able to feed the line down the mast without getting it twisted around any other line.

    I replaced the main halyard with line from the Melbourne Rope Company. The specs are stronger than say New England Ropes and it was local. But the inside is an odd weave that makes it harder to splice.

    I flopped the jib sheets end to end to even out the wear on those.

    I replaced all the monitor lines as the old ones had completely shredded the sheath of the rope in various places.

    I also whipped the ends of the lazy jack lines which had never been done.

  • Exhaust Manifold

    I (Jon) finished these jobs variously on Mar. 9th.

    Forever ago as we were sailing to Tonga, the exhaust manifold sheared two of the four bolt studs that hold the manifold onto the engine. Part 1 of the story is here. Part 2 is here. Much frustration was derived from making a temporary fix. This involved drilling out the stud that had sheered, then drilling out the drill bit that broke while trying to drill out the sheered stud. We then re-tapped the hole with larger threads. Enlarged the hole in the exhaust manifold which bolt passes through to help with alignment. And finally, Matt made up a heavy duty bracket, that while he calls it janky, is probably what kept it from breaking again.

    I now set about to making a more permanent fix. We had helio-coils flown in to Fiji, but never got around to installing them. So that became my job. I drained the coolant and pulled the exhaust manifold off. Doing this on my own was much harder than when Matt and I were both able to fit in the engine room and get four ands on it. But it happened.

    Another bolt had sheered at some point either sometime in the last few months or now when I was talking off the manifold, so I had to drill that out, though it came out much easier than the ones we drilled out in Tonga.

    Then I tapped the holes with the helio-coil tap and inserted the helio-coils. This was easier than I expected. Than I inserted the new studs we ordered. Our temporary fix was using bolts to hold it on, but the factory spec’ed studs should be stronger. There are long studs and short studs you can order. We ordered both because Matt wasn’t sure which were ours. it’s ends up our manifold uses the long studs. There is one old stud still in the engine block, the 2nd one from front of the boat. It was completely seized inside the engine block, which isn’t a terrible thing.

    After this, the exhaust manifold, of course, wouldn’t fit back on. I hadn’t perfectly centered the studs when tapping with the helio-coil kit. (and you unfortunately can’t temporarily mount the manifold and drill and tap through the old holes to make sure  you have perfect alignment. The way the manifold is constructed precludes allowing a drill to get close enough) So I had to enlarge the holes in the exhaust manifold that the studs pass through.

    We also had bought new gaskets for in between the manifold and the engine block, so those were applied. And the gaskets were also slathered with purple Permatex.

    I think that’s about it. Despite that it should be perfectly back to new, I put Matt’s bracket back on, as it seems like there’s no reason why not.

  • Auto Pilot Maintenance

    I (Jon) finished these jobs variously on Feb. 28th.

    We have two Auto-helm 3000 auto pilots.

    One auto-pilot motor completely ceased to function as we crossed the Pacific. It had been making an excruciating noise and just locked up. The other auto pilot wasn’t in very good shape either.  In fact it was labeled ‘does not work’ but we gave it a try when the other failed, and lo and behold it worked, though not particularly well; it just made a lot of noise that seemed unhealthy. So I set about to try and clean both of them and get them both operational.

    There were lots of little plastic gears to keep straight and organized. The metal parts had an incredible amount of corrosion on them. So much so that they were incredibly difficult to get apart.

    Once all cleaned up and put back together, one gear box turned really well, and the other was still very hard to turn.

    Then on one of them the following happened. There is a gear that is connected to the motor shaft via a key in the shaft and inside the gear. The inside of the gear stripped though and so was now perfectly cylindrical, instead of having the matching keyed fit.  So that motor now can’t be connected to the rest of the auto-pilot gear box.

    So now I took the motor that worked from one auto-pilot, and the gear box that worked well from the other auto-pilot and put them together to form one that works.

    To get the other one working, I would need a new keyed gear for the motor. And more work done lubricating the gear box.

  • Wind Generator tie-off

    I (Jon) finished this job on January 19th.

    We have a KISS wind generator. They are made without a charge controller or a self breaking system for heavy winds.  This allows the power production to be higher than other wind generators, but in extremely heavy winds, the blades will not brake, instead they spin freely. This probably isn’t great for the bearings and makes too much noise when sleeping directly under it. KISS generators, when making power, are much quieter than others, but once wind speeds get over 30 knots and the blades start to free rotate, it makes more noise than I enjoy.

    So I rigged up a pulley, a cleat and a couple of tie off points and now it’s much easier to tie off the wind generator. The tie off points are located 90 degrees from each other so in any wind direction it is quite easy to tie it off in a direction that stops the blades from rotating.

  • Plinths

    I (Jon) finished these jobs variously on January 6th, 17th, and 19th.

    The paint on the plinths has been peeling off over the last year. The plinths are the made of prefab’ed fiberglass and are very waxy, the paint doesn’t like to stick.

    I sanded the hell out of them and repainted them. The paint seems to be sticking well, a few months later. No peeling happening. I painted two layers of primer and another three layers of paint. Hopefully that will do the trick.

    I had problems with sanding the old paint off. I invariably had to sand some of the deck as well. Then when I went to mask them off, where do I put the mask? there’s not a clean line from old paint directly down to fiberglass. Maybe I should have masked the deck when I sanded… but the tape for the mask would just getting ruined quickly I’m sure.

    So now there’s an obvious line where the new paint went down. It is particularly noticeable where it abuts the non-skid on the deck. The obvious solution is to touch up the non-skid, but I haven’t gotten around to doing that.

  • Various Electrical Jobs

    I (Jon) finished these jobs variously Dec. 1st, Dec. 12th, Jan. 17th,

    I finished off our lightening protection by fastening a wire that led to the backstay to a keel bolt. This was accomplished under the sole in the quarter berth.

    the SSB is connected at the stern to the keel bolts by a foil of copper running through the bilge.When in the bilge it is up on the side out of where the nastiness generally resides. When it passes through the engine room though, it hangs out directly below the engine where all sorts of grease, grime and nastiness gets on it, potentially corroding it. It’s also easy to cut your finger on it when reaching under the engine. I attached to the side of the engine compartment so that it was up against the wall and out of harms way. I also reran the foil through the cockpit locker so that it was more firmly attached there.

    I also cleaned the SSB antenna backstay fitting, scrubbing clean the copper fixture and coating everything with dielectric grease.

    I repaired the wiring for the incandescent light in the forward clothing locker. The wiring had shorted out because the insulation on the wires had worn through where they enter the light fixture. It also needed a new switch. I broke the old one while soldering new electrical connections to it.

    I also fixed the incandescent light next to the companionway which was having electrical issues as well. And needed a new bulb.

    Two of the Alpine Glow lights have needed new bulbs and so those got replaced.