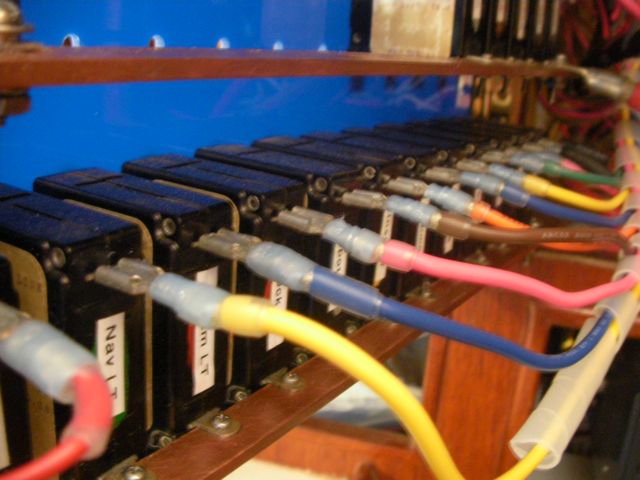
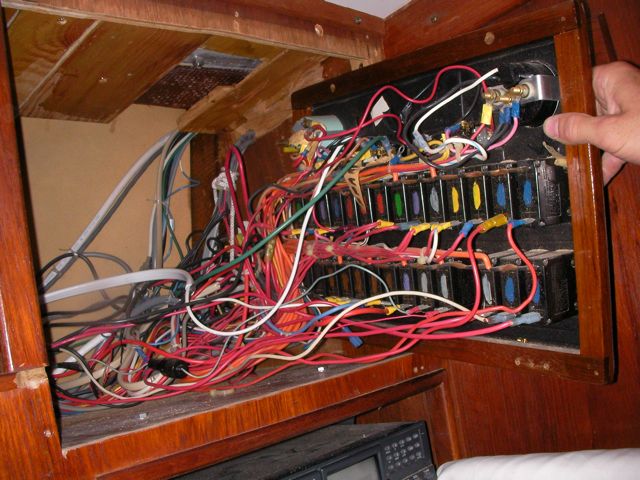
This was a hell of a job. First I’ll describe the original state of the panel. The panel was set back 4 inches in the space, behind a 3 inch vertical piece of trim. The panel was hinged at the bottom, so that when it folds down it hits the piece of trim, preventing it from opening less than halfway. Inside the panel, all of the negative wiring was piled up on a single stud, with over 16 terminals stacked on top of each other, all corroding. A handful of wires had pulled out of the terminals and were hanging loose in the compartment, only a few inches away from the hot stud. It was unorganized, impossible to access and work on it, and a serious fire hazard. I took out the old panel and cut out the trim so that the new panel could be mounted at the face of the compartment (rather than 4″ recessed). I constructed a new panel out of plexiglass from TAP plastics, laboriously drilling all the holes to accomodate the circuit breakers. I put a piece of hardwood trip around the outside (coated with penetrating epoxy) and used a long piano hinge to mount it. I used all of the old breakers from the old panel. To make the common, hot side of the circuit breakers, I bought a strip of solid copper from McmasterCarr, and drilled out holes to match the location of the circuit breakers. I bought tiny little screws from bowline and screwed the common hot side of each breaker flat against the copper bus bar. I ran 0 gauge hot and negative cables to the compartment, mounting all the negative to the right and all the hot to the left. The 0 gauge hot supply runs to a stud, and 3-4 gauge jumper cables connect from this stud to each of the copper bus bars on the back of the panel (there are three rows of breakers). I mounted three terminal blocks on the left side of the compartment, to mirror the three rows of circuit breakers. I used short jumpers of 12 gauge wire in as many different colors as I could find to make the connections from the circuit breakers to the terminal blocks. These short jumpers are bundled into spiral wrap to tame them. All of the negative wiring runs to a dedicated spot (very few stacked terminals) on two ample sized negative bus bars. The wiring remains loose in the compartment behind the panel, and looks completely disorganized. But there’s plenty of space and it is simple to trace wiring. I am concerned that if I bundle the wiring all up to make it look pretty, it will only make it more difficult to trace wiring.


")


Leave a Reply