Category: Standing rigging

  • Replaced chainplates, added plinths

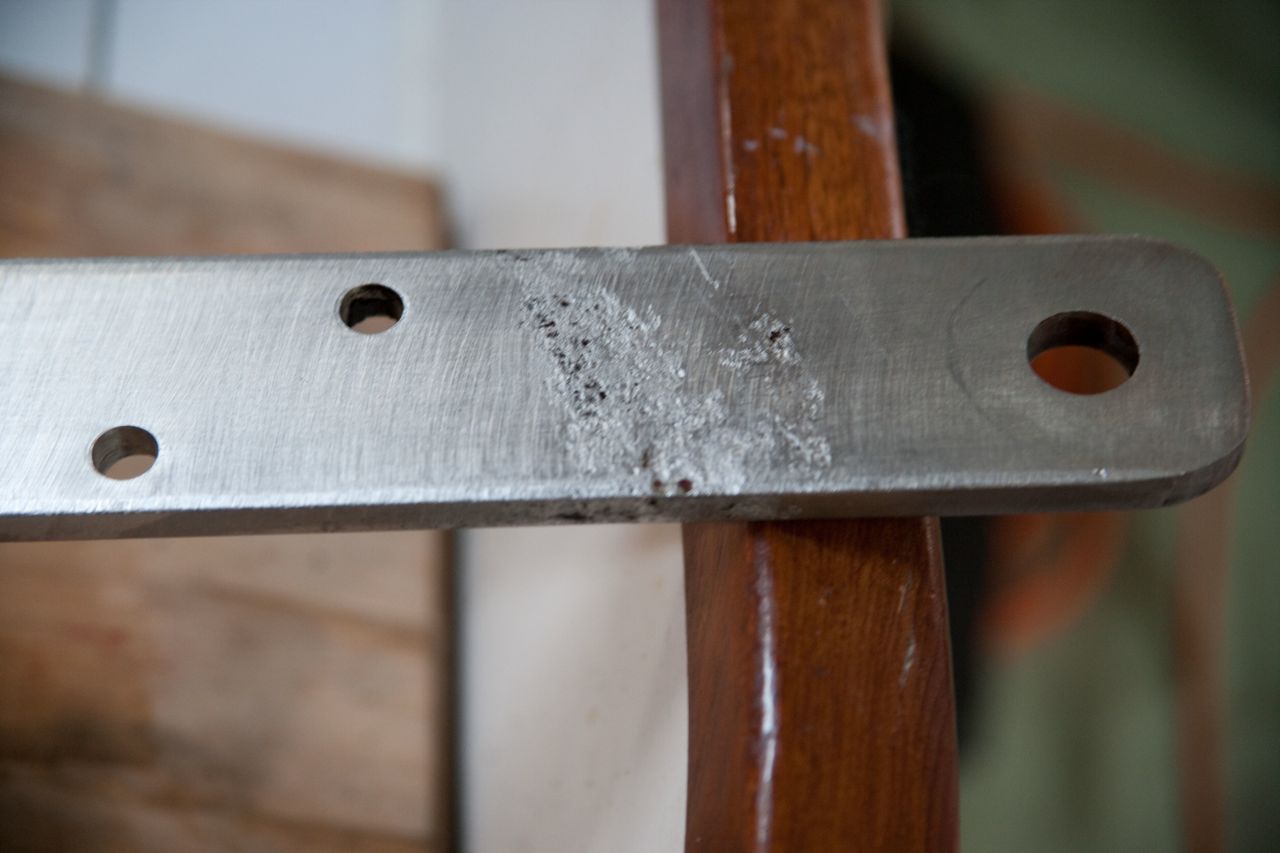
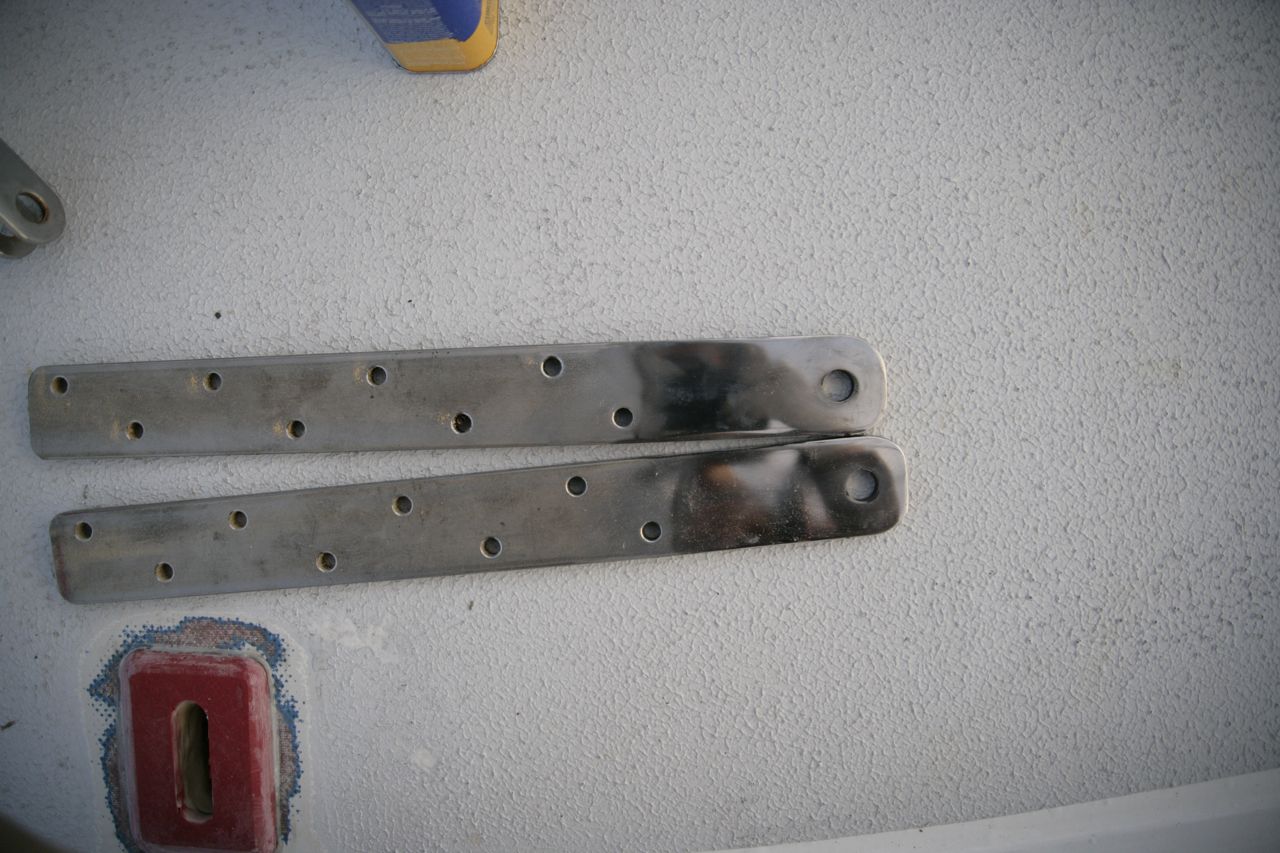
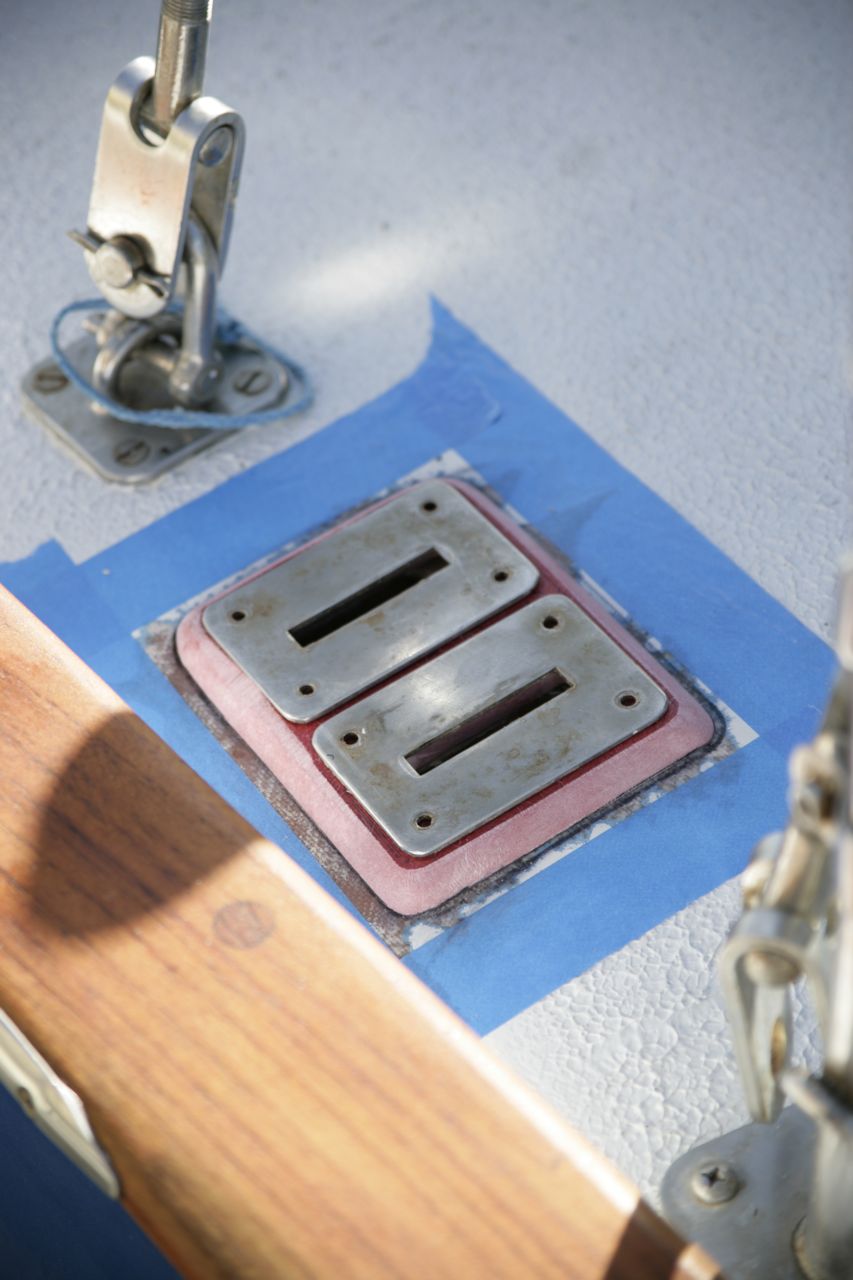
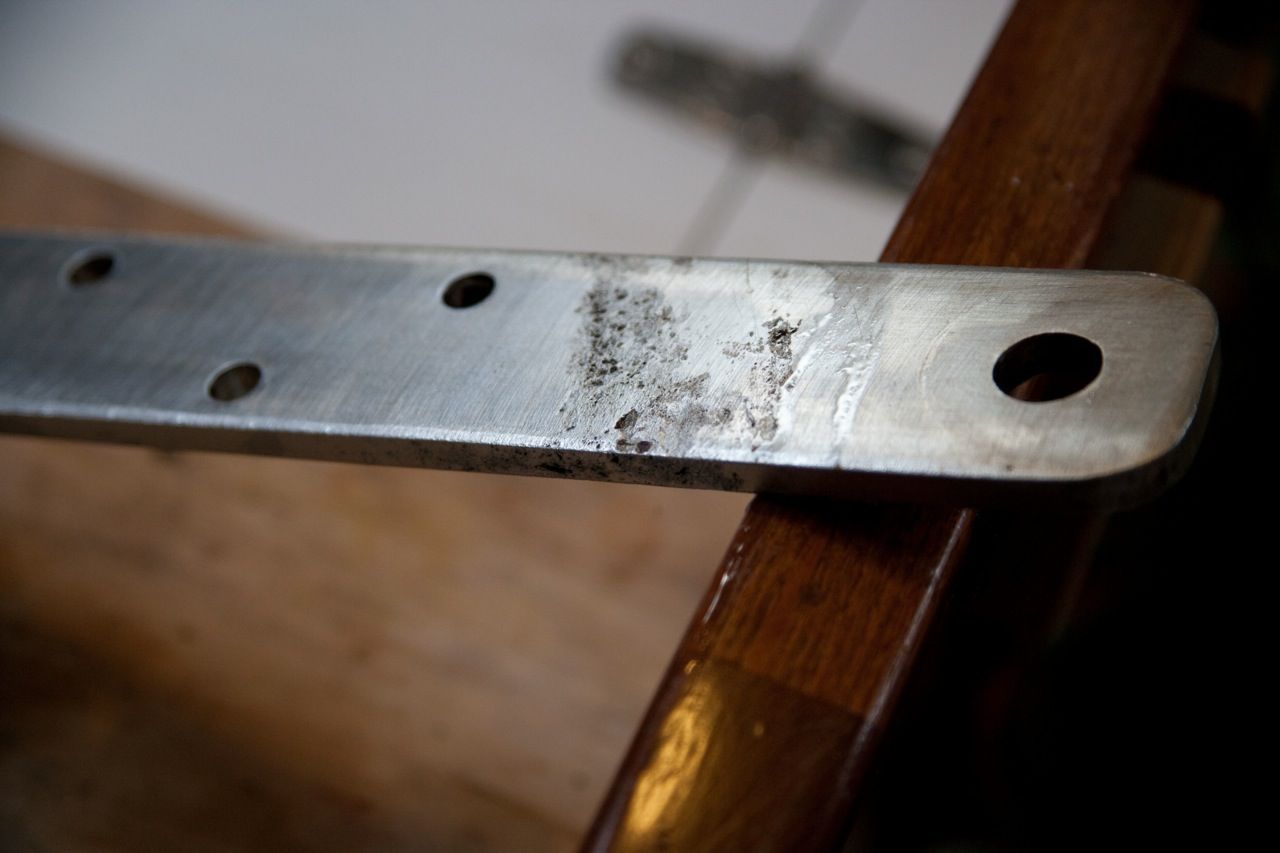
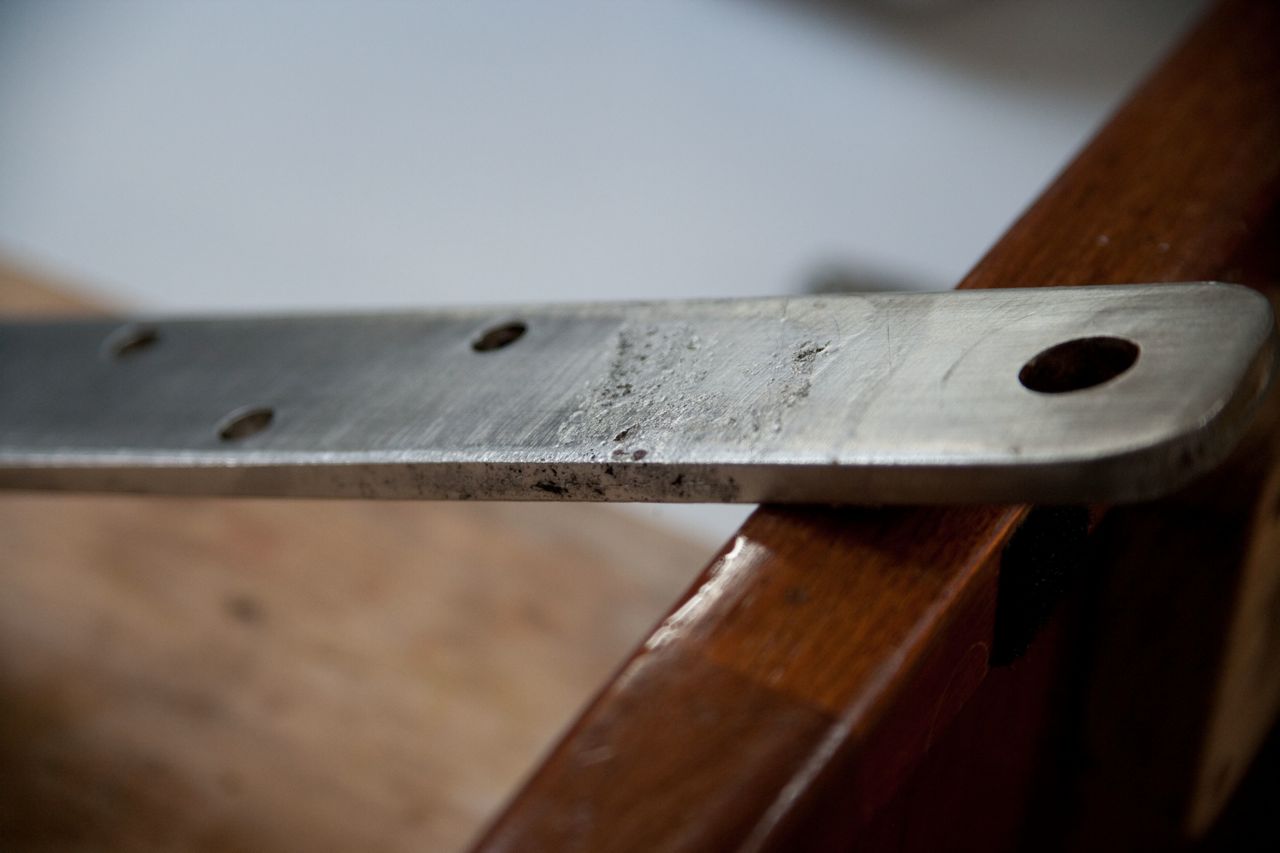
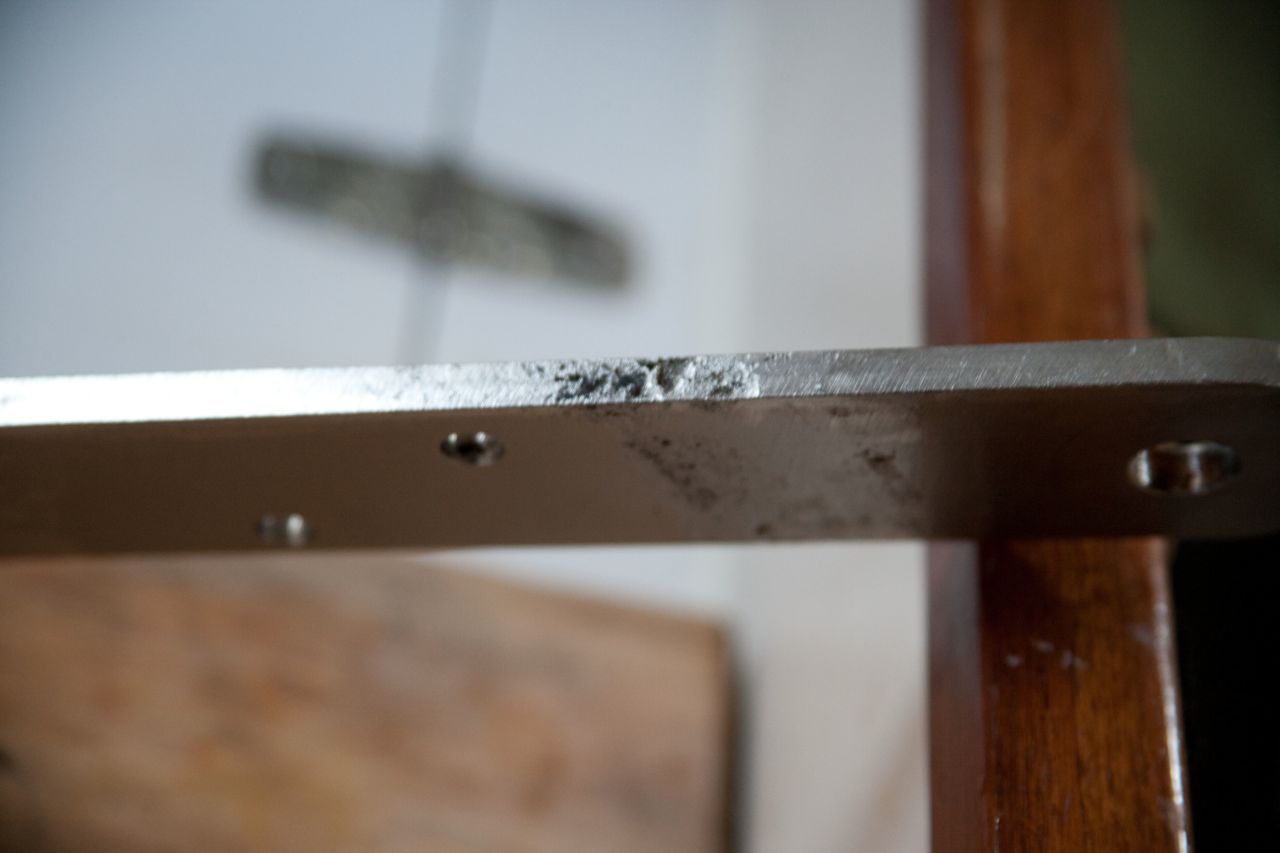
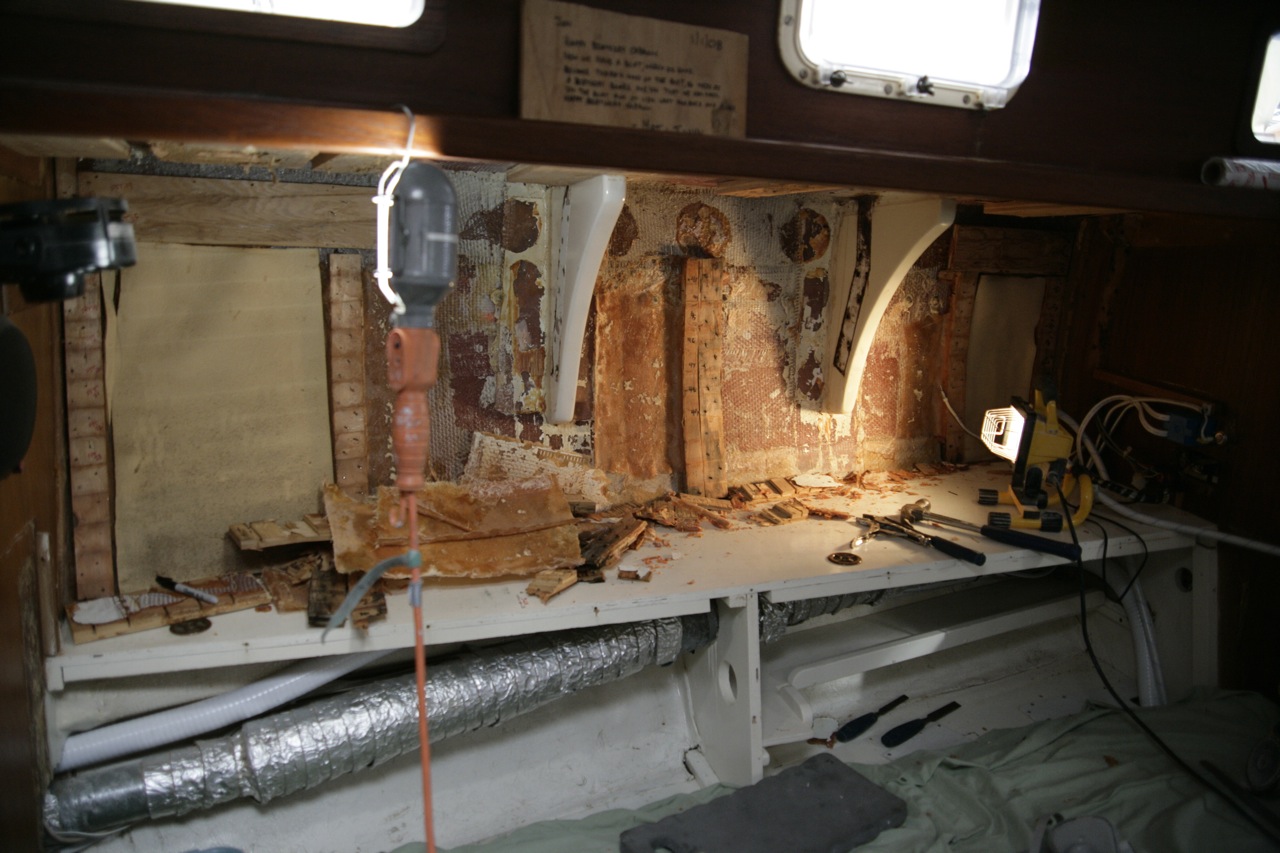
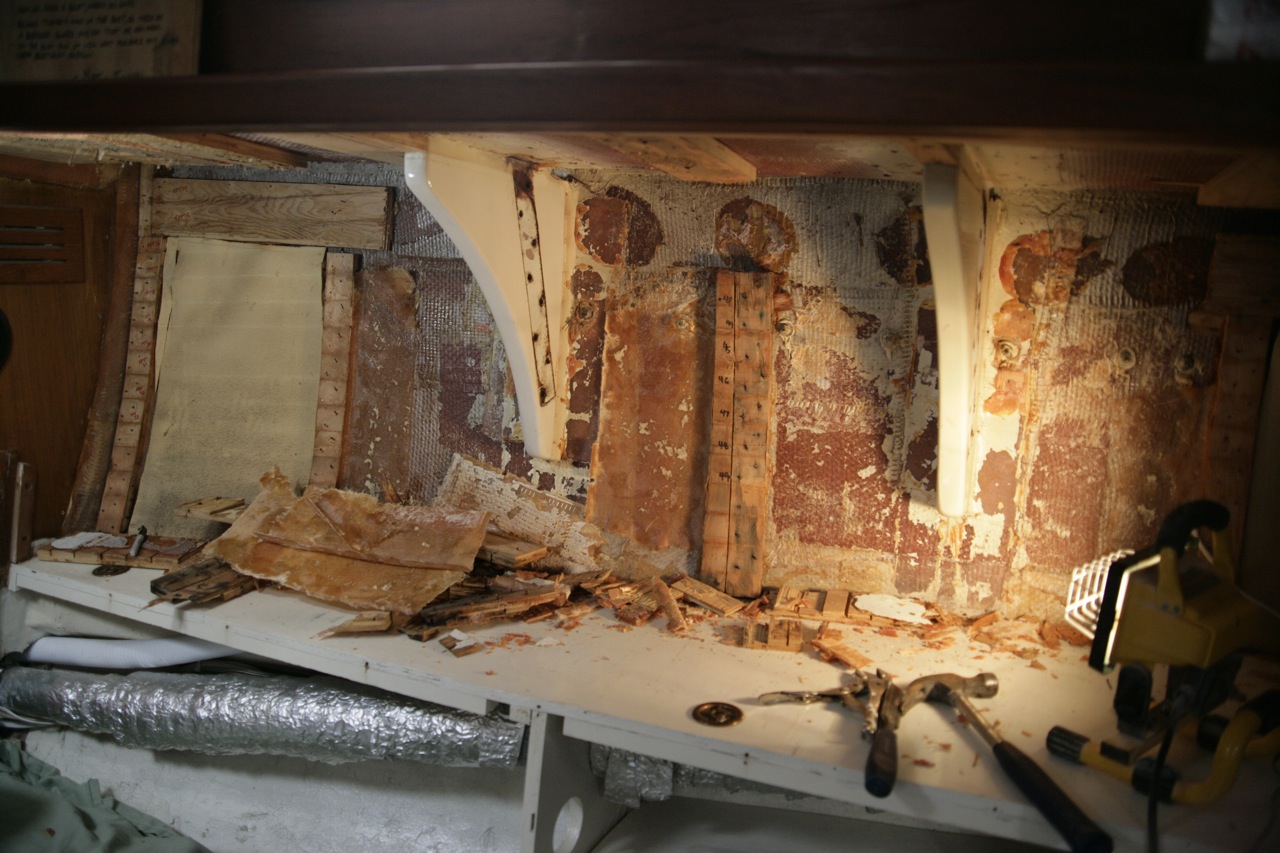
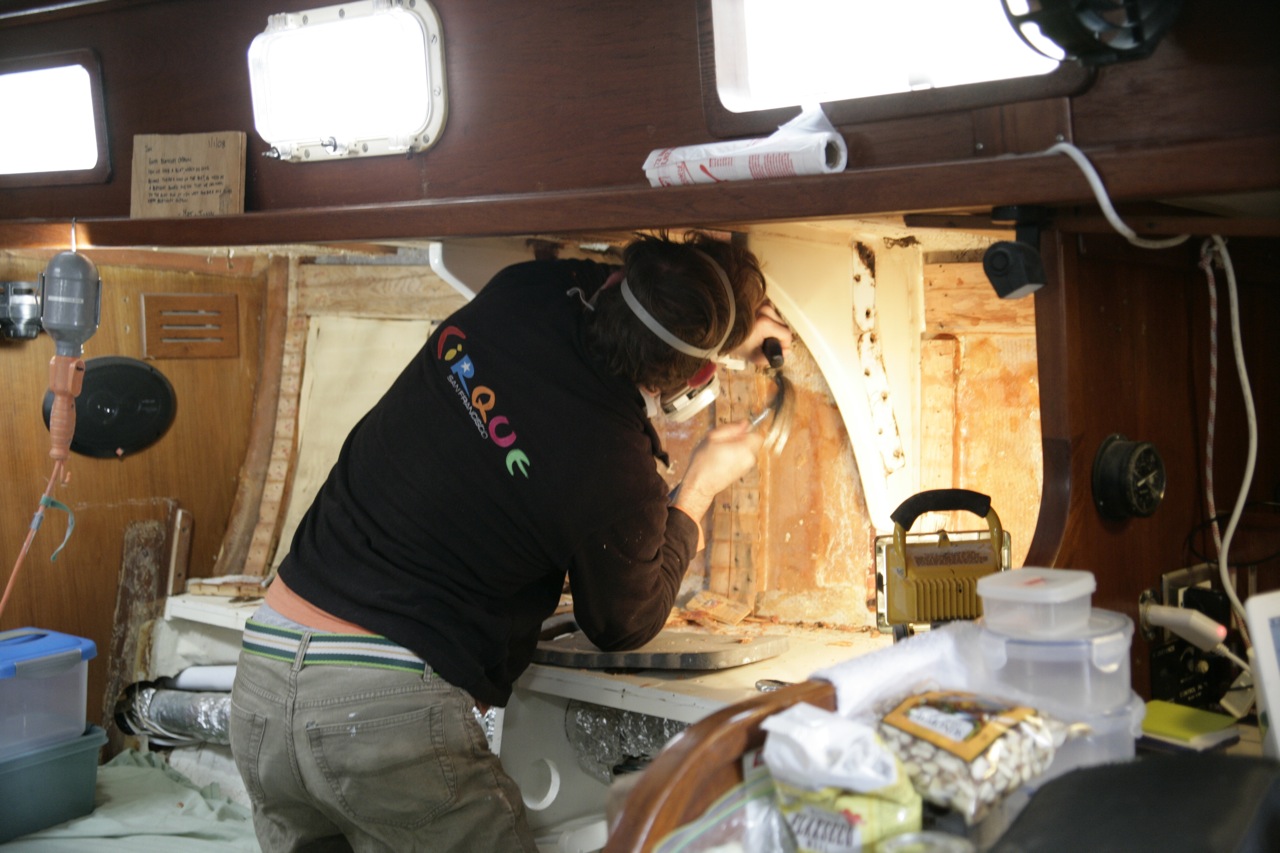
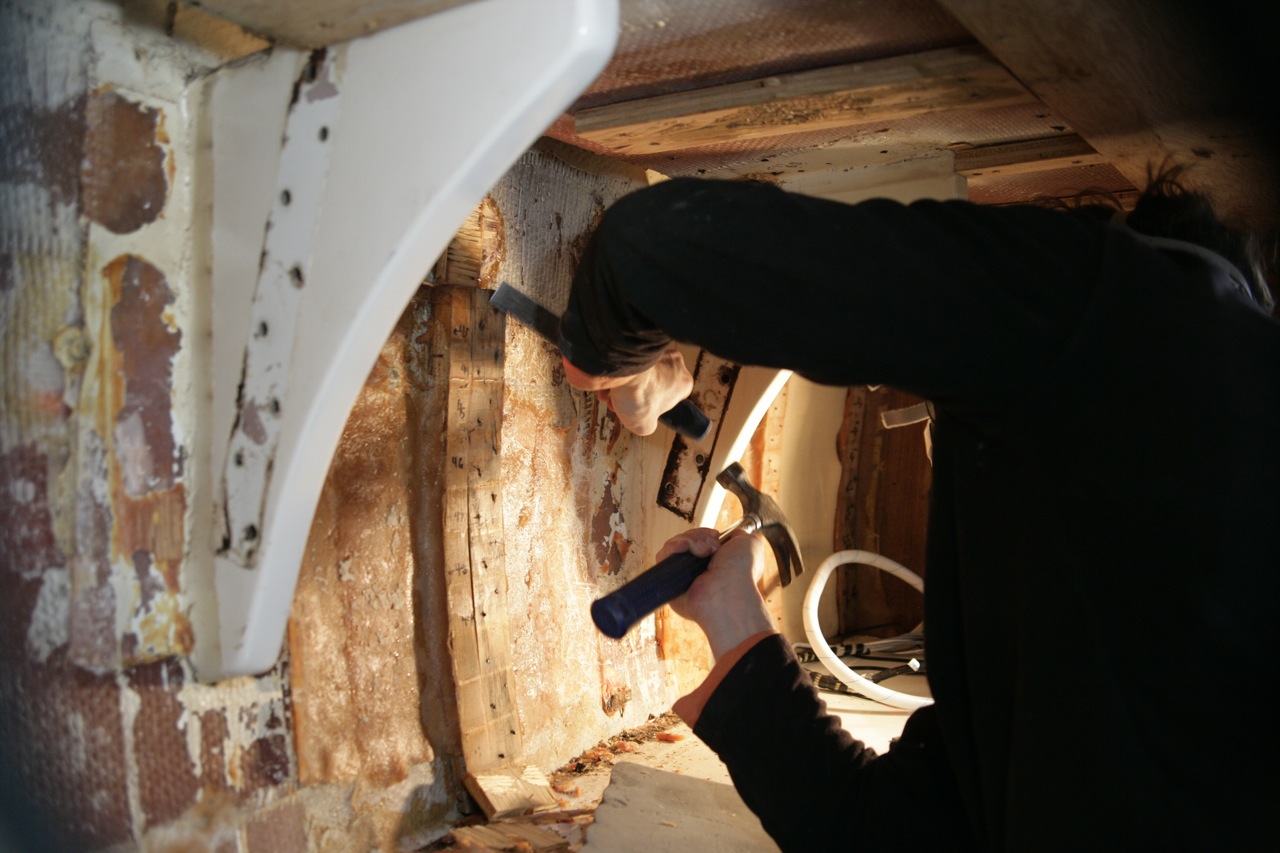
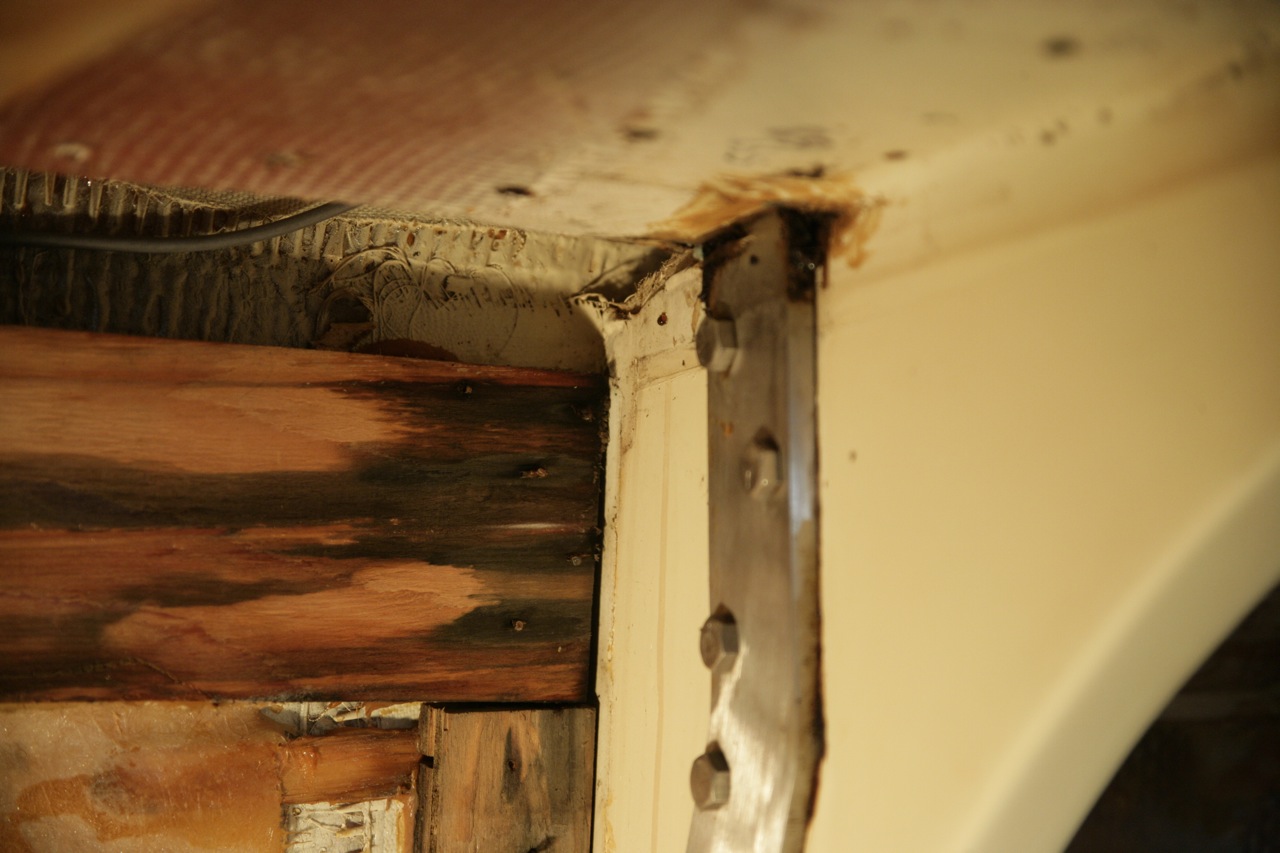
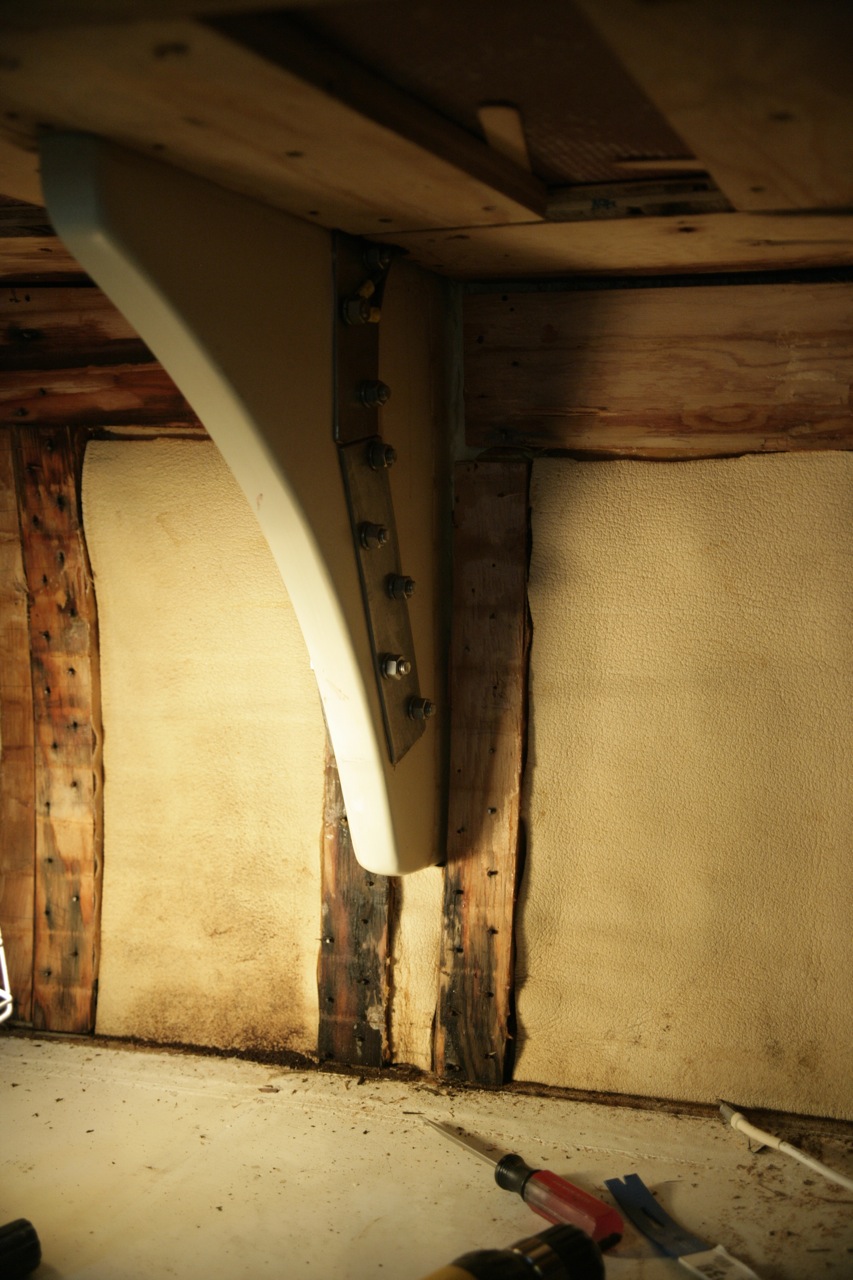
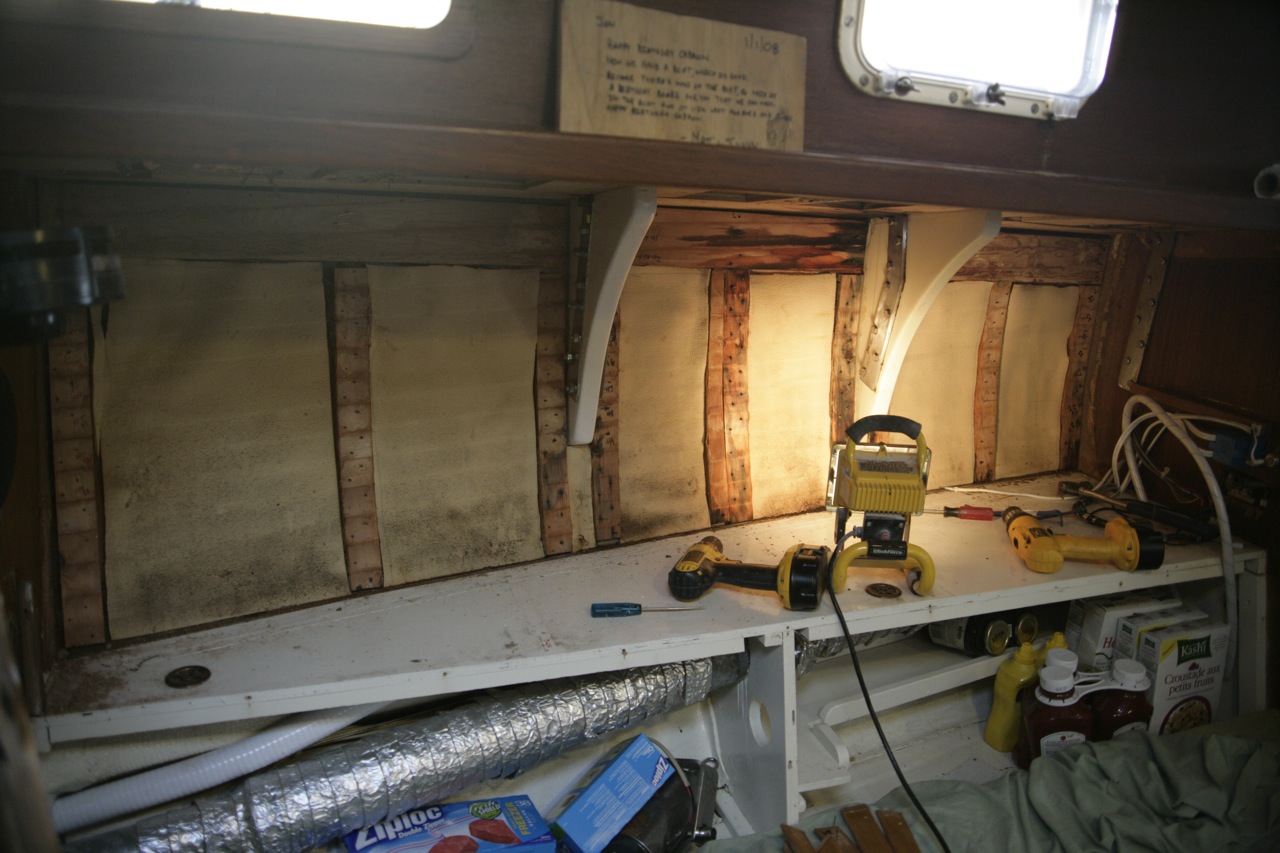
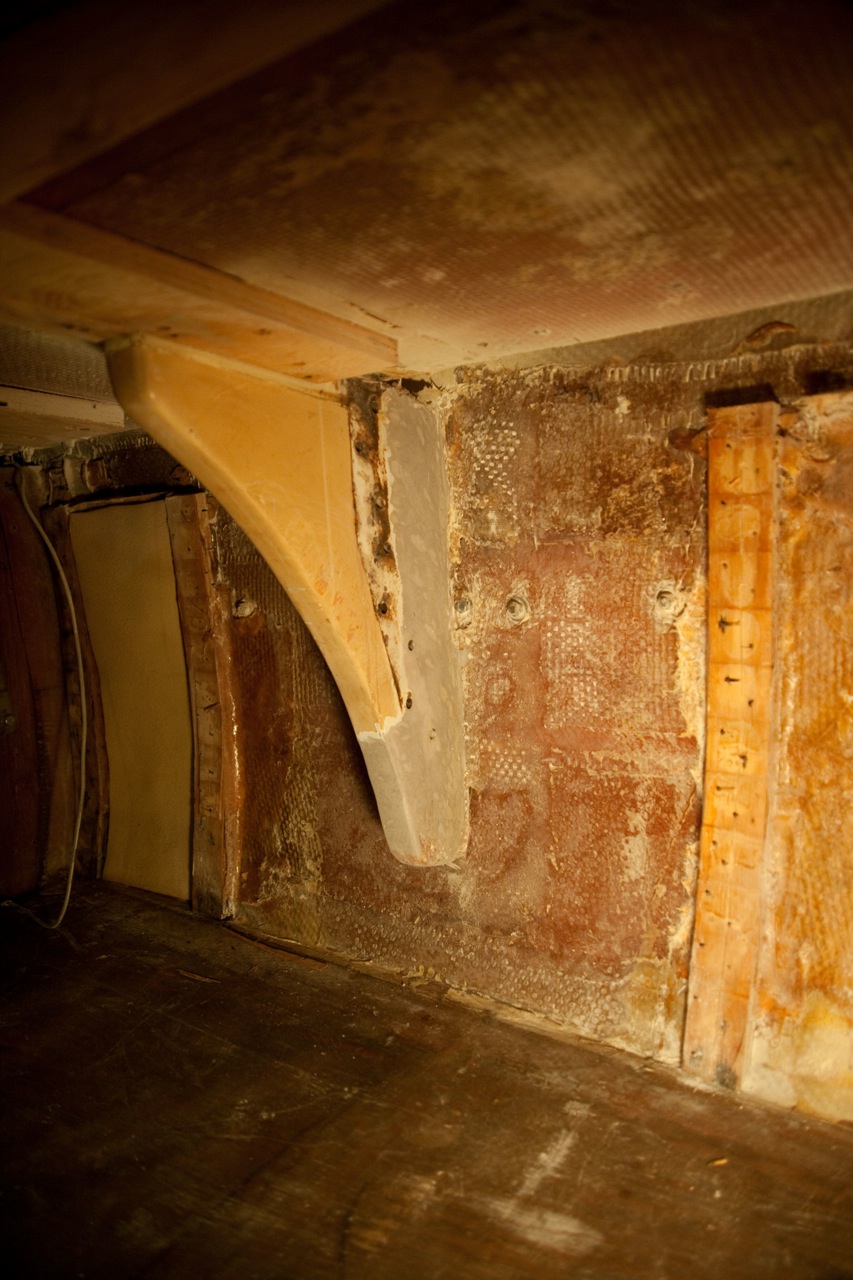
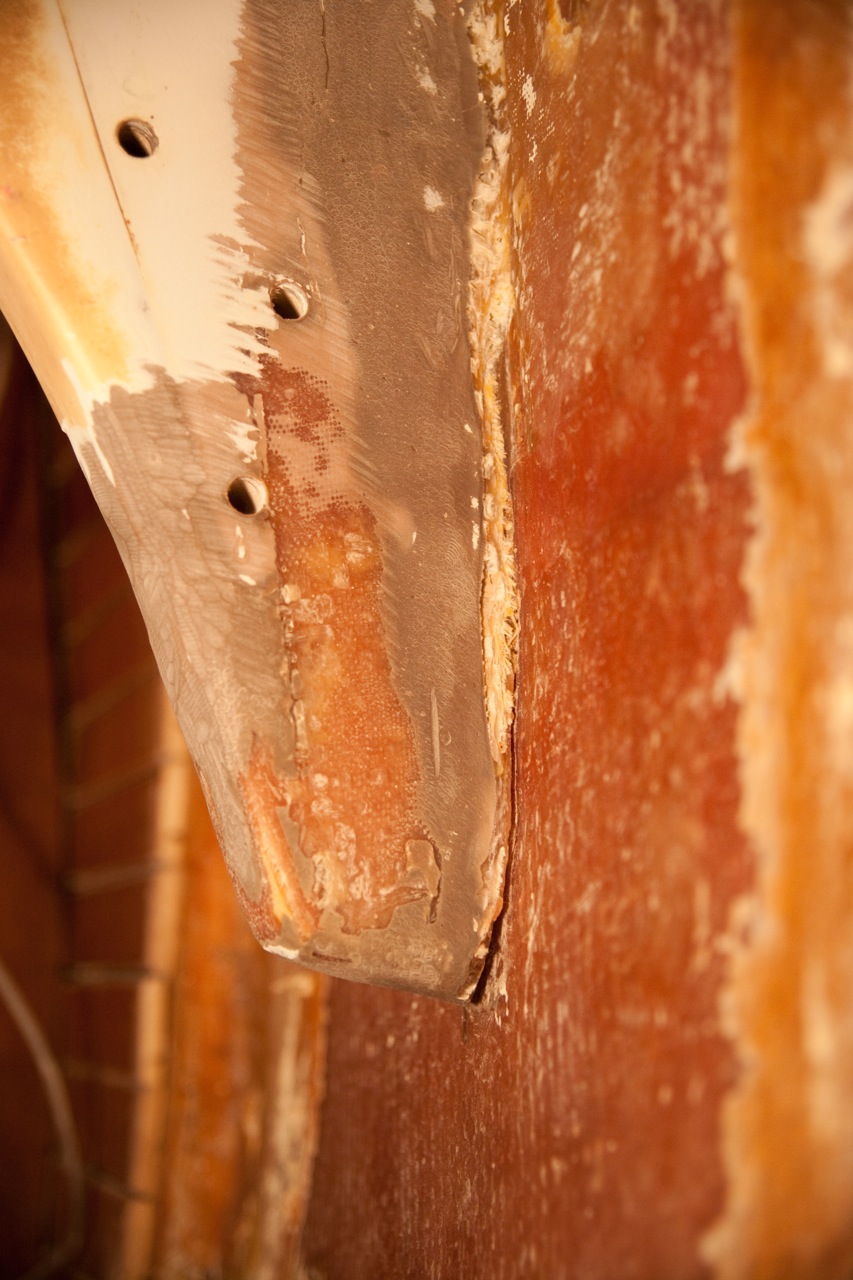
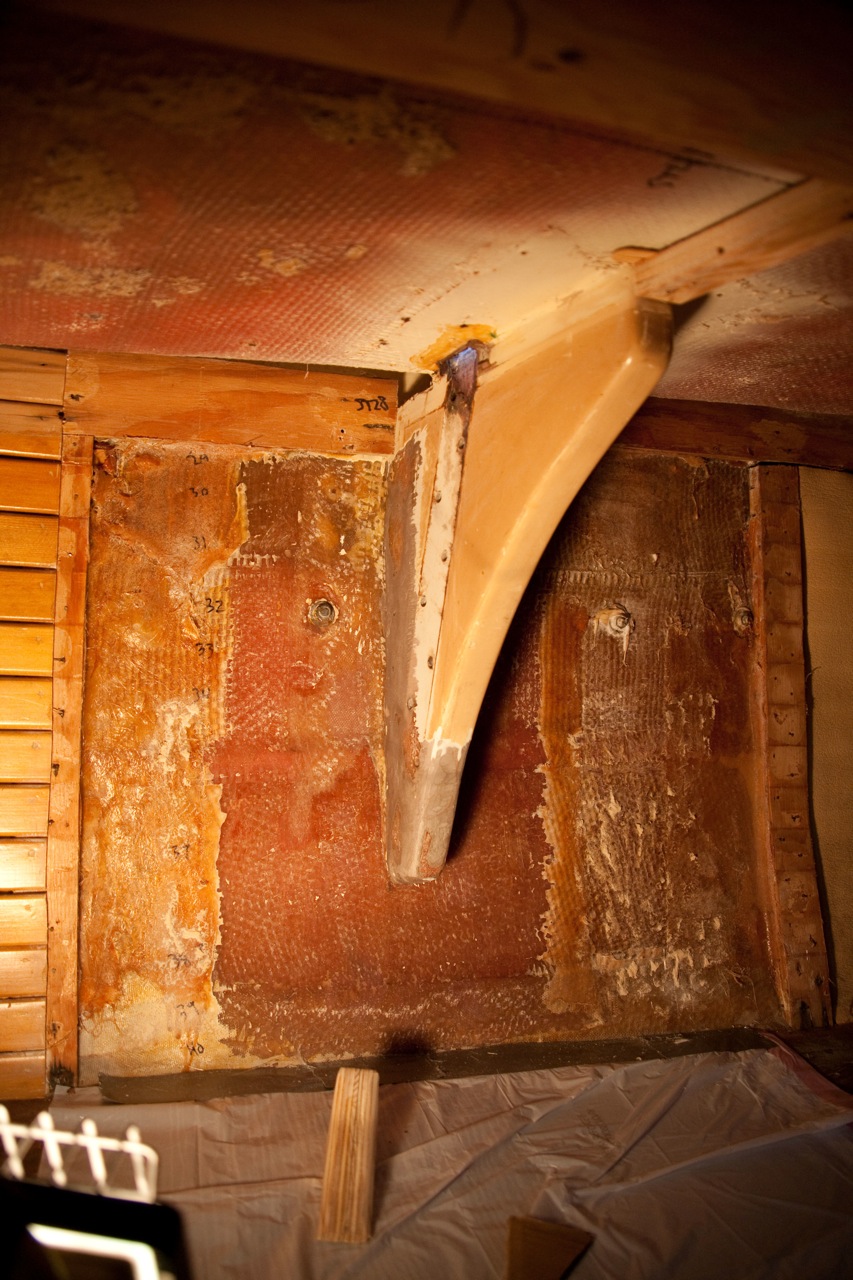
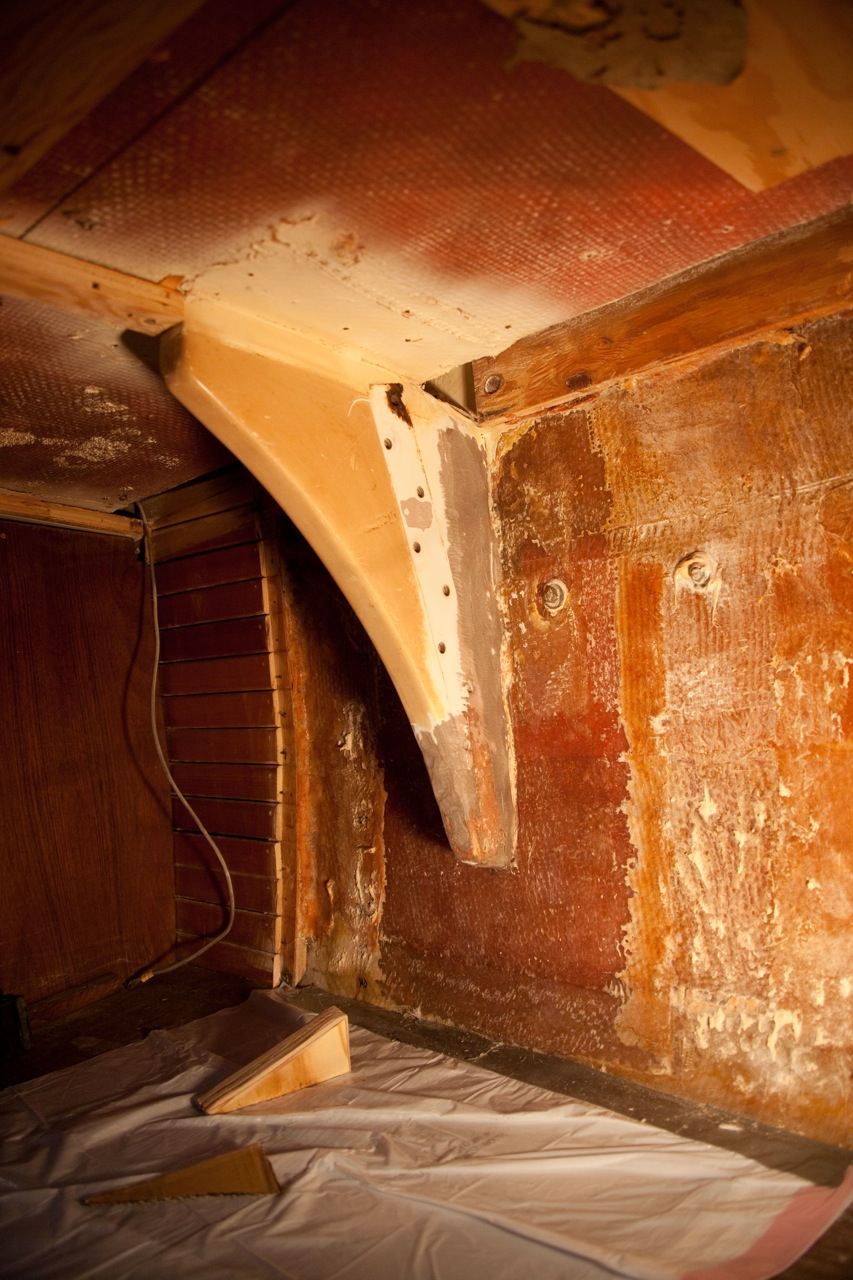
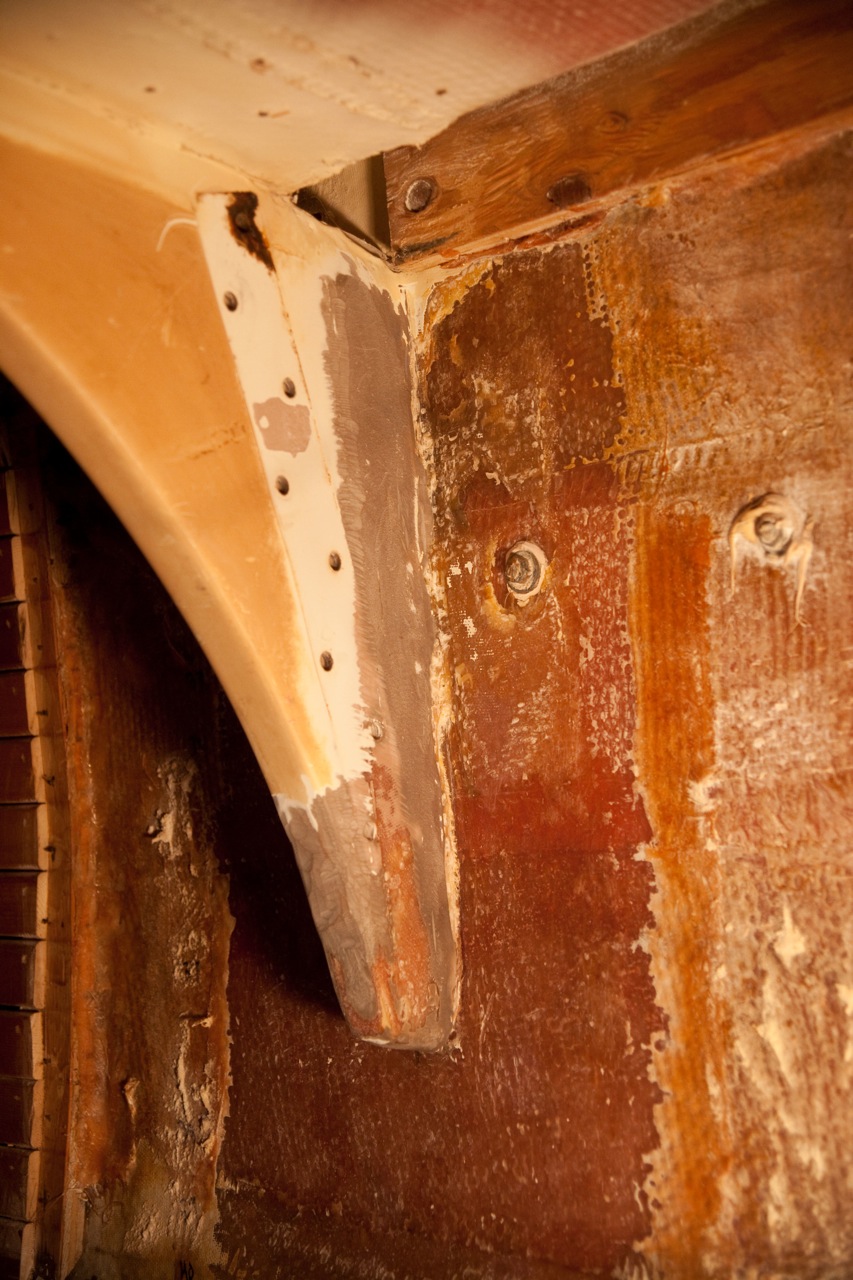
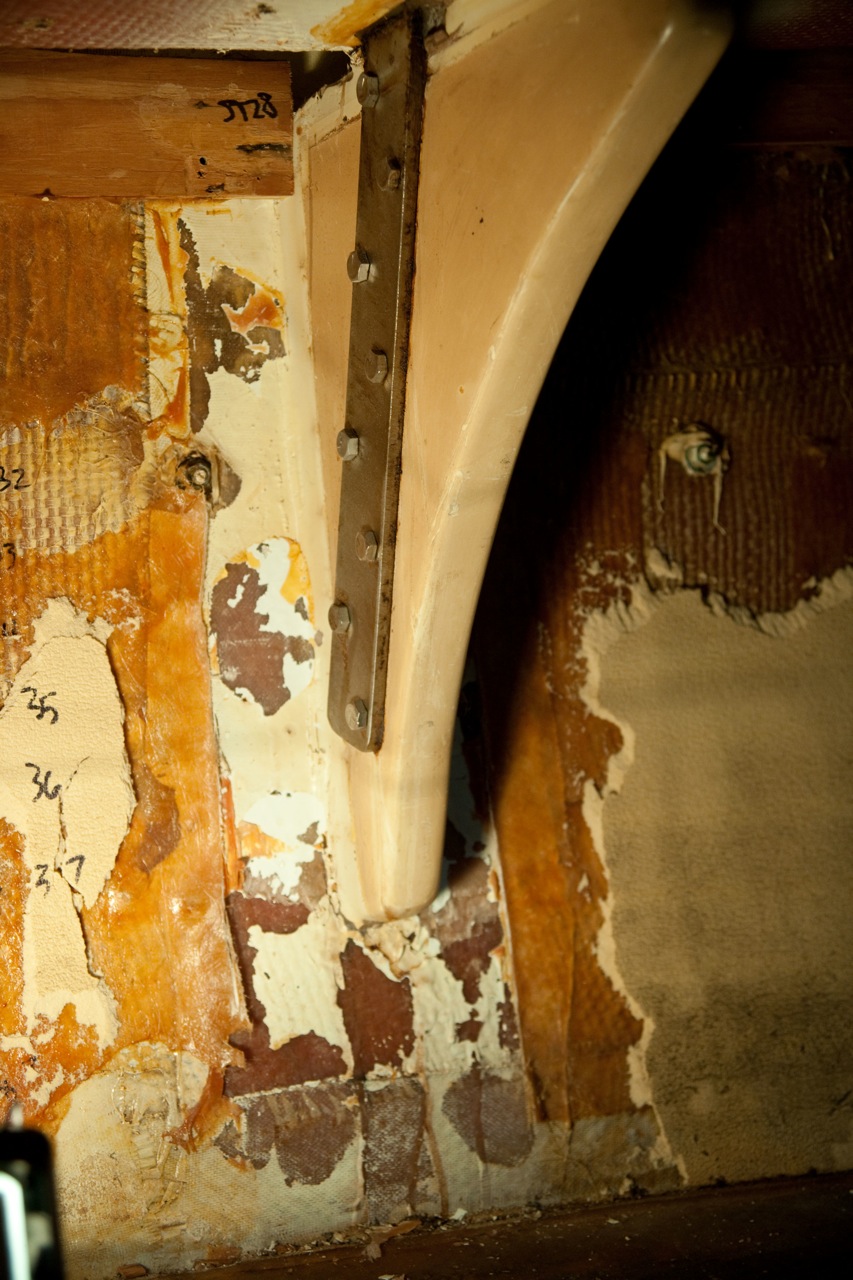
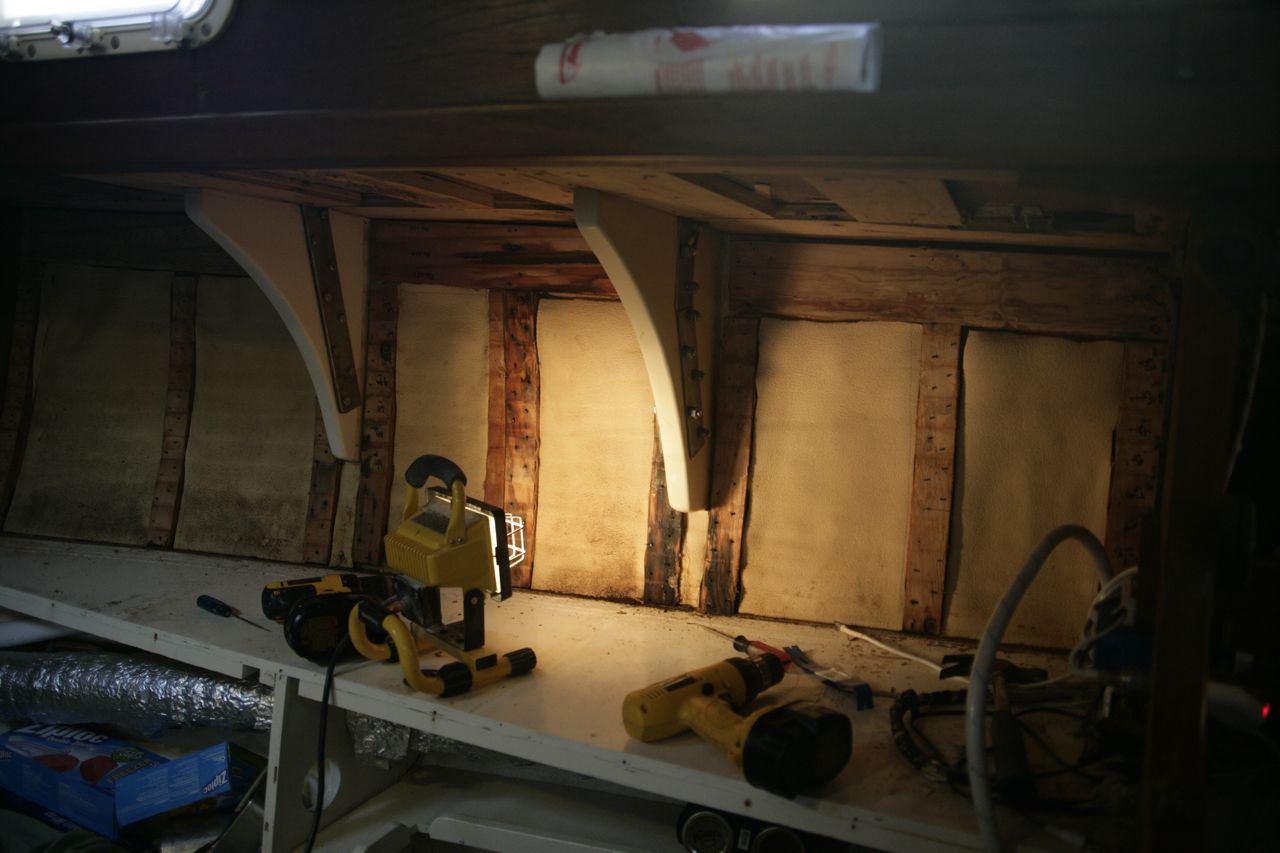
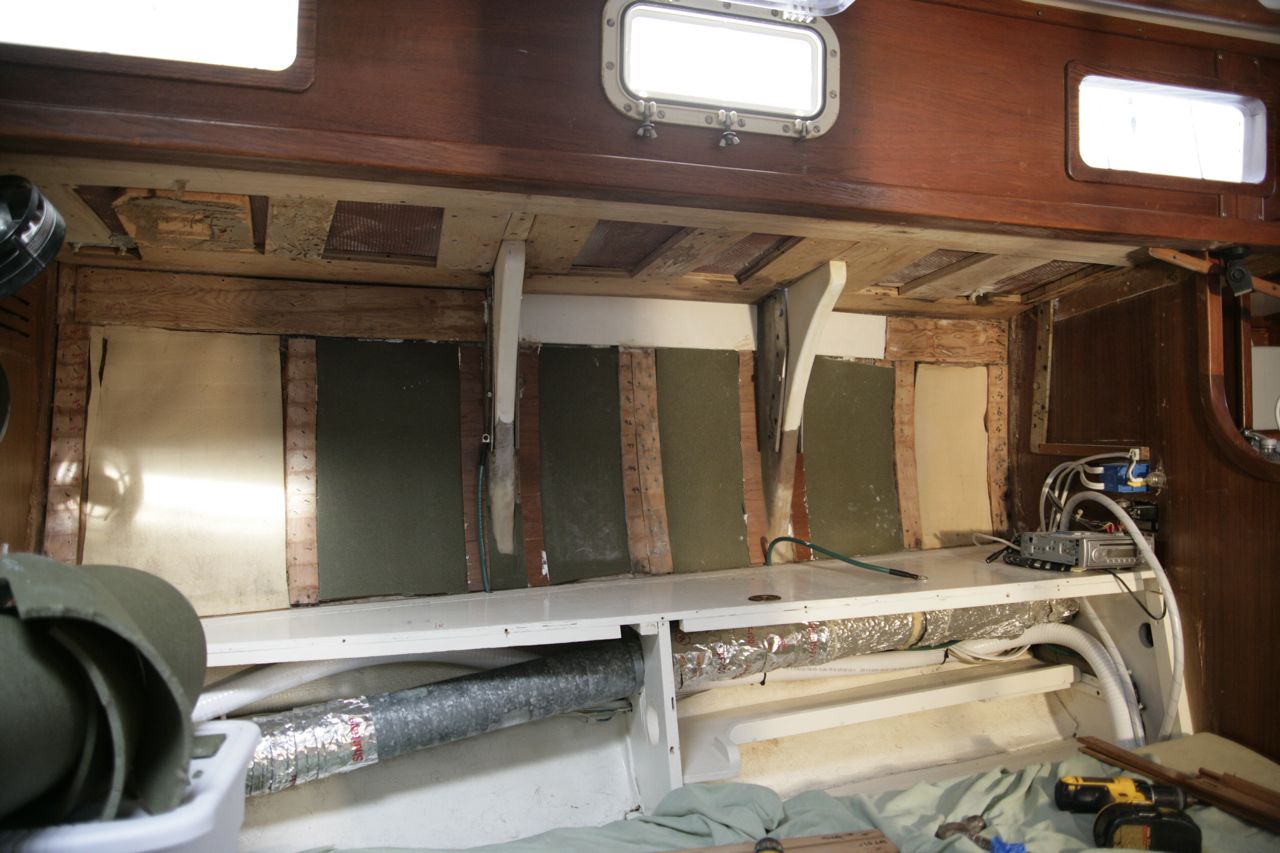
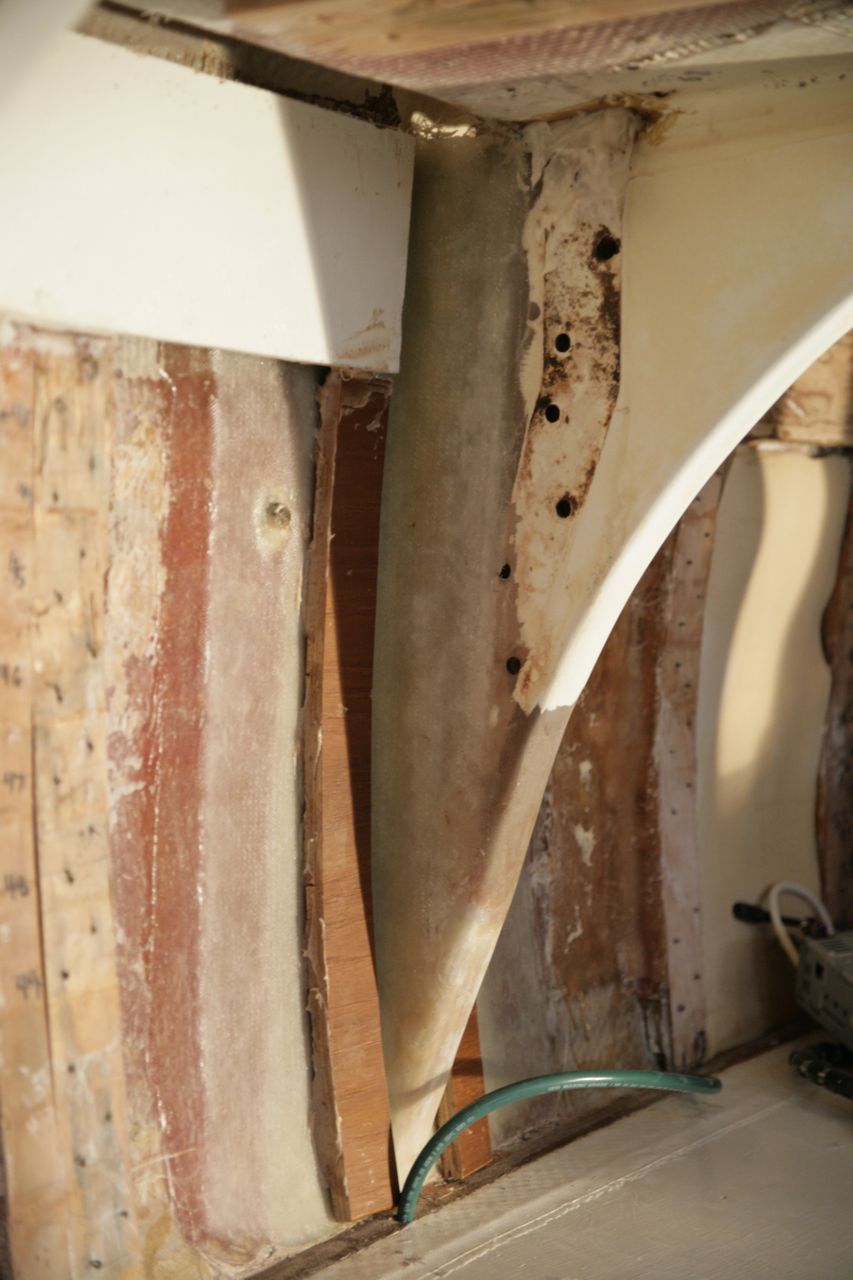
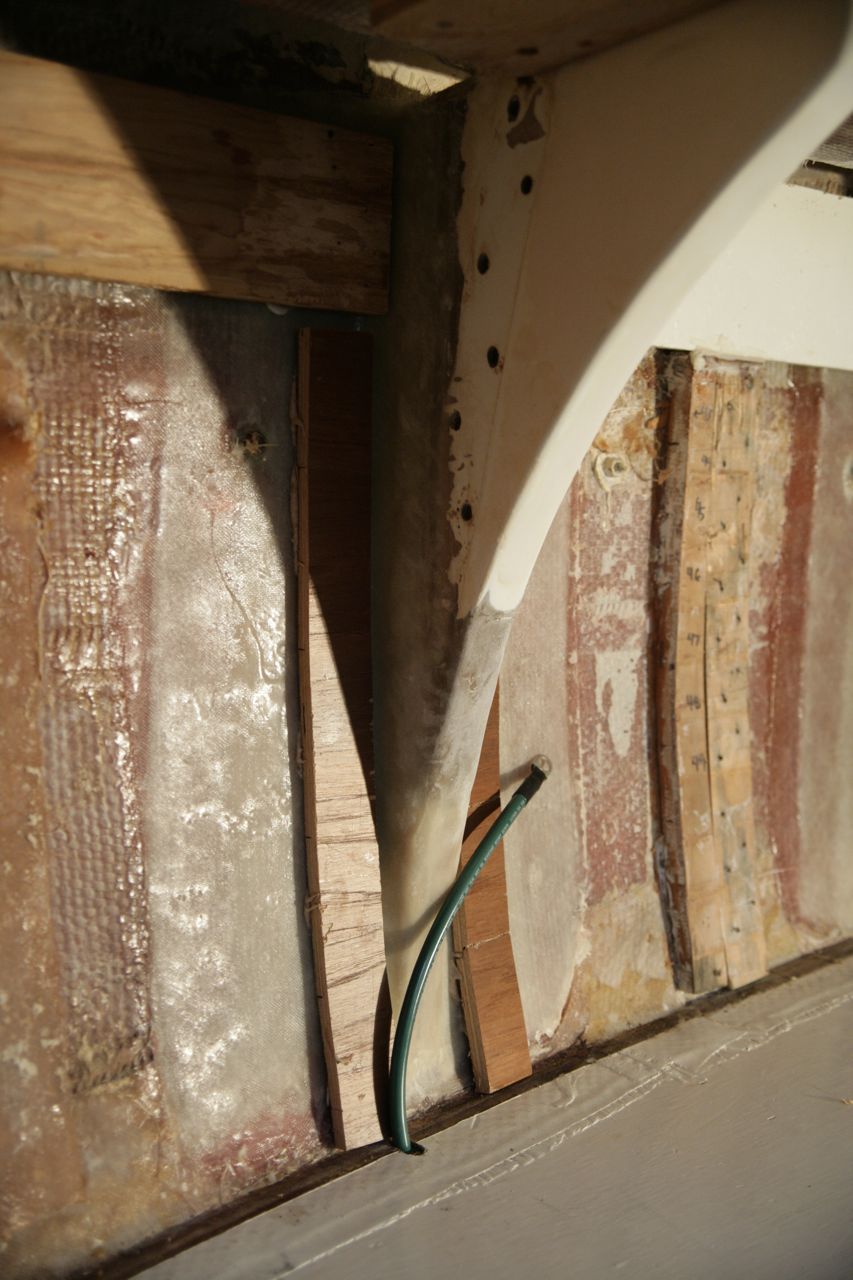
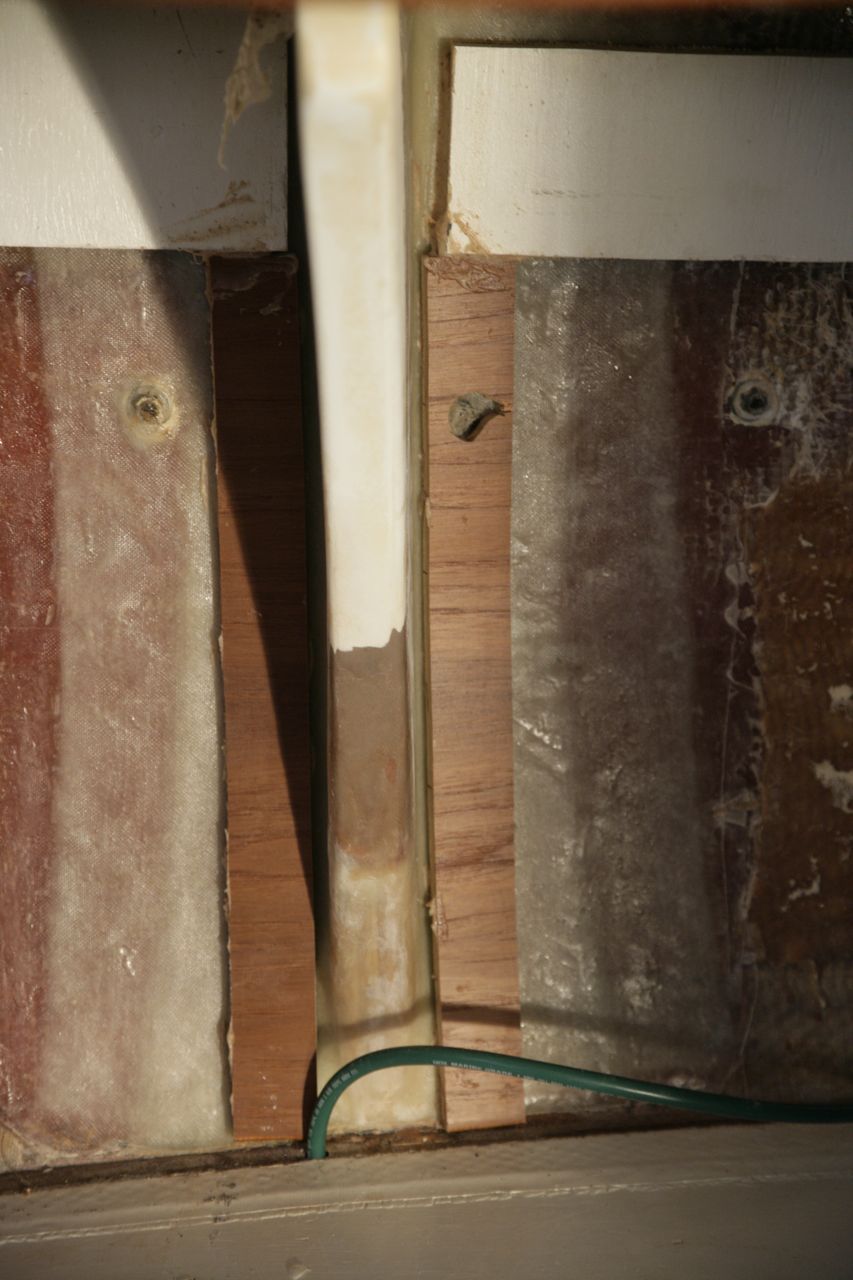
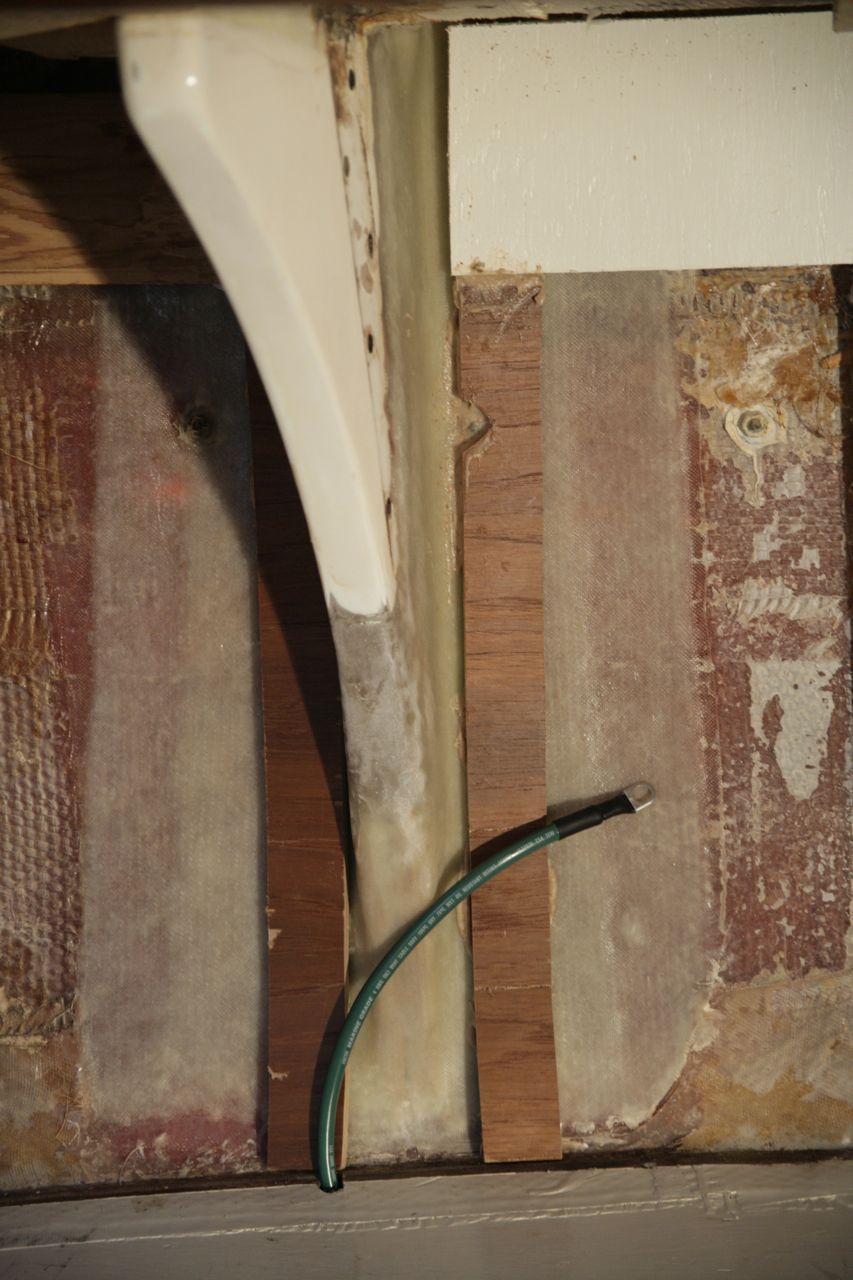
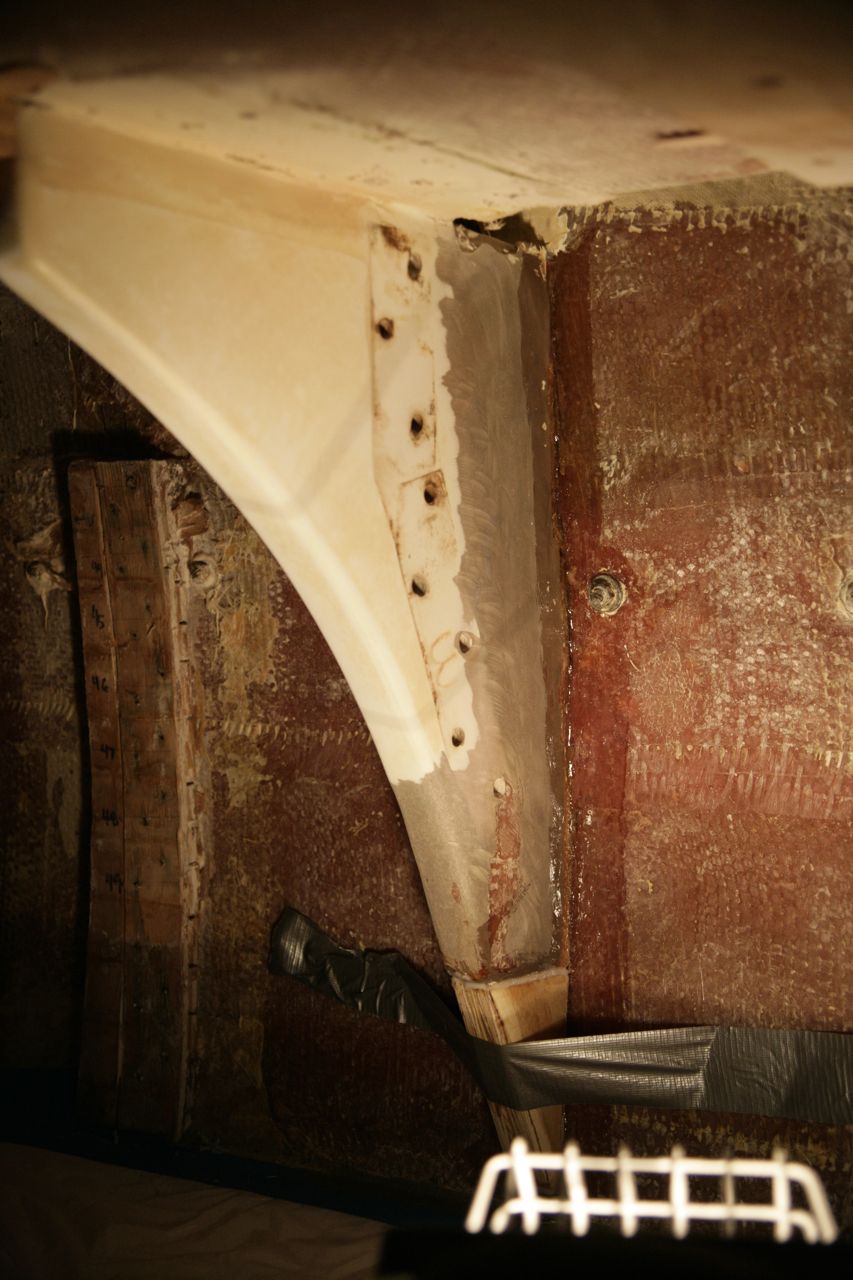
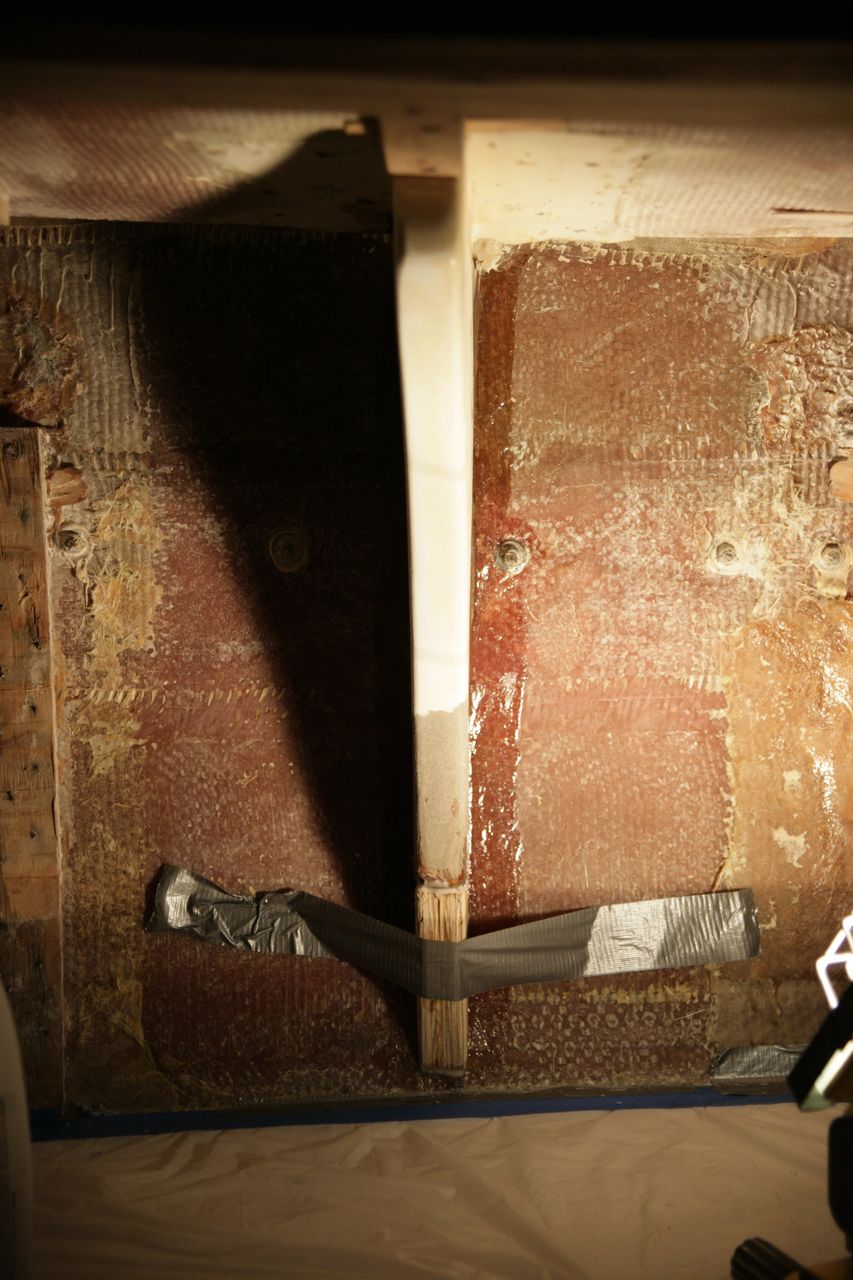
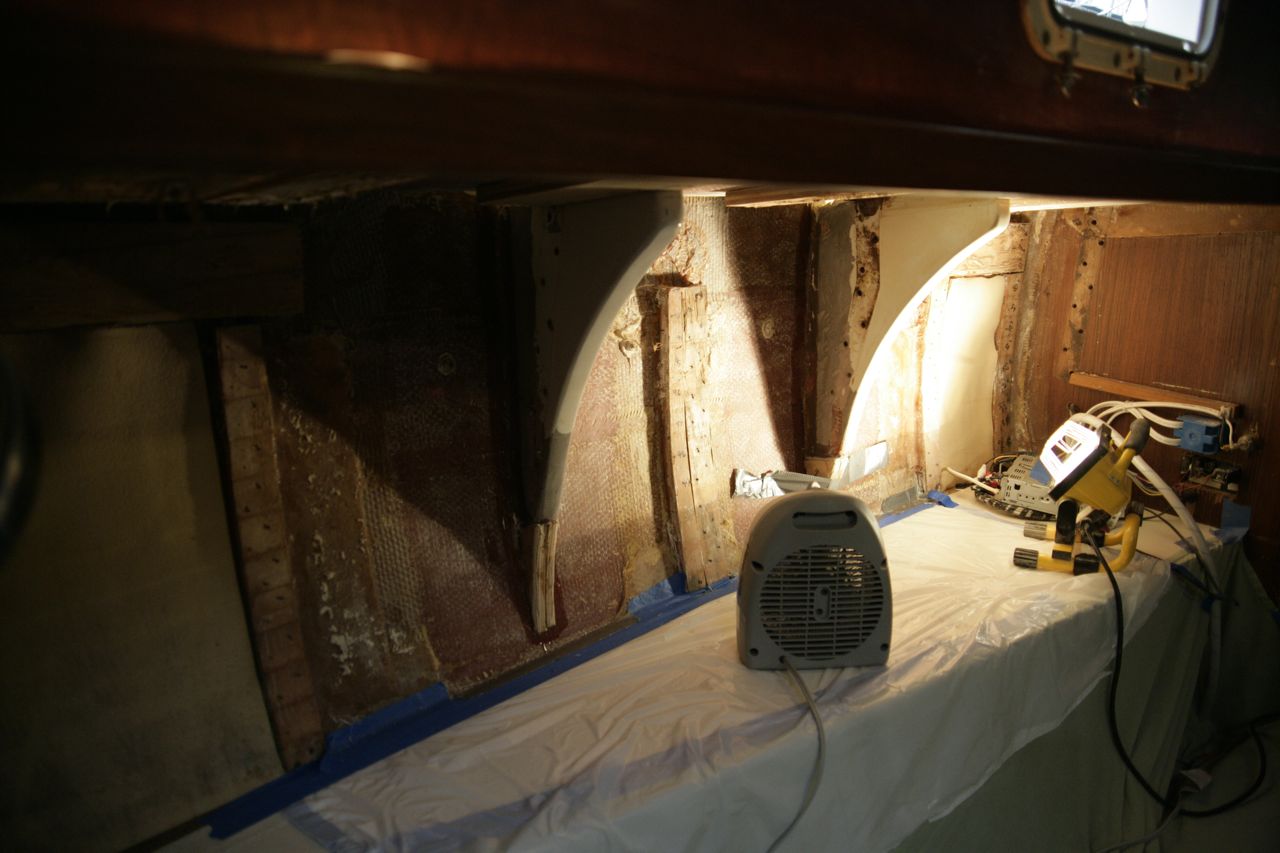
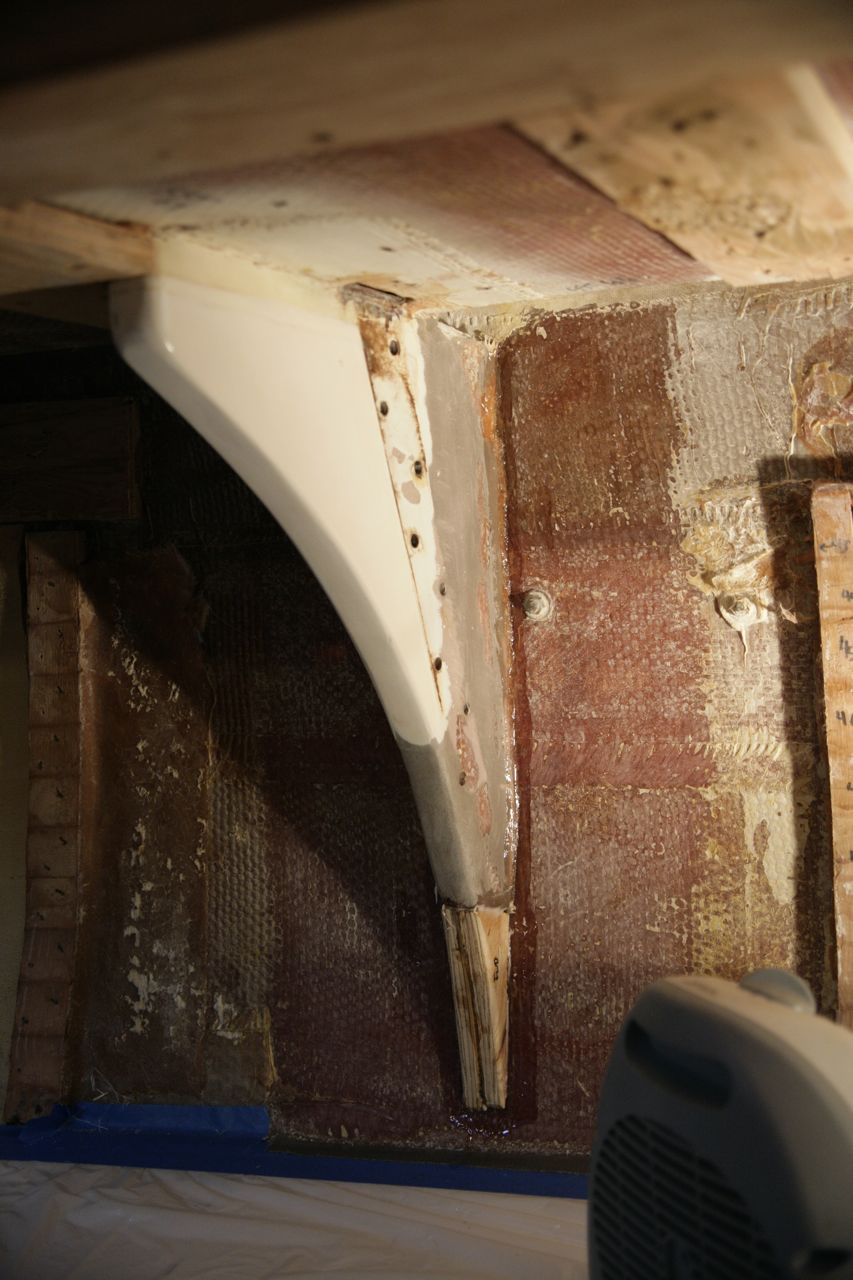
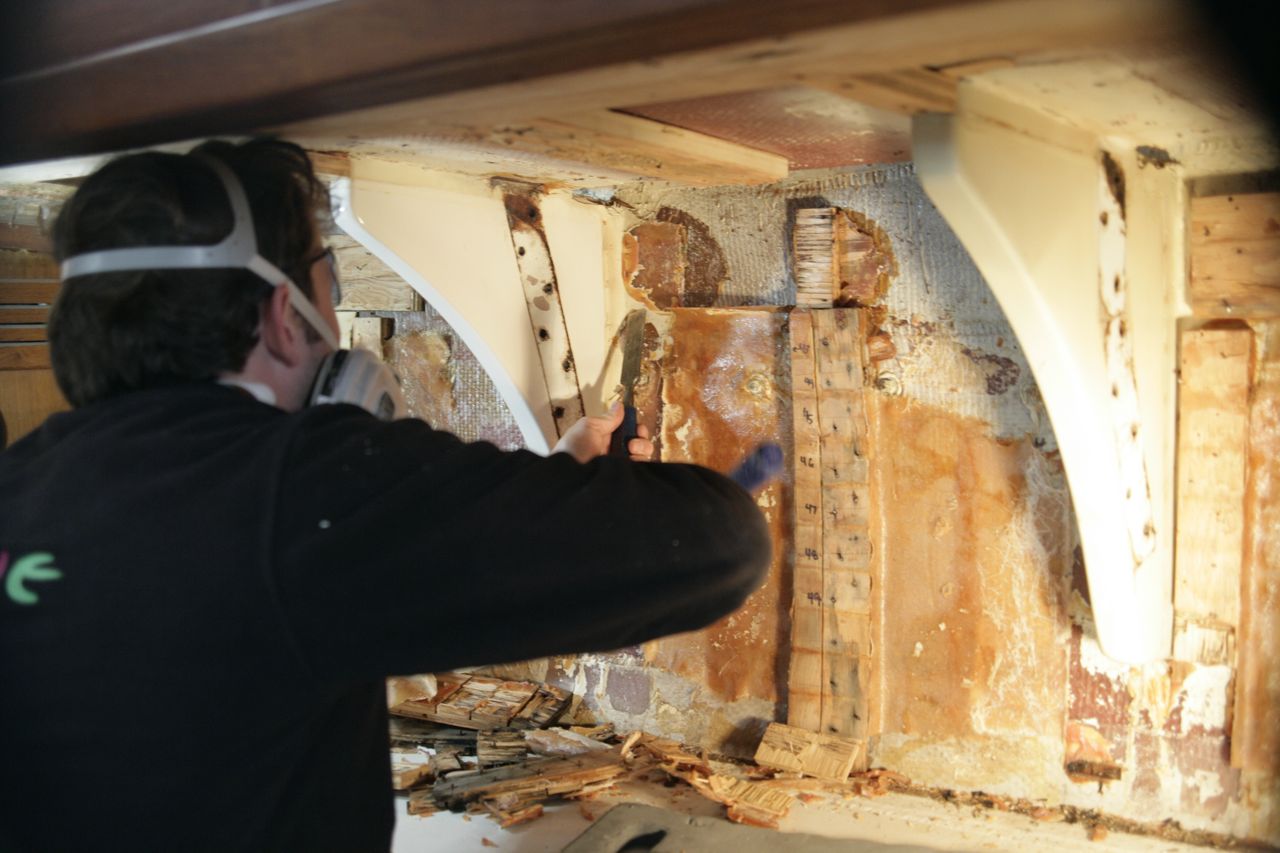
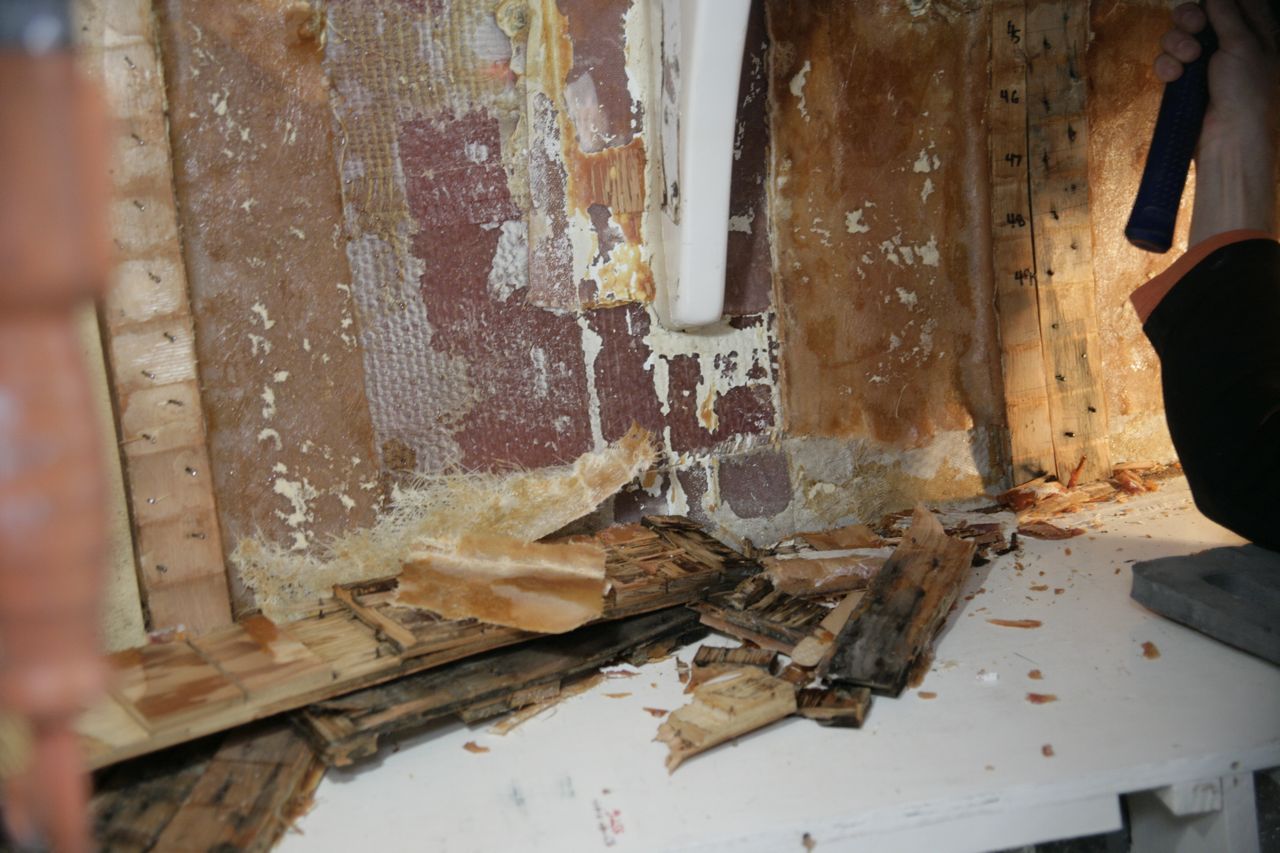
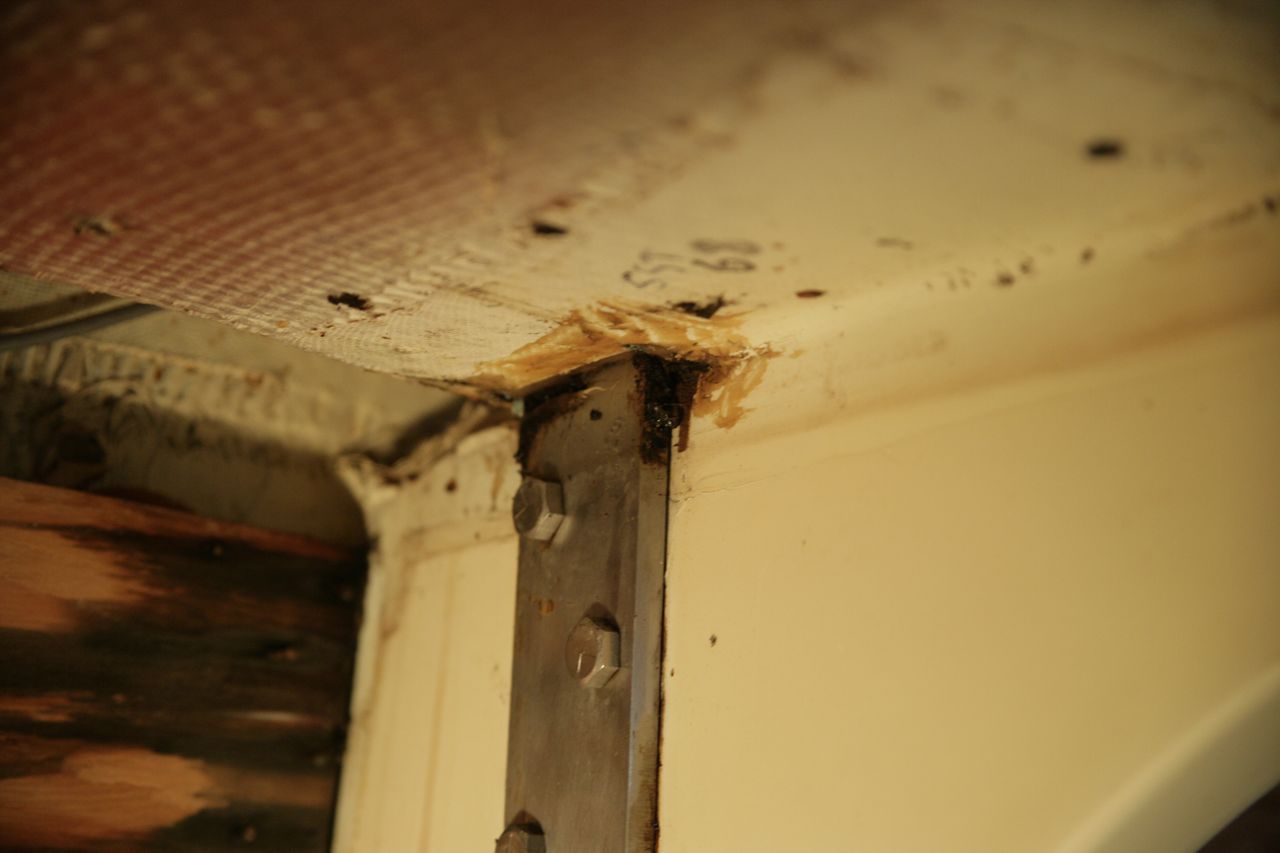
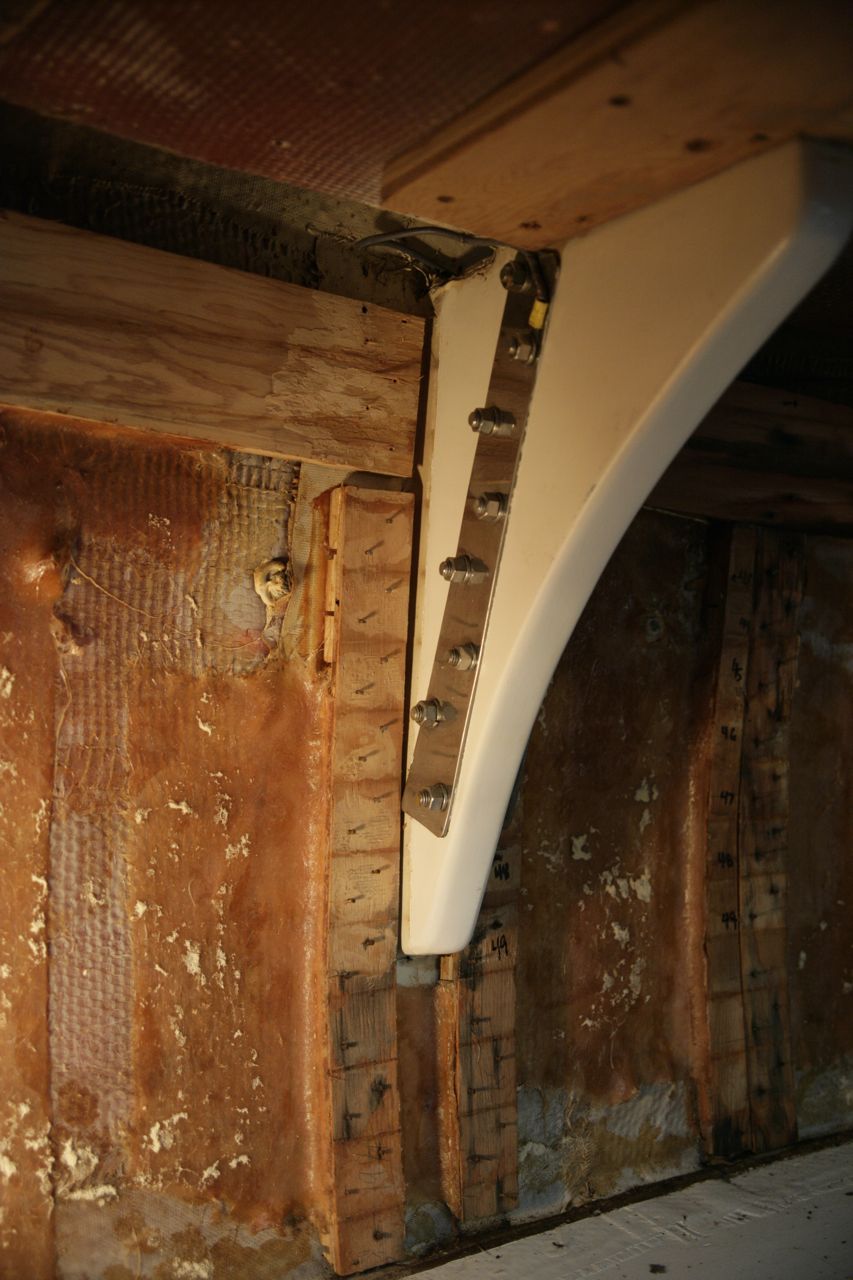
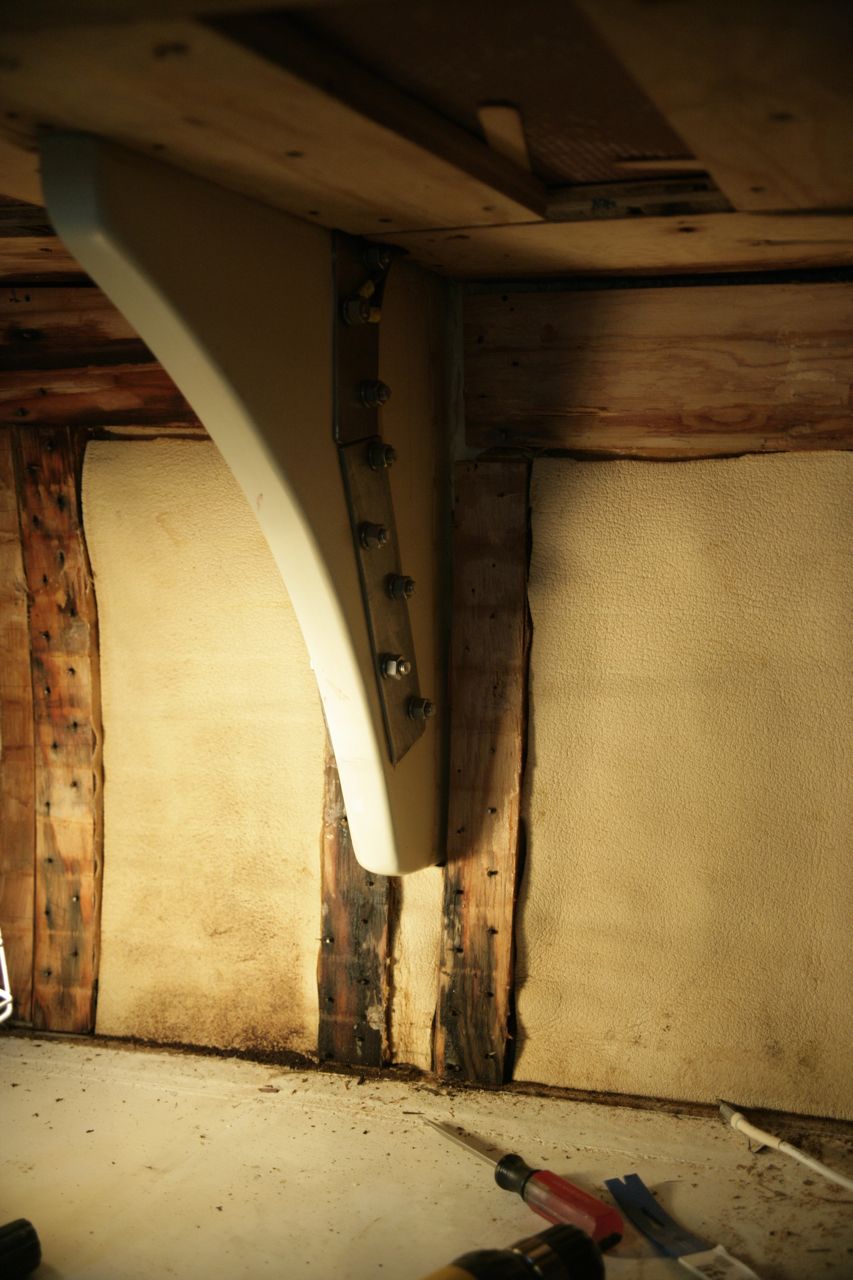
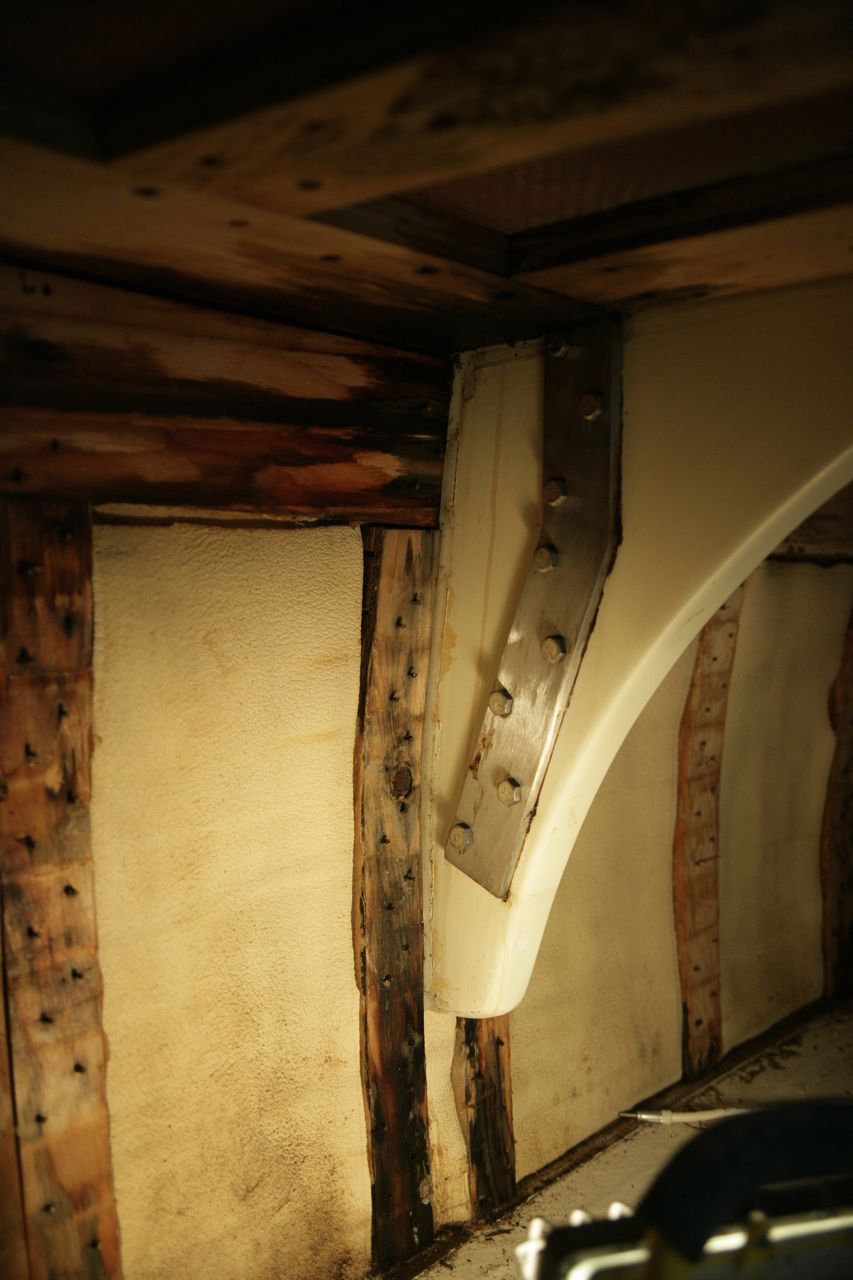
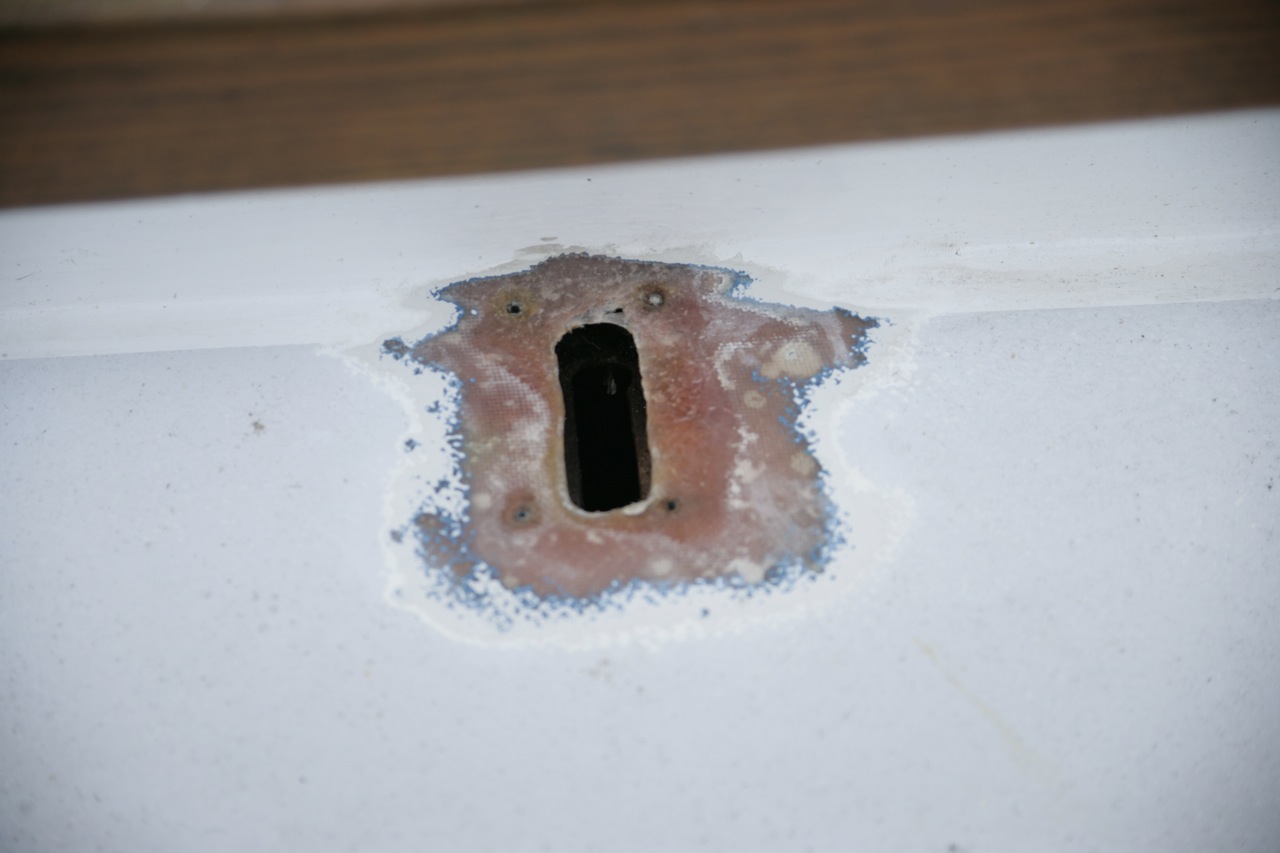
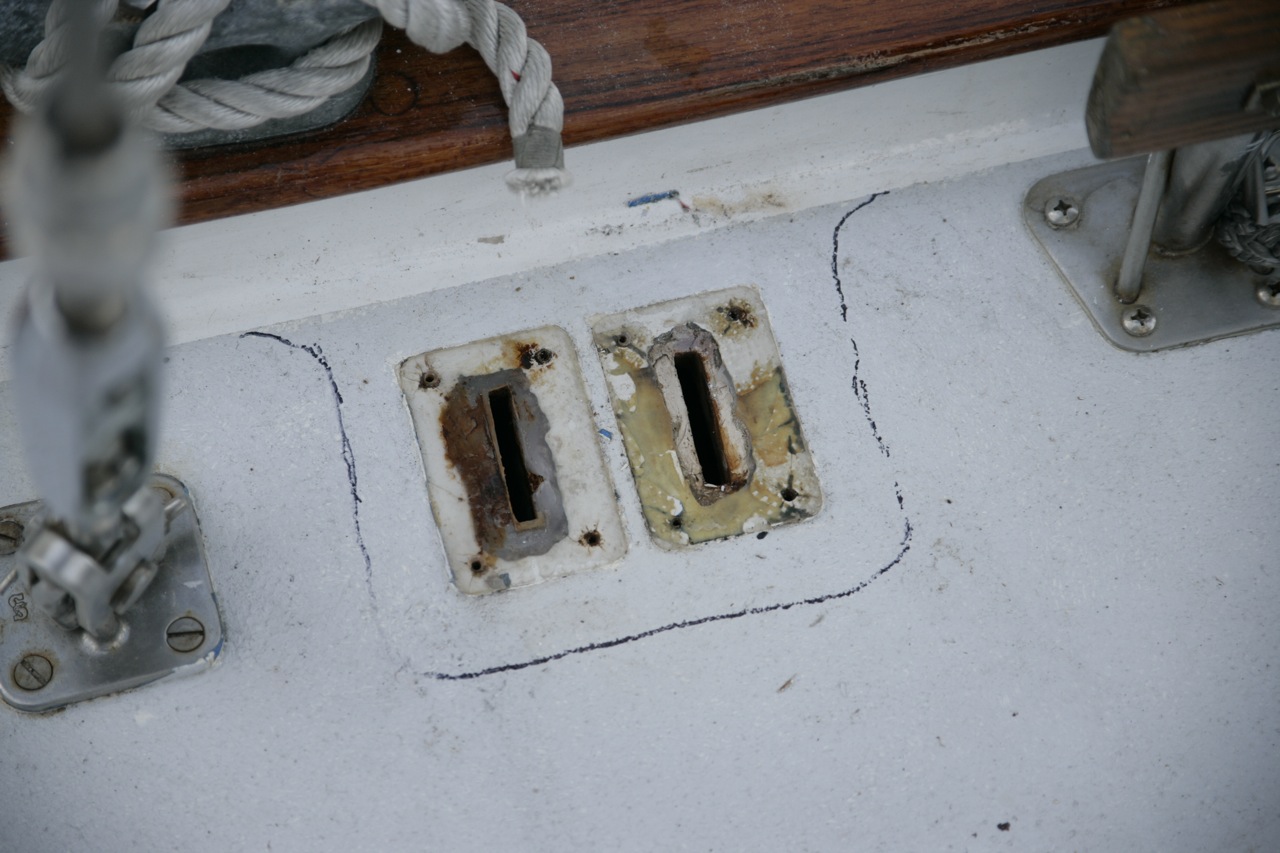
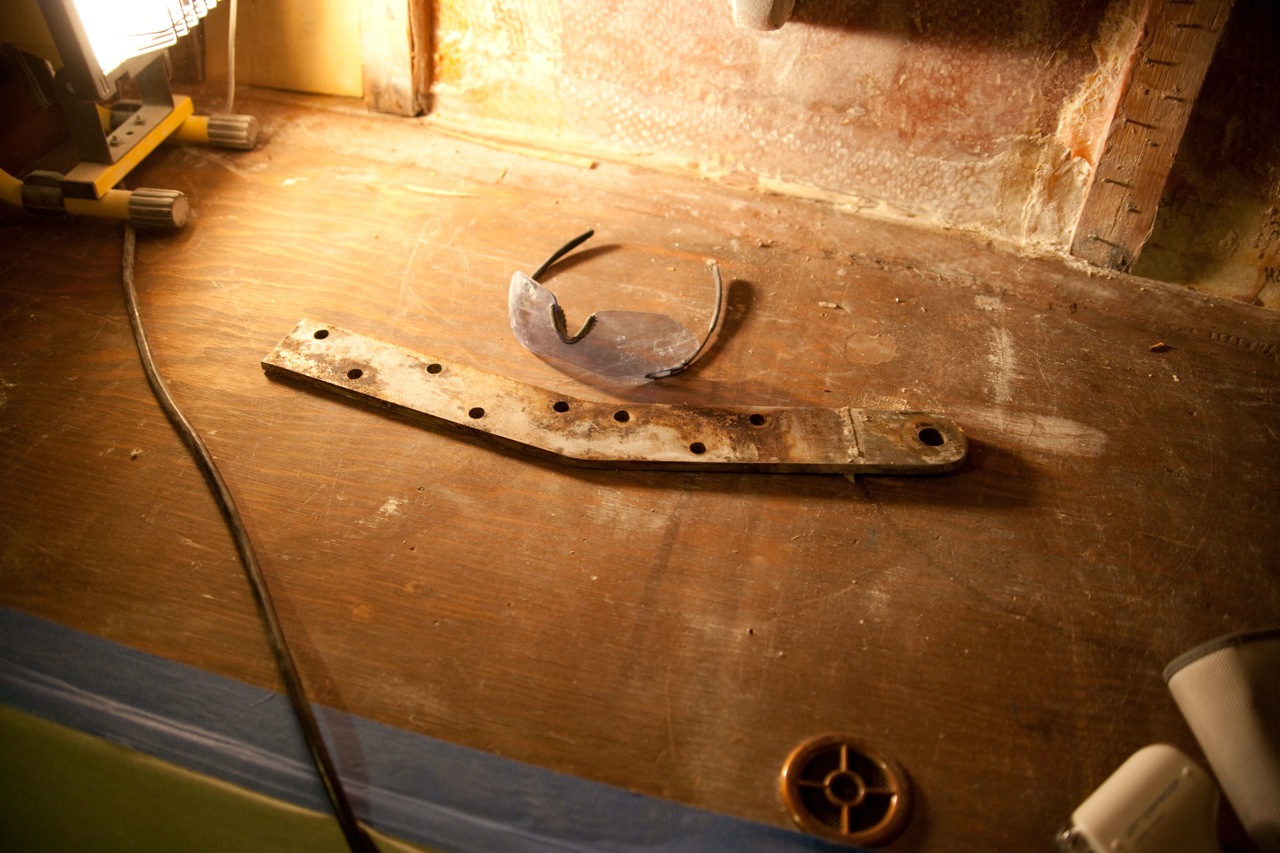
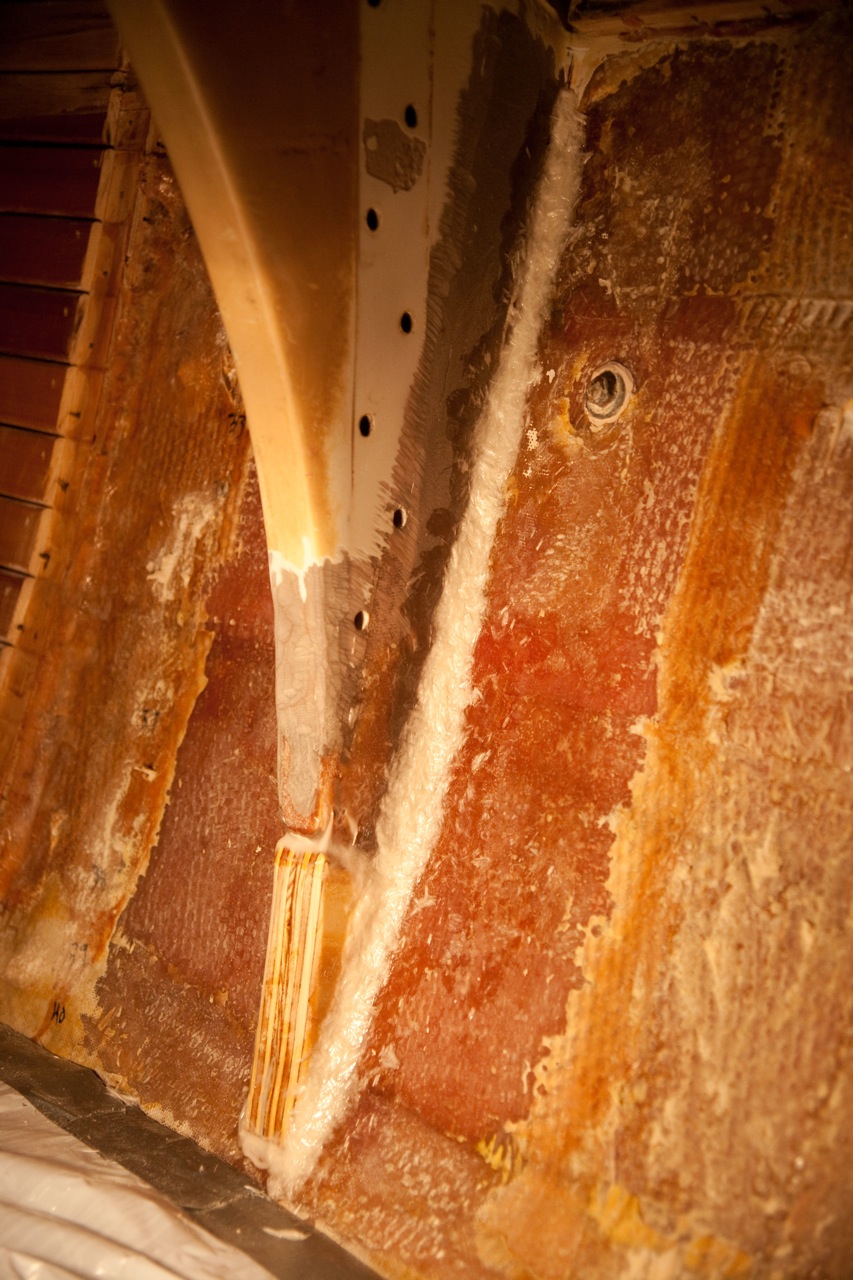
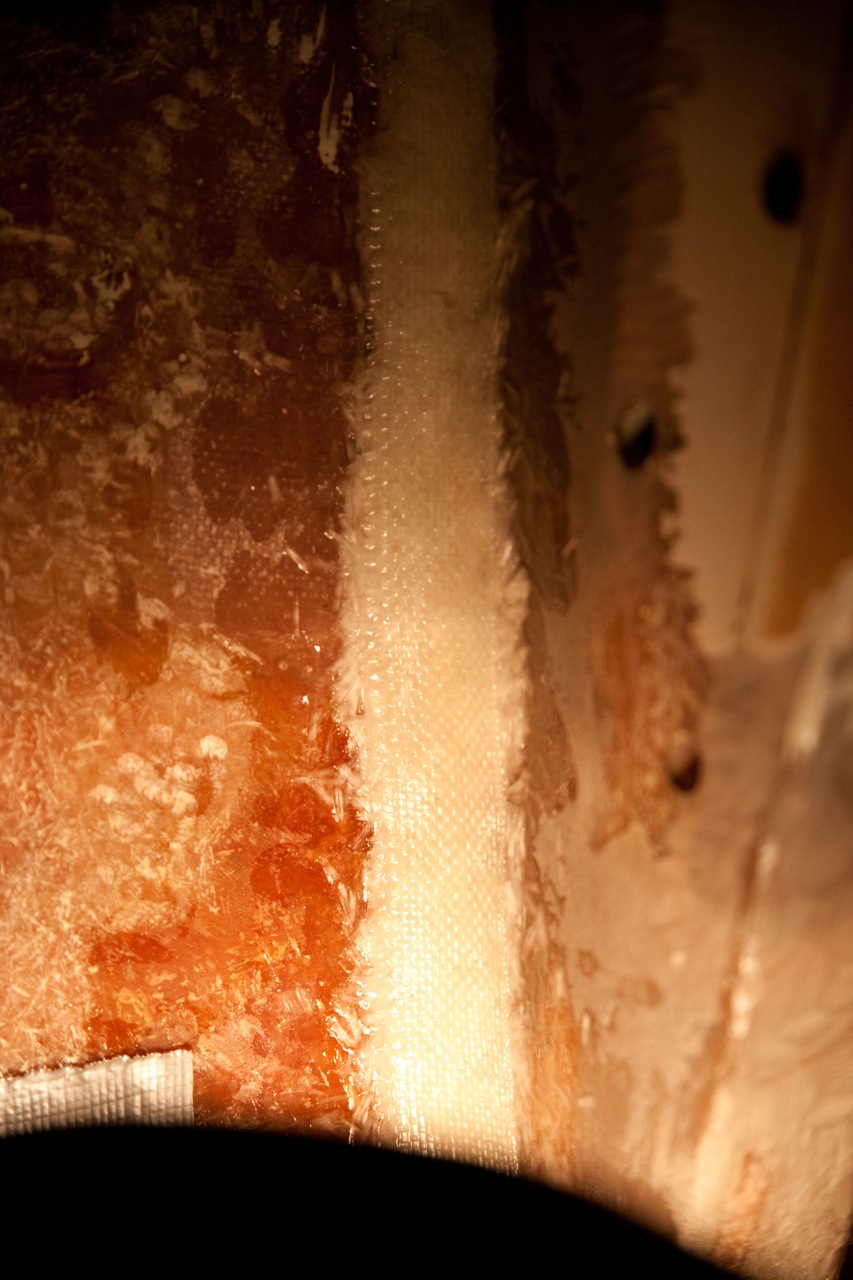
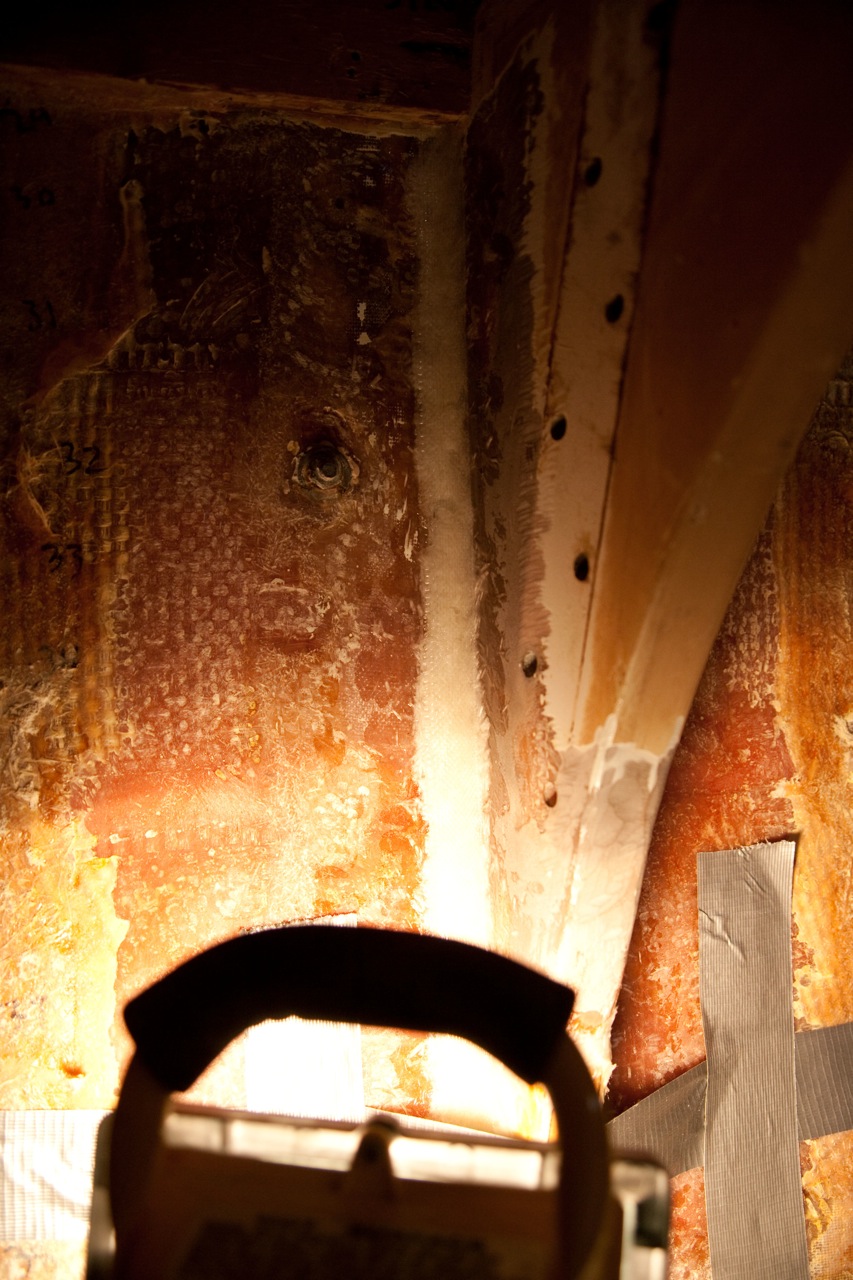
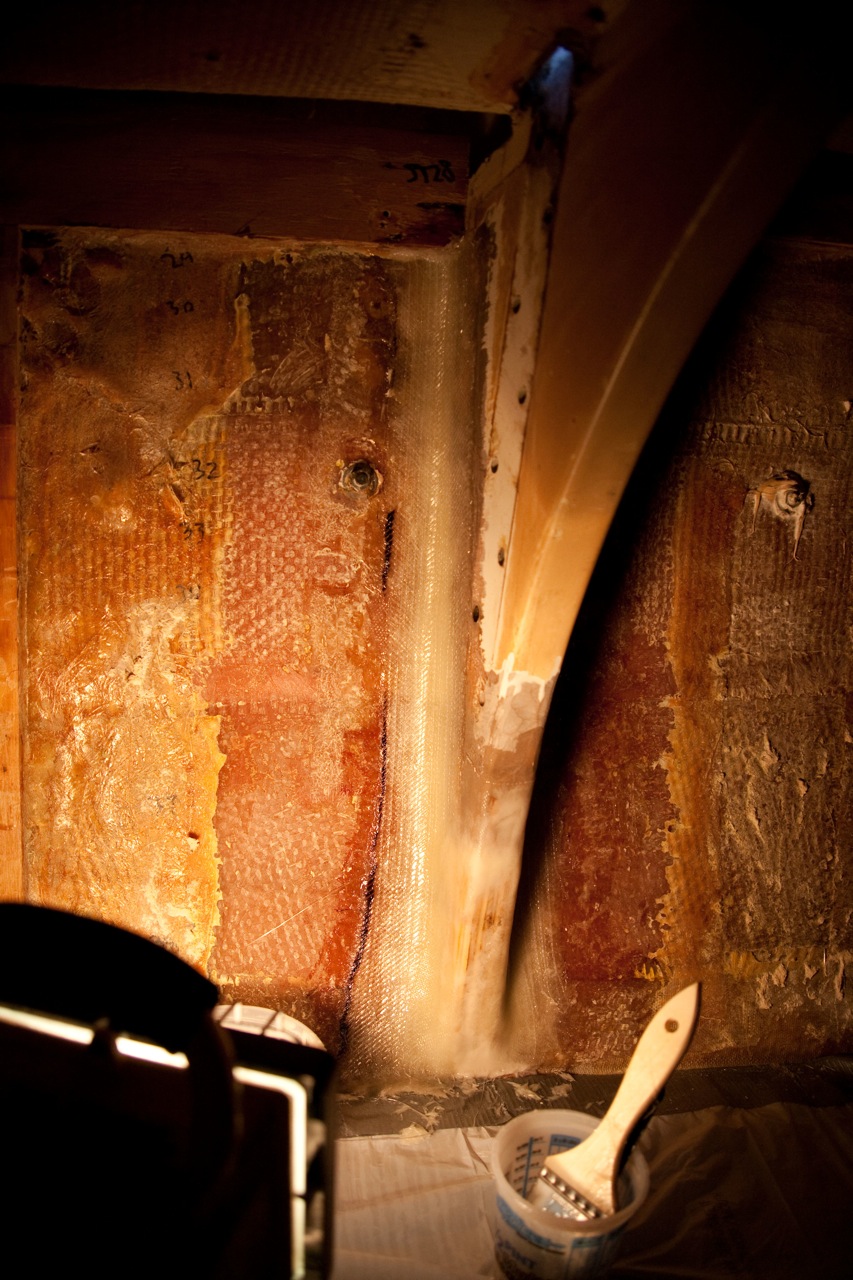
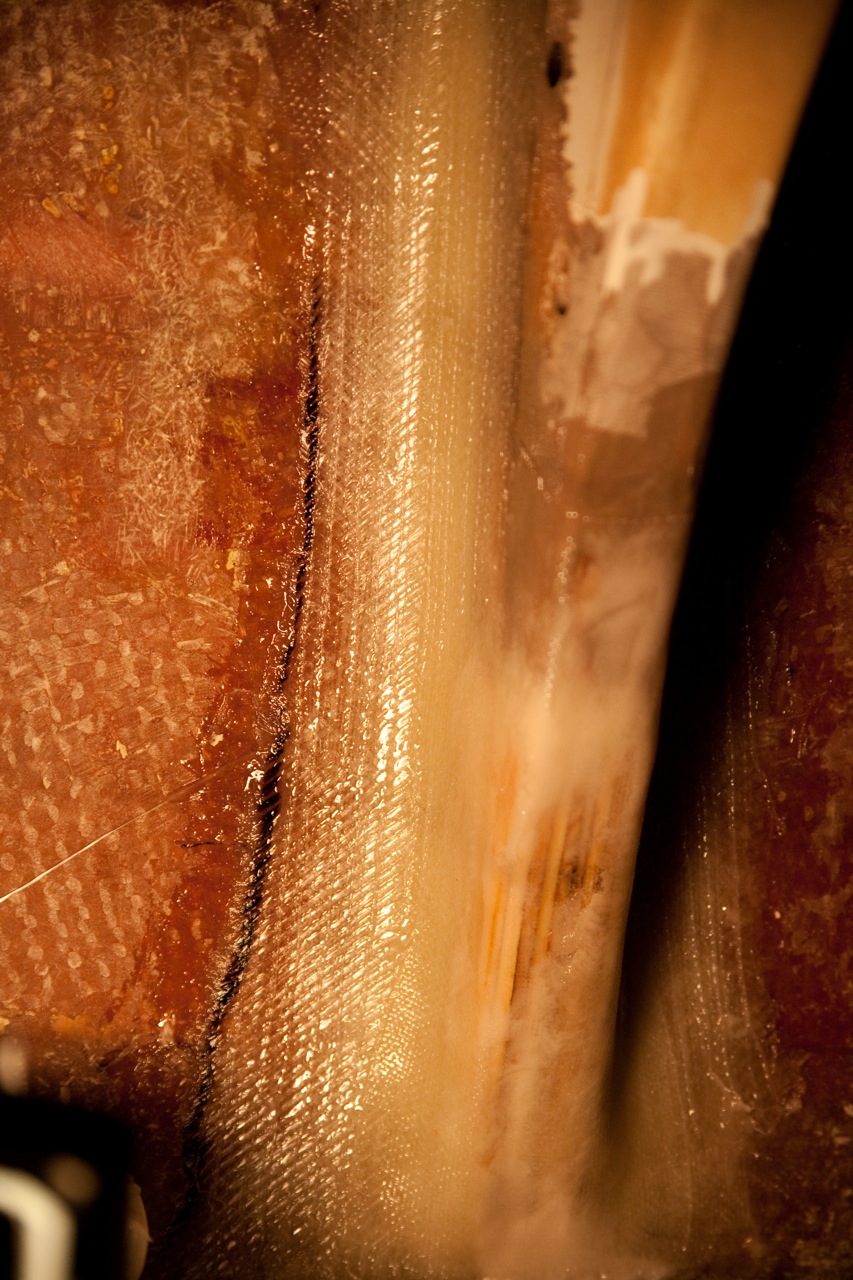
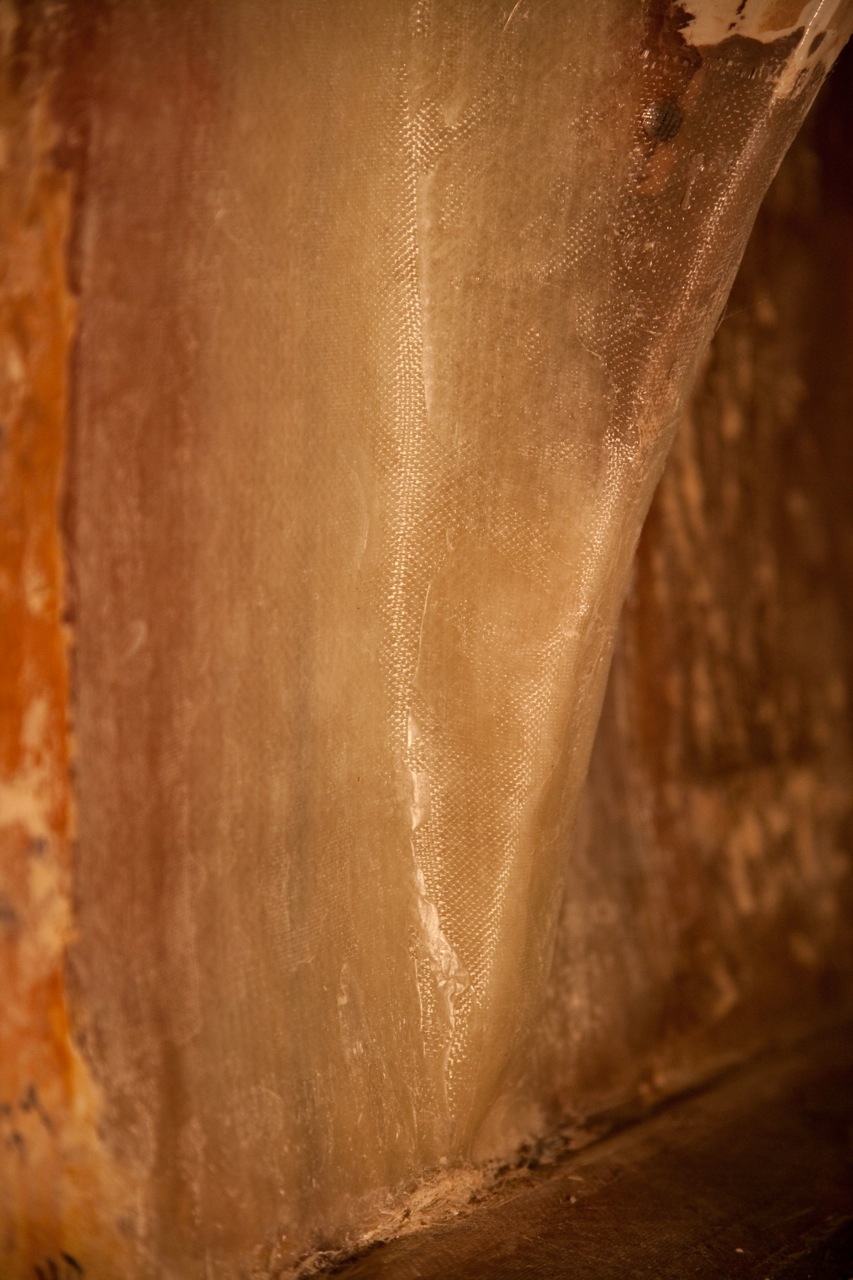
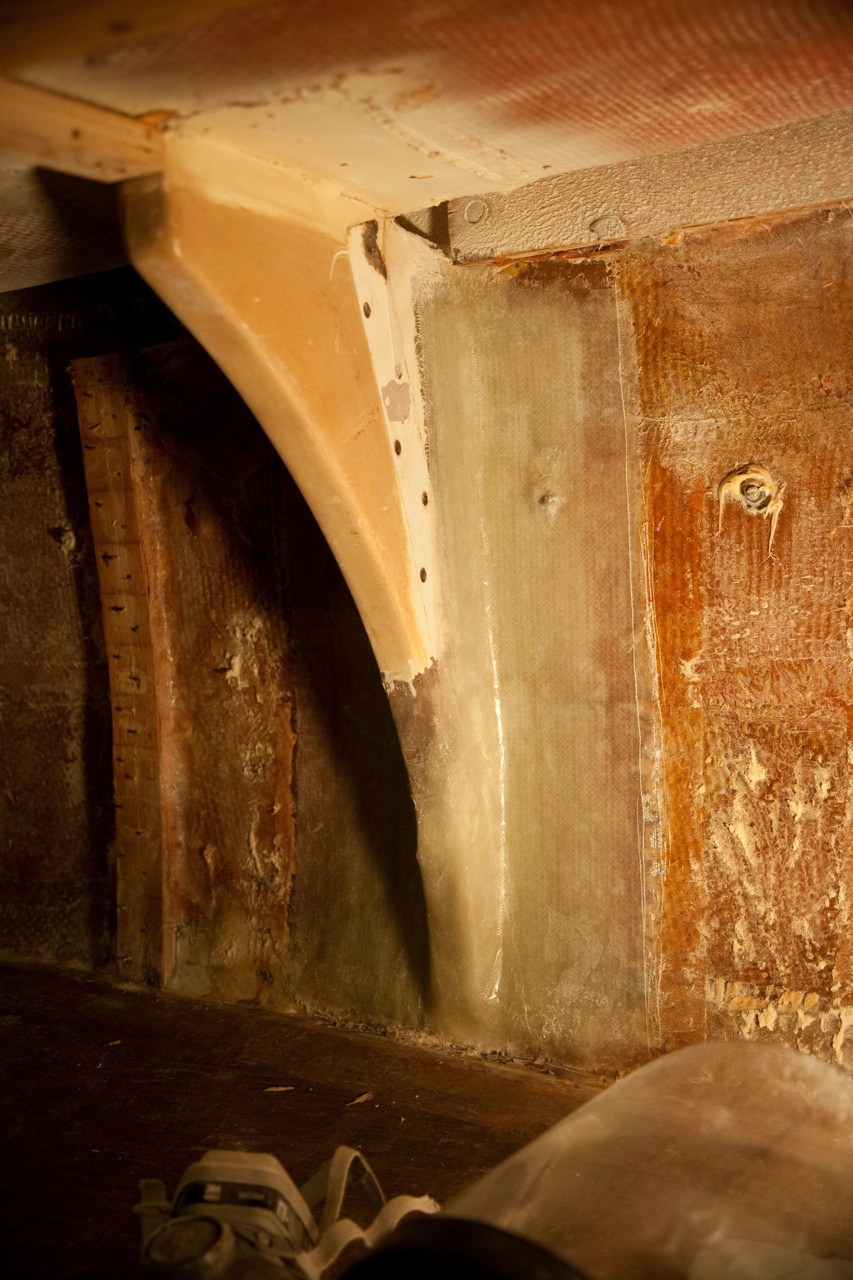
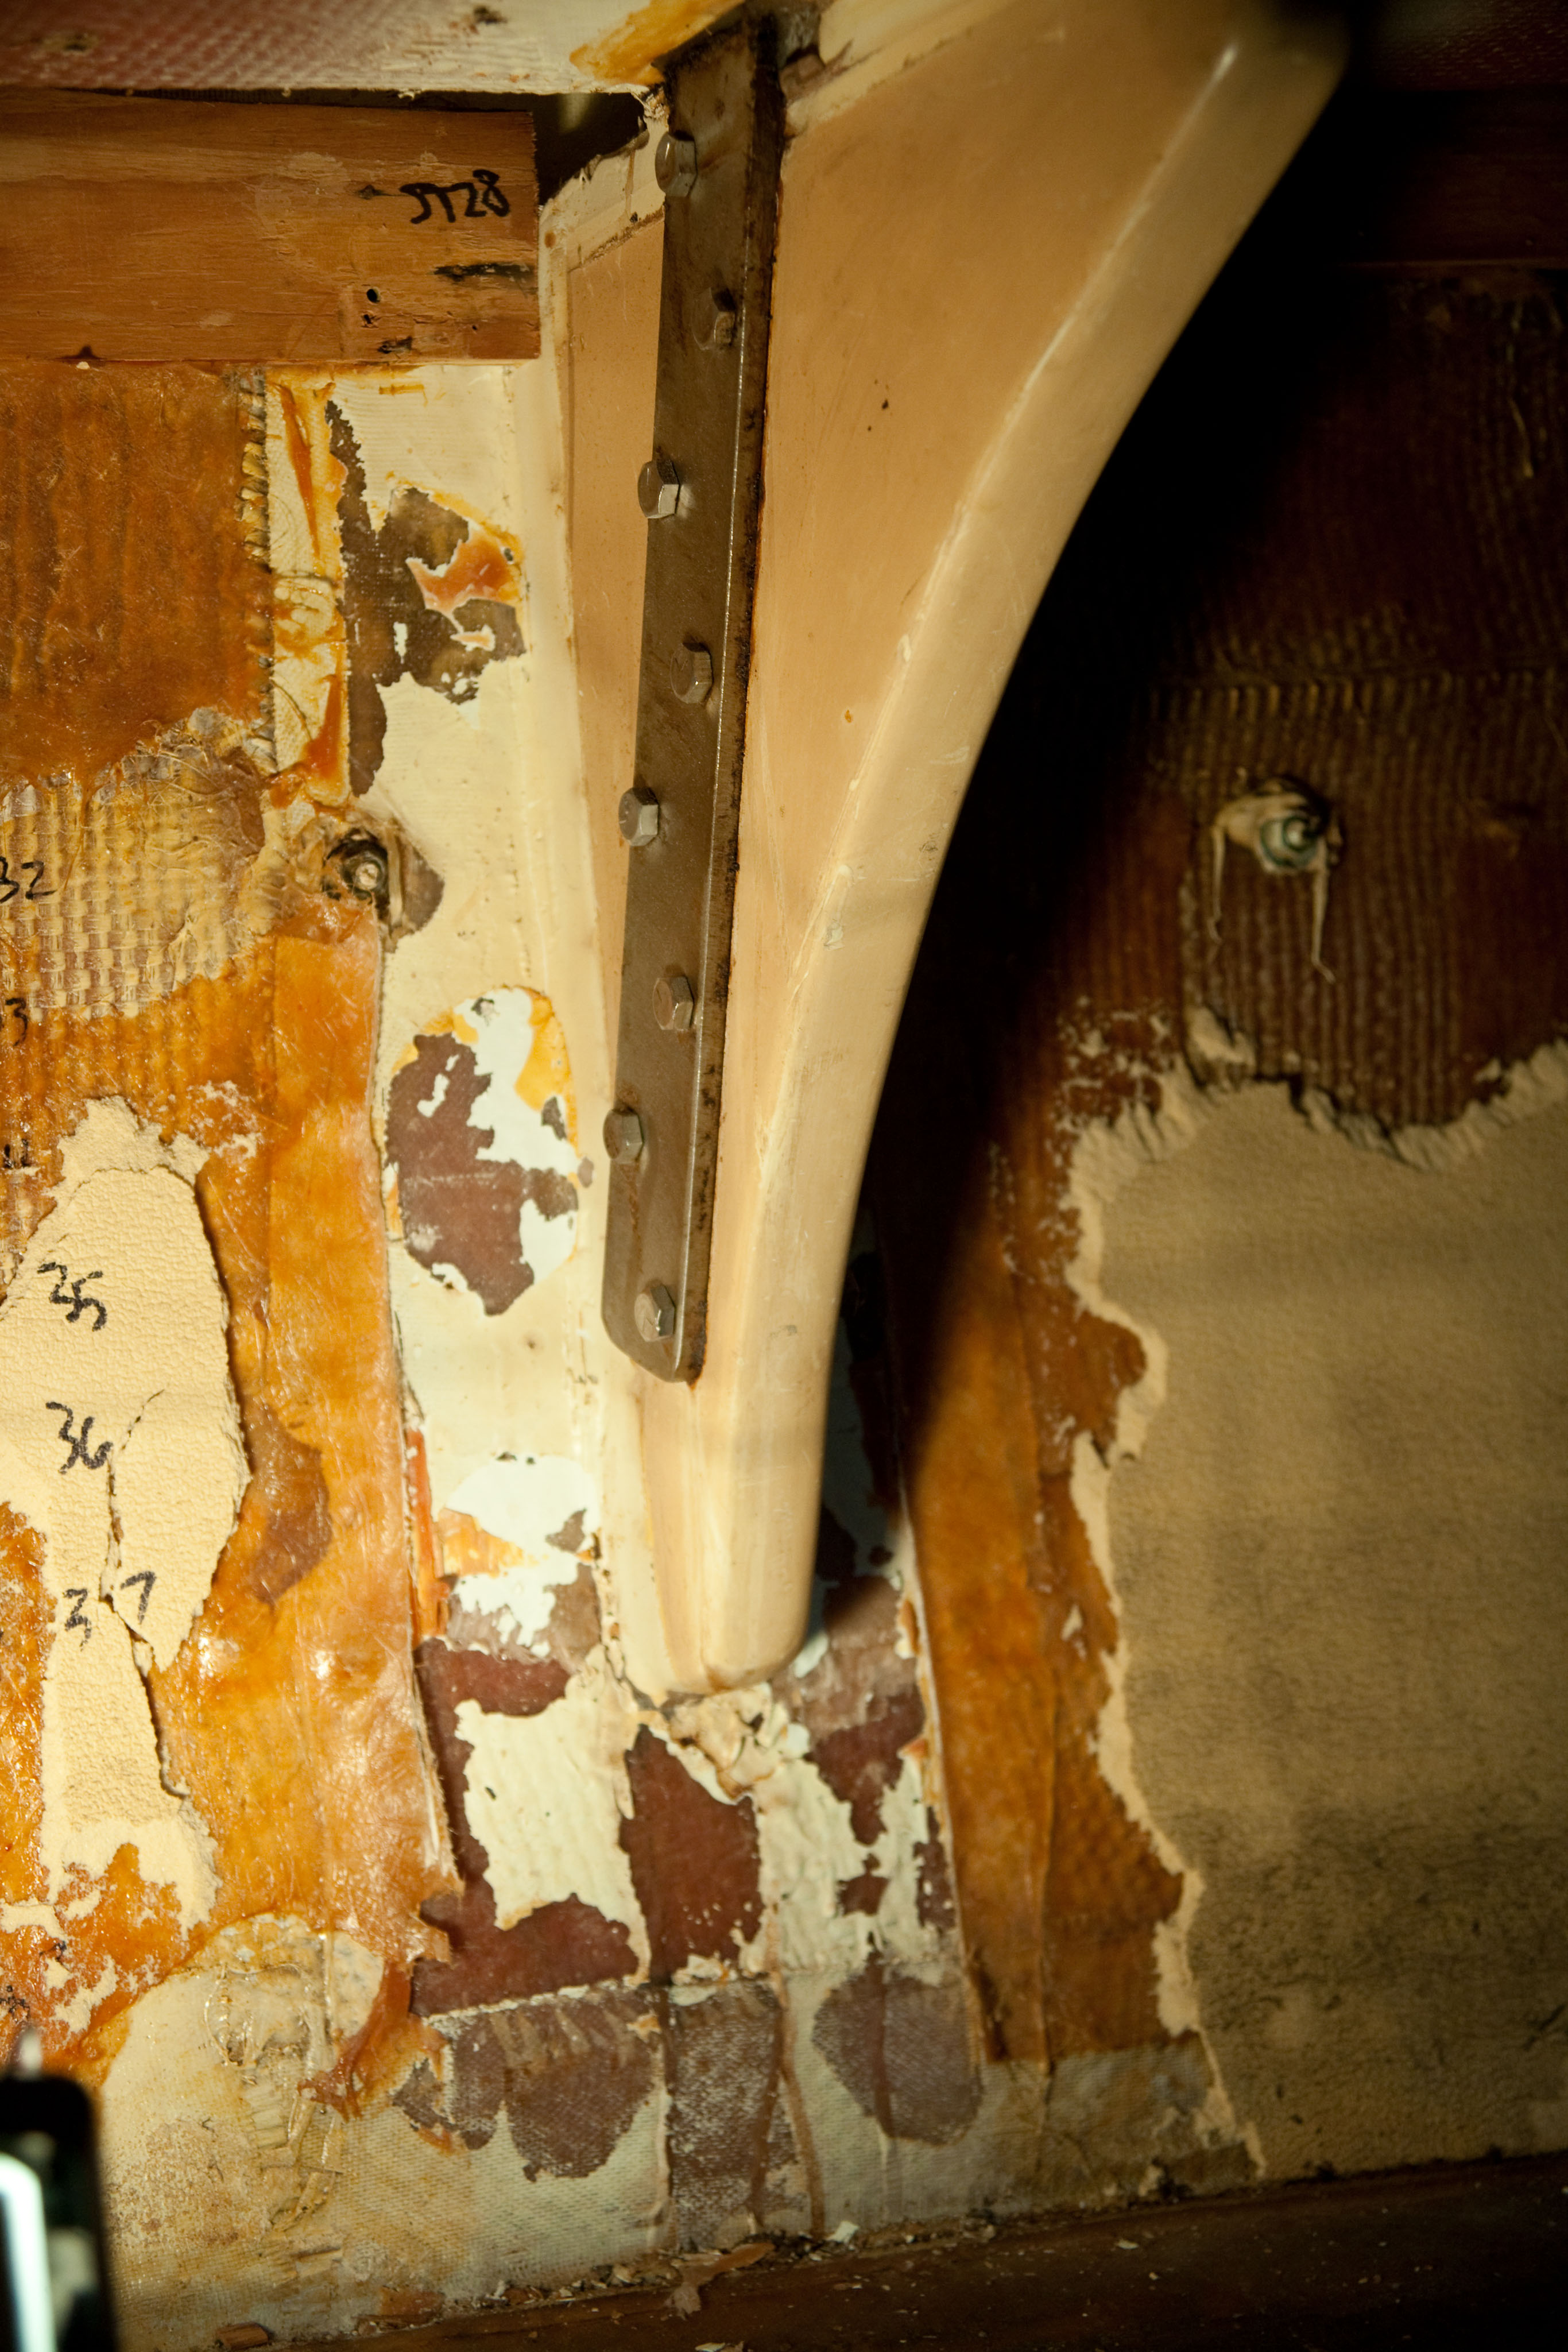
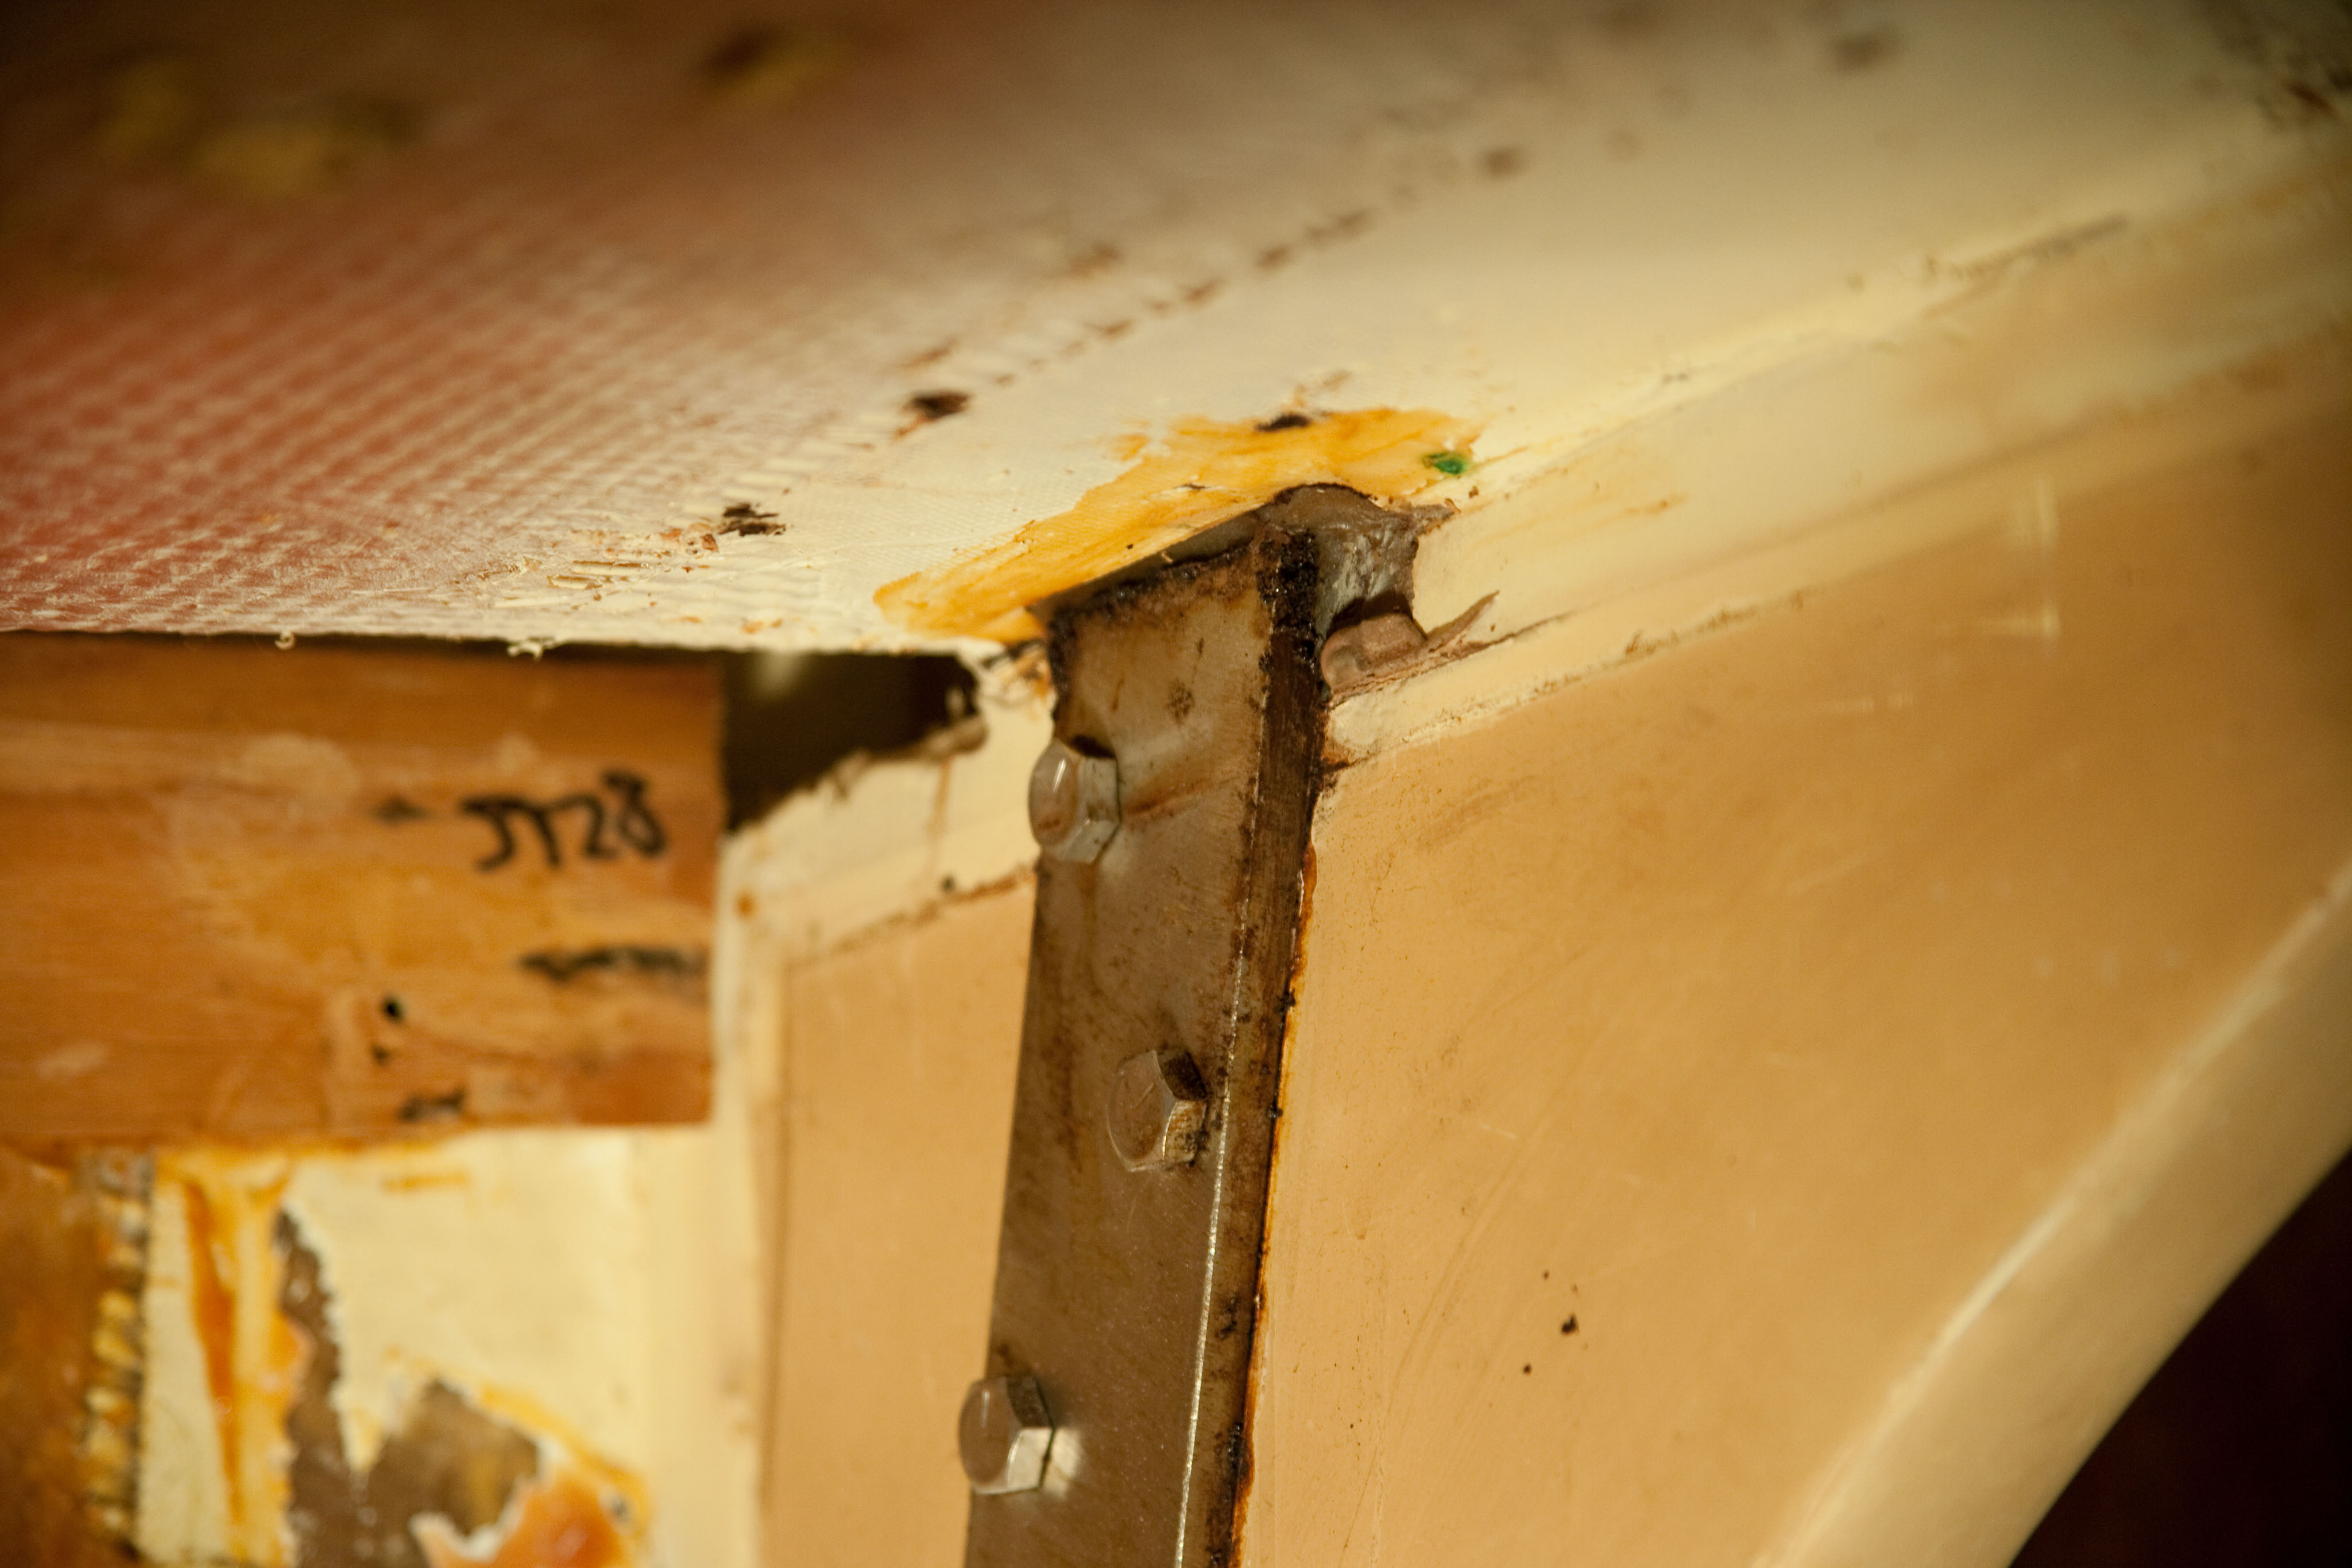
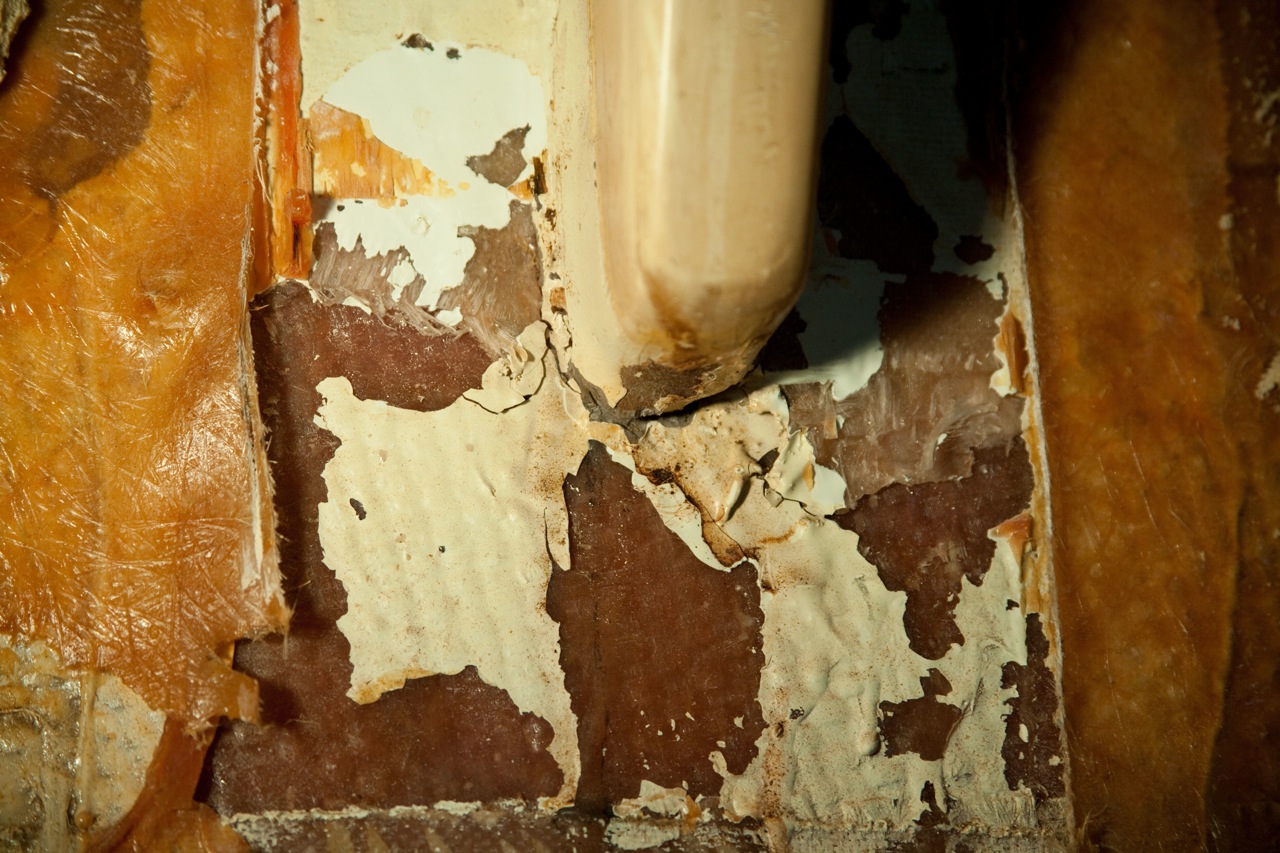
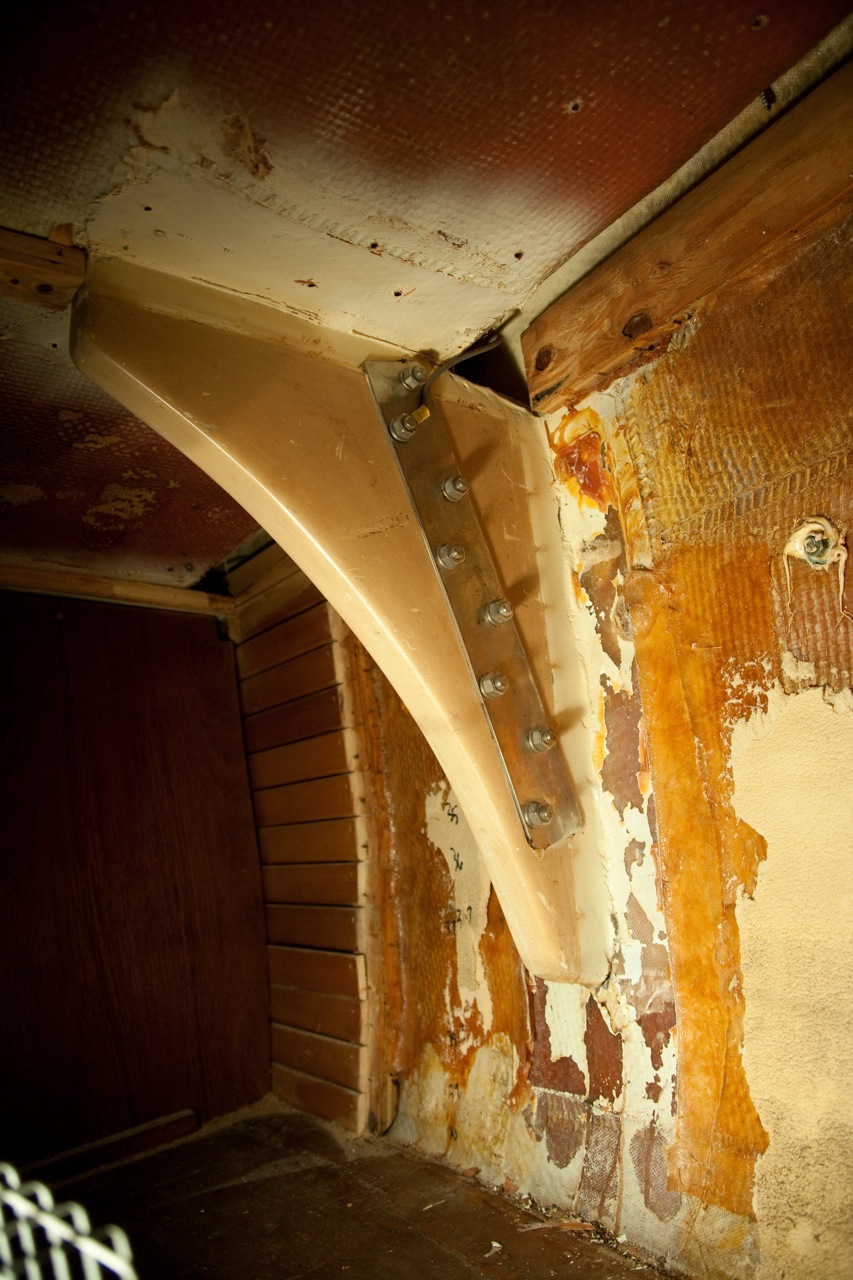
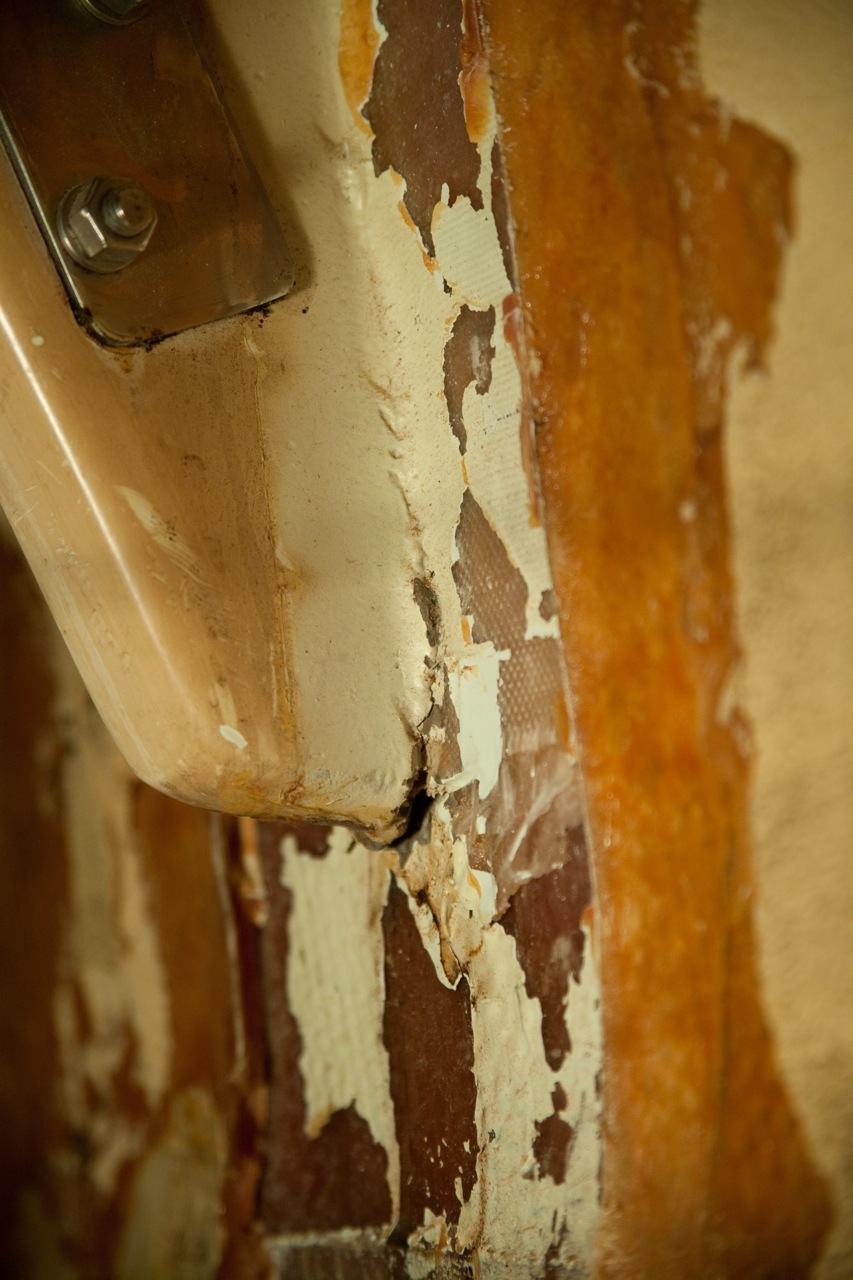
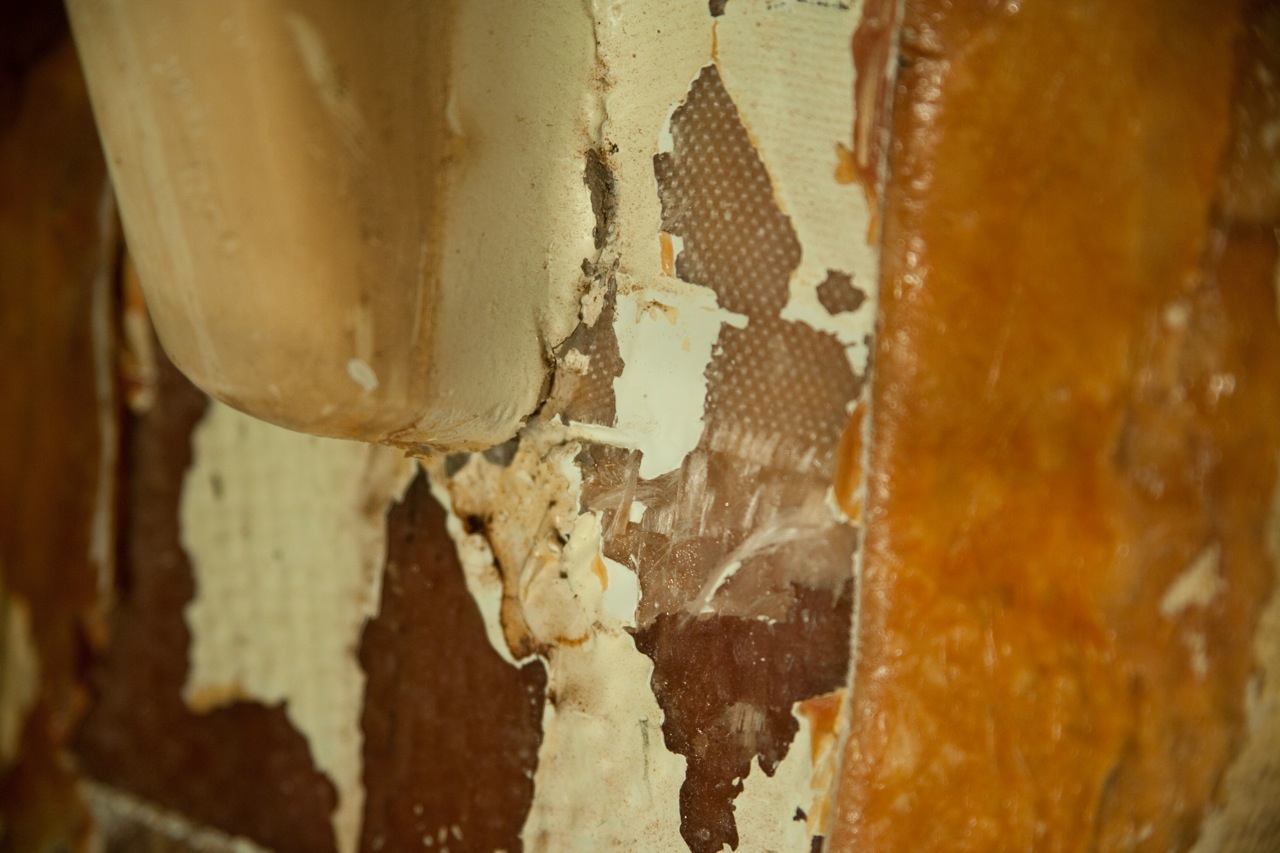
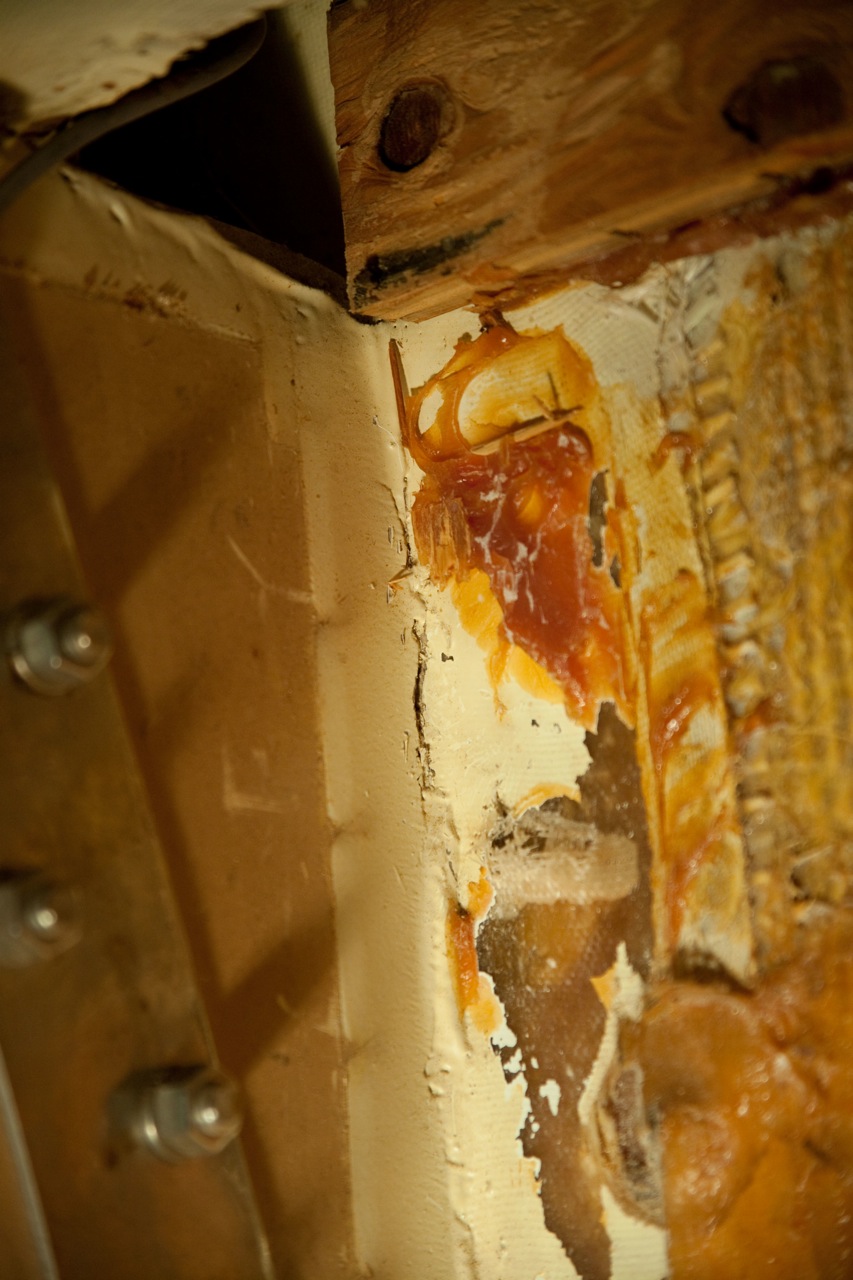
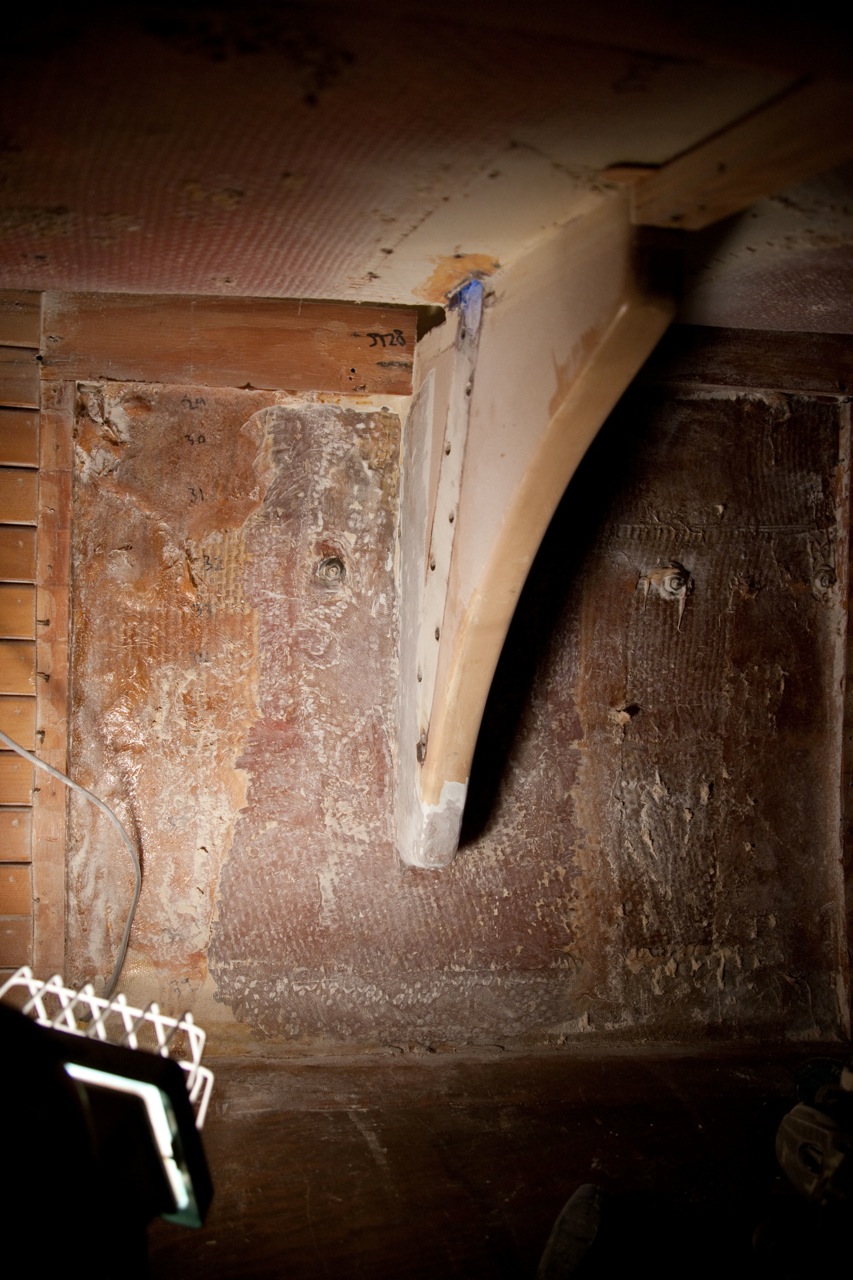
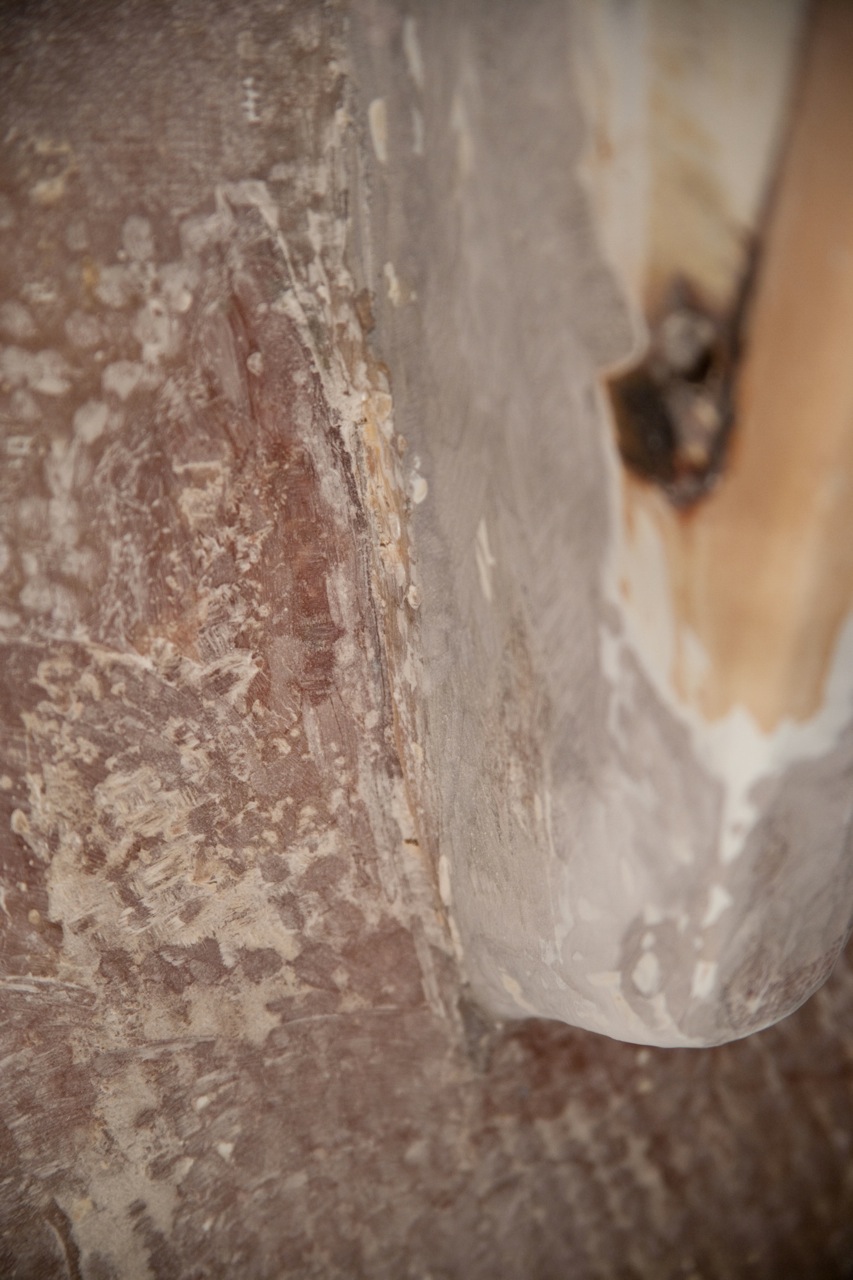
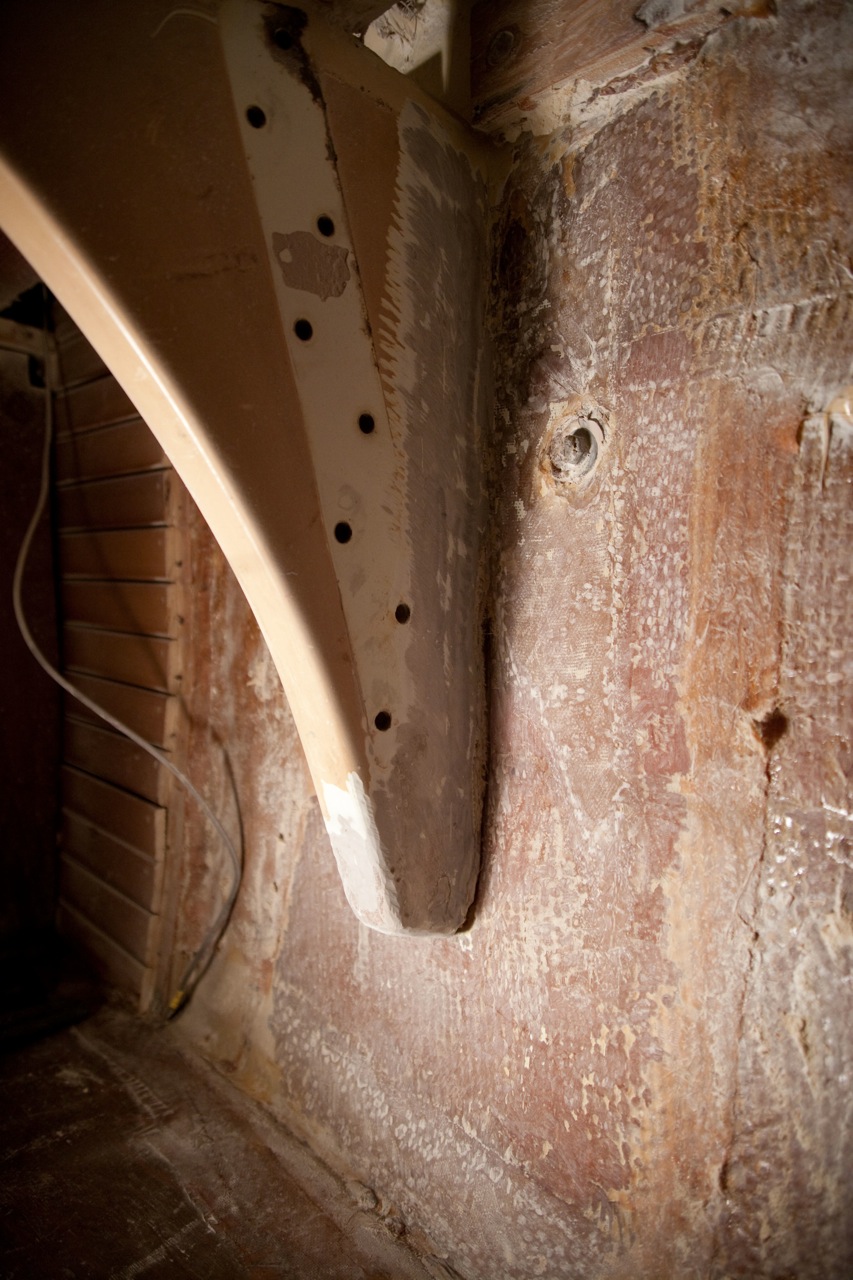
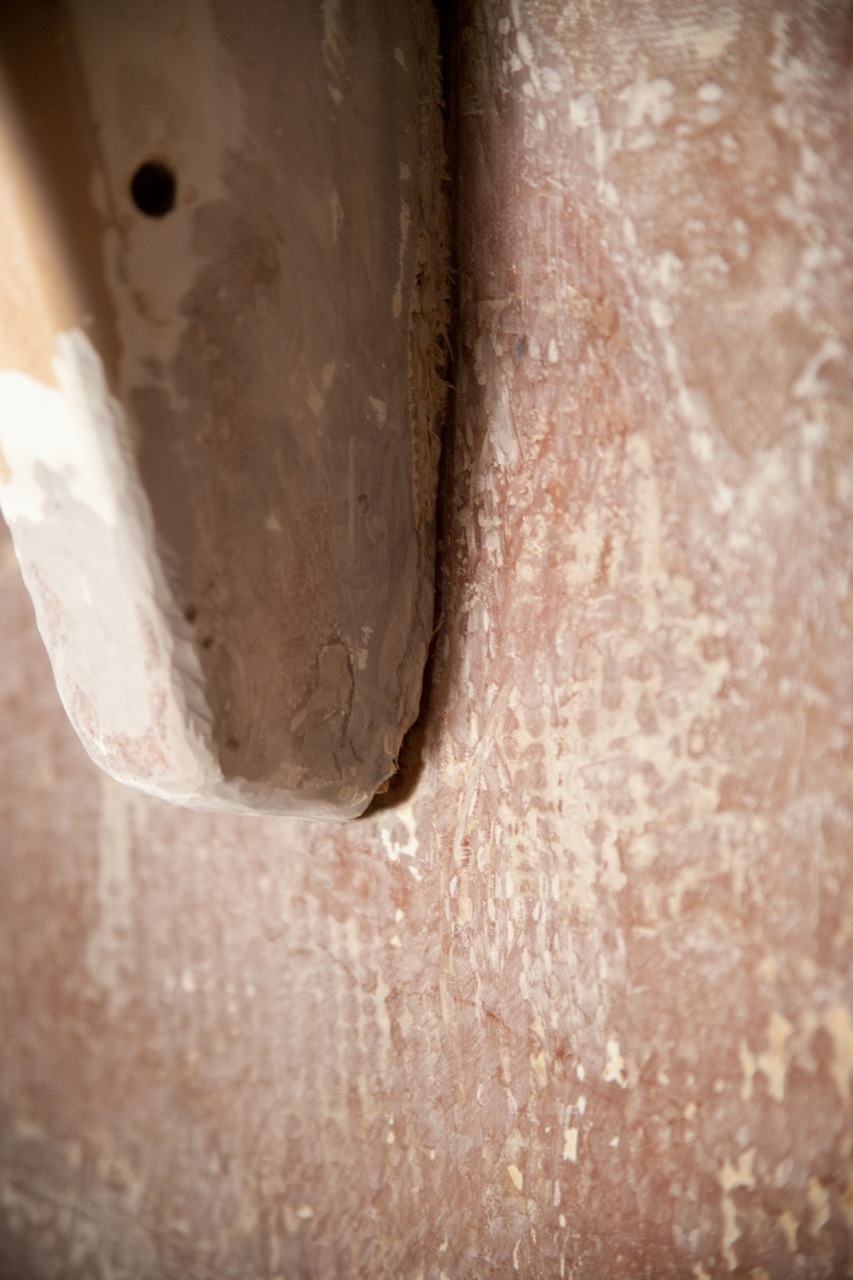
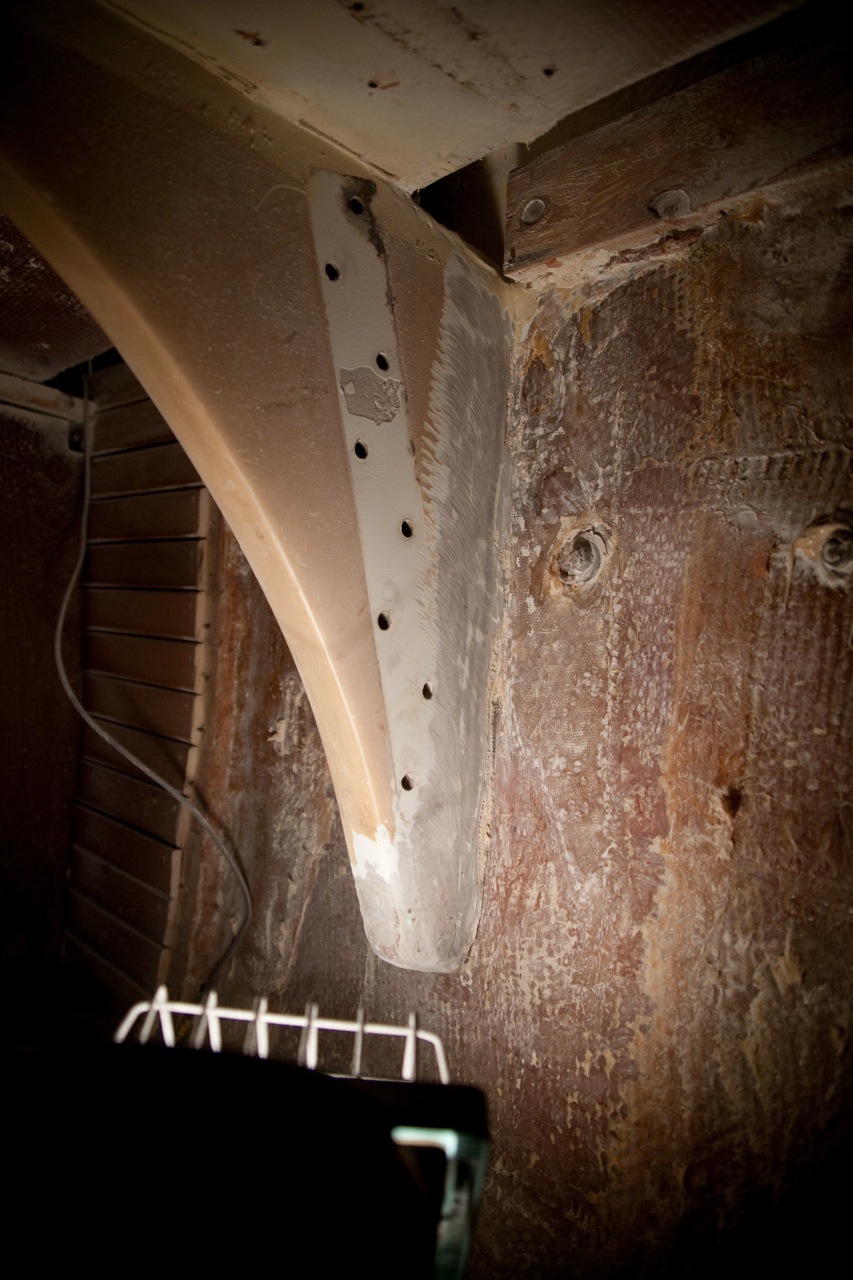
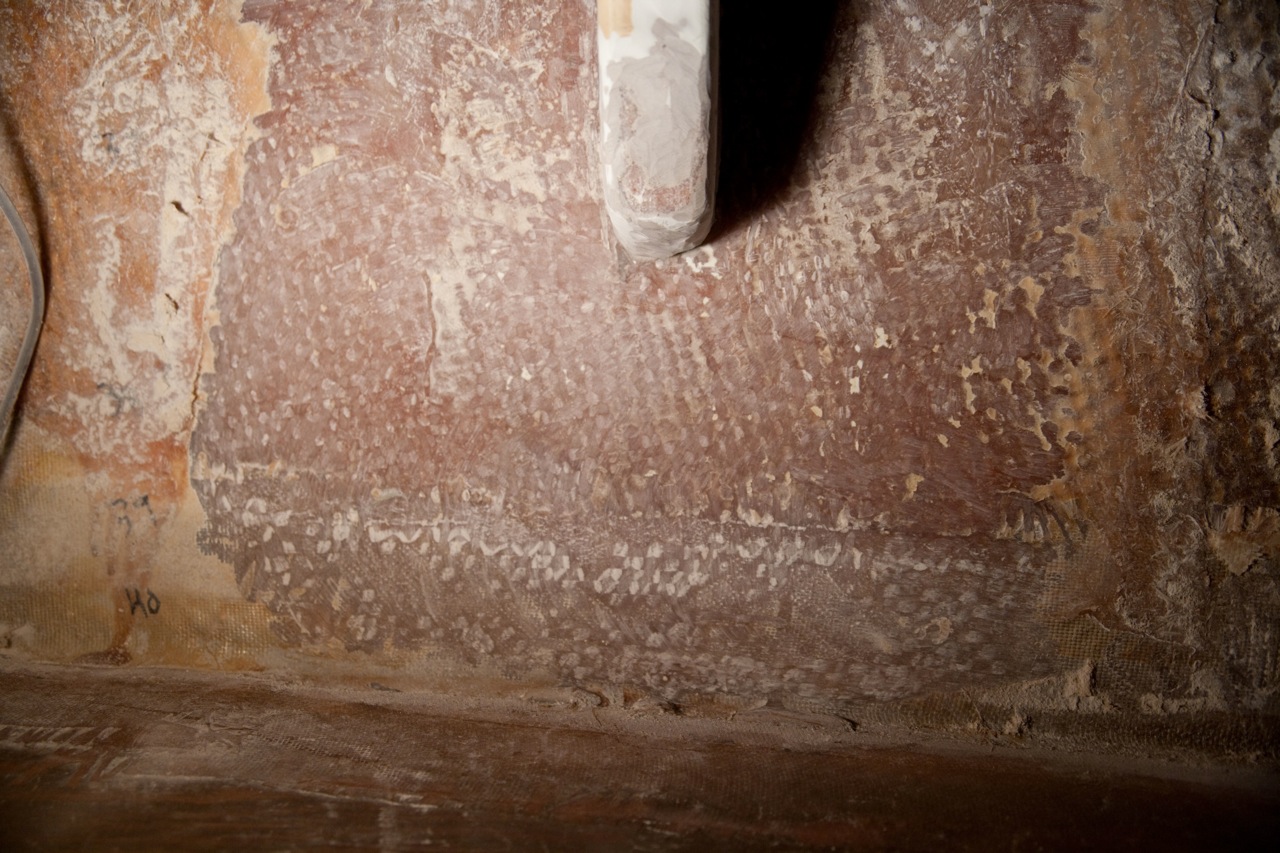
    In the process of re-glassing the knees to the hull, we decided that it would be prudent to replace the chainplates as well.  Most of the old ones looked okay, though when Jonny cleaned one up really well for inspection there was clear signs of pitting right where the plate passes through the deck (see the pictures).  The nature of stainless is that it fails without much more warning that that, and we already had everything apart, and Pete was willing and able to fabricate a new set for me, so it was a no brainer.

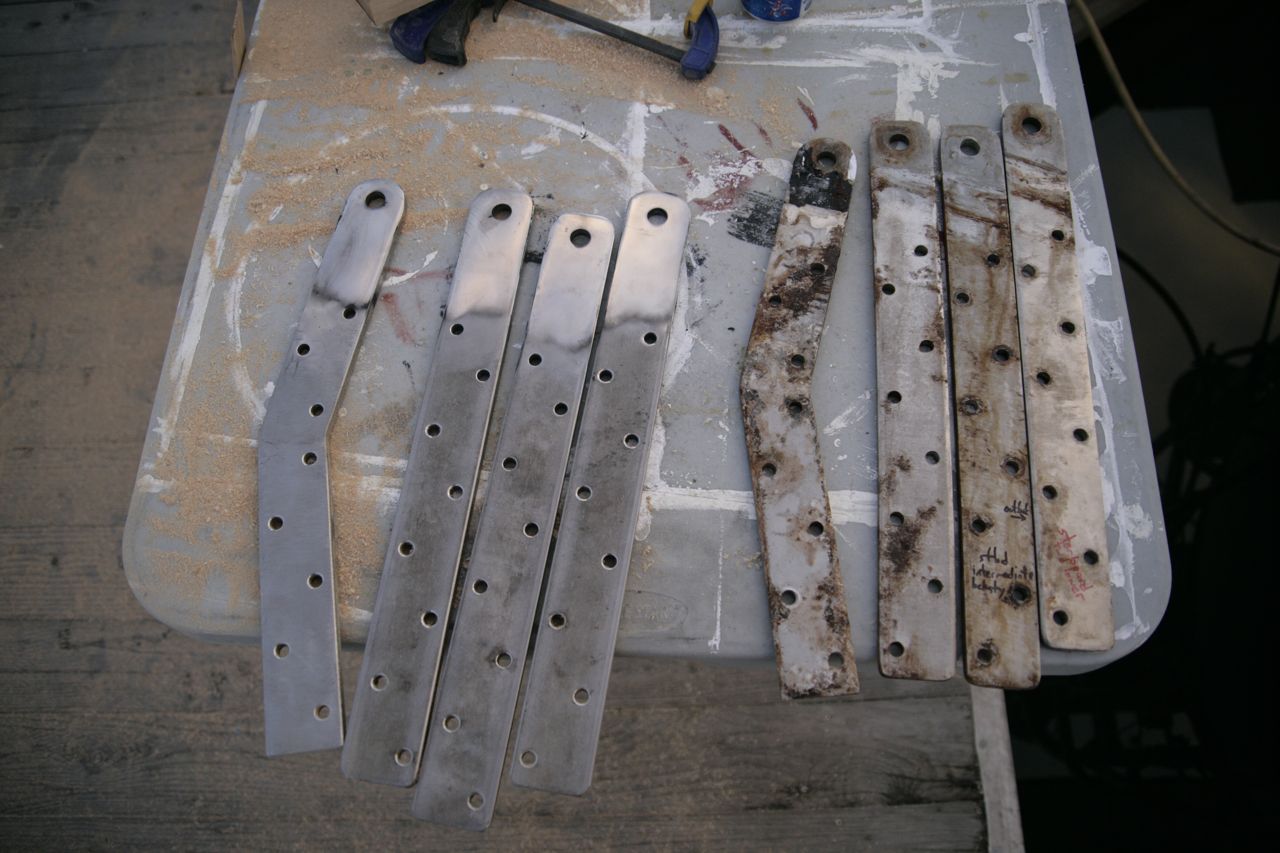
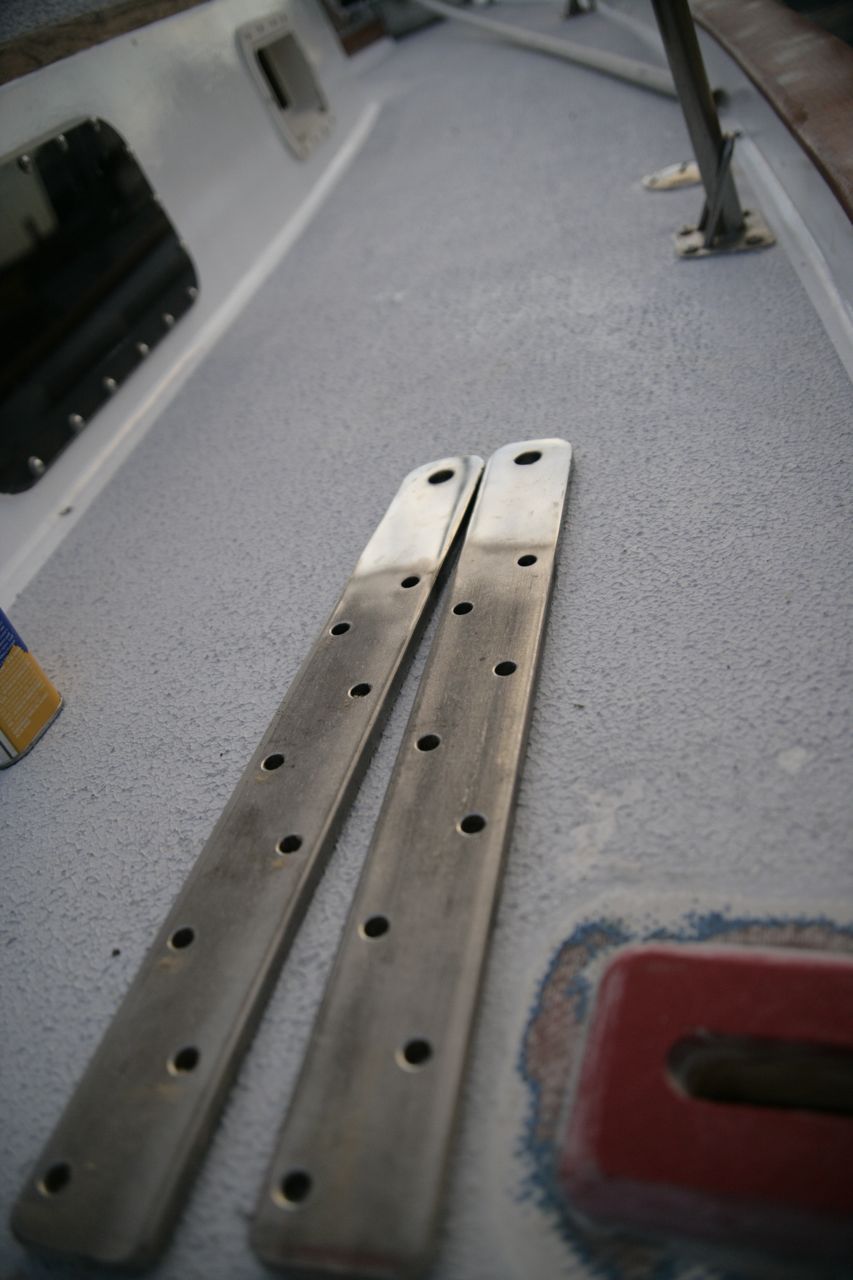
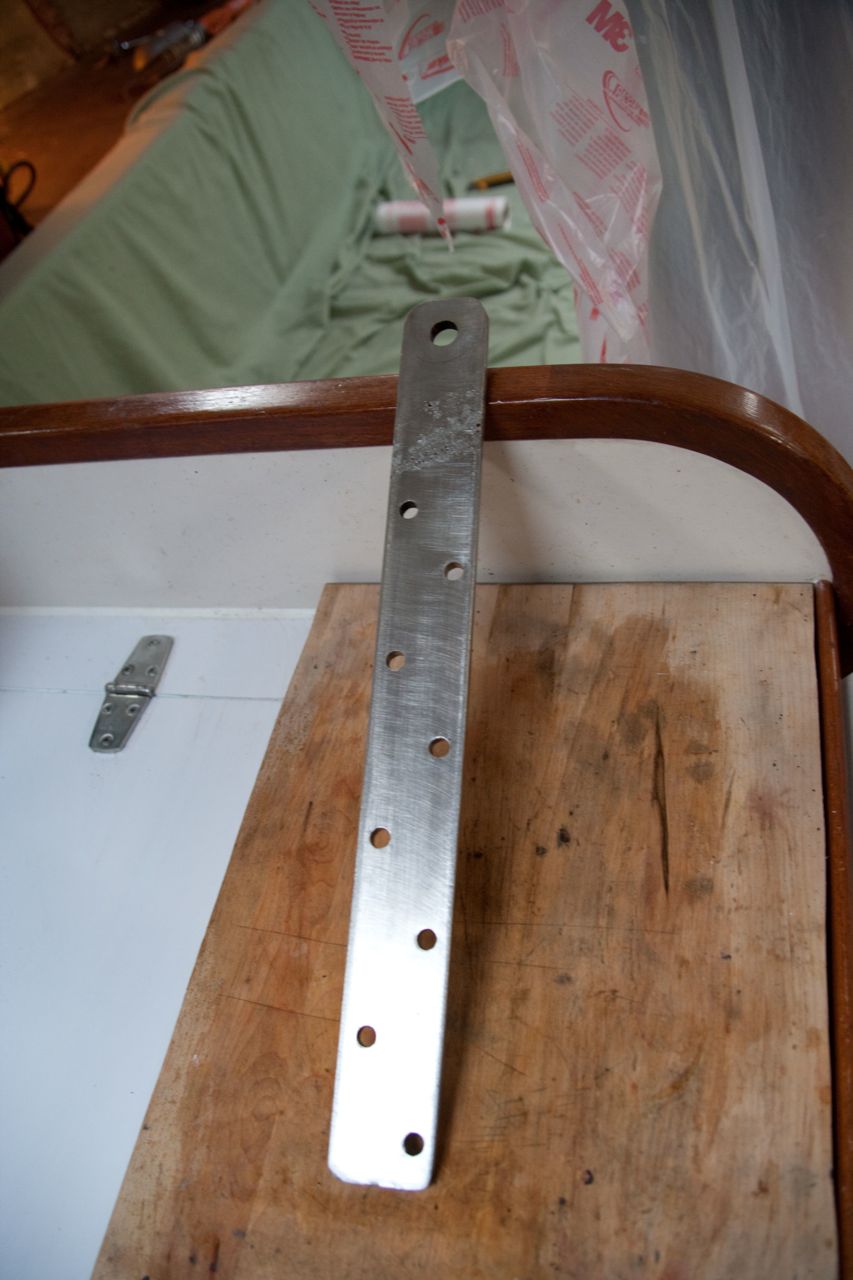
    The old plates were 5/16″ thick, the metal yard had 3/8″, so we went up a size.  The yard cut the plates to length and Pete drilled the holes and rounded the ends.  The metal was mill-finished from the yard, i.e. a roughish matte gray texture, and stainless corrodes where it isn’t polished, so I spent 2/3rds of a day polishing just the upper 4 inches of each plate–the portion that lives through the deck and above deck.  If we weren’t two weeks away from departure, I would have done the whole surface, because I finally figured out the fastest way to do the polishing (after a few years and many different stainless polishing project attempts) and goddamn the mirror finish on that stainless is gorgeous.  There is an immense satisfaction in taking a gray flat metal and taking it to the point where you can see yourself in the reflection.  But there is no functional reason to polish to portion that is below deck–it’s only the portion inside and above deck that is susceptible to the corrosion.

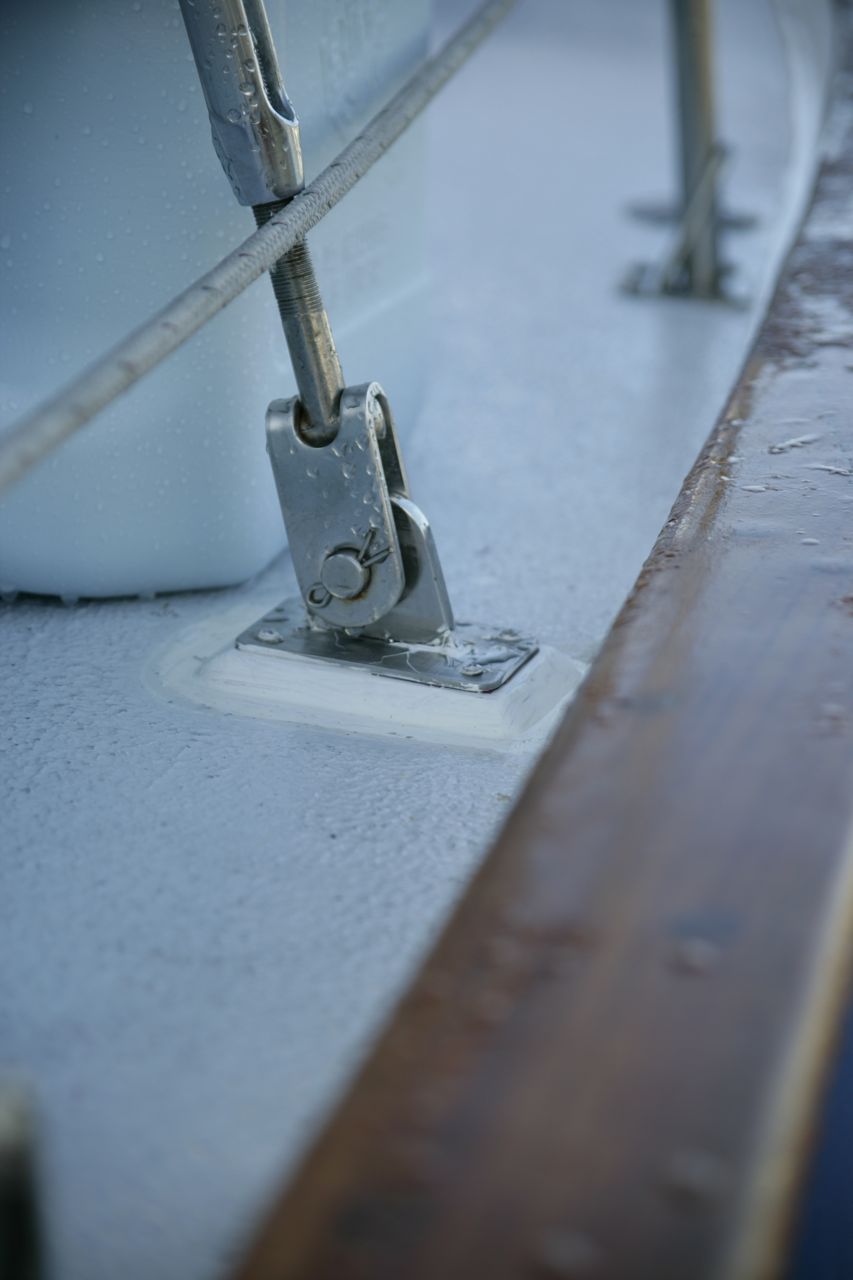
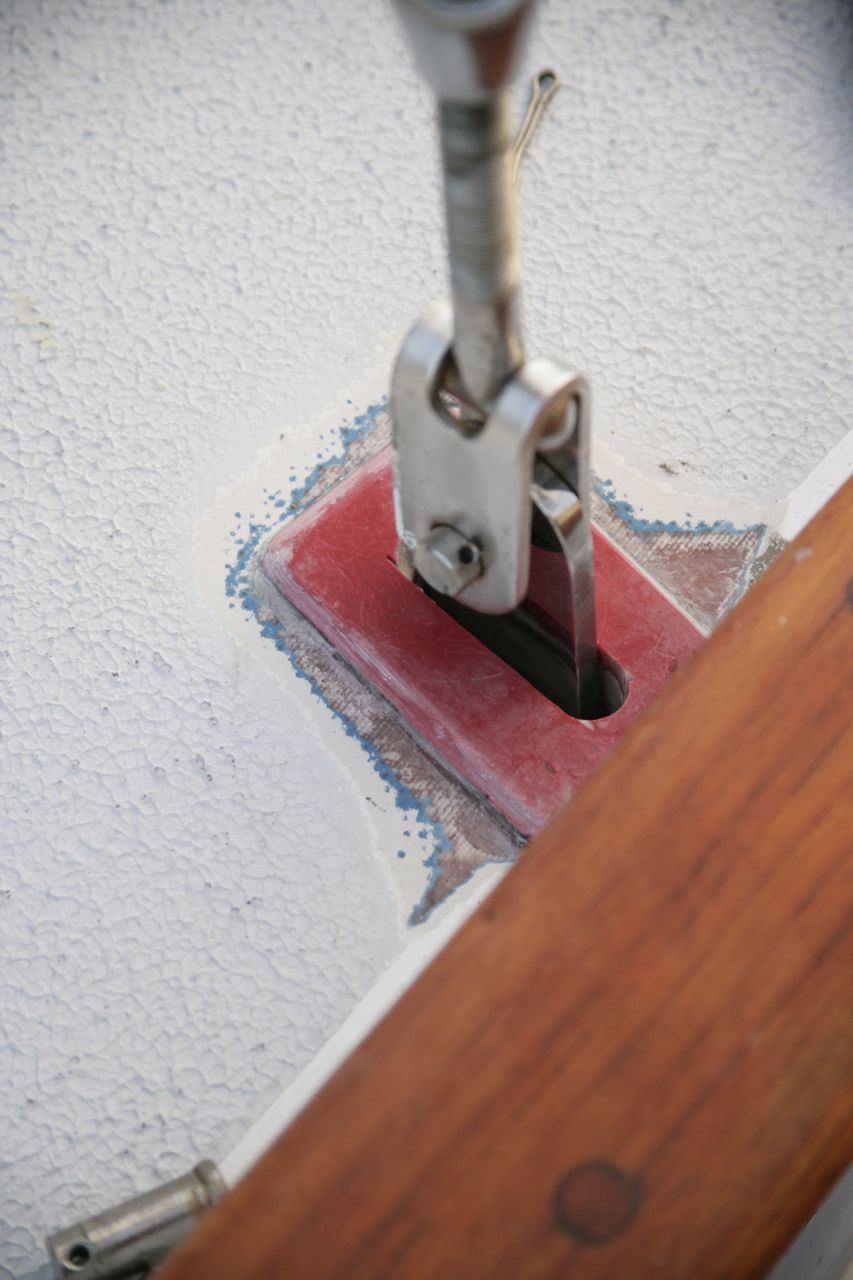
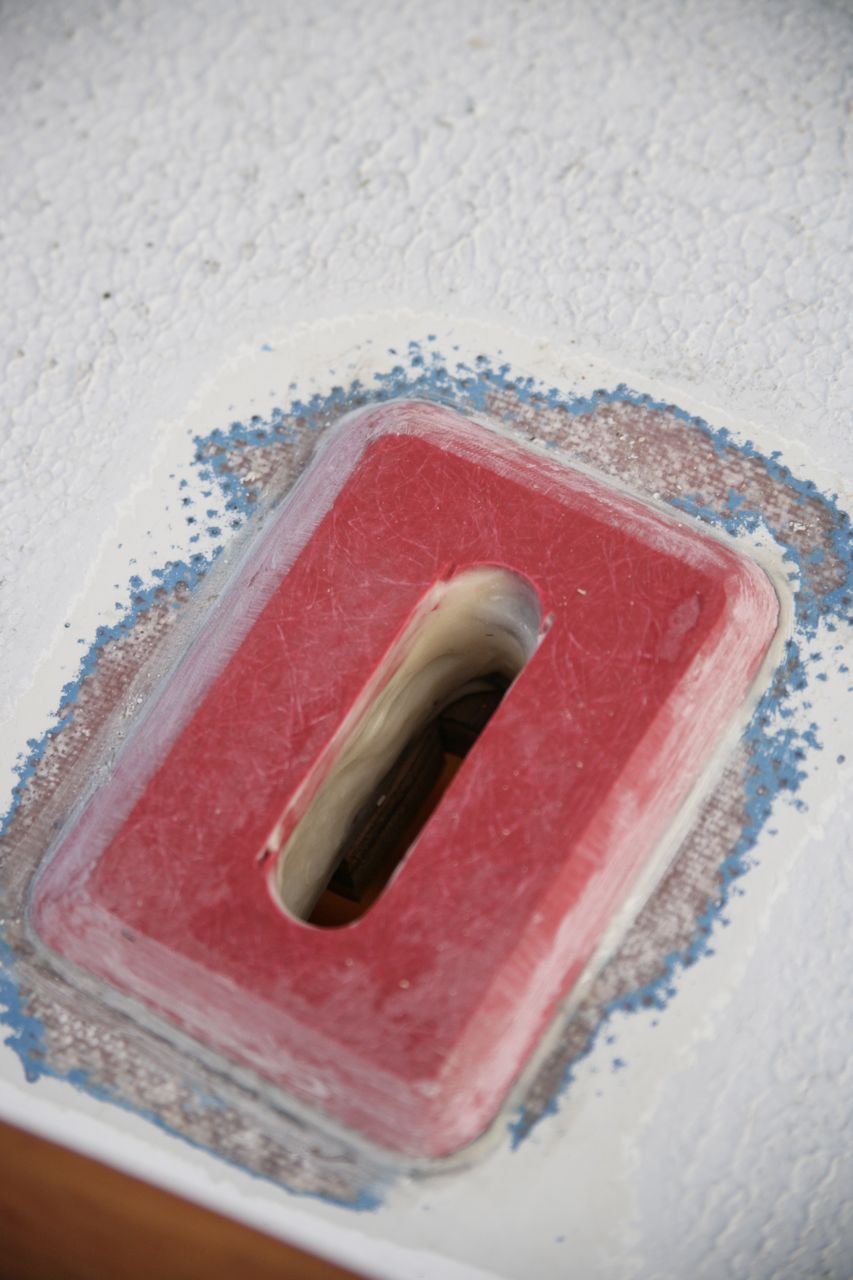
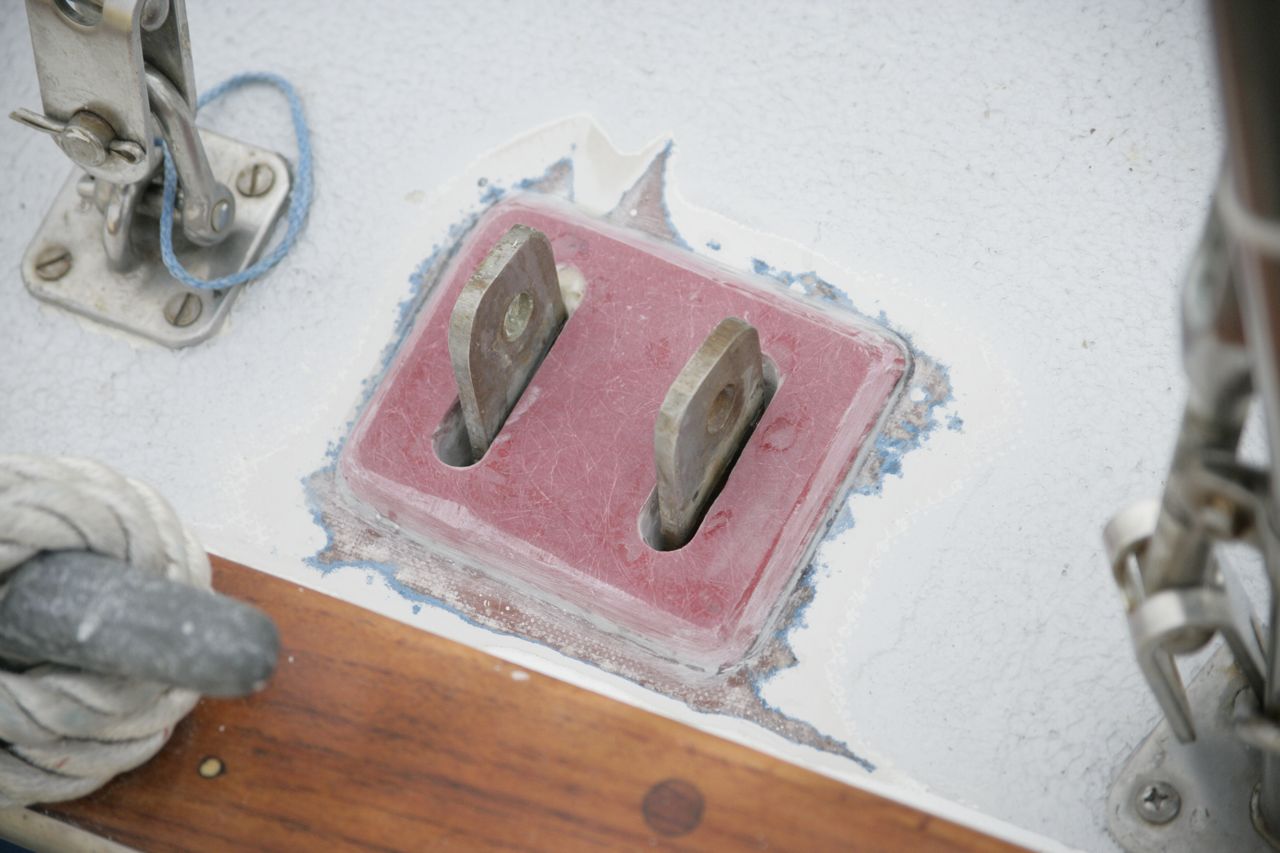
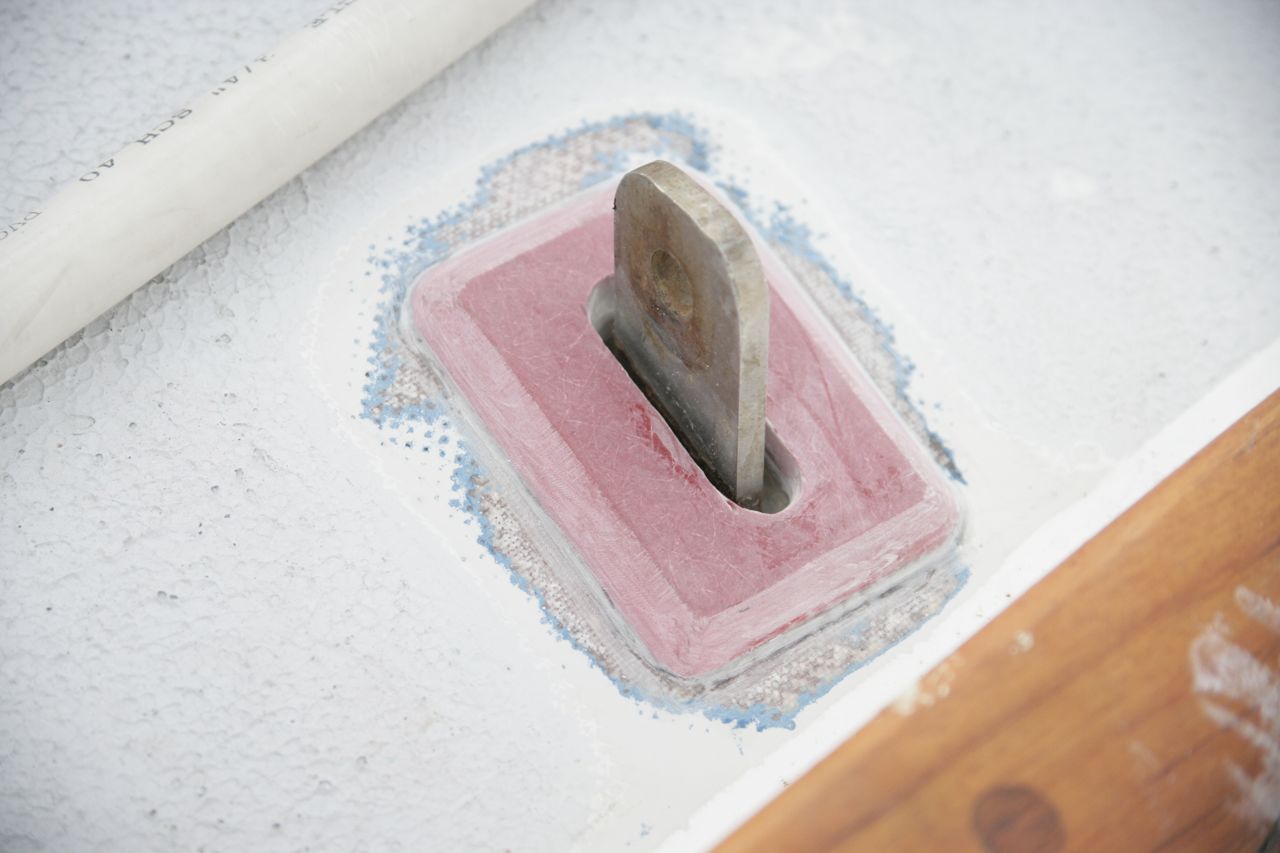
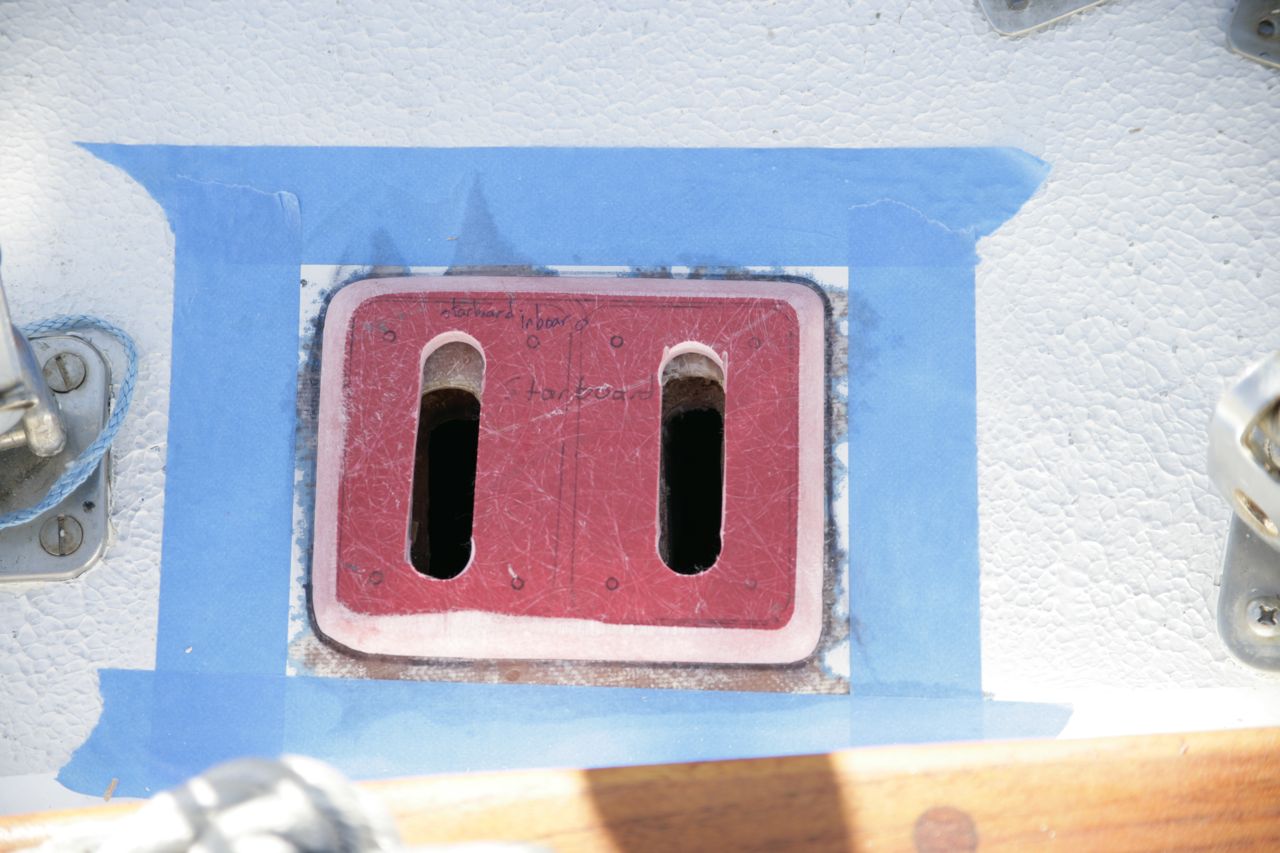
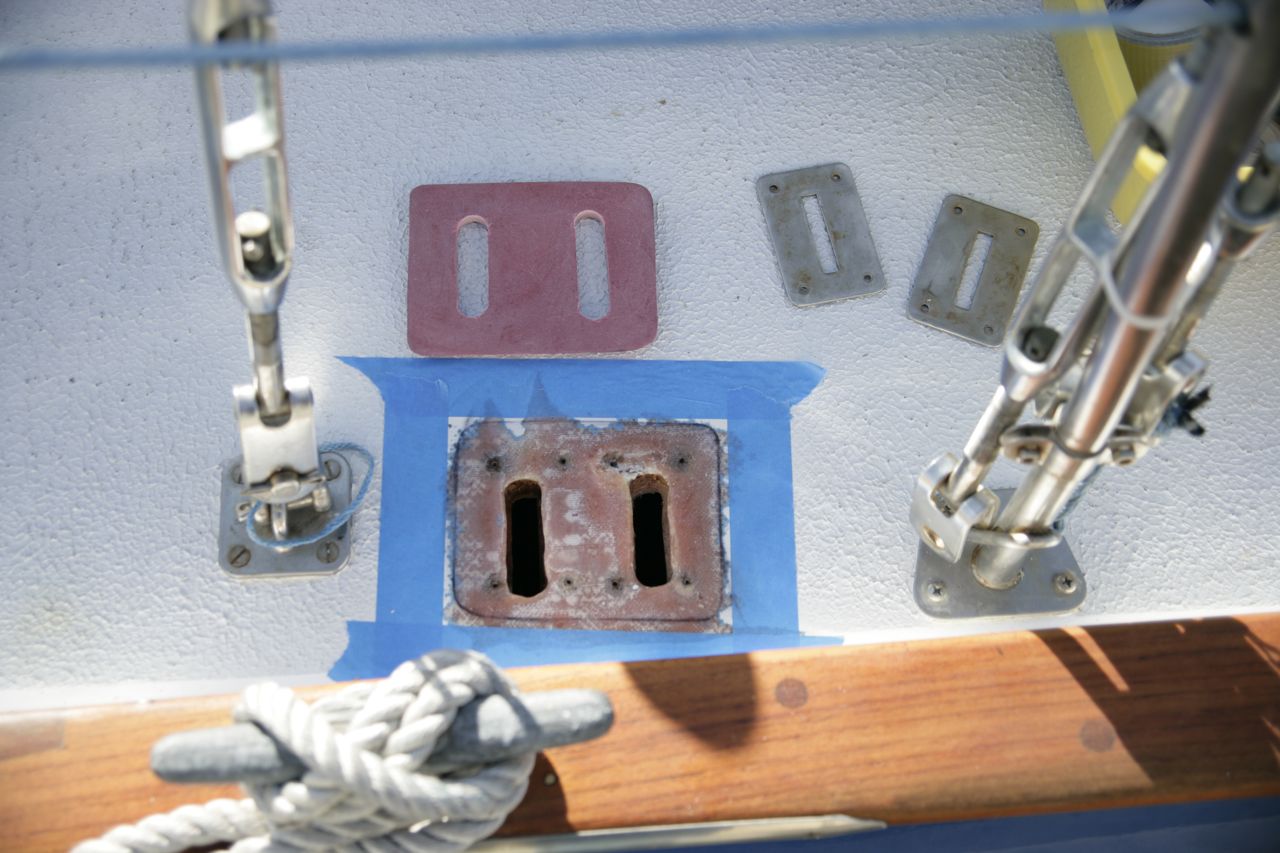
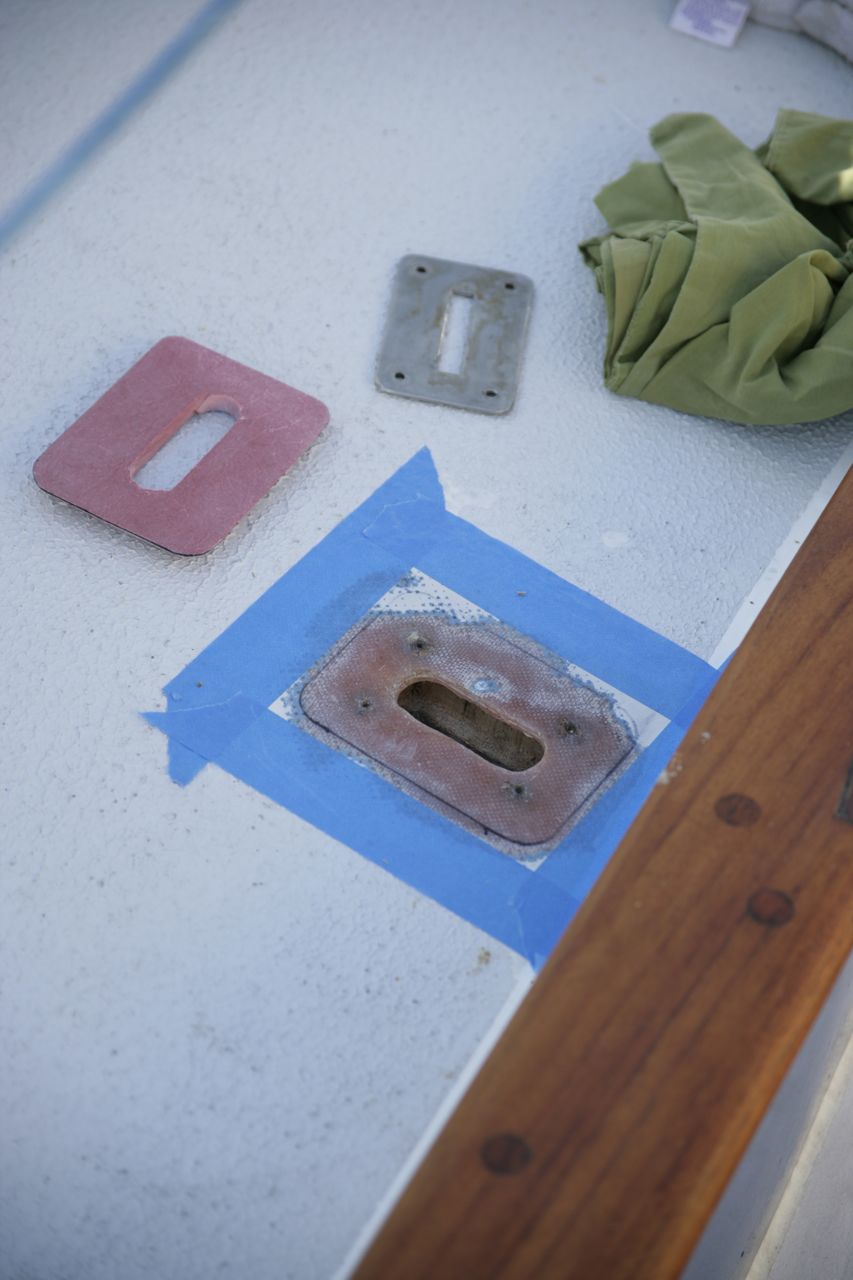
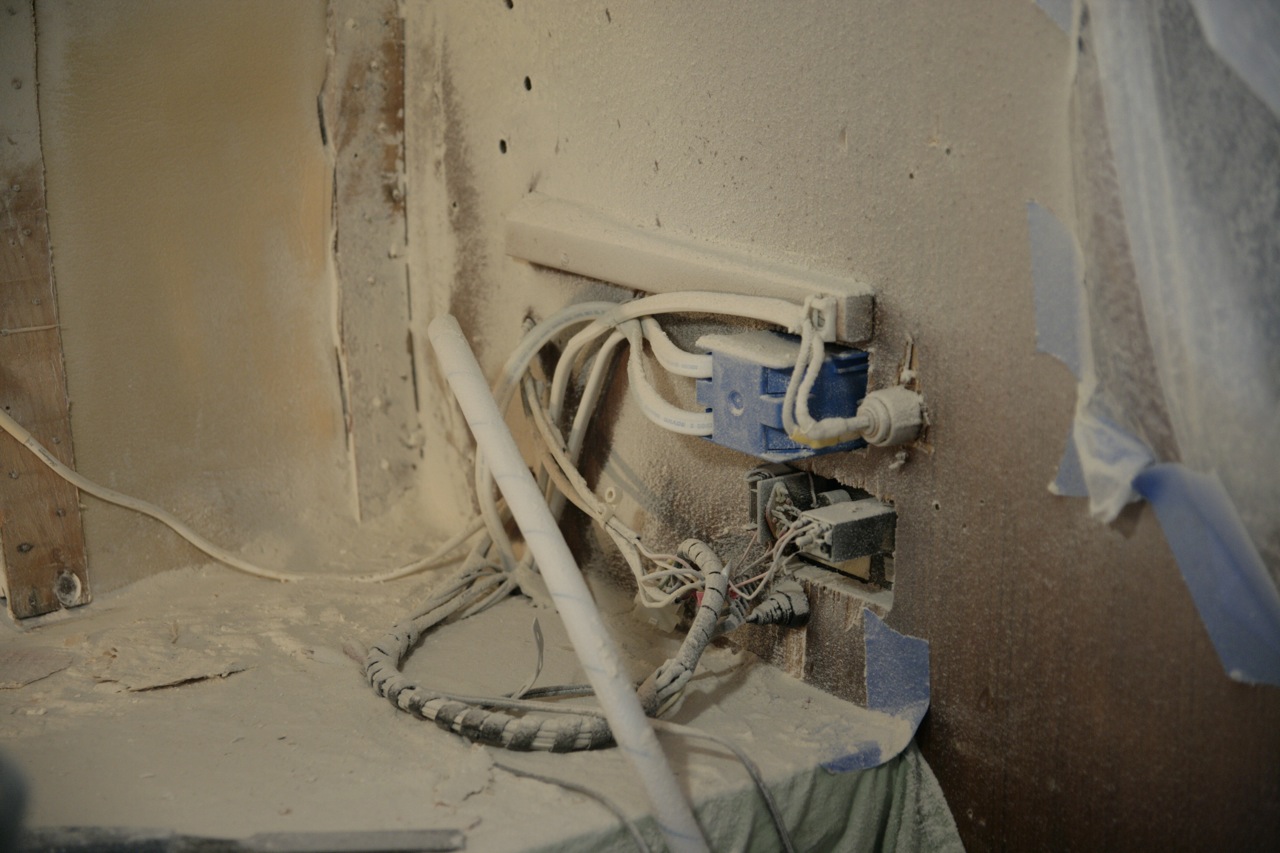
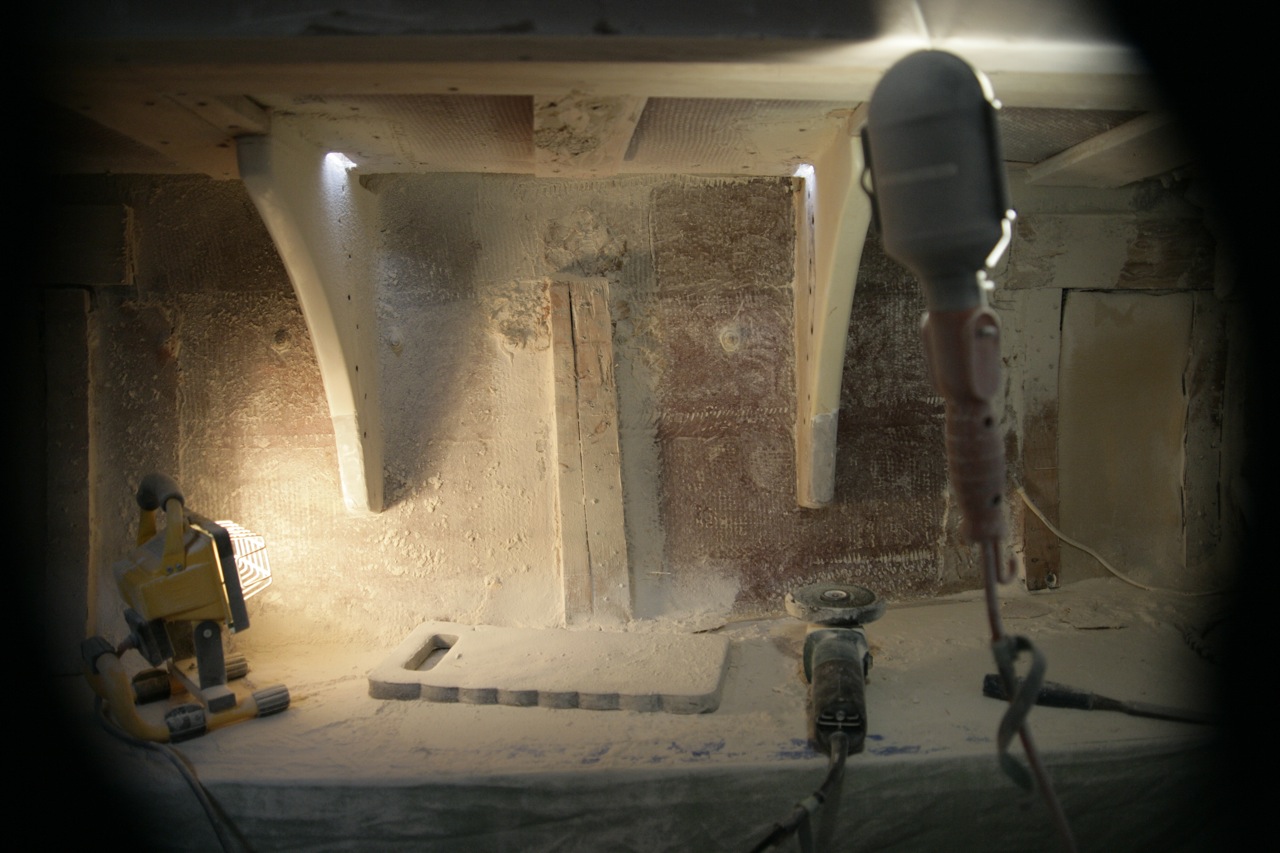
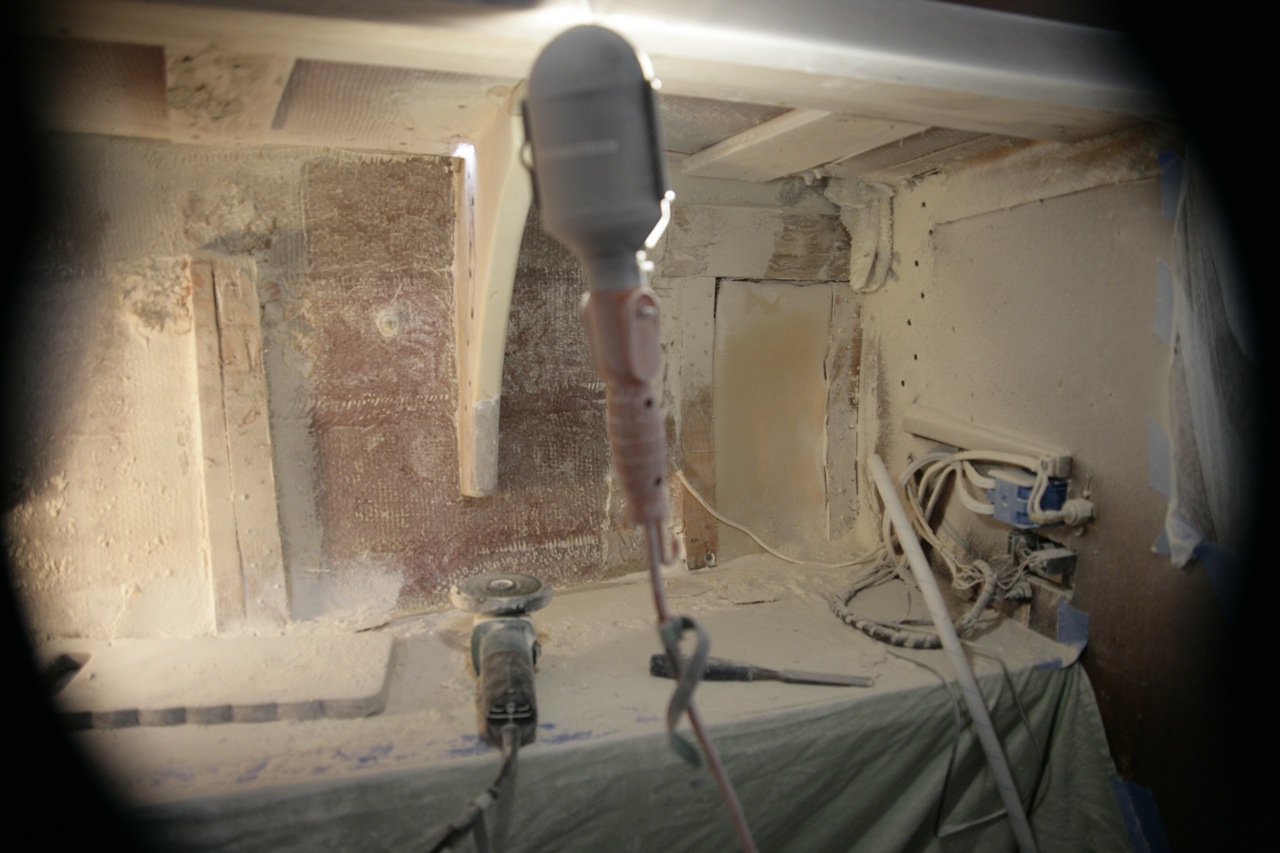
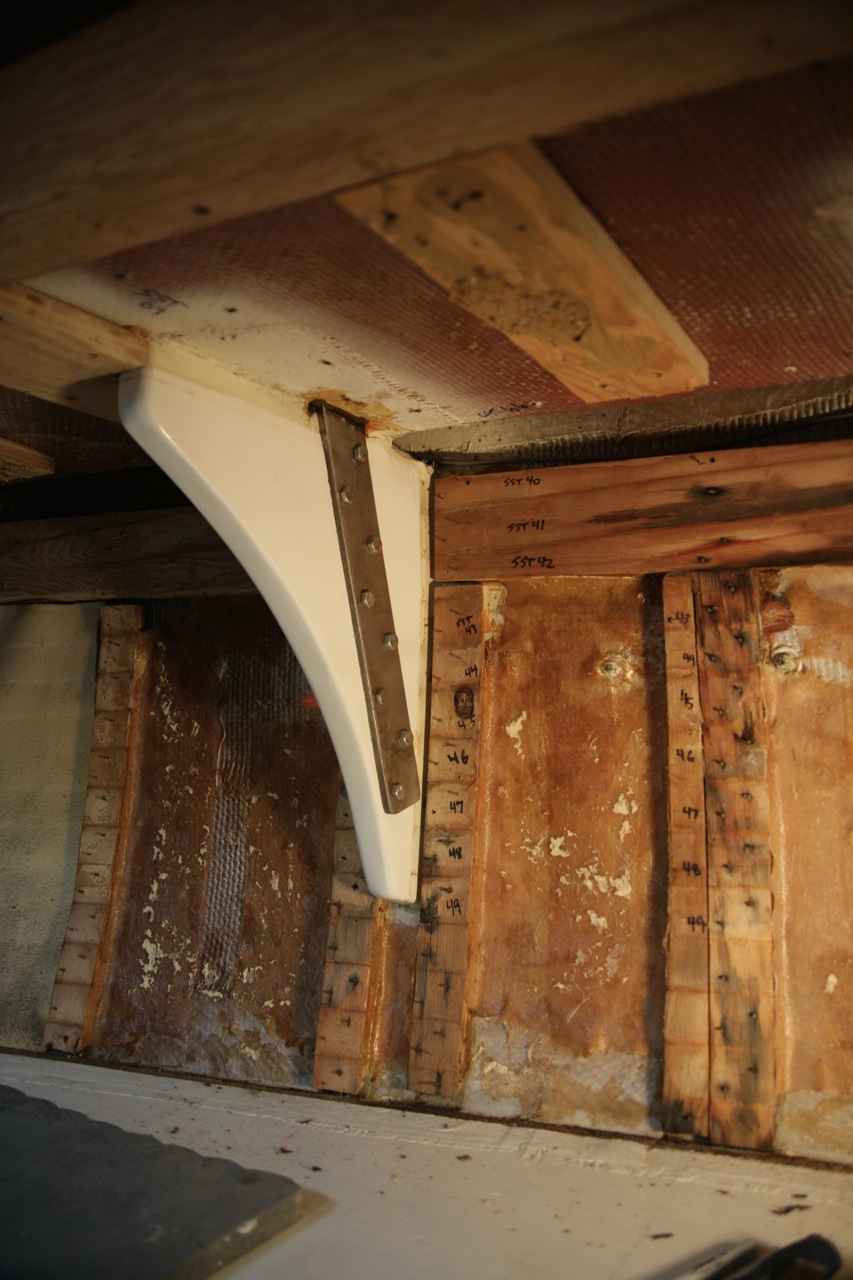
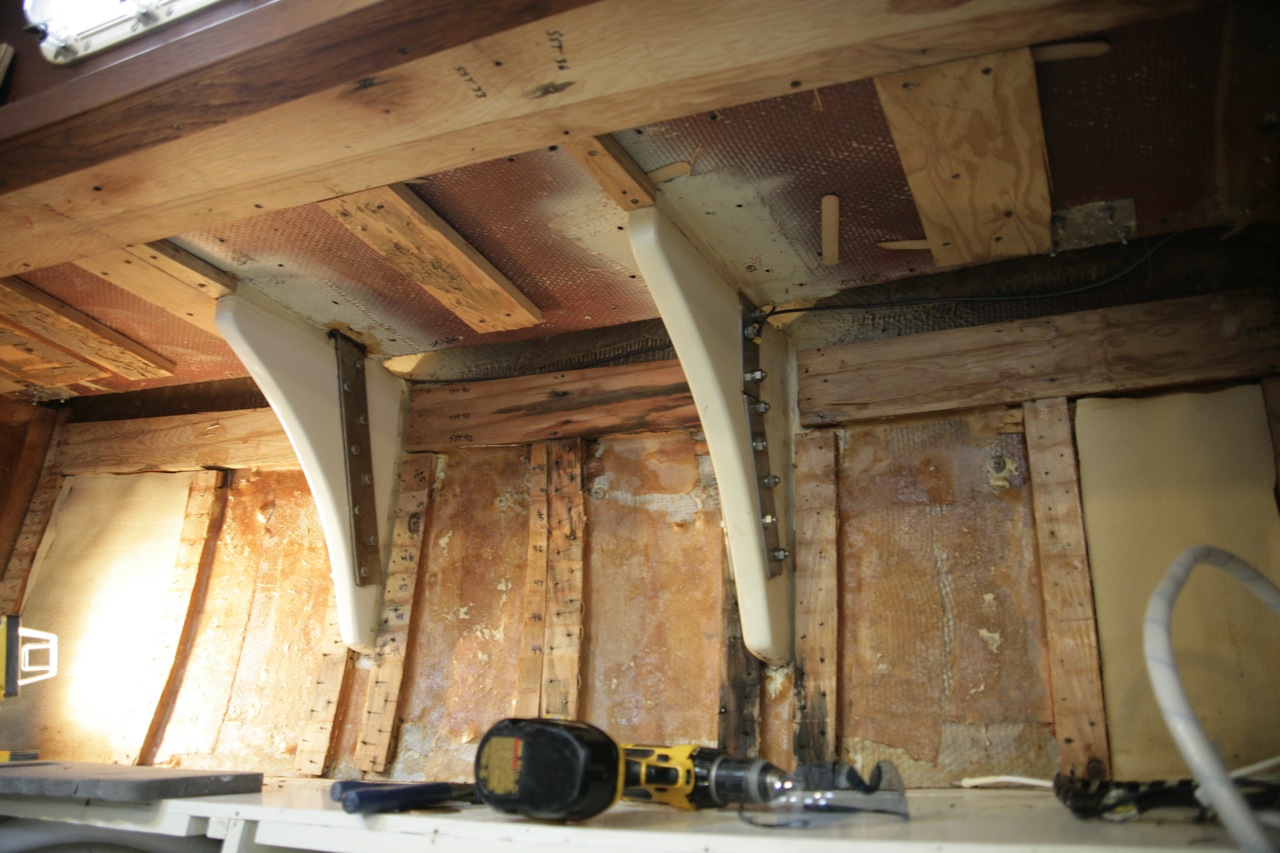
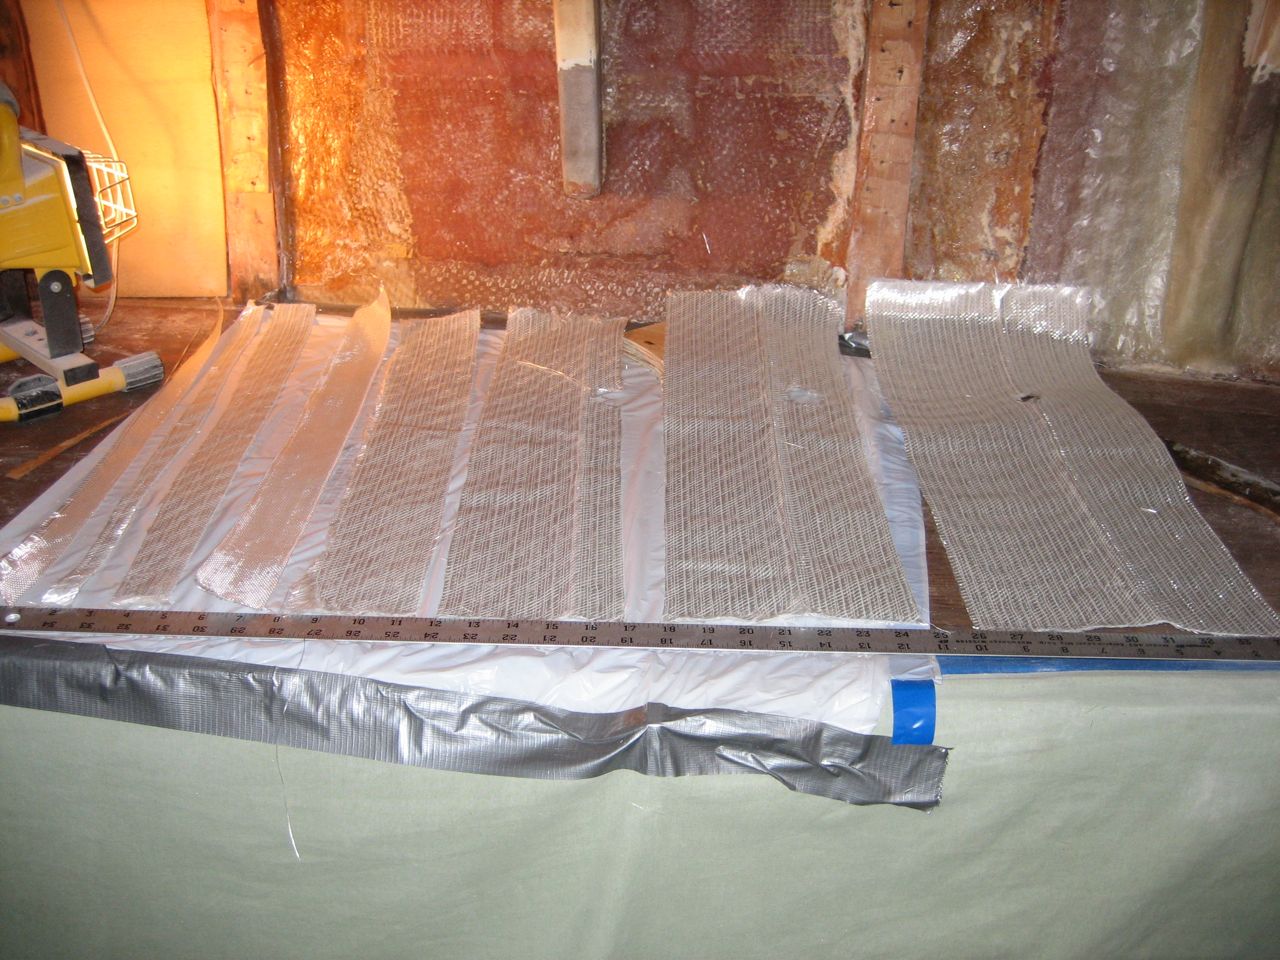
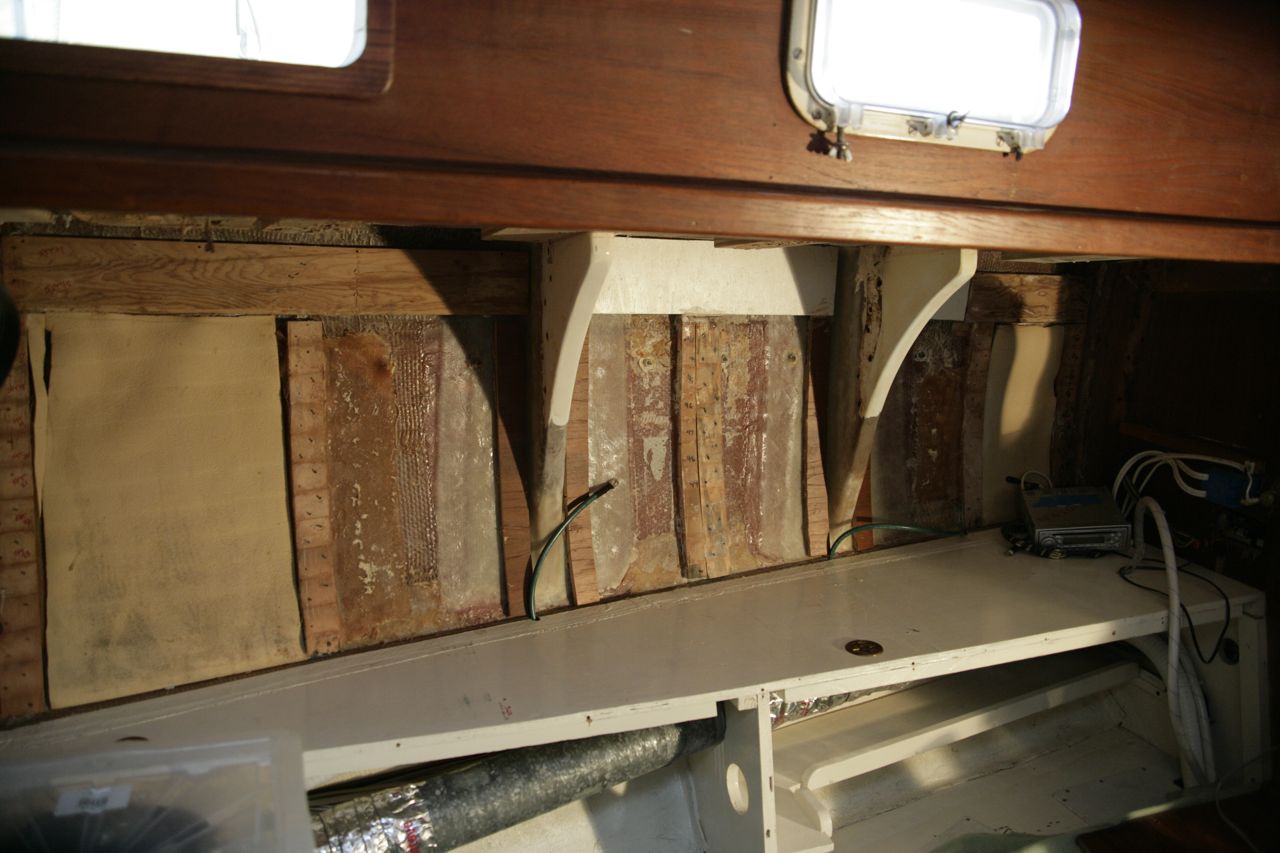
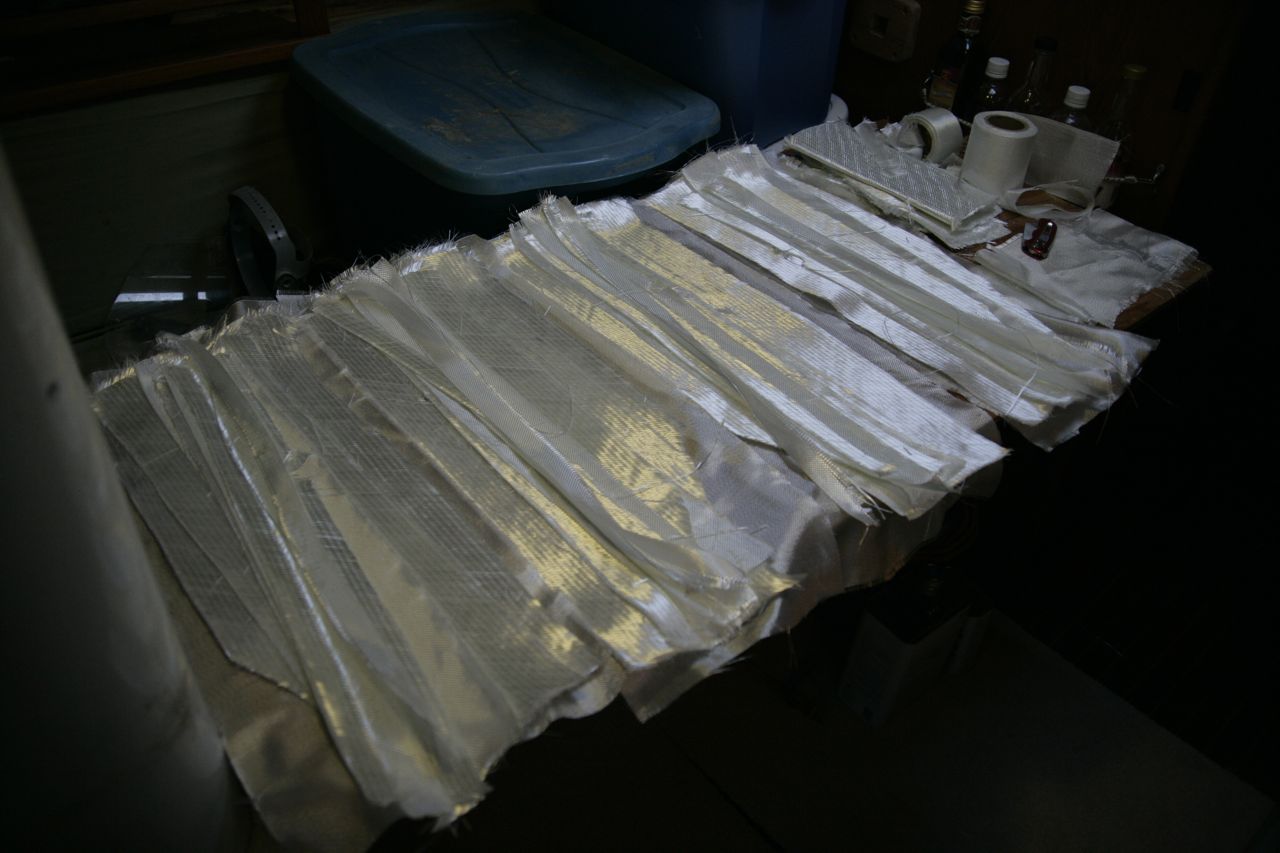
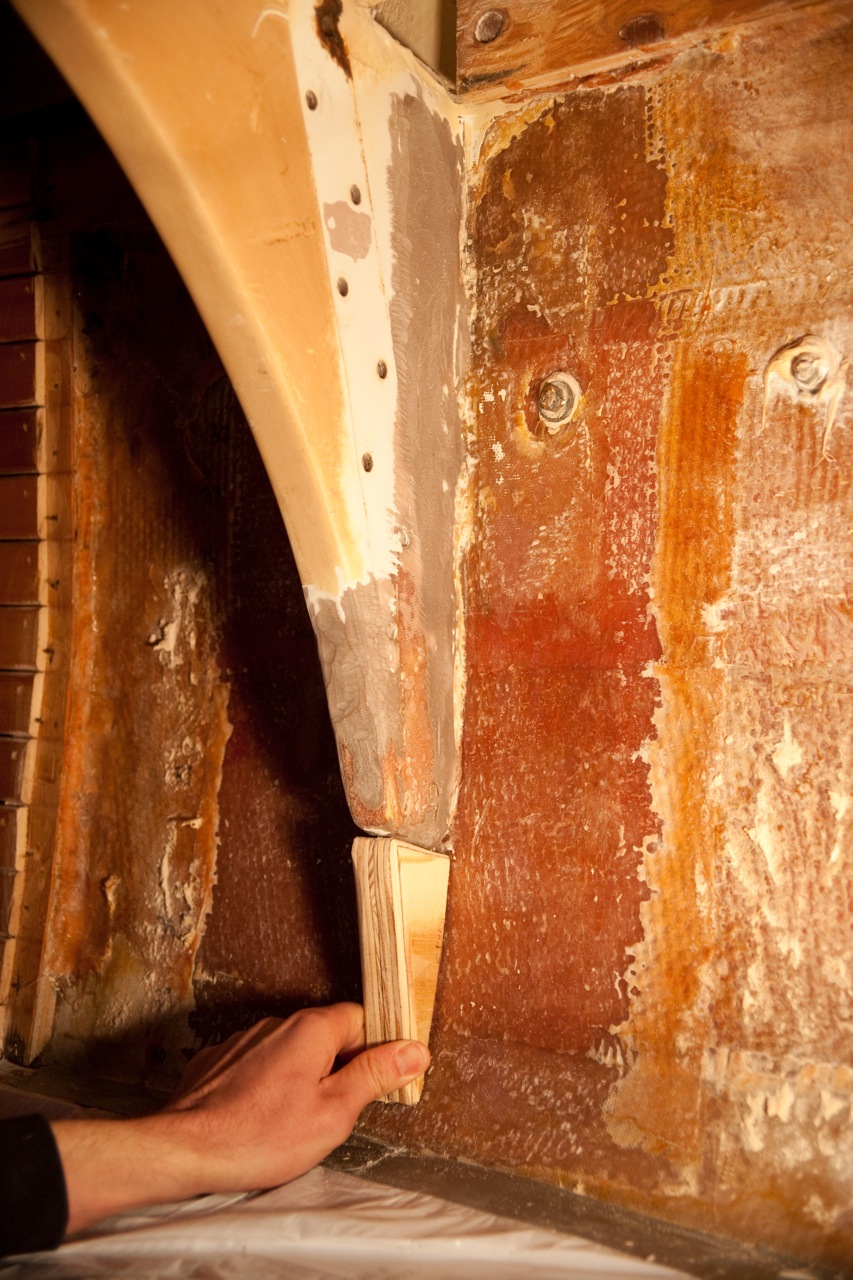
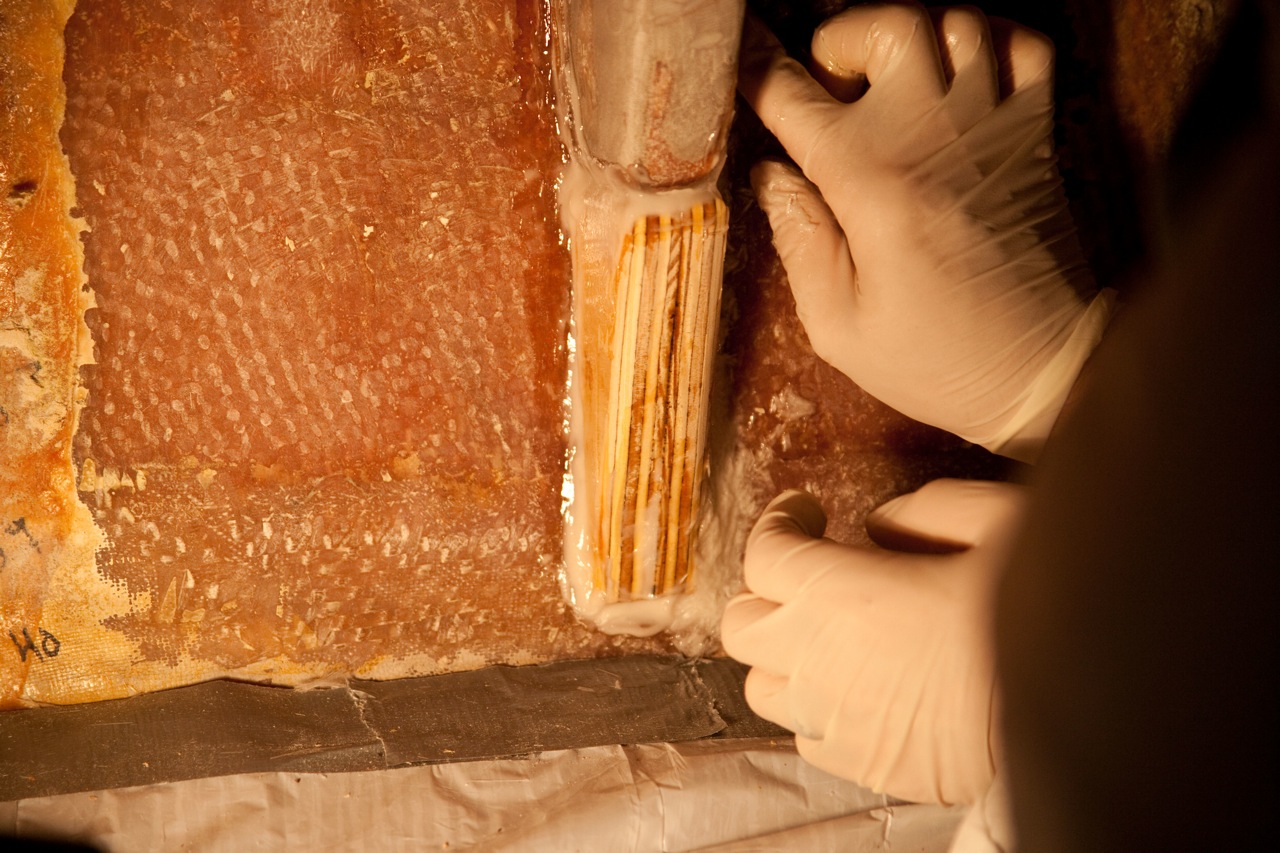
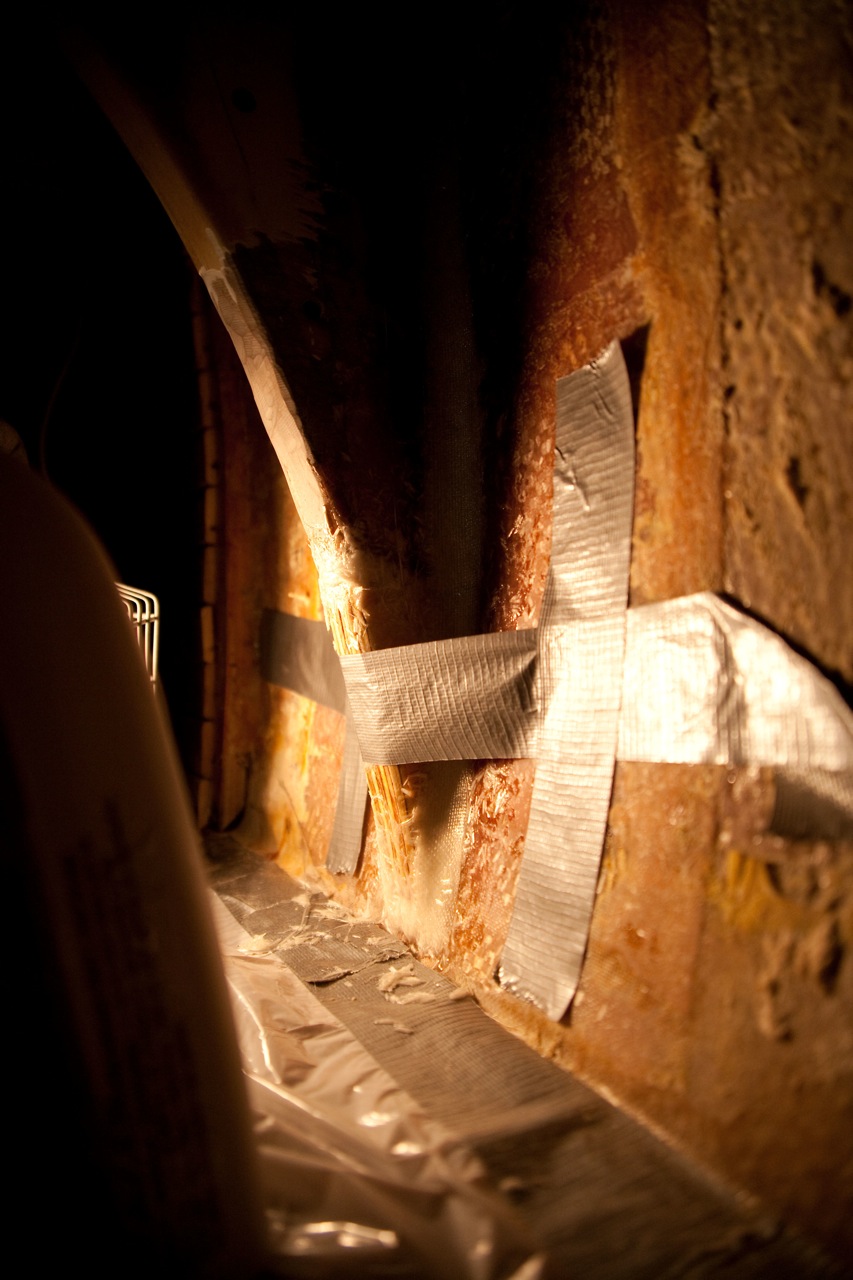
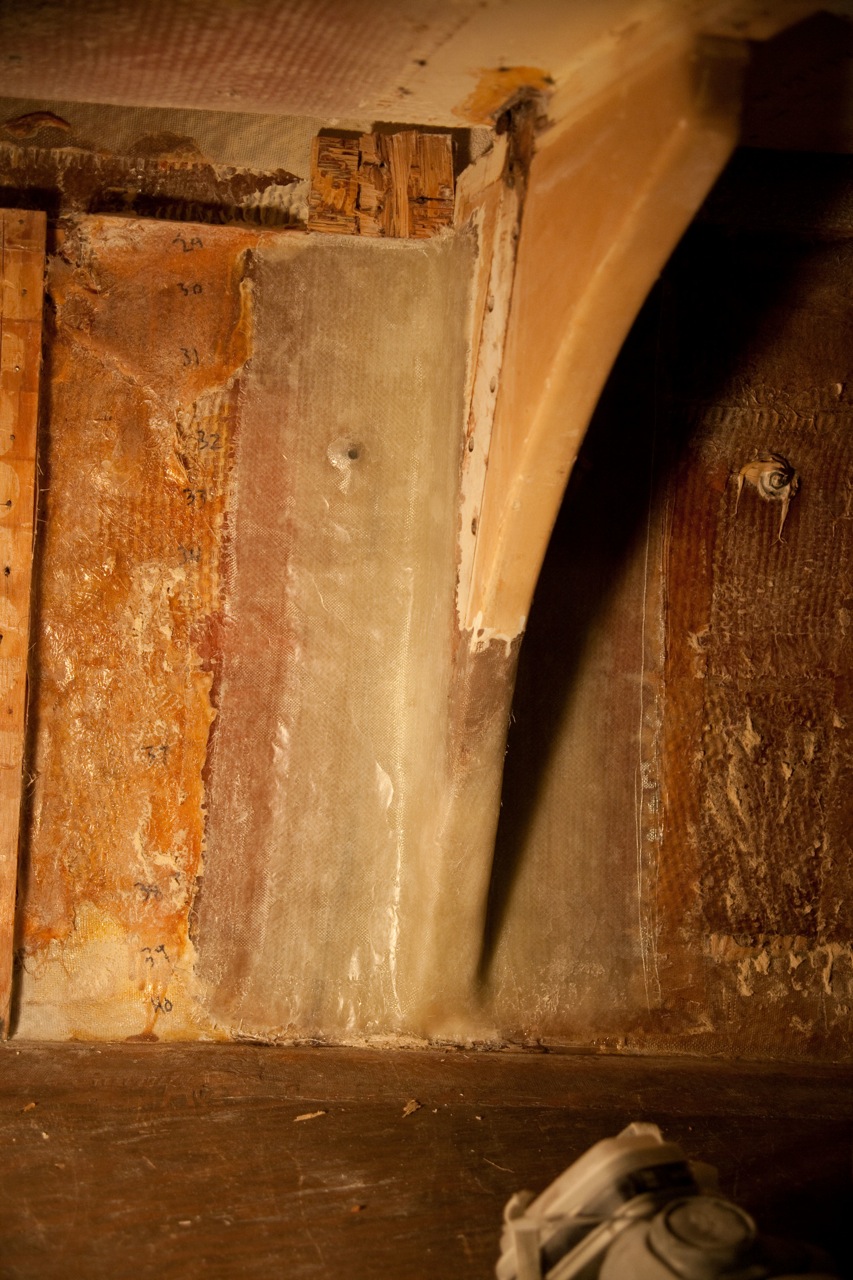
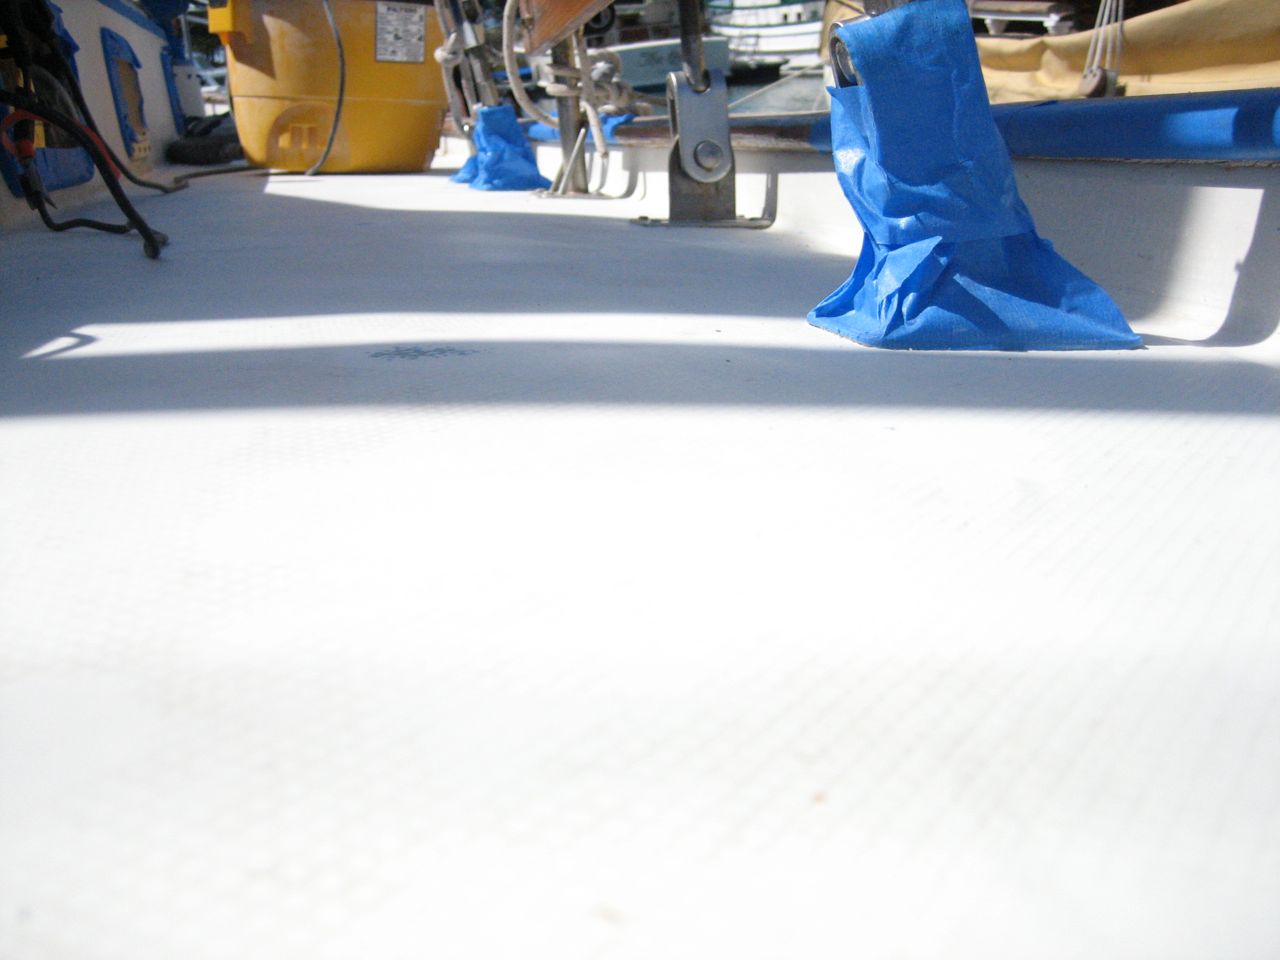
    Jim Hassberger from Kanga suggested that we add plinths to the deck, through which the chainplates protrude, in order to prevent the plates from ever sitting in water.  At first I didn’t want to do the extra work, but good sense prevailed and we took the extra time to do it.  Jon cut rectangles from a leftover piece of 3/8″ thick FRP (pre-made sheet of fiberglass) from McMaster-Carr that we had used in the construction of the lazarette and propane locker lids.  He ground a bevel into each side, then I cut an overlarge slot down through the center to admit the plates.  I temporarily mounted the chainplates (two bolts each loosely connected), then marked the position of the plinths.  Then I removed the chainplates and glassed the plinths to the deck with slightly thickened epoxy (after having sanded down the area under them to bare glass).

    While epoxying the plinths to the deck, I filled the voided core area underneath them (from which I had removed the balsa) with thickened epoxy as well.  I used a putty knife and my fingers to jam the thick epoxy in the gaps, and roughly shaped the slot with my finger.  After it cured I came back with the dremel and cleaned up the slot.  Now, if any water penetrates the sealant around the chainplate, it will enter the ceiling of the boat (and be visible) rather than rotting out the core of the deck, to which it has no access.

    The plinths didn’t end up adding that much time and effort, and didn’t cost anything since we already had the extra fiberglass plates sitting around, so I’m glad we did it.

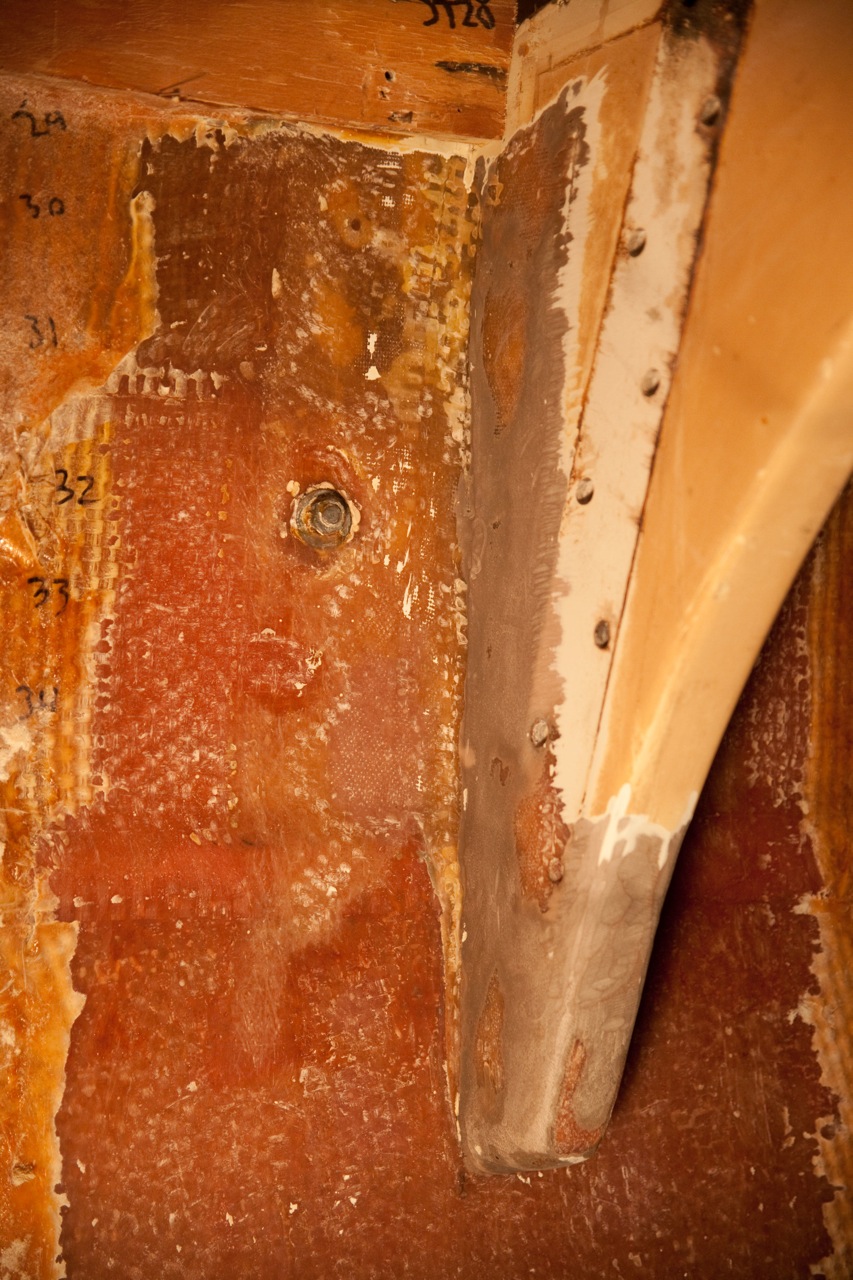
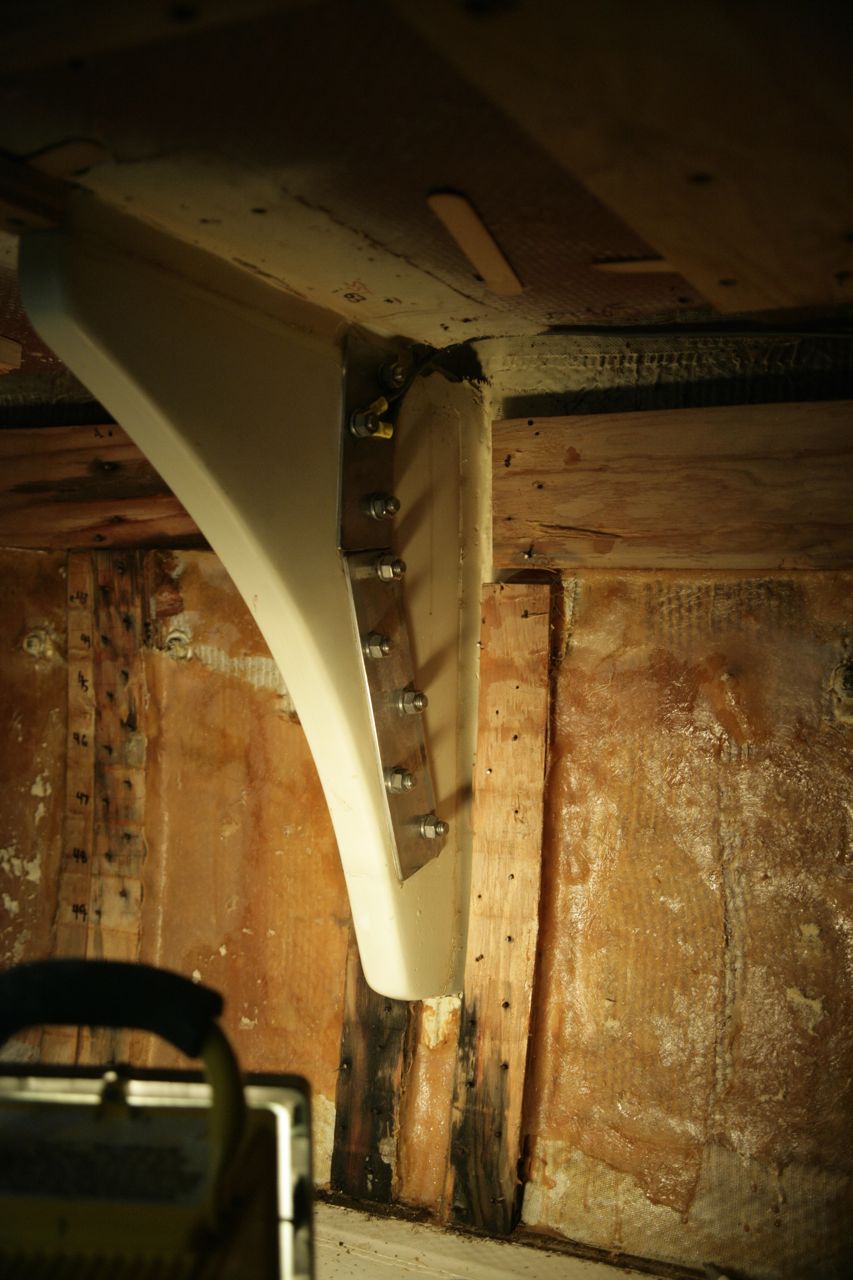
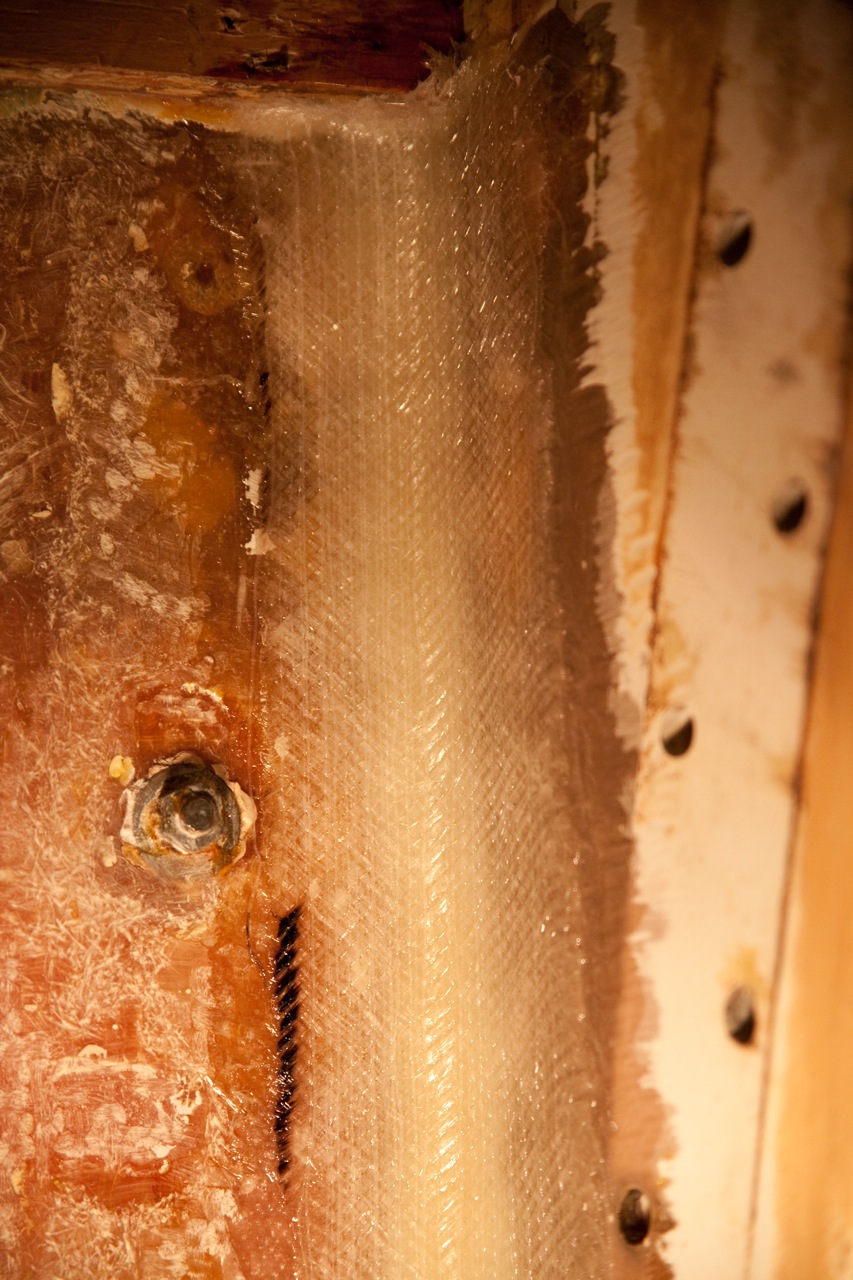
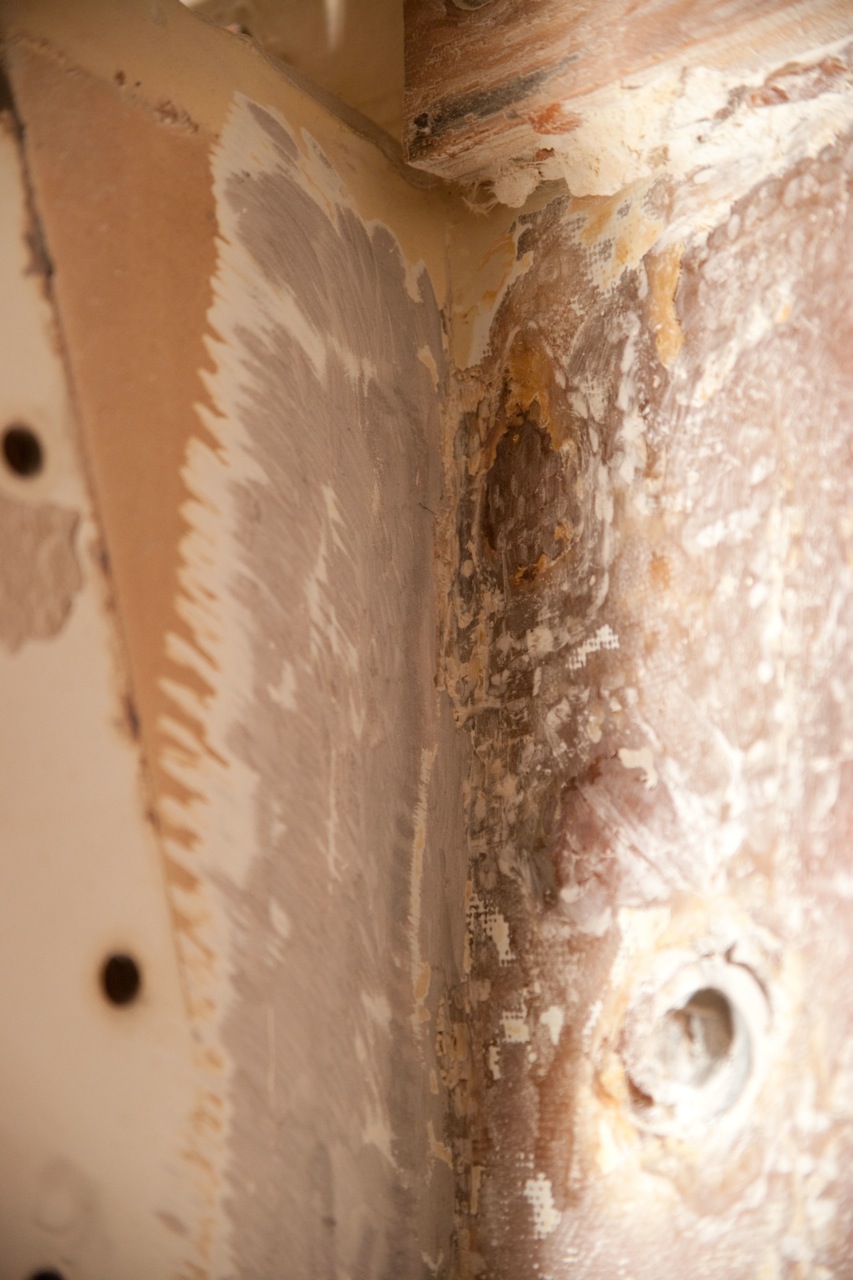
    I used new bolts/nuts/lockwashers on the chainplates, stainless of course, and bedded them onto the side of the knees with a light layer of silicon to prevent water from wicking into that joint to corrode them (Pete’s suggestion).

  • knees (part 3)

    See knees part 1 and knees part 2.

    This job was massive, and I didn’t have the luxury of time to sit back and consider.  I forged ahead, ripping out the cabinetry on both the port and starboard sides, then the slats, and then going to town with the grinder.  Making fiberglass snow a 1/2″ thick that covered everything–thank god I taped it all off with plastic.  Even with a box fan in the hatch sucking it out, it was still insanely uncomfortable.

    On the starboard side the cabinet didn’t come out so easily: I ended up breaking it a little in the process.  On immediate inspection, both of these knees showed a small gap and cracking between the bottom point and the hull, indicating that they had indeed parted from the hull somewhat.  After chiseling off the old kerfs (those vertical pieces of wood on either side of the knees, to which the horizontal trim battens were nailed) I was able to see that they used entirely too little tabbing to secure the knee to the hull.  In the process of grinding off the old, bad stuff, I discovered that at the lowest level the tabbing had delaminated from the hull along its entire length, so I ended up having to grind off all of the old tabbing from the hull (I wasn’t that bad on the port side).  I was in the bunny suit with the respirator and ear plugs and safety glasses and full face shield over that for 6 straight hours grinding away–it was a very unpleasant day.  By the time I was done I had created a 1/4″ of fiberglass “snow” over every single surface inside my bubble (as karen called it).

    As on the port side, I fabricated triangular extensions out of plywood to extend the knees farther down the hull.

    I used the same method and layup as I did on the first knee (in part 2).

    As usual, putting it all back together took an eternity.

  • First knee reglassed (Knees Part 2)

    See knees part 1.

    Jon cut two triangles of 3/4″ plywood that I sandwiched together and used as an extension to the bottom of the knee–this was an excellent piece of advice I received from Paul Rosenthal (justifying the cost of having him out for a consultation by itself).  He also convinced me (or pointed out) that there was no good reason for putting a reinforcing pad of fiberglass between the knee and the deck.  As he explained, the deck should only take the load if the construction is wrong–the hull should be taking all the load.

    This was my lay-up (so that I remember two days from now when I do the next one):

    large fillet of epoxy thickened with chopped glass (a container of ready-made chopped glass from TAP plastics).
    Strip of 6oz glass ~1cm
    strip of knytex ~2cm
    6oz glass ~3cm
    knytex ~3in
    6oz glass ~5in
    knytex ~6in
    knytex ~7in
    knytex ~8in (4in each side)
    6oz glass ~9in

    The knytex is a layer of mat and biaxial fabric bonded together; it is thick and extremely strong.  It does not like to take corners at all–hence the thick fillet.  If not for the thick fillet, the knytex would pull away from the joint and leave a gap (and weakness).

    I think the job is strong enough.  I am not a fiberglass professional and so I worry about various things, like whether I use too much resin, and other small things, but until someone smarter tells me what to change I have to plow forward with what I’ve got.

  • Knees Broken (Part 1)

    My worst fears have come true: the raised lumps on the deck that we discovered while refinishing are caused by the knees, which have separated from the hull and are rotating up and pushing on the deck inboard of the chainplates.  Three out of four knees have ~1/8″ to 1/4″ gaps at their bottom ends, and the tabbing towards the bottom is colored white, further indicating delamination from the hull.

    We were intending to depart in January; I don’t see how that’s possible now with this job thrown into my lap at the last minute.  Karen and I just moved onto the boat, and I’m going to have to rip out the cabinets and do a massive fiberglass grinding and repair.

    I removed the slats that hide the port forward lower; I chose to tackle this one first because it doesn’t require removing cabinets to access it.

    I used plastic to tape off the entire area.  I wore a bunny suit, full facemask, and respirator.  I ground the fiberglass tabbing off until reaching clean, solid glass.  That part really sucks, the grinding.

  • discovered lumps

    While sanding the boat pre-painting, we discovered three lumps (one starboard, two on port) inboard of the shrouds, where the knees underneath are exerting upward pressure on the deck.  No word yet on whether this should be cause for alarm.  Here are some pictures; it’s hard to see.  The blue is where I sanded through the gelcoat on the lump.

  • Replaced standing rigging

    We redid everything except the backstay, which had been replaced in 2005 with a rod. The backstay was in great condition, and was already setup with the ssb insulators, so we felt it would be silly to replace a perfectly good rod. We used 316 stainless 1×19 wire, in two diameters: 3/8″ for the forestay and uppers, 5/16″ for the lowers, the babystay, and the intermediate backstays. We used norseman fittings, top and bottom, so that we could do everything ourselves. We measured from scratch, so to speak–from the hole in the tangs to the holes in the chainplate. Then we subtracted an amount for the upper terminal, the lower terminal, and the turnbuckle in order to determine what length to cut the wire. We cut the wire using a diamond blade on a dremel tool. This works just fine, but is slow. If you have a grinder, get a thin cutoff blade for it and use that (by the end we got around to doing it this way).  We did all of this in the living room at our old place, 2,000 miles away from the boat, hoping that our measurements were all correct (we wanted to have it all ready to go when the boat arrived in the workyard, to minimize yard expenses).  Here is our final spreadsheet of numbers. I decided on this plan using Brion Toss’s “Rigging Apprentice”. I used his numbers for constructional stretch as well. Like many do-it-yourself minded cruisers, we are much indebted to Toss for passing on his knowledge. When we restepped the mast, we discovered with delight that our measurements were spot on–each turnbuckle is now extended slightly more than halfway, which allows for some additional stretch and some tightening when we do a final tuning of the rig. Instead of using cotter pins to lock off the turnbuckles, we put a small machine screw through each hole with a nylok nut–it’s way faster to remove the nuts and pull out the machine screw than to bend the cotter pin back and pull it out–and the machine screws don’t cut and rip things like the cotter pins do.