Author: admin

  • Installed storage shelves in wet locker

    First we moved the bar for hanging clothes a few inches inboard and up, in order to maximize the empty space behind and below.  Then Jonny built a box/shelf for the bottom and a few shelves above that, designed at a height that will accomodate our favorite brand of rubbermaid storage bin.

  • Rebedded Dorade Boxes

    To install the forward portlight, the dorade box had to be removed.  After taking out the four screws that secure the box onto two mounting strips, we were able to clearly note that the mounting strips were completely rotten and soggy.  The heads of all the screws securing the mounting strips to the deck broke right off, and the mounting strip pulled right off of the screws.  We drilled all new holes in the deck and filled them all with thickened epoxy to serve as sealed mounting points for the new strips, which will be teak treated with multiple coats of penetrating epoxy.

  • Rebedded pushpit & aft cleats

    My god there is so much through the deck that needs to be rebedded.  Just another few to add to the list.  Jonny had a great time climbing down and through the lazarette to reach all of the nuts on the starboard side (we haven’t attacked the lazarette locker redo as of yet).

    In the process of removing the pushpit the nav lights got drilled through, so there is an extra splice right beneath the deck, the purpose of which will probably confuse future owners.

  • Added reflective tape to the mast

    When dinghying back to the boat in the dark after a day on land, it is difficult to figure out which boat is yours in a crowded anchorage.  With these reflective strips two-thirds of the way up the mast, one of our headlamps will be able to illuminate it from some distance.

    Credit goes to another for this brilliant idea–I just wish I could remember which book I read it in.  Bud Budworth also did it on Tara, Valiant 40 hull #117; I was fortunate enough to hang out with him on his boat in ventura and talk shop a few months ago.

  • Installed portlight on forward surface cabin top

    This is an unconventional one!  No one does this!  It’s a terrible place for a portlight!

    But it’s also a fantastic place for a portlight.  Conventional wisdom says that it’s a bad location because waves washing over the bow will pummel the window, either breaking it or causing it to leak at the least.  But we are so confident in our portlight design (1/2″ thick acrylic 6″ x 16″ hole, through-bolted with 12 bolts and thoroughly sealed with silicon) that we went ahead and did it.

    Not only does it let in a significant amount of light, but it lets us see up onto the foredeck to check out what’s going on.  I’m convinced that it’s bombproof and I’m glad for our choice.

    Be sure to check out the post about our original post about added portlights, where I detail the whole process.

  • Serviced tow generator

    A combination wind/tow generator came with the boat.  It was unmarked and I had some difficulty in finding out what it was.  It is a “Redwing” generator made by Downwind Marine in San Diego circa 2001.  A guy named Chris at Downwind Marine was enormously helpful in providing detailed answers to my most detailed questions–I believe he may have been the one who designed and built them.  (They aren’t building them anymore, he said, because the guy who made the blades stopped, and the increasing difficulty of permanent magnet DC generators). The generator is super heavy, and super overbuilt, to my immense enjoyment.  I dismantled it in order to check the brushes and potentially rewire it (the cord was looking manky).  I called Chris in order to figure out a detail of dismantling it: the cylindrical fitting was corroded to the shaft and I needed to know whether the fitting was threaded onto the shaft.  Chris told me that it is not threaded onto the shaft and moreover that a 1/2″ bolt can be threaded into the end of the fitting in order to conveniently press it off the shaft.  Even with this aid, I still needed to put a long extension pipe on the socket wrench in order to get the torque to remove it.  This removed, I could access the interior of the generator to check the brushes (fine for now) and to clean the commutator, etc. The only thing that remains is finding the other parts that are necessary to rig it up as a tow generator–I know they’re on the boat somewhere but I sure as hell don’t know where.

  • Expanded port settee bed

    Jonny built a plywood platform that slides out in tracks mounted on the bulkheads.  It slides out to the mast, and greatly increases the area of the port settee for sleeping.  The plywood is 3/4″ thick and the tracks are pieces of 1″x1″, above and below the plywood, and secured with screws every ~3″.  The most important aspect is the trim piece on the leading edge.  We used the same piece that was on the settee.  It needs to be strong, in order to provide rigidity to that edge.  Ours is still a little wobbly, but I think that if we put a half dozen more screws up into the trim from the bottom (right now it is only screwed in through the front) it will fix it.

    The design was based on notes gleaned from the Valiant Owner’s Group, and a huge thanks to all who gave advice on that topic.  It was a reasonably easy job and is a HUGE improvement in the sleeping comfort in the salon.

  • Switched out faucets with custom ones; added soap dispenser

    There is only one type of faucet that is available for use with manual water pumps, so far as I can tell.  And that faucet was too short to extend into our sink in a convenient way–it barely hung over the edge, making it frustrating to wash pots, fill pots, etc.  So we made our own out of pieces of copper tubing which was easy to bend, and painstakingly figured out a way to seal and mount it in the countertop in a way that would allow them to swivel. The result is not pretty, I’m not going to lie.  But it is a big improvement in function, and seems to work perfectly well so far.  We made one for both our fresh and salt water pumps.

    Notice the extremely convenient soap dispenser that we also added.

  • Added second foot pump for seawater

    We already had a foot pump for freshwater, we wanted a second one for pumping seawater while on passage (i.e. when the seawater is clean enough to use for something–we won’t be using marina water for anything!) in order to conserve freshwater.  There wasn’t enough room in the base of the cabinet, so we had to move the freshwater pump (which we had already replaced previously) over a few inches. The pumps come in left and right handed versions (hoses come off either the right or the left side)–we chose the very common Gusher Mk3 model.  I purchased one of each, so that the hoses can come off of each pump towards the center of the cabinet–otherwise there’s no way in hell we would have been able to get the hoses on or off. The faucet for the seawater pump replaced the pressure water faucet (a common household type).  We don’t plan on using the pressure water at all, so instead of drilling another hole through the countertop and creating a forest of faucets, we used the existing hole and cleared some space while we were at it.

  • Modified salon table

    The original salon table was a 40 lb monstrosity that was permanently attached between the mast and the forward bulkhead of the salon.  It had leaves on each side that would fold up; in this fully activated postion the table was so large that one couldn’t walk around it, and even sliding in the seat to be at the table was challenging.  Even with the leaves down, the large wooden box in the middle of the boat took up all the space.

    Jonny removed the old table and salvaged pieces of it to fabricate a folding table that stows upright against the bulkhead.  This was not an entirely original idea: most Valiants shipped with tables like this.  Our situation was slightly complicated by the fact that the distance between the mast and bulkhead is about 7″ greater than the distance available to stow it vertically against the wall, so Jonny constructed a solid platform mounted on the bulkhead that extends into the cabin sufficiently to allow the table to fold up.  The resulting table is extremely solid, and the greatly increased space and convenience have made this one of our favorite improvements.

  • Added 4 fixed portlights

    I drew up a pattern and had TAP plastic (we are very fortunate to have one right down the road from us in El Cerrito) make us four 8″ x 18″ portlights out of 1/2″ acrylic, with 2″ radius rounded corners, a half-bevel edge all around, and a ton of screw holes.  The portlights overlapped the cabintop by an inch all around, so the actual size of the cutout was 6″ x 16″.  We cut the holes in the cabintop using a hole saw followed by the cutoff blade on the grinder followed by the Fein tool.  We dug out the balsa core to a 1″ depth all around the cutout, then filled it with thickened epoxy.  I stopped by a local lumber yard and collected a brown paper bag of sawdust from under one of their saws, and I used this sawdust as filler for the epoxy–it was a hell of a lot cheaper than the West System stuff.  Although I did have to resort to the West System filler for the top gap, because the sawdust stuff wasn’t sticky enough, it would fall out of the top. After the epoxy cured, I ground it off fair, then used Quik Fair to fair it smooth.  After the quik fair cured I sanded it smooth, then we put a couple layers of paint on it.  We mounted the portlights with #10 machine screws, through-bolted.  I had TAP plastics drill the holes in the acrylic oversized, so that there is room for expansion without the acrylic cracking.  We mounted the acrylic with a washer (one each bolt) between the acrylic and the cabintop, to leave room for the silicon so it wouldn’t all squeeze out. Finishing the inside–keeping it pretty-was the hardest part.  The layers of our coachroof were as follows, from the outside in: fiberglass-balsa core-fiberglass-airgap-veneered trim plywood.  The whole thickness was ~2-1/4″.  I did the trim in two pieces: first a ring made out of 18″ wide 5/16″ thick plank of white oak that is usually used for flooring.  Some great guys at the set building studio at work cut the frame out of it for me, and I never would have been able to keep it looking good myself, so I owe them big time.  Then I used 2″ wide mahogany veneer that I bought from MacBeath’s hardwood nearby for the inside surface.  I put a pretty dark stain followed by three coats of polyurethane on all of it.  The trim ring was glued in place with wood glue, clamped with about 10 a-clamps from home depot.  The veneer has glue on the back already; you use an iron to iron the veneer on. The resulting portlights are completely bomber, and still look pretty good on the inside.  We could have used fewer bolts, but I don’t regret our design.  I would do the same thing again. Jonny has some GREAT videos (1, 2, 3) of the process.

  • Mounted mirror aft of engine

    I picked up a piece of 24″ x 20″ mirrored acrylic from TAP plastics for $15, cut it with a fine-toothed blade on the jig saw (still managed to fracture off the corner at the end–that stuff is a pain to work with) and mounted it with four wood screws to the bulkhead behind the engine.  Our engine faces aft (we have a v-drive), and the belts and pulleys are less than 6 inches from that bulkhead, which makes it extremely difficult to see and to work on.  This mirror changes that!  I’m very pleased with myself.  I just hope it doesn’t warp from the heat, or get scratched in under a month . . . we’ll see, but man if it holds up I will be bragging about it for some time.

  • Added/replaced spinnaker hardware on deck

    The old downhaul was routed down the starboard side, to the same winch as the topping lift.  Which meant that when flying the spinnaker, the starboard cabintop winch was needed for both of those purposes, while the port cabintop winch was unused.  Jonny had pulled the downhaul hardware (a fairlead and turning block) out of the deck months earlier anyway, and filled the holes with epoxy, so I was free to put it wherever I wanted.  I ended up routing it just inboard of the handrails on the port side, back to the port cabintop winch.  We’ll try it out this weekend.

    The topping lift runs from the mast down the starboard cabintop and comes under the dodger just right of the companionway.  The old rope clutch exploded one day when we were out sailing (which is my way of saying that the pin busted apart the plastic).  The old clutch was mounted atop standoffs also–not particularly strong.  Finally, it was a terrible lead from the clutch to the winch.  So we replaced the clutch and added a turning block jobby–check out the pictures.  It’s a necessary evil; I wish we didn’t need the turning block jobby, but I’m glad that it exists to solve this problem nicely.

    You’ll notice that both the clutch and the turning block mounted on top of blocks of polyethylene (starboard in one case, UHMW in another case) in order to provide a fair lead.

  • Rebedded stanchions and bow pulpit

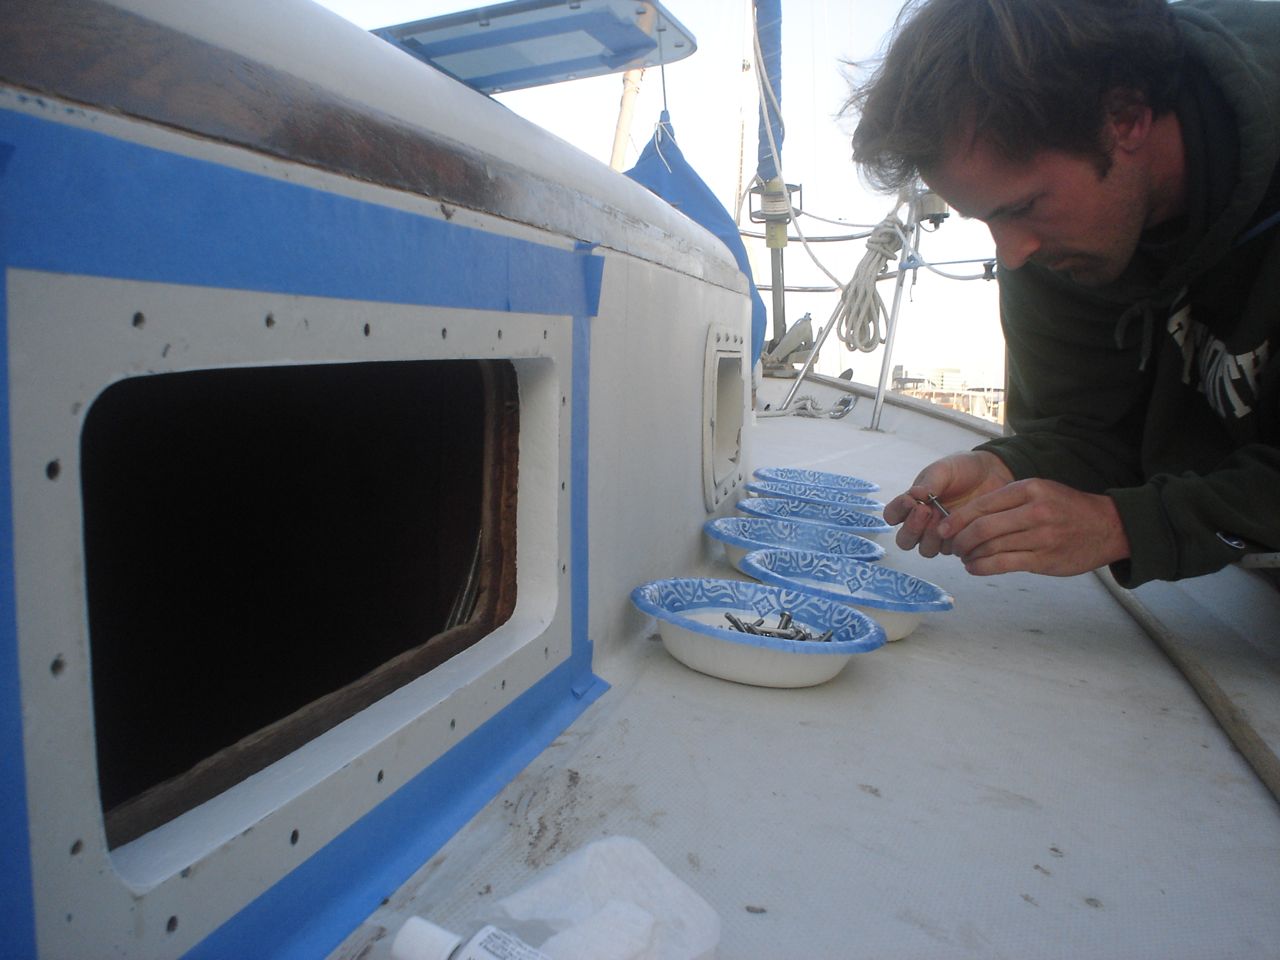
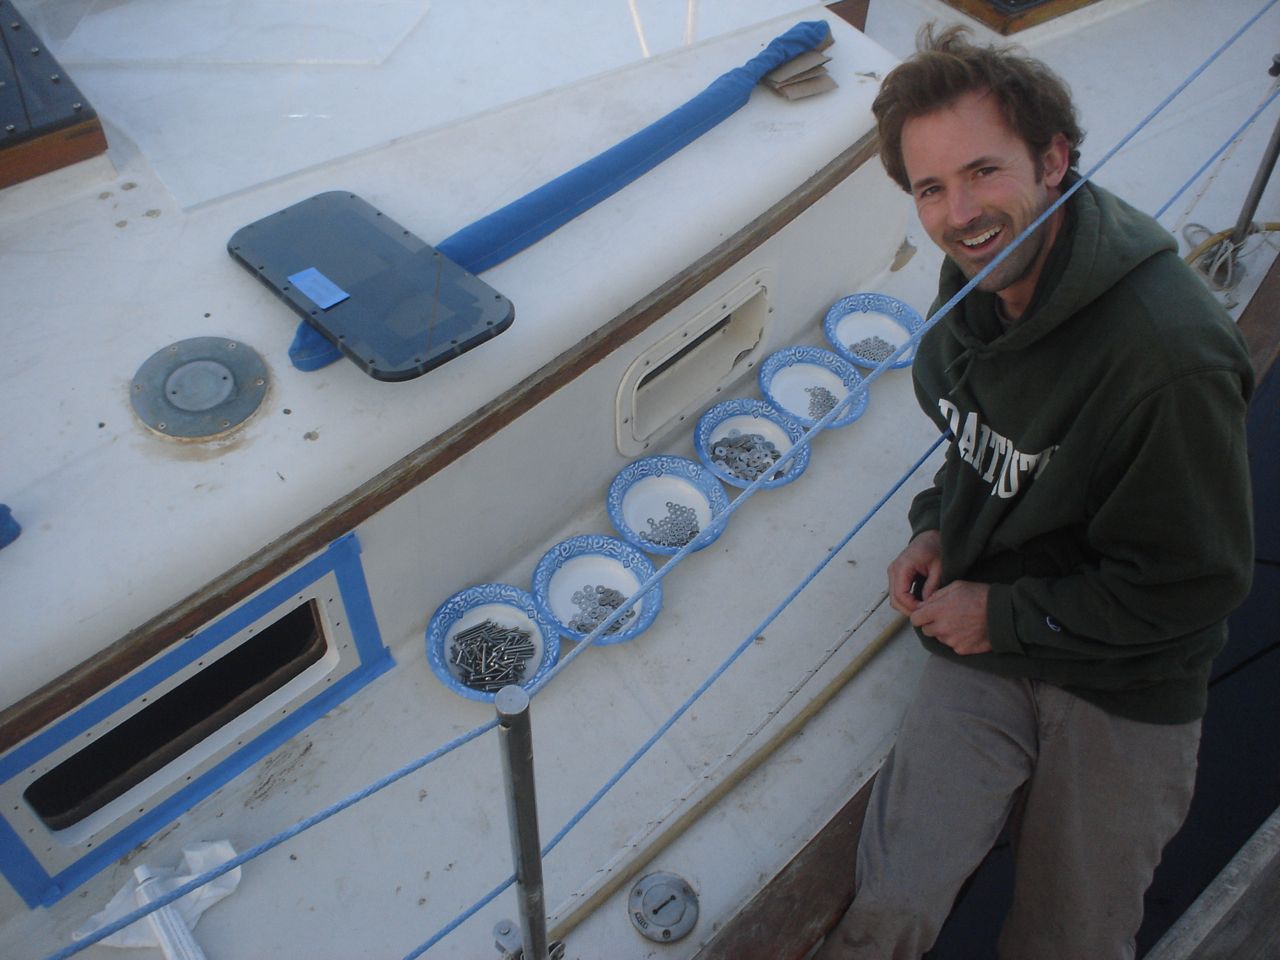
    I had been imagining that this task would involve annoying labor over a period of months, but Jonny decided the issue by removing all the stanchions on Monday.  Since we wanted to sail on the weekend, we got our act in gear.

    We drilled out the holes, cored out the deck a little ways back inside each hole (more on the gates since we wanted a larger load bearing plug of epoxy), taped the bottoms of the holes, and filled them with thickened epoxy.  When the epoxy cured it left little mounds on top of each hole (we slightly overfill) which I then sanded down.  I’ve taken to duct taping the shop vac to our orbital sander and using 36 grit paper–it is an extremely efficient and clean way to fair off the excess epoxy, without the danger of accidentally grinding off the gelcoat (which seems to happen everytime I turn on the grinder).

    Then we drilled out new holes through the center of each epoxy plug, and remounted the stanchions using 3M 4200UV fast cure as the sealant.  We used to use Lifecaulk, but it takes too long to cure.  See, this is the thing: in order to do it right, you need to not tighten the bolts all the way, but leave a gap in which the sealant can cure, then you tighten the bolts fully and it’s a perfect gasket since the squeezing expands the rubbery sealant to fill all gaps.  But if you use a slow drying sealant, it is too tempting to skip that step and just tighten it fully, rationalizing that the seal will be good enough.  But it’s not true.  We did this exact thing–used lifecaulk and tightened before it dried–when we remounted the bow pulpit after trucking it up from Mexico (we should have cored and epoxied then, but we forgot).  And this time when we pulled it up, the forward starboard plate very clearly had water penetrating beneath it.  Bummer.  The fast cure dries in 24 hours, so use the fast cure and leave everything loose for just one more day because it’s worth it.

    We still have to rebed the stern pushpit.

  • Replaced water pump

    After replacing the thermostat housing gasket, we discovered a second, more serious leak from the water pump.  The water pumps are designed to leak through a weep hole to indicate when the bearing is going bad, thereby inspiring you to replace it (before it fails and something worse happens). Fortunately, the previous owners had left us a brand new one as a spare in one of the buckets.  It was easy enough pulling it off the front of the engine, especially with the new mirror I installed on the bulkhead.  However, the new pump needed the pulley from the old one, and it was NOT easy getting the pulley off the old or onto the new.  The pulley has four threaded holes on the front of it, to use with a puller.  The puller is placed against the center shaft, and two bolts are threaded into the holes, pulling the pulley off the shaft.  Well we didn’t have a puller, and couldn’t find a reasonably priced one nearby, so with the help of a good friend Pete we managed to finally jury-rig a puller out of a sturdy door hinge–really we just needed a stout piece of metal that wouldn’t bend, and it was a fantastic bonus that the holes just happened to match up to the holes on the pulley.  It didn’t go onto the new one easily, either.  It needed to slide on 2.4cm, or something exact like that, and I managed to get the first 1.4cm with a hammer and a block of wood (no banging directly on the cast metal, or you’ll crack it).  To get the rest of the way, I ended up buying a small vice from Ashby Lumber nearby.  I was wanting a vice for the boat anyway, so when I realized this could be the tool I sprung for it.  It STILL was a bitch to get on there–I ended up bending the handle of the vice slightly (now I know why every vice on the farm has a bent handle).

  • Compression tested engine

    Did it dry on each cylinder.  Then put a capful of oil into each cylinder and retested.  This allows you to determine how much of the reduction in compression is a result of “blowby”–gases escaping past the rings on the cylinder–rather than gas escaping around inlet or exhaust valves, or a blown head gasket.

    The results:
    Dry
    #1 480
    #2 400
    #3 420
    #4 480

    Wet
    #1 540
    #2 580
    #3 480
    #4 530

    This signifies to me that we’re getting some blowby.  I don’t yet know how to interpret the absolute numbers.

    Update 5/27/11:

    The engine has run flawlessly since writing this post, with the exception of air in the fuel lines which is unrelated to the internal condition of the engine.  It always starts right up and sounds great.  Many people have told me not to worry about the compression numbers if the engine is running well.  So I won’t.

  • Fabricated gasket for dinghy gas tank

    The old one let gas leak out after we filled it at the gas station, and let water leak in when it rained later that day.  Which required another few hours of effort to siphon to good gas off of the water (after first transferring it to a clear container) so we could move forward with getting the outboard operational.

  • Caulked companionway with 4200 UV

    There was a leak manifesting itself in the engine room, just below the companionway, and I think it must have been coming from the seam of the wood with the deck.  I caulked it and it hasn’t rained since, to test this theory.  But it needed it anyway.

  • Replace raw water intake hoses

    (referring to the hoses from seacock to strainer, and strainer to v-drive) The old ones were looking somewhat dry and cracked on the outside, and the hose clamps all around were heavily corroded.  All new now.

  • Adjusted valve clearances

    Pete showed me how to adjust the valves.  All of them were within a thousandth or so of where they were supposed to be, anyway (which is .012), so this job will not have made much of a difference.  It was a valuable experience, however, to help de-mystify the engine.